Table of Contents
Advertisement
Advertisement
Table of Contents

Subscribe to Our Youtube Channel
Related Manuals for Siruba C007KP


Summary of Contents for Siruba C007KP
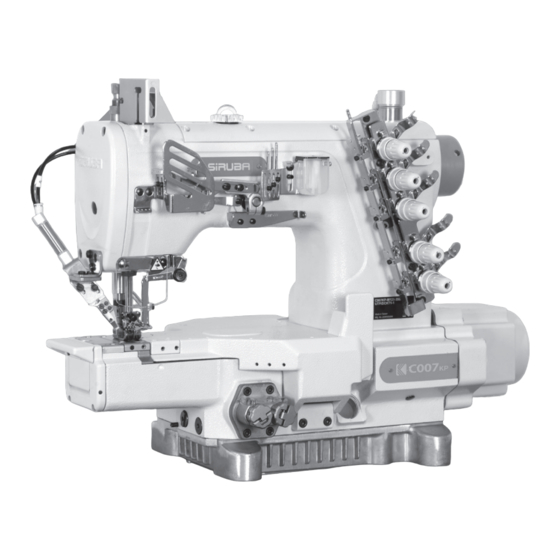
- Page 1 使用說明書與零件圖 INSTRUCTIONS BOOK & PARTS LIST C007KP...
- Page 3 如果忽視此標記而運行了錯誤的機械操作,保養時肯定會引起當事者 或第三者人員重傷或死亡。 如果忽視此標記而運行了錯誤的機械操作,保養時有可能會引起當事 者或第三者人員受傷及造成設備損壞。 運動 部 位, 謹 防 工傷 事 故 Moving part, beware of industrial accident 高壓 部 位, 謹 防 觸電 事 故 High voltage, beware of electric shock 高溫 部 位, 謹 防 燙傷 事 故 High temperature, beware of burns 禁止...
- Page 4 頁 /PAGE INDEX 索引 GENERAL SAFETY INSTRUCTIONS 一般安全事項說明 IMPORTANT SAFETY INSTRUCTION 重要安全事項說明 WARNING 特別事項 WARNING TAG 警告標籤 SAFETY INSTRUCTION OF NEEDLE GUARD 護針安全圖說 MOVING THE SEWING MACHINE 搬運縫紉機 THE INSTALLATION POSITION OF THE SEWING MACHINE 縫紉機的安裝位置 SPECIFICATIONS 規格 SAFETY SWITCH AND ITS FUNCTION 安全開關及其功能...
- Page 5 潤滑 LUBRICATE AND COOLING OF NEEDLE AND THREAD 針與線之冷卻與潤滑 CHANGE THE LUBRICATION OIL 潤滑油之更換 CHANGE THE OIL FILTER 濾油器之更換 REPLACE THE NEEDLE 針之更換 TROUBLESHOOTING 故障檢修 THREADING DIAGRAM 穿線圖 TABLE CUT-OUT 桌板圖 PARTS LIST 零件圖 DEMOLITION PROCESS 報廢流程 C007KP Net Weight(Kg)
-
Page 6: General Safety Instructions
GENERAL SAFETY 一般安全事項說明 INSTRUCTIONS Warning! 警告! When using this machine, basic safety 當使用這台機器,基本安全預防應恆被遵守 Precautions should always be followed to ,以減輕火災、電擊、或是個人傷害的風險 reduce the risk of fire, electric shock and 。包含以下注意事項。 personal injury, including the followings. 在操作這台機器之前,請閱讀所有說明並且 Read all these instructions before 緊記於心。... - Page 7 Introduction 8. 中斷機器電源 8. Disconnect machine When not in use, before servicing and 當不使用機器時、維修前、以及更換配件 when changing accessories. 時。 9. 避免誤啟動 9. Avoid unintentional starting Do not carry a plug-in tool with a finger on 不要以手指置於啟動開關上之後,搬運一個 the switch. Ensure the power switch is off 已插入電源的工具。確定在插電之前,電源...
-
Page 8: Important Safety Instruction
IMPORTANT SAFETY 重要安全事項說明 INSTRUCTION For operating safely and getting the 恭喜您購買本機器,為了使這台機器能獲 best functions of this machine, you must 得最佳功能以及安全的操作,務必請正確 operate it correctly. Please read and 的使用這台機器,使用前請仔細閱讀使用 follow the instructions of this manual, 說明書,希望您能長期使用它。請記得將 and keep it at hand for future references. 此說明書放在容易取得的地方。... - Page 9 Introduction (5) 若使用離合器馬達而無煞車片裝置 (5)If clutch motors without brake pads are used,must wait until the motor 時,必須待馬達完全停止。 stops completely. 8. 假如不慎讓機器及配件使用之油或油 8. If grease, oil, or any fluid contacts your skin or eyes by any chance, 脂,接觸到眼睛、皮膚或誤食時,請立 please wash the contacted area 刻以水清洗接觸部位及就診。...
- Page 10 15. 為使機器能正常操作以及減少噪音, 15. In order to operate properly and to reduce the noise, please place the 機台務必平放地上,機器避免在強烈 machine flat and level on the ground. 噪音的環境下操作。 Avoid operating the sewing machine at a noisy surrounding. 16. 選用適當的電源插頭,並由電子技師 16. Select a proper power plug and install it by an electrician.
- Page 11 Introduction c. 當您打開電源開關後或機器已 在運轉 c. Please never put your fingers under the needle(s) or in the thread take-up 中,絕不可將您的手放在針的下方或針 cover to prevent physical injuries when 線控線桿外蓋中,以免導致人員受傷。 you turn on the power switch or operate the machine. d. 當機器運轉中,梭頭高速轉動,為了避 d. While the machine is in operation, the 免對手可能引起之...
- Page 12 WARNING 特別事項 Please confirm the followings to avoid 為了避免機器故障及損壞,請先確定以下 malfunction or damage to this machine. 事項: 1. 當您安裝好機器後,做第一次機器操作 1. After installing the machine, and before the first operation, please clean it 前,請徹底清潔機器。 completely. 2. 清除運送途中累積之灰塵及溢出之油 2. Clean all dust and overflowed oil during transportation.
-
Page 13: Warning Tag
Introduction WARNING TAG 警告標籤 곯 롭 뎡 뎬 뷕 뻣 rate part n off thre with s may adin need main g, chan safe caus e inju clea ning swit ging devi ces. bobb etc. befo in and 危險 ages volt inju utes... - Page 14 SAFETY ILLUSTRATION OF 護針安全圖說 NEEDLE GUARD 壓具 防護裝置如圖 圖 4/Fig.4 MOVING THE SEWING MACHINE 搬運縫紉機 ( 圖 5) 곯 뎬 뷕 뻣 M ov 롭 뎡 in g T ur er at pa rts e wi th re n of ne ed ad in f ma...
-
Page 15: The Installation Position Of The Sewing Machine
Introduction THE INSTALLATION POSITION OF 縫紉機的安裝位置 THE SEWING MACHINE 設備 設備 ( 圖 6) 應將 造 圖 6/Fig.6 SPECIFICATIONS 規格 1. 使用馬達: 1.Motor types: (1) 定位馬達 (1)position motor (2) 伺服馬達 (2)servo motor 2. 使用馬力 : 1HP (定位馬達)或 2.Horse power :1HP for position motor/ 600W(伺服馬達... - Page 16 SAFETY SWITCH AND ITS FUNCTION 安全開關及其功能 壓 驅 間 驅 壓 驅 圖 驅 圖 驅 圖 驅 圖 開 回 點 點 圖 開 開 造 圖 應 避 圖 7/Fig.7...
- Page 17 Introduction INSTALLATION AND ADJUSTMENT 定位器之安裝與調整 OF SYNCHRONIZER 1. 將隱藏式定位器 (1) 壓入車頭長溝 (2) 後, 1.Press the hidden synchronizer into the 再以螺絲 (3) 鎖緊。( 圖 8) long groove of the machine head,and then 2. 在連接各部接線或接頭時應注意先關閉電 tighten the screw (3). (Fig.8) 2.Before connecting each wire or plug,please 源開關。...
-
Page 18: Operation Process
OPERATION PROCESS 操作步驟 當 開 ( 圖 10)-1 ( 圖 10)-2 當 ( 圖 10)-4 當 高點 開 UTP-K UTR-K UTP-K UTR - K 處 UTQ-K UTQ -K 壓 壓 UTS-K UTS -K 壓 開 ( 圖 10)-2 回 壓 ( 圖... - Page 19 Introduction UTR - K UT S -K UTR-K UTS-K 開 壓 1. 前壓 ( 開始車縫 ) 2. 中央 ( 壓具下放 ) 3. 後半壓 ( 壓具提升 ) 4. 後壓 ( 自動切線裝置 ) 圖 10/Fig.10...
-
Page 20: Names Of Major Parts
NAMES OF MAJOR PARTS 各部件名稱 곯 뎬 뷕 롭 뎡 뻣 g pa te wi y cau in sw , cle , ch h bef bo bbi n and G ER D AN 危 險 h vo it 5 d wa g are h an s co... - Page 21 Introduction THE DESCRIPTION OF THE 機種說明 MODEL S pecif icat ions of machine cate gory 種類及規格 說明 1. 型號及分 類表示 1.De scrip tion of the mac hine name ① represents the type of the machine: ①表示機種別: C=Three needles cylinder bed chainstitch C=筒式三針...
- Page 22 ⑤ ⑤ 一般 褲 褲 褲 一般厚 包 包 褲 鍊 褲 92=four needles chain seaming 縫 ⑥ ⑥ ( 圖 14 ) ( Fig .14) 圖 14/Fig.14...
- Page 23 Introduction (Fig.15) ⑦ ⑦ ( 圖 15) 圖 15/Fig.15 ⑧ ( 圖 16) ⑧ (Fig.16) 圖 16/Fig.16 ⑨ ⑨...
- Page 24 (Table 1) 編 4500 1~3.6 厚 4500 1~3.6 厚 4000 1~3.6 表 1/Table 1 C007KP 厚 厚 車縫最高轉 速 (R . P.M) 4500 4500 4000 4000 最大縫距 Max . Stitc h Length 1.4~3.6mm 29mm 31mm 35mm 4-5 KGF 5-7 KGF 壓...
- Page 25 Introduction IMPORTANT SAFETY 關於本機的重要安全注意事項 INSTRUCTIONS OF THIS MACHINE 搬 包 防 搬 應 防 避 高 高 高 警示建議 區 當 當 間 處 調...
-
Page 26: Installation
INSTALLATION 安裝 過 商店 開 傷 起 過 傷 皮帶 (BELT) 桌板 (TABLE) 馬達 (MOTOR) 圖 17/Fig.17... - Page 27 Introduction 圖 18/Fig.18 Table 3 高 8 0% Table1 Table 厚 廠 同 表 3/Table 3...
-
Page 28: Install The Motor
INSTALL THE MOTOR 馬達之安裝方式 INSTALLATION PROCEDURE: 安裝步驟: 1. 首先將連軸器 (A) 依順時針方向的第一顆螺 1.Attach coupling (A) to lower main shaft (B) 絲 (1),固鎖於大心軸 (B) 上之長槽孔 (3), by fitting the first setscrew (1) to the long groove (3) of shaft, then tighten it and the 接著再鎖緊螺絲... -
Page 29: Motor And Belt
Introduction MOTOR AND BELT 馬達與皮帶 1. 離 合器 馬達 1/ 2 馬力 ( 或 4 00 瓦 ),3 相 1 .Clutch Mot or,1/2HP( 400W),3 pha se,2 2 極 M 番 V 型皮帶 。 pole M typ e V belt . 2 . -
Page 30: Adjusting Spreader Thread Take-Up
ADJUSTING NEEDLE THREAD 針線挑線桿之調整 TAKE-UP ( 圖 21) (Fig.21) 圖 21/Fig.21 ADJUSTING SPREADER THREAD 上叉線過線片之調整 TAKE-UP ( 圖 22) (Fig.22) -
Page 31: Adjusting Presser Foot
Introduction 圖 22/Fig.22 ADJUSTING PRESSER FOOT 壓具之調整 ( 圖 23) (Fig.23) 針 (NEEDLE) 圖 23/Fig.23 ADJUSTING STITCH LENGTH 縫目長度之調整 縫 目 長 度 由 1.4~ 3. 6mm 或 7 ~18 針 / 英 吋 Stitch length can be adjusted variably in 無階... - Page 32 圖 24/Fig.24 2. 用 手 調 整 旋 轉 旋 鈕 ①可立即由刻度板③內 之指針對應左側刻痕及數字觀看得知目前的 送具齒移動距離。 3. 欲調整長縫目時,將旋鈕①以順時針方向旋 轉,反之則小。 4. 針距之調整會使差動比改變, 故針距調整後, 需接著調整差動比。 ADJUSTING DIFFERENTIAL RATIO 差動比調整 差動比 = 後送齒送具行程:前送齒送具行程 1. 本機之差動比可從 1:0.9 調整至 1:1.4。 1:0. 9 to 1:1.4. 2. 用 手 調 整 旋 轉 旋 鈕 ② 即 可 調 整 前 送 齒 送 具...
-
Page 33: Operation Environment
Introduction ADJUSTING PRESSURE OF THE 壓具壓力強度之調整 PRESSER FOOT Pressure of the presser foot should be as 在 布 料 推 送 順 暢 且 縫 合 完 美 之 情 況 下, 壓 具 壓力盡量輕些。( 圖 25) light as possible,so that cloth can be feed and sewed smoothly.(Fig.25) 圖... -
Page 34: Maintenance
CONDITIONS OF ALL OPERATORS 操作者條件 MAINTENANCE 保養... - Page 35 Introduction 《Maintain the feed dog》 《清潔送料具保養方式》 1. 抬起壓具 1.Raise the presser foot. 2. 將兩個螺絲①拆下,然後拆下針板②。 2.Remove two screws ① ,and then remove needle plate ② . 圖 27/Fig.27 3. 以軟毛刷清除送布牙③上的布屑。( 圖 27) 3.Use a soft brush to clean dust and lints on the feed dog teeth ③...
- Page 36 養 養 盤 夠 間 每 每週 每 盤 每 表 4/Table 4 LUBRICATION 潤滑 1. 請 選 用 MOBIL#10 或 ESSO#32 或 同 級 1.Please use MOBIL#10 or ES SO#32 or its Equivalent oil. 之潤滑油。 2. 由 於 新 機 器 在 裝 運 前 已 將 油 倒 盡, 因 此 新 2 .
- Page 37 Introduction 3. 每 天 必 須 檢 視, 如 果 油 已 低 於 油 標 指 示 窗 3 . B e s u r e t o c h e c k e v e r y d a y a n d r e f i l l the oil,if oil level is lower than line L of 之下限,必須加注新油,當機器開始運轉,...
-
Page 38: Change The Oil Filter
CHANGE THE LUBRICATION OIL 潤滑油之更換 1. 將螺絲 D 鬆開,使油槽之油完全排出後再 1 . L o o s e n s c r e w D a n d f a s t e n i t a f t e r 鎖緊。( 圖 31) drain all the oil from the tank.(Fig.31) 2. -
Page 39: Replace The Needle
Introduction REPLACE THE NEEDLE 針之更換 1. 選用針之規格與尺寸請參照 ( 表 5) 1.See table 5 for the sizes and the specifications of the needles. 2. 旋開螺絲①並取下針,將新針插至針座最底 2.Loosen screw ① ,then pull out the used 端,並使針之長溝面向自己。( 圖 33) needles.Insert the new needles into the holder holes as far as they can go,and let the long groove of the needle face you.(Fig.33) 3. -
Page 40: Troubleshooting
TROUBLESHOOTING 故障檢修 詢 開 傷 調 過大或過小 ? ◎ 過 ◎ 調 ◎ ◎ ◎ 圖 ◎ 向 ◎ ◎ 磨 ◎ 適當調... - Page 41 調 造 ◎ 造 ◎ 間 ◎ 調 適當 間 ◎ 過 同 問題 調 當 ◎ 高 間 同 當...
- Page 42 調 ◎ 問 題 調 當 造 ◎ 問題 調 開 過 ◎ 開 過 ◎ 起 ◎ 圖 ◎ 向 過 ◎ 適當調 ◎ 適當 ◎ 適...
- Page 43 調 調 壓 壓 過 過 過線處 過線處 傷 傷 ◎ 磨 磨 厚 厚 ◎ ◎ 圍 圍 點 點 壓 壓 壓 壓 處 處 ◎ 高 高 ◎ 調 調 高 高 齒高 齒高 同 同 適當壓具壓力 適當壓具壓力...
- Page 44 調 壓具壓力過小 ◎ 壓腳壓力 常 ◎ 調 ◎ 調 當 調 ◎ ◎ 筒磨損過 ◎ 筒 ◎ 過 ◎ 間 磨 調 磨...
- Page 45 調 避 造 傷 間 起 ◎ 高 ◎ ◎ 調 壓具壓力過小 ? ◎ 調整壓具壓力。 齒過 ◎ 調 齒高 當 起 ◎ 適當調 齒高 當 ◎ 齒高 調 過 ◎ 適當調...
- Page 46 調 起 壓具壓力 ◎ 適當調整壓具壓力。 過 ◎ ◎ 常 ◎ 過 過 ◎ 調 ◎ 過 起 ◎ ◎ 磨 ◎ 圓...
- Page 47 調 ◎ ◎ 濾 ◎ 磨 間 ◎ 調 開 開 ◎ 高 過 ◎ 加裝 CL 如遇抬壓腳力道不足時。 請依下列實施: If the strength or the presser foot lifter A . 參數 64 項,出廠值:40 改為 100 is insufficient with being equipped with B...
- Page 70 DEMOLITION PROCEDURE 報廢流程 當 區 開 屬 開 明 屬 屬 銅 銅 銅 屬 回 處...
- Page 72 由於對產品的改良及更新,本產品使用說明書中與零件圖之產品及外觀的修改恕不事先通知 ! The specification and/or appearances of the equipment described in this instruction book & parts list are subject to change because of modification which will without previous notice. MY127KP .JAN.2021...
Need help?
Do you have a question about the C007KP and is the answer not in the manual?
Questions and answers