
Subscribe to Our Youtube Channel
Related Manuals for Hinkley VAIL


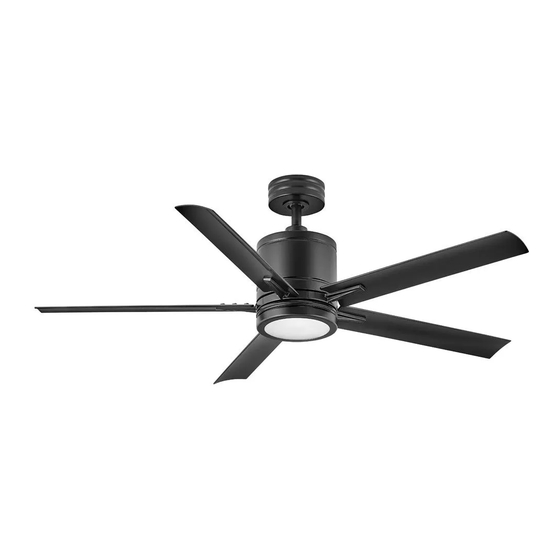
Summary of Contents for Hinkley VAIL
- Page 1 52" VAIL ™ INDOOR / OUTDOOR LED FAN DC MOTOR CEILING FAN INSTRUCTION MANUAL...
- Page 2 SO WE’RE HERE IF YOU HAVE A QUES TION, NEE D SOME HELP OR W ANT TO CHAT ABOUT OUR PR ODUCTS. SEND SUGGE S TIONS OUR WAY TOO— WE’RE ALWAYS LOOKING TO MAKE YOUR E XPERIENCE WITH HINKLEY A PO SITIVE ONE. > SERVICE@HINKLEY.COM > 800.HINKLEY >...
-
Page 3: Table Of Contents
HANGING THE FAN SPECIFICATIONS ELECTRICAL CONNECTIONS SMART BY BOND FINISHING THE INSTALLATION INSTALLING THE BLADES WARNING: Read and follow these instructions c a re fully and be mindful of al l warnings shown throughout . | hinkley.com | ©2019 Hinkley Lighting, Inc. - Page 4 GENERAL INSTALLATION & OPERATION INSTRUCTIONS To ensure the success of the installation, be sure to read the instructions and review the diagrams thoroughly before beginning To avoid possible electric shock, be sure electricity is turned off at the main power box before wiring. All electrical connections must be made in accordance with local codes, ordinances and/or the National Electric Code.
-
Page 5: Important Safety Precautions
TOOLS & MATERIALS REQUIRED • PHILLIPS SCRE WDRIVER • FL AT SCRE WDRIVER • WRENCH OR PLIERS • WIRE CUTTER • S TEPL ADDER • WIRING SUPPLIE S AS RE QUIRED BY ELE CTRICAL CODE | hinkley.com | ©2019 Hinkley Lighting, Inc. -
Page 6: Unpacking Your Fan
Remove all parts and hardware. Do not lay motor housing on its side, or the decorative housing may shift, be bent or damaged. • Examine all parts. You should have the following: VAIL PACKAGE CONTENT Blade Set of 5 BL902152Fxx... -
Page 7: Preparation
35 pounds. Attach hanging bracket to outlet box using screws provided with the outlet box. Flat Washer Spring Washer Outlet Box Screw Fig. 1 | hinkley.com | ©2019 Hinkley Lighting, Inc. -
Page 8: Hanging The Fan
HANGING THE FAN Remove ball from downrod by loosening set screw in the side of the ball. Slide ball down and remove ball pin; remove Cross pin ball. (Fig. 1) Carefully support fan body (motor) in its styrofoam packing Hanger with the mounting collar (where the wires come out) facing ball upward. - Page 9 Safety Cable Loop of the cable into the clamp and pull as much cable through as Wood Screw possible. Firmly tighten screw in the clamp. Cut off excess cable. And Washer Safety Cable Fig. 4 | hinkley.com ©2019 Hinkley Lighting, Inc.
-
Page 10: Electrical Connections
ELECTRICAL CONNECTIONS REMEMBER -Turn off the power! NOTE - Control must be installed within 30 feet of fan. WARNINGS: Check to see that all connections are tight, including ground, and that no bare wire is visible at the wire nuts, except for the ground wire. BLK (AC IN) CAUTION: To reduce the risk of electric shock, this fan must be installed with an GROUND... -
Page 11: Finishing The Installation
Make sure the hook on the hanging bracket properly sits in the groove in the hanger ball before attaching the canopy to the bracket by turning the housing until it drops into place. | hinkley.com | ©2019 Hinkley Lighting, Inc. -
Page 12: Installing The Blades
INSTALLING THE BLADES Place rubber washer on screw. Insert this assembly through the blade and start the screw into the blade arm. Repeat this procedure without tightening the screw until all 3 screws have been started into the blade arm. NOTE: Make sure that concave side of blade is facing down. - Page 13 Remove the screws and take out the glass shade form the light cover (Fig. 2), then attach the metal Plate to the light cover B and light cover A with the screws provided. (Fig. 3) | hinkley.com | ©2019 Hinkley Lighting, Inc.
-
Page 14: Installing The Wall Control
INSTALLING THE WALL CONTROL Option 2. For single gang box REMEMBER to turn off the power before you begin. NOTE - Secures to any surface or application: flat wall, single gang Remove the existing wall plate and the old switch from the wall outlet box, multi gang box. - Page 15 Attach the cradle A to the wall switch box using the supplied hardware. Attach the multi-gang faceplate to the switch set in the wall outlet box. Cradle A of Hinkley switch will fit in any standard decora face plate. Remote transmitter will be held in place with built in magnets.
-
Page 16: Operation
OPERATION Your DC brushless motor is equipped with an button: automatically learned type remote control. Press this button and release instantly to There is no frequency switches on the receiver turn on or off the light. or transmitter. The fan can start to use once the pairing process is done. - Page 17 An UPWARD airflow moves warmer air off the ceiling area as shown in Figure 4. This allows you to set your heating unit on a coole r setting without affecting your comfort. SUMMER MODE WINTER MODE (COUNTERCLOCKWISE DIRECTION) (CLOCKWISE DIRECTION) Fig. 3 Fig. 4 | hinkley.com | ©2019 Hinkley Lighting, Inc.
-
Page 18: Care And Cleaning
CARE AND CLEANING Periodically it may be necessary to re-tighten blade to blade arm screws or blade arm to motor screws to prevent clicking or hu mming sound during operation. This is especially true in climates with broad temperature and humidity ranges. When dusting the blades, you must support the blade to prevent bending - no pressure should be applied to the blades. -
Page 19: Energy Guide
0.05 • Energy Use: 17 Watts All estimates based on typical use, excluding lights ftc.gov/energy RPMs Airflow Shown Is a Weighted Average of High and Low Cubic Feet per Minute Based on Downrod | hinkley.com | ©2019 Hinkley Lighting, Inc. -
Page 20: Smart By Bond
SMART BY BOND HINKLEY SMART FAN OPTIONS: • Brute Force Method In add ition to the included wal l con trol, you c an con trol your Hinkley fan a) Turn mains power OFF to the fan. through the Bond app . - Page 21 HINKLEY IS PROUD TO PROVIDE YOU WITH CEILING FAN PRODUCTS THAT ENHANCE YOUR SPACE WITH COMFORT, PURPOSE AND STYLE. AS A FAMILY COMPANY, WE ARE COMMITTED TO DESIGN, PERFORMANCE AND QUALITY, AND WHAT’S IMPORTANT TO YOU IS PARAMOUNT TO US.
- Page 22 GLOBAL HEADQUARTERS 33000 Pin Oak Parkway | Avon Lak e , Ohio 44012 T (440 ) 653 5500 | F (440 ) 653 5555 | hinkley .com...
- Page 23 52" VAIL ™ VENTILADOR LED INTERIOR / EXTERIOR DC MOTOR MANUAL DE INSTRUCCIONES EN ESPAÑOL...
- Page 24 > > >...
- Page 25 COLGAR EL VENTILADOR INTELIGENTE POR BOND CONEXIONES ELÉCTRICAS TERMINANDO LA INSTALACIÓN INSTALACIÓN DE LAS CUCHILLAS ADVERTENCIA: Lea y siga estas instrucciones atentamente y tenga en cuenta todas las advertencias que se muestran a lo largo. ©2019 Hinkley Lighting, Inc. | hinkley.com |...
- Page 26 Si el compartimento de la batería no se cierra de forma segura, deje de usar el producto y manténgalo alejado de los niños. Si cree que las baterías pueden haber sido ingeridas o colocadas dentro de cualquier parte del cuerpo, busque atención médica de inmediato. | hinkley.com...
- Page 27 • • • To reduce the risk of personal injury, do not bend the blade arms when installing them, balancing the blades or cleaning the fan. • • • • • • • | hinkley.com | ©2019 Hinkley Lighting, Inc.
- Page 28 DESEMBALAJE TU VENTILADOR DESEMBALA TU VENTILADOR Y COMPRUEBA EL CONTENIDO • • CONTENIDO DEL PAQUETE VAIL Juego de 5 cuchillas BL902152Fxx Soporte para colgar CA902466Fxx Marquesina de techo y anillo de moldura En bolsa de hardware Cubierta de bola de humedad...
- Page 29 Fije el soporte para colgar a la caja de salida con los tornillos que se Arandela plana proporcionan con la caja de salida. Arandela de resorte Tornillo de la caja de salida Fig. 1 | hinkley.com | ©2019 Hinkley Lighting, Inc.
- Page 30 Fig. 1 Fig. 2 | hinkle y.com...
- Page 31 Introduzca el extremo del cable en la abrazadera y pase la mayor arandela cantidad de cable posible. Apriete firmemente el tornillo en la abrazadera. Corte el cable sobrante. Cable de Fig. 4 seguridad | hinkley.com ©2019 Hinkley Lighting, Inc.
- Page 32 BLANCO del receptor al cable neutro BLANCO del edificio. Conecte el cable de tierra del edificio de COBRE a los 4 cables de tierra AMARILLO / VERDE del ventilador AMARILLA y el receptor. ROJA ROJA AMARILLA GRIS Soporte de suspensión Admirador Receptor Fig. 1 Fig. 2 hinkley.com...
- Page 33 | hinkley.com | ©2019 Hinkley Lighting, Inc.
- Page 34 | hinkle y.com...
- Page 35 Fig. 2 Fig. 3 Fig. 1 | hinkley.com | ©2019 Hinkley Lighting, Inc.
- Page 36 El transmisor remoto se mantendrá en su lugar con imanes incorporados. Placa de pared Cuna B Placa Ancla de frontal Caja de salida plastico Transmisora placa de pared Cuna A Placa frontal Transmisora Pared Fig. 1 Sistema de control HIRO Fig. 2 | hinkley.com...
- Page 37 Fije la base A a la caja de interruptores de pared utilizando los accesorios suministrados. Conecte la placa frontal de varios grupos al interruptor en la caja de salida de la pared. La base A del interruptor Hinkley encajará en cualquier placa frontal decora estándar. Fig. 4 El transmisor remoto se mantendrá...
- Page 38 NOTA: Se puede controlar un solo ventilador con hasta 3 controles de pared en una habitación. Cada control Sistema de control HIRO deberá repetir el proceso de emparejamiento según las instrucciones anteriores y todos los controles deben estar a menos de 30 pies del ventilador. | hinkley.com...
- Page 39 Fig. 3 Fig. 4 | hinkley.com | ©2019 Hinkley Lighting, Inc.
- Page 40 1. Revise los fusibles o disyuntores del circuito. 2. Compruebe la luz indicadora LED del control de pared. Si el LED no se ilumina al presionar un botón, no está transmitiendo una señal. Compruebe la alimentación al control de pared / disyuntor y todas las conexiones eléctricas. 3.
- Page 41 0.05 • Energy Use: 17 Watts All estimates based on typical use, excluding lights ftc.gov/energy RPMs Airflow Shown Is a Weighted Average of High and Low Cubic Feet per Minute Based on Downrod ©2019 Hinkley Lighting, Inc. | hinkley.com |...
- Page 42 INTELIGENTE POR BOND OPCIONES DE VENTILADOR INTELIGENTE DE HINKLEY: • Método de fuerza Además del control de pared incluido, puede controlar su ventilador Hinkley a bruta través de la aplicación Bond. a) Apague el suministro eléctrico del ventilador. b) Vuelva a encender el ventilador.
- Page 44 GLOBAL HEADQUARTERS 33000 Pin Oak Parkway | Avon Lak e , Ohio 44012 T (440 ) 653 5500 | F (440 ) 653 5555 | hinkley .com...
- Page 45 52" VAIL ™ VENTILATEUR LED INTÉRIEUR / EXTÉRIEUR DC MOTOR...
- Page 46 > SERVICE@HINKLEY.COM > 800.HINKLEY > LET’S SEE THAT HINKLEY STYLE @HINKLEY #HINKLEYSTYLE inkley.com.
- Page 47 CARACTÉRISTIQUES SUSPENSION DU VENTILATEUR INTELLIGENT PAR LIEN CONNECTIONS ELECTRIQUES FIN DE L'INSTALLATION INSTALLATION DES LAMES ATTENTION: Lisez et suivez attentivement ces instructions et tenez compte de tous les avertissements affichés tout au long. | hinkley.com | ©2019 Hinkley Lighting, Inc.
-
Page 48: Instructions Générales D'installation Et D'utilisation
INSTRUCTIONS GÉNÉRALES D'INSTALLATION ET D'UTILISATION Pour assurer le succès de l'installation, assurez-vous de lire les instructions et de revoir attentivement les schémas avant de commencer Pour éviter tout risque d'électrocution, assurez-vous que l'électricité est coupée au niveau du boîtier d'alimentation principal avant de procéder au câblage. Tous les branchements électriques doit être fait conformément aux codes locaux, aux ordonnances et/ou au Code national de l'électricité. - Page 49 • • • • • • • • • • • • | hinkley.com | ©2019 Hinkley Lighting, Inc.
-
Page 50: Déballage De Votre Ventilateur
Retirez toutes les pièces et le matériel. Ne posez pas le boîtier du moteur sur le côté, sinon le boîtier décoratif pourrait se déplacer, être plié ou endommagé. • Examinez toutes les pièces. Vous devriez avoir les éléments suivants: CONTENU DE L'EMBALLAGE VAIL Jeu de 5 lames BL902152Fxx... -
Page 51: Préparation
35 livres. Fixez le support de suspension à la boîte de sortie à l'aide des vis fournies Rondelle plate avec la boîte de sortie. Rondelle à ressort Vis de boîte de sortie Fig. 1 | hinkley.com | ©2019 Hinkley Lighting, Inc. - Page 52 ACCROCHER LE VENTILATEUR Retirez la balle de la tige de suspension en desserrant la vis de réglage sur le côté de la balle. Faites glisser la balle vers le bas et retirez la goupille; retirer la balle. (Fig. 1) Goupille transversale Soutenez soigneusement le corps du ventilateur (moteur) dans son emballage en mousse de polystyrène avec le collier Balle suspendue...
- Page 53 à la solive de plafond. Insérez l'extrémité du câble dans la pince et tirez autant de câble que possible. Serrez fermement la vis Vis à bois et rondelle du collier. Coupez l'excédent de câble. Fig. 4 Câble de sécurité | hinkley.com ©2019 Hinkley Lighting, Inc.
-
Page 54: Connections Electriques
CONNECTIONS ELECTRIQUES RAPPELEZ-VOUS - Coupez le courant ! REMARQUE - La commande doit être installée à moins de 30 pieds du ventilateur. AVERTISSEMENTS : Vérifiez que toutes les connexions sont bien serrées, y compris la terre, et qu'aucun fil dénudé n'est visible au niveau des serre-fils, à l'exception du fil de terre. ATTENTION : Pour réduire le risque de choc électrique, ce ventilateur doit être installé... -
Page 55: Fin De L'installation
Assurez-vous que le crochet du support de suspension repose correctement dans la rainure de la boule de suspension avant de fixer la verrière au support en tournant le boîtier jusqu'à ce qu'il tombe en place. | hinkley.com | ©2019 Hinkley Lighting, Inc. -
Page 56: Installation Des Lames
INSTALLATION DES LAMES Placer la rondelle en caoutchouc sur la vis. Insérez cet assemblage à travers la lame et enfoncez la vis dans le bras de la lame. Répétez cette procédure sans serrer la vis jusqu'à ce que les 3 vis aient été insérées dans le bras de la lame. - Page 57 Retirez les vis et retirez la plaque de verre du couvercle de la lampe (Fig.2), puis fixez le couvercle métallique au couvercle de la lampe B et au couvercle de la lampe A avec les vis fournies. (Fig.3) | hinkley.com | ©2019 Hinkley Lighting, Inc.
-
Page 58: Installation De La Commande Murale
INSTALLATION DE LA COMMANDE MURALE N'OUBLIEZ PAS de couper l'alimentation avant de commencer. Option 2. Pour une seule boîte de gang REMARQUE - Se fixe à n'importe quelle surface ou application : mur plat, boîte simple, boîte multi. Retirez la plaque murale existante et l'ancien interrupteur de la boîte Option 1. - Page 59 Fixez la plaque frontale multi-gang à l'interrupteur situé dans la boîte de prise murale. Le berceau A de l'interrupteur Hinkley s'adaptera à n'importe quelle plaque frontale decora standard. Fig. 4 L'émetteur à distance sera maintenu en place avec des aimants intégrés.
-
Page 60: Opération
OPÉRATION Votre moteur CC sans balais est équipé d'une télécommande de type à apprentissage automatique. bouton: Appuyez sur ce bouton et Il n'y a pas de commutateurs de fréquence sur le relâchez-le instantanément pour allumer récepteur ou éteindre la lumière. ou émetteur. - Page 61 Un flux d'air VERS LE HAUT déplace l'air plus chaud de la zone du plafond comme illustré à la figure 4. Cela vous permet de régler votre unité de chauffage sur un réglage plus frais sans a ecter votre confort. MODE ÉTÉ MODE HIVER (DANS LE SENS DES AIGUILLES (DIRECTION CONTRE-HORAIRE)) Fig. 3 Fig. 4 D'UNE MONTRE) | hinkley.com | ©2019 Hinkley Lighting, Inc.
-
Page 62: Entretien Et Nettoyage
ENTRETIEN ET NETTOYAGE Périodiquement, il peut être nécessaire de resserrer les vis de la lame sur le bras de la lame ou du bras de la lame sur les vis du moteur pour éviter les cliquetis ou les bourdonnements pendant le fonctionnement. Cela est particulièrement vrai dans les climats avec de larges plages de température et d'humidité. -
Page 63: Caractéristiques
Toutes les estimations sont basées sur une utilisation typique, à l'exclusion des lumière ftc.gov/energy RPMs Le débit d'air affiché est une moyenne pondérée des pieds cubes hauts et bas par minute, basée sur la tige de descente | hinkley.com | ©2019 Hinkley Lighting, Inc. -
Page 64: Intelligent Par Lien
INTELLIGENT PAR LIEN • Méthode de la force brute OPTIONS DE VENTILATEUR INTELLIGENT HINKLEY : En plus de la commande murale incluse, vous pouvez contrôler votre ventilateur Hinkley via l'application Bond. a) Coupez l'alimentation secteur du ventilateur. b) Rétablissez l'alimentation secteur sur le ventilateur. - Page 65 HINKLEY EST FIÈRE DE VOUS FOURNIR DES PRODUITS DE VENTILATEUR DE PLAFOND QUI AMÉLIORENT VOTRE ESPACE AVEC CONFORT, OBJECTIF ET STYLE. EN TANT QU'ENTREPRISE FAMILIALE, NOUS NOUS ENGAGEONS À CONCEVOIR, PERFORMANCE ET QUALITÉ, ET CE QUI EST IMPORTANT POUR VOUS EST PARAMOUNT POUR NOUS.
- Page 66 GLOBAL HEADQUARTERS 33000 Pin Oak Parkway | Avon Lak e , Ohio 44012 T (440 ) 653 5500 | F (440 ) 653 5555 | hinkley .com...
Need help?
Do you have a question about the VAIL and is the answer not in the manual?
Questions and answers