Eryone ER-20 Quick Starter Manual
Hide thumbs
Also See for ER-20:
- User manual (30 pages) ,
- Quick starter manual (2 pages) ,
- Manual (2 pages)
Advertisement
Quick Links
Advertisement

Related Manuals for Eryone ER-20


Summary of Contents for Eryone ER-20
- Page 1 Eryone ER-20 Quick Starter Guide Shenzhen Eryone Technology Co.,Ltd...
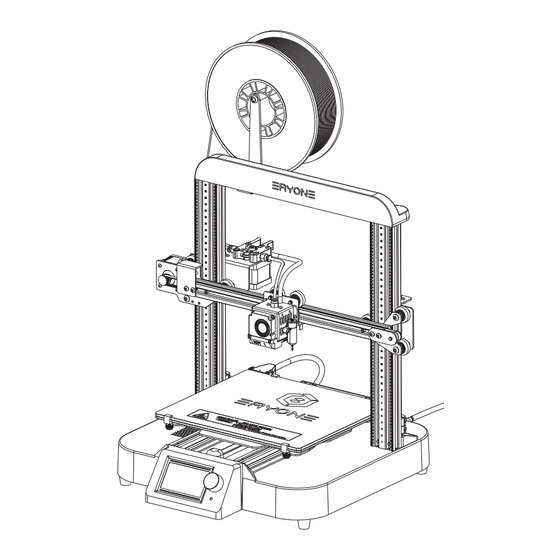
- Page 2 Quick Assembly Overview Base Frame Printing Surface Extruder Gantry Frame Ery Sensor Extruder Stepper Motor SD Card Slot Power Switch Power Cable Port 10. LCD Screen 11. USB Cable Port 12. Filament Spool Holder...
- Page 3 Prepare Base Frame Half Assembly Gantry Frame Half Assembly Lead Screw All-in-One Toolkit Pack...
-
Page 4: Tools And Accessories
Tools and Accessories Tool Assemble Accessories • • M5X35 Round Head Hexagon Socket Screw Slant Edge Scraper • • M4X16 Round Head Hexagon Socket Screw Shear Cutter • • M3X6 Cap Head Hexagon Socket Screw Cross Screwdriver • • M5 Spring Pad 7# Wrench •... - Page 5 Assembly You can find the assembly video of Eryone ER-20 from here: https://www.youtube.com/c/Eryone3D Step 1: Assemble the Gantry Frame 1. Assemble the Lead Screw: Take out the T8 x 8 lead screw and gantry frame parts, and insert the lead screws through the lead screw copper nuts by rotating.
- Page 6 4. Connect Flat Cables: According to the cable mark, connect the bus, E0 and X-axis motor cable. 5. Assemble the Filament Spool Holder: Prepare the filament holder, M4 x 16 round head hexagon socket screw x 2, M4 hex key allen wrench, and put the filament spool on the holder.
-
Page 7: Movement Test
Test Before Print -Movement test Click “Motion” → “Auto Home” to execute the homing (home position: on the left side of the bed). -Preheat hotend and heated bed Choose “Temperature” → “Preheat PLA”. Observe the temperature of nozzle and bed. Choose “Motion”... - Page 8 2) Then click LCD button→Print from SD card→Select “Test_1.gcode” After test model is complete. You need to learn how to slice till files to be able to print your own model. If you want to learn more about 3d print. You can refer to “Eryone ER-20 User Manual”.
Need help?
Do you have a question about the ER-20 and is the answer not in the manual?
Questions and answers