
Related Manuals for Eryone Thinker S


Summary of Contents for Eryone Thinker S
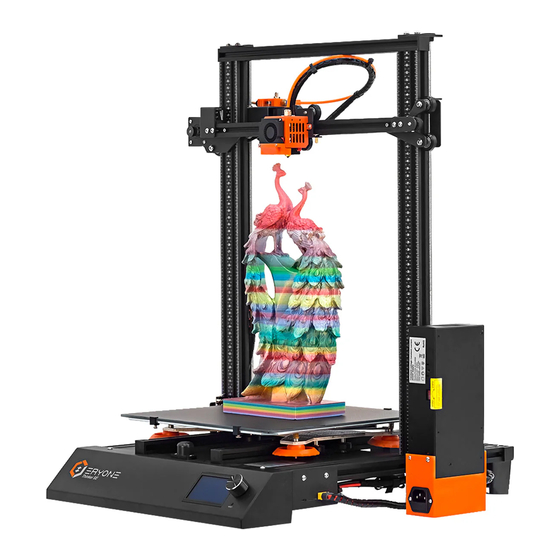
- Page 1 Eryone Thinker S User Manual Marketing info: marketing@eryone.com Technology service: technical@eryone.com WhatsApp: +86 13670143392...
-
Page 2: Table Of Contents
1. Overview of Eryone Thinker S · · · · · · · · · · · · · · · · · · · · · · · · · 5 1.1 A glance of Thinker S · · · · · · · · · · · · · · · · · · · · · · · · · · · · · 5 2. - Page 3 7.4 Large volume and high quality · · · · · · · · · · · · · · · · · · · · · · · 19 7.5 Power failure protection · · · · · · · · · · · · · · · · · · · · · · · · · · · 20 7.6 Compatible with auto-leveling sensors ·...
-
Page 4: Notices
Legal Eryone makes no warranty of any kind with regard to this material, including, but not limited to, the implied warrants of merchantability and fitness for a particular purpose. Eryone should not be liable for errors contained herein or for incidental or consequential damages in connection with the furnishing, performance, or use of this material. - Page 5 This document is protected by copyright. All right reserved. No part of this document maybe photocopied, reproduced or translated into another language without the prior written consent of Eryone. © Copyright 2018 Shenzhen Eryone technology Limited. All rights reserved.
-
Page 6: Overview Of Eryone Thinker S
Please carefully read and understand the contents of this user manual before you use Eryone Thinker S. Failure to read the manual may lead to personal injury, damage to Thinker S. Learn everything about Using your Eryone Thinker S by following the instructions in this user manual, you will find that using 3D printer is such an easy thing. -
Page 7: Specifications
2. Specifications Printing Print technology Fused Deposition Modeling Build Volume 300mm x 300mm x 400mm Printing Precision 0.05mm 12.5 μm / 12.5μm / 2.5μm Positioning precision Filament diameter 1.75mm Default Nozzle diameter 0.4mm Printing Speed 30mm/s~145mm/s Software Supported Software Cura, Simpfily3D, Pursa slicer3r, Repetier-host,etc Printing file types *.gco,*.gcode... -
Page 8: Printer Assembly
3. Printer Assembly For the Eryone Thinker S 3d printer, we suggest you following the “Eryone Thinker S Quick Starter Guide “ After a successful completion, continue to the next step. 4. First steps 4.1Test before print About the LCD layout, you can refer chapter 6. -
Page 9: Load The Filament
-Load the filament Note: The extruder will not work until the temperature is higher than 170℃.(Temperature protection feature) Preheat your hotend at first. Click your LCD button→Prepare→Preheat PLA End. Insert filament into the Teflon tube. When the filament goes though extruder block, with one hand press the handle, make sure the filament can go though the slot of the gear, then guide filament in by hand till filament starts to string from the hotend. -
Page 10: Levelling The 3D Printer On Manual
When homing the axis is finished. You can click LCD button→Prepare →Change filament Choose “Preheat PLA” the hotend will heating then you need to click the LCD button to continue. You can click” Purge more” a few times till the filament comes out of the nozzle. -
Page 11: Levelling The Heated Bed
4.2.2 Levelling the heated bed The recommended distance between the nozzle and printing surface is 0.05~0.1mm(Thickness of A4 paper). There are 4 knobs under the heated bed, by which you can tighten or loosen the springs to reduce or increase the distance between the nozzle and printing surface. The distance from nozzle will increase if you tighten knobs, otherwise, it will decrease distance from nozzle. -
Page 12: Printing
5.1 Install the driver Connect Eryone Thinker S to your PC/laptop via USB cable. Normally the driver will be installed automatically, the same way as you use your keyboard. If your PC can’t get the driver automatically, please insert the SD card to your PC with SD card reader(Package included it). -
Page 13: Setting Your 3D Printer
5.2 Setting your 3D printer Ultimaker Cura download link: https://ultimaker.com/software 1.Open the Cura then add the new printer : Click “Custom” →“Custom FFF printer” then input your printer name... - Page 14 2.Set the correct values on machine settings Copy these code to your Start-Gcode area: G28 ;Home G1 Z15 F1000; G1 Y-3 F1000;Move Y axis G1 X100 E6 F1000;lines G1 X150 E12 F1000;lines M117 >>>>>>>>>>>>>>> For the End Gcode, you can use the default of the Cura 3.Set the correct nozzle size and filament diameter...
- Page 15 4.Import the printer profile The printer profile and filament profile is on your SD card. Profiles\Cura 4.0\ 5.Import the filament profile to Cura:...
-
Page 16: Load Printing Model
5.3 Load printing model Click this icon to import the stl file 5.4 Slice the model When the stl file import finished, you need to adjust your model. Move your model: Left click the model→Click the arrow to adjust your model Red arrow is X axis Green arrow is Y axis Blue arrow is Z axis... -
Page 17: Printing Via Sd Card
Rotation If you find that the model is not placed well. Then you can click rotation icon to adjust it. After that, you can click the slice icon and you can save it to SD card. 5.5 Printing via SD card Power on your 3d printer at first. -
Page 18: Lcd Layout
6. LCD layout This section is for LCD layout. Items not mentioned below are not used for the common print setup-you should not change any of the unmentioned items unless you are absolutely sure what you are doing. □ Info screen □... - Page 19 □ Control □Temperature □ Nozzle □ Bed □ Fan Speed 1 : □ Fan Speed 2 : □ Fan Speed 3 : □ Auto temp □ MIN □ Max □ Fact □ PID-P □ PID-I □ PID-D □ Preheat PLA conf □...
-
Page 20: Special Function Of Eryone Thinker S
7. Special Function of Eryone Thinker 7.1 Magnetic and flexible printing surface With many magnets, built-in aluminum plate, easily remove the printing surface from the aluminum plate; The printing surface is combined fromm spring steel and PEI sheet, they are flexible. When the sheet's temperature under 40℃, you can remove it easily. -
Page 21: Power Failure Protection
Compatible with auto-leveling sensors(Not included sensor) With pre-designed interface for BL-touch and proximity switch, update Eryone Thinker S firmware to enable the auto-leveling function is easily. 8. FAQ-Common Assembly issues 8.1 X carriage is loose If you find your X carriage is loose. You can use the wrench to tight the eccentric nut this will remove wobble and slack in the X carriage. -
Page 22: Faq-Print Problem
Preheat the hotend to 240℃(You can click the LCD button then choose ”Preheat ABS End” ) Refer to our forum for more info about this issue: https://eryone.com/forum 10.FAQ-Error messages 10.1 Mintemp error The mintemp error occurs when at least one of the temperature readouts of the hotend or the heated bed drops below 5℃. -
Page 23: Maxtemp Error
10.2 Maxtemp error The maxtemp error occurs when at least one of the temperature readouts of the hotend or the heated bed more than the limit values. Check if the thermistor cable is not damaged and look for any overtightened zip-ties around the cables leading to the electronics board. - Page 24 If you can’t find the problem solutions from forum You can feel free contact us via Email: technical@eryone.com Facebook: https://www.facebook.com/groups/24727 1792709370/ Youtube: https://www.youtube.com/c/Eryone3D Shenzhen Eryone Technology Co., Ltd. 3F, Building 9, Xiaweiyuan Industrial Park, Gushu 2th road, Bao`an District, Shenzhen city, Guangdong Province, China...
Need help?
Do you have a question about the Thinker S and is the answer not in the manual?
Questions and answers