Table of Contents
Advertisement
Quick Links
Advertisement
Table of Contents

Subscribe to Our Youtube Channel
Summary of Contents for Belkin OmniView F1D104-USB
-
Page 1: User Guide
OmniView ™ 4-Port USB KVM Switch User Guide F1D104-USB P73428... -
Page 2: Read Before Installation
Windows 98/98 SE systems HID (Human Interface Device) driver must be installed prior to using the USB KVM switch. To install the HID driver, first connect a USB keyboard and mice directly to computer (before installing KVM switch) then follow the Windows installation instructions, this will install the HID device driver and allow the use of the KVM switch. - Page 3 Thank you for purchasing the Belkin Components USB KVM Switch! Now you can control up to four different USB computers on any operating system! With exclusive Time-Delay Technology, USB switching is seamless and error- free. The built-in USB to PS/2 converter allows users to work on a standard PS/2 keyboard and take advantage of hot key switching and On-Screen Display.
-
Page 4: Package Contents
Package Contents • 4-Port USB KVM Switch F1D104-USB • 12VDC, 1.6A switching power adapter • This manual • Registration card... -
Page 5: Product Detail
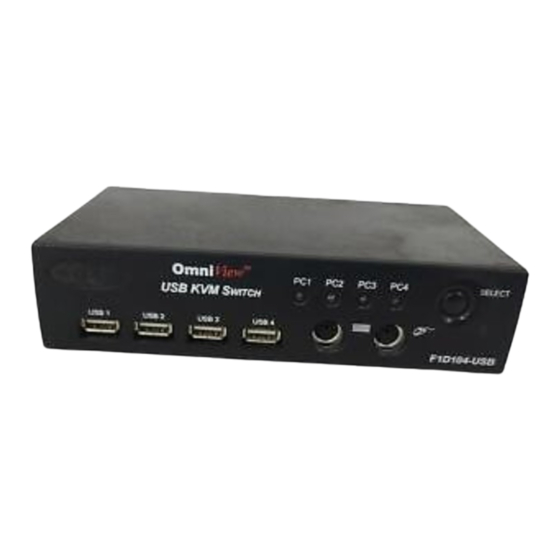
Front View Four Downstream USB Ports Rear View Monitor Connector DC Power Four Upstream USB Connectors to Computers Jack Reset Button Product Detail LED Port Indicators PS/2 Keyboard & Mouse Ports VGA Connectors to Computers Select Button... -
Page 6: Installation Instructions
Connect your keyboard and mouse to the USB KVM. You can use either USB or PS/2 or both. However, we recommend using a PS/2 keyboard, and either type of mouse. Using a PS/2 keyboard allows you to control the KVM switch through hot keys and On-Screen Display. - Page 7 USB Mouse Connecting a Windows-based PC to the USB KVM Switch Using a USB KVM Cable Kit (Belkin F3X1895-XX), connect the VGA and USB cables to an empty port at the back of the USB KVM. Connect the other ends of the USB KVM Cable to the appropriate ports at the back of your PC.
- Page 8 HID-Class (Human Interface Device) drivers. So all you need to do is keep hitting "NEXT" until Windows loads the ® drivers. Only when the drivers are loaded can you start using the devices connected to the USB KVM Switch. See below: Click NEXT Click NEXT...
- Page 9 Installation Instructions (continued) Make sure no boxes are checked. Click NEXT Click NEXT You’re done! Click FINISH.
- Page 10 Installation Instructions Connecting a Macintosh Using a USB KVM Cable Kit (Belkin F3X1895-XX), connect the VGA and USB cables to an empty port at the back of the USB KVM. Rear View USB KVM Connect the other ends of the USB KVM Cable to the appropriate ports at the back of your Mac.
- Page 11 1 saying that the file may be lost or corrupted. The same is true when you are using a streaming device such as the Belkin VideoBus USB Video Capture device. You can switch from one computer to the next only if the VideoBus is no longer in use by the first computer.
- Page 12 Switch to NEXT ACTIVE port Directly switches to port Y You can switch directly to any port by giving the USB KVM the PORT number. For instance, if you press [SCROLL LOCK] [SCROLL LOCK] [2], the computer on PORT 2 will be selected.
-
Page 13: Autoscan Mode
Usage (continued) AutoScan Mode: To enable AutoScan mode, press [SCROLL LOCK] [SCROLL LOCK] [0]. In AutoScan mode, the USB KVM remains on one port for a number of seconds, before switching to the next. This time interval is set in the On-Screen Display menu. NOTE: There is no mouse or keyboard control in this mode. - Page 14 Usage (continued) The main On- The current Screen Display selected menu is shown port is shown in on the right. It RED. shows the currently selected BANK. If you have only one USB KVM, it will say “BANK 0”. The current selected port is shown in RED.
- Page 15 BANK, while the [PAGE DOWN] key brings you to the next BANK. • Once you have selected a computer on the menu, press [ENTER] to switch to its port. • Pressing the [TAB] key opens the Function menu. In this menu, you can select SCAN TIME and DISPLAY TIME.
-
Page 16: Scan Time
Usage (continued) SCAN TIME: SCAN TIME: Amount of time the USB KVM stays on one port before switching to the next port when in Scan Mode. DISPLAY TIME: Amount of time the On-Screen Display enu or Port Name remains displayed on-screen after making a port selection. -
Page 17: Monitor/Video Problems
• Your resolution and/or refresh rate is extremely high, or your cable is too long. Replace your VGA cables with coaxial double-shielded cables such as Belkin A3H981-XX. • Check to make sure that the power adapter is plugged in and is working properly. -
Page 18: Fcc Statement
Belkin Components warrants this product against defects in materials and workmanship for its lifetime. If a defect is discovered, Belkin will, at its option, repair or replace the product at no charge, provided it is returned during the warranty period, with transportation charges prepaid, to the authorized Belkin dealer from whom you purchased the product. - Page 19 Fax: +44 (0) 1604678330 Belkin Components B.V. Diamantlaan 8 • 2132 WV Hoofddorp • The Netherlands Tel: +31 (0) 235698765 Fax: +31 (0) 235612694 © 2000 Belkin Components. All Rights Reserved. All Trade Names Are Registered Trademarks of Respective Manufacturers Listed. United Kingdom...


Need help?
Do you have a question about the OmniView F1D104-USB and is the answer not in the manual?
Questions and answers