Table of Contents

Related Manuals for Arcam A38


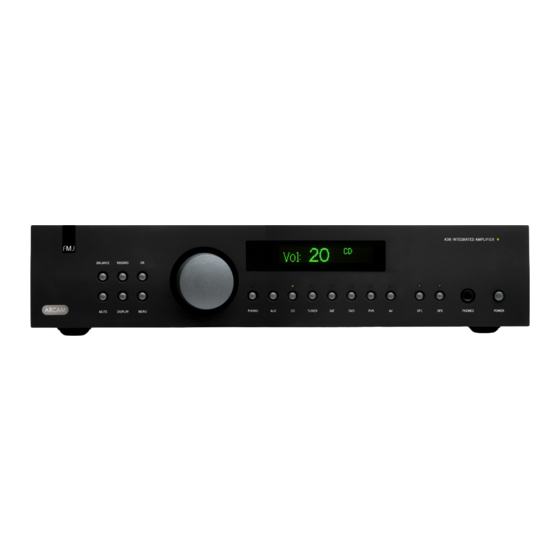
Summary of Contents for Arcam A38
- Page 1 A38/P38 Integrated and power amplifiers H a n d b o o k...
-
Page 2: Safety Guidelines
safety CAUTION: To reduce the risk of electric shock, do not remove cover (or back). No user serviceable parts inside. Refer servicing to qualified guidelines service personnel. and insert the plug fully into the socket. MAny of thEsE ItEMs ArE coMMon sEnsE PrEcAutIons but, for your own sAfEty And to EnsurE thAt you do not dAMAGE thE unIt, wE rEcoMMEnd thAt you rEAd thEM. important safety instructions 5. -
Page 3: Table Of Contents
Arcam has been producing specialist audio products of remarkable quality for over three safety guidelines ...E-2 decades and the new A38 and P38 amplifiers are the latest in a long line of award winning Important safety instructions... E-2 Safety compliance ... E-2 HiFi. -
Page 4: Overview
The CR90 remote control supplied with the A38 is an eight-page ‘universal’ learning remote control which is simple to use, and once set up is able to control a complete system. -
Page 5: Placing The Unit
Check that the plug supplied damp. fits your supply – should you require a new mains lead, Do not place the A38 on top of a power amplifier please contact your Arcam dealer. < or other source of heat. -
Page 6: A38 Connections
‘visible’ to the remote-control). See page 7 for more information. Pre-/power-amplifier connections These sockets are only used if you are using the A38 as a pre-amp, for example, when using the A38 in conjunction with a P38 in a bi-amplified system. -
Page 7: Audio Inputs
Dinky Link, located in Zone 2 Signal ���� �� The A38 can also provide a +12V trigger output to control devices such as the power amplifier in Zone 2. The +12V trigger is active when the unit is ‘On’ . sockets to PrE out sockets. -
Page 8: Loudspeakers
The A38 and P38 are designed to allow easy bi-wiring, but you will need to connect to loudspeakers that provide separate terminals for the two cables. Each speaker must have two pairs of terminals;... -
Page 9: Single Wiring
Single wiring Both the A38 and P38 are designed for bi-wiring, which is why there are duplicate speaker terminals on the back. For single wiring, we recommend that you use the lower set of speaker terminals on your amplifier. If each speaker has more than one pair of connecting terminals, use the terminals labelled or ‘Low Frequency’... -
Page 10: A38 Operation
There are three brightness levels: ‘on’ , ‘dimmed’ and ‘off ’ . If the A38 is switched off while the display is set to ‘off ’ , the display is set to ‘dimmed’ when the A38 is switched on again. -
Page 11: A38 Setup
A38 comes on at the (reduced) ‘Max. On Volume’ level if the last-used volume exceeds this value. If this item is set to ‘Disabled’ , the A38 always comes on at the last used volume, even if this is very loud. -
Page 12: Remote Control
Source keys inserting batteries into the As the CR90 can control your A38 as well as a range of remote control other equipment, many of the buttons have more than one function depending on the ‘device mode’ or ‘page’... -
Page 13: Amp Commands
��� – Switches A38 between stand-by PowEr � � � and on Some number keys can be used for source 1–9 selection: � � � DVD input Not used for A38 � � � AV (television sound input) ���... -
Page 14: P38Connections
P38 in a more conventional stereo configuration. ��������� Connect the rIGht from an A38) to the socket labelled PrE out r on your first P38. AudIo In r Pull out the link supplied on the back panel (labelled ‘link’), and use it to connect the left and... -
Page 15: Remote Switching
A38 Integrated Amplifier to the socket rEMotE In of your P38, you can use the A38 to switch the power amplifier on and off. If configured in this way, the front panel button PowEr of the A38 (or the button on the remote control) switches both amplifiers on and off together. -
Page 16: Specifications
12.2kg mains lead CR90 remote control 4 x AAA batteries e-16 continual improvement policy Arcam has a policy of continual improvement for its products. This means that designs and specifications 100W are subject to change without notice. 150W 140W 200W 0.005%... -
Page 17: Troubleshooting
If this mechanism activates, wait 30 seconds before switching the unit on again. remote-control codes The following tables give the infrared commands accepted by the A38. Power commands menu navigation commands Command... -
Page 18: Product Guarantee
This equipment should be packed in the original packing and returned to the dealer from whom it was purchased, or failing this, directly to the Arcam distributor in the country of residence. It should be sent carriage prepaid by a reputable carrier – not by post. No responsibility can be accepted for the unit whilst in transit to the dealer or distributor and customers are therefore advised to insure the unit against loss or damage whilst in transit.
Need help?
Do you have a question about the A38 and is the answer not in the manual?
Questions and answers