Table of Contents
Advertisement
Quick Links
Advertisement
Table of Contents

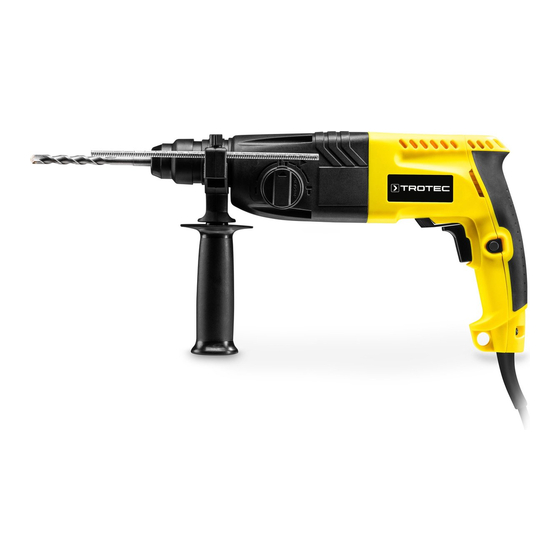
Summary of Contents for Trotec PRDS 05-230V
- Page 1 PRDS 05-230V ORIGINAL INSTRUCTIONS ROTARY HAMMER...
-
Page 2: Table Of Contents
Info Information marked with this symbol helps you to carry out your tasks quickly and safely. Follow the manual Information marked with this symbol indicates that the instructions must be observed. rotary hammer PRDS 05-230V... -
Page 3: Safety
Any power tool that cannot be controlled with protected supply. Use of an RCD reduces the risk of the switch is dangerous and must be repaired. electric shock. rotary hammer PRDS 05-230V... - Page 4 Cutting accessory contacting a "live" wire may make exposed metal parts of the power tool "live" and could give the operator an electric shock. rotary hammer PRDS 05-230V...
- Page 5 • for chiselling in concrete, rock and plaster Wear tight-fitting protective clothing. whilst adhering to the technical data. This protects you from the draw-in and entanglement We recommend using the power tool with original Trotec hazard posed by rotating parts. accessories. Wear safety boots.
- Page 6 Dangers can occur at the device when it is used by untrained people in an unprofessional or improper way! Observe the personnel qualifications! Warning The device is not a toy and does not belong in the hands of children. rotary hammer PRDS 05-230V...
-
Page 7: Information About The Device
• 1 x Transport case Device depiction • 1 x Additional handle • 1 x Keyless drill chuck with SDS-plus shank • 1 x SDS flat chisel (14 x 250 mm) • 3 x SDS drill bits (6/8/10 x 150 mm) • 1 x Depth stop • 1 x Manual rotary hammer PRDS 05-230V... -
Page 8: Transport And Storage
• Remove the tool from the tool holder. • Clean the device as described in the Maintenance chapter. • For storing the device, use the transport case included in the scope of delivery in order to protect the device from external influences. rotary hammer PRDS 05-230V... -
Page 9: Start-Up
Please proceed as follows to remove or insert tools: 1. Push the SDS-plus system tool holder (1) to the rear, remove the tool from the tool holder (if any) and let go of the tool holder. rotary hammer PRDS 05-230V... - Page 10 With the depth stop you can determine the penetration depth of the drill bits. 1. Loosen the fastening screw (2) at the mount. 2. Insert the depth stop (6). 3. Adjust the depth stop (6) to the desired length. rotary hammer PRDS 05-230V...
-
Page 11: Operation
Impact drilling in masonry / bricks: • Use a drill bit suitable for masonry / bricks. Chiselling in general: • Use a suitable chisel. 5. Check the keyless drill chuck (7) and the inserted tool for tight fit. rotary hammer PRDS 05-230V... - Page 12 ð The device operates with the previously selected settings. ð Operating mode: Drilling 6. Let go of the on/off switch (4) to stop the device. 7. Wait until the device has stopped before putting it away. rotary hammer PRDS 05-230V...
- Page 13 1. Stop the tool by letting go of the on/off switch (4). 2. Turn the function selector switch (3) to the position. 3. Turn the tool manually into the desired position. ð Operating mode: Chiselling 4. Turn the function selector switch (3) back to the position to continue working. rotary hammer PRDS 05-230V...
- Page 14 The motor's rotational direction can be changed by means of device. ð The on/off switch is locked in place. the switch for clockwise / counter-clockwise rotation (10). ð The device keeps running and continuous operation is Please proceed as follows to select a rotational direction: activated. rotary hammer PRDS 05-230V...
-
Page 15: Available Accessories
11-piece SDS drill bit and chisel set 6.205.001.101 2. Carry out a short test run to see whether the rotational direction matches the intended application. A wrong rotational direction may damage the tool and / or workpiece. rotary hammer PRDS 05-230V... -
Page 16: Errors And Faults
Maintenance tasks which require the housing to be be selected. opened must only be carried out by authorised • Check whether the correct drill bit is selected. specialist companies or by Trotec. • Check whether the function selector switch (3) is set to Notes on maintenance position ... -
Page 17: Disposal
Part 1, Section A enter the housing. • Clean the device with a soft, damp and lint-free cloth. Herewith, we – Trotec GmbH– declare that the machinery Make sure that no moisture enters the housing. Protect designated below was developed, constructed and produced in electrical components from moisture. - Page 18 Trotec GmbH Grebbener Str. 7 D-52525 Heinsberg +49 2452 962-400 +49 2452 962-200 info@trotec.com www.trotec.com...


Need help?
Do you have a question about the PRDS 05-230V and is the answer not in the manual?
Questions and answers