Canon BJC-85 User Manual
Color image scanner cartridge
Hide thumbs
Also See for BJC-85:
- User manual (287 pages) ,
- Reference manual (21 pages) ,
- Specifications (2 pages)
Table of Contents
Advertisement
Advertisement
Table of Contents

Related Manuals for Canon BJC-85


Summary of Contents for Canon BJC-85
- Page 1 IS-12 Color Image Scanner Cartridge...
-
Page 2: Table Of Contents
Contents Introduction Using the Scanner ® Using the Scanner With Windows ® Using the Scanner With Macintosh Scanner Problems Contents... -
Page 3: Introduction
© 2000 Canon Computer Systems, Inc. I Disclaimer Canon Computer Systems, Inc. has reviewed this manual thoroughly in order that it will be an easy to use guide to using your optional IS-12 Color Image Scanner Cartridge with the Canon BJC-85 Color Bubble Jet Printer. All statements, technical information, and... - Page 4 Introduction I Trademarks Canon, BJ, and Bubble Jet are trademarks of Canon Inc. Microsoft and Windows are registered trademarks of Microsoft Corporation in the U.S. and other countries. Mac and the Mac logo are trademarks of Apple Computer, Inc., registered in the U.S.
-
Page 5: Using The Scanner
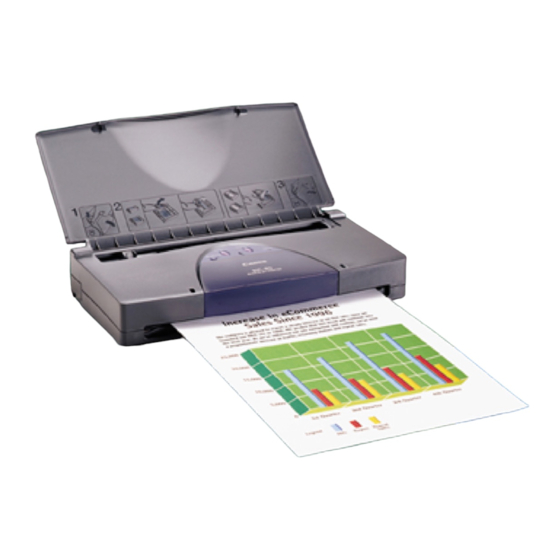
Using the Scanner Scanner Driver Basics Unpacking the Scanner Cartridge Installing the IS Scan Software Installing the Scanner Cartridge Basic Scanning Procedure Using the White Calibration Sheet Scanning Area Guidelines Loading an Image Using the Scanner... - Page 6 Scanner Driver Basics Installing the optional IS-12 Color Image Scanner Cartridge in the printer makes it possible to scan and save images such as your favorite photographs and greeting cards. Photograph Greeting card Home page Wallpaper for your computer Using the Scanner...
- Page 7 Windows To use the scanner cartridge, you must install the IS Scan software, which includes the IS Scan scanner driver and the IS Scan Plus utility program. These two programs provide many features that allow you to perform simple color adjustments to improve the quality of the original image or enhance the image for artistic effect.
- Page 8 Unpacking the Scanner Cartridge Make sure you have the following items. I IS-12 Color Image Scanner Cartridge The scanner cartridge is composed of precision components. To avoid Caution poor scanning results, do not touch the optical components or electrical contacts. Electrical contacts Optical components Using the Scanner...
-
Page 9: White Calibration Sheet
Unpacking the Scanner Cartridge I White Calibration Sheet You use this sheet to maintain the correct color balance of scanned images. The first time you install the scanner cartridge, you need to run the white level calibration. You will also run calibration when the white level calibration data needs to be updated. -
Page 10: Installing The Is Scan Software
Installing the IS Scan Software Make sure the BJC-85 printer driver is installed before you proceed with the following instructions. Insert the printer driver CD-ROM into your CD-ROM drive. Click Start and then click Run. In the Run dialog box, type: d:\drivers\ISScan\disk1\setup.exe... -
Page 11: Installing The Scanner Cartridge
Installing the Scanner Cartridge • The scanner cartridge is composed of precision components. To avoid Caution poor scanning results, do not touch the optical components or electrical contacts. • To avoid damaging the scanning head of the scanner cartridge, do not attempt to store the scanner cartridge in an SB-10 Ink Cartridge Storage Box. - Page 12 I Replacing a BJ Cartridge With the Scanner Cartridge Make sure that the printer is plugged in and turned on. Open the cartridge cover and press the CARTRIDGE button; the cartridge holder moves to the center of the printer. Lift up on the green tab to remove the BJ cartridge from the cartridge holder.
- Page 13 Remove the scanner cartridge from its protective case. With the label on the scanner cartridge up, set the scanner cartridge in the cartridge holder at a slight angle. Align the marks ( marks on the holder. Cartridge holder Press down on the raised left side of the scanner cartridge until it locks in place.
- Page 14 Follow this procedure to remove the scanner cartridge and install the BJ cartridge when you are finished scanning. Make sure that the printer is turned on and then press the CARTRIDGE button to move the cartridge holder to the center of the printer.
- Page 15 Lift up the tab Place the scanner cartridge in its protective case. Always remove the scanner cartridge from the printer and store it in its Caution protective case when it is not being used. To avoid damaging the scanning lens on the scanner cartridge, do not attempt to store it in an Ink Cartridge Storage Box.
-
Page 16: Basic Scanning Procedure
Basic Scanning Procedure After installing the IS Scan scanner driver, you can use the BJC-85 printer as a scanner. Remove the BJ cartridge installed in the cartridge holder and then install the IS-12 Color Image Scanner Cartridge. Start a graphics application program. - Page 17 The first time you use the scanner, you need to perform the White Level Calibration. Using the White Calibration Sheet Insert the image you wish to scan into the scanning holder, then load the scanning holder into the auto sheet feeder. Loading an Image Scan the image.
- Page 18 Using the White Calibration Sheet The white calibration sheet provided with the scanner cartridge is used for maintaining the correct color balance of scanned images. White level calibration is required when the scanner cartridge is used for the first time and when the white level calibration data needs to be updated.
- Page 19 Load the white calibration sheet with the cropped corner at upper left. Align the sheet with the right side of the sheet feeder. Adjust the paper guide to the left side of the sheet. Follow any instructions on your screen. When the white calibration sheet is ejected from the paper output tray, White Level Calibration processing is complete.
- Page 20 Note • Do not leave the white calibration sheet in locations that are exposed to direct sunlight or that are subject to high temperatures or humidity. • Do not bend or wrinkle the white calibration sheet. • When cleaning the white calibration sheet, use a soft cloth that is dipped in a weak, neutral detergent solution, and then wipe its wet surface off with a dry, soft cloth.
- Page 21 • If you wish to scan images larger than the size of the scanning holder provided with the IS-12 Color Image Scanner Cartridge, the SH-101 A4/LTR scanning holder is available for purchase. Visit the Canon Web site to find out about accessories and supplies (www.ccsi.canon.com).
-
Page 22: Loading An Image
• Do not leave the scanning holder in locations that are exposed to direct sunlight or that are subject to high temperatures or humidity. • When you load the scanning holder on the printer, be sure to set the paper thickness lever to the down (or envelope) position. Scanning with the lever set incorrectly will adversely affect the print quality. - Page 23 Loading an Image Adjust the paper guide to the left edge of the scanning holder. Paper Guide Caution To prevent possible damage to the scanning holder, always insert the seamed side into the auto sheet feeder first. Using the Scanner...
-
Page 24: Using The Scanner With Windows
Using the Scanner With Windows Using IS Scan Changing the Scanning Mode Using the Customized Scanning Mode Saving the Settings Using the Saved Settings Other IS Scan Features Using IS Scan Plus Using Copy Using Capture Image Using Capture Photo Editing a Scanned Image Printing a Scanned Image Saving a Scanned Image... -
Page 25: Using Is Scan
Install the IS-12 Color Image Scanner Cartridge in the printer. Installing the Scanner Cartridge Make sure Canon IS Scan 2 is set as the Acquire Source and then select the command used for scanning (such as Acquire or TWAIN) from the menu of the application program. - Page 26 • Select the most appropriate scanning mode for the image you wish to scan in the Scanning Mode box. Changing the Scanning Mode Load the image you wish to scan in the auto sheet feeder of the printer and click the Prescan button. Note It’s a good idea to use prescanning to determine whether or not an image...
- Page 27 • Release the mouse button. The Selection Box appears on the image. Note • To move the Selection Box, place the mouse pointer within the Selection Box and drag the mouse to the desired position. • To resize the Selection Box, point to a corner of the Selection Box and then drag the mouse.
- Page 28 Load the image you wish to scan in the auto sheet feeder again. Click the Scan button. Remember, if you specified a Selection Box in step 5, only that portion of the image is scanned. After scanning is complete, click the Transfer button to transfer the image data to the TWAIN-compatible graphics application program.
- Page 29 Note • Some TWAIN-compliant graphics application programs do not display the main IS Scan dialog box but instead display a different screen characteristic of the application program. If you are using this type of application program, read the documentation of the application program carefully and perform prescanning or normal scanning.
-
Page 30: Changing The Scanning Mode
Changing the Scanning Mode You can select a scanning mode according to your scanning purpose. Optimum settings, such as image type and resolution, are pre-assigned based on the contents of a scanning job. When you wish to customize the settings for special scanning jobs, click the Custom button. - Page 31 Scanning Purpose Mode Scans by converting a monochrome image into the data suitable for facsimile transmission Scans by converting a monochrome image into the data suitable for OCR input Suitable for scanning an image that consists mostly of text Used for customizing the settings for special scanning jobs Using the Customized...
- Page 32 Using the Customized Scanning Mode When you select Custom in the Scanning Mode box of the main dialog box, the Custom dialog box opens and allows you to adjust the scanning settings for special scanning jobs. Open the main IS Scan dialog box. Click the Custom button in the Scanning Mode box.
- Page 33 Specify these settings in the Custom dialog box: Standard Value You change the standard values for the default settings here. Image Type Select a type of image: Color (the default), Grayscale, or Monochrome. Resolution Determines the precision of the scanned image. The higher the resolution setting, the higher the precision and quality of the scanned image.
- Page 34 Using the Customized Scanning Mode Character Emphasis Determines whether or not Image Trust processing is used for scanning grayscale images. Image Trust processing sharpens the appearance of characters in monochrome documents. This is especially helpful if you intend to use the scanned original with an OCR software application. This option is available only when the Image Type is set for Monochrome.
- Page 35 Click the OK button to return to the main dialog box. Make sure that the image you wish to scan is inserted into the scanning holder properly and is loaded in the auto sheet feeder of the printer, then click the Scan or Prescan button.
-
Page 36: Saving The Settings
Saving the Settings You can save the settings in the main IS Scan dialog box to a file. The next time you scan, you only need to open the file in which the desired settings are stored and start scanning. I Saving the Settings to a File Save the Page Size, Scanning Mode, and Image Size settings in the main IS Scan dialog box as a file. -
Page 37: Using The Saved Settings
Using the Saved Settings Open the file in which the desired settings were saved and use those settings for scanning. Select Open Settings File from the Settings menu. Select the file you wish to use, then click the Open button. The file name is displayed in the Settings File box, and the settings change in the main IS Scan dialog box. -
Page 38: Device Information
I Device Information When you select Device Information from the Option menu of the main IS Scan dialog box, you can verify the name of the printer that is currently connected to your system and information on the communication mode. -
Page 39: Using Online Help
Other IS Scan Features I Enlarging the Scanned Image in the Preview Area To enlarge the scanned image in the preview area, click the Enlarge icon ( key) or select Large from the View menu. To return to the original size, click the Standard icon ( key) or select Normal from the View menu. -
Page 40: Launching Is Scan Plus
Using IS Scan Plus IS Scan Plus is a utility program that allows you to edit, enhance, print, and save an image acquired by the IS Scan scanner driver. You can use IS Scan Plus if you do not have a graphics application program. - Page 41 Scan and edit a photographic print such as a snapshot. Using Capture Photo Device Information Verify the name of the printer that is currently connected to your system and information on the communication mode. Using IS Scan Plus Using the Scanner With Windows...
- Page 42 You can access the online Help from all the screens that IS Scan Plus displays. I Verifying the Device Information Make sure that the printer is connected properly and is turned on, and click the Device Information button. • If the printer is connected using the parallel interface, Device Information displays a communication mode such as ECP/1 or ECP/2.
- Page 43 I IS Scan Buttons Returns to the main IS Scan Plus screen. Moves back to the previous screen. Displays the Edit screen. Editing a Scanned Image Prints a scanned image. Printing a Scanned Image Saves a scanned image. Saving a Scanned Image Using IS Scan Plus Using the Scanner With Windows...
-
Page 44: Using Copy
Using Copy Use the Copy feature when you wish to print an image immediately after scanning. You cannot edit or enhance the scanned image before printing. Click the Copy button in the main IS Scan Plus screen. The Copy screen displays: Using the Scanner With Windows... - Page 45 • The Copies box is disabled. Click the Print Setting button. This displays the Print Setup dialog box. Make sure Canon BJC-85 is displayed as the default printer. Click the Properties button, if necessary, to display the Printer Properties dialog box and specify any printer settings.
- Page 46 Another dialog box appears to remind you to remove the scanner cartridge, and install the BJ cartridge according to your print job. Also, make sure paper is loaded in the auto sheet feeder of the printer. Click the OK button in the dialog box. Printing begins.
-
Page 47: Using Capture Image
Using Capture Image Use the Capture Image feature to scan an image other than a photographic print. You can also edit, enhance, save, and print the scanned image. Click the Capture Image button in the main IS Scan Plus screen. This displays the Capture Image screen. - Page 48 Select the paper size in the Paper Size box. Insert the image you wish to scan in the scanning holder, and then load it in the auto sheet feeder of the printer. Click the Prescan button. The remaining steps are similar to those described for Scanning an Image using IS Scan.
-
Page 49: Using Capture Photo
Using Capture Photo Use the Capture Photo feature to scan a photographic print such as a snapshot. You can also edit, enhance, save, and print the scanned image. Click the Capture Photo button in the main IS Scan Plus screen. The Capture Photo screen displays: By default, a Selection Box displays in the Preview Area. - Page 50 • Select Regular or Panorama in the Photo Size box. Insert the image you wish to scan into the scanning holder, and then load it in the auto sheet feeder of the printer. Click the Prescan button. The remaining steps are similar to those described for Scanning an Image.
-
Page 51: Editing A Scanned Image
Editing a Scanned Image You can edit or enhance a scanned image acquired using the Capture Photo or Capture Image feature. The editing features you can use vary according to the settings you used for scanning and whether you used the Capture Photo or Capture Image feature for scanning. You can edit or enhance the image displayed in the Preview Area. - Page 52 You can select these editing options. For details on each feature, use the online Help for IS Scan Plus. Contrast / Brightness Adjusts the brightness and contrast of an image. Image Compensation Softens edges in the image by reducing the contrast between pixels, or sharpens hazy or blurred images.
- Page 53 Background Allows you to add a background to a monochrome image. Crop Photo Crops a scanned photograph in the Preview Area. Frame Allows you to add a frame border around the image. Note • Depending on the settings you use for scanning, some editing features are not available.
-
Page 54: Printing A Scanned Image
Printing a Scanned Image You can print a scanned image acquired using the Capture Image or Capture Photo feature. Remove the scanner cartridge, and install the BJ cartridge according to your print job. Click the Print button on the IS Scan Plus screen. If you are using Capture Image, the Print dialog box appears: Using the Scanner With Windows... - Page 55 If you are using Capture Photo, the Photo Print Options dialog box appears. Click Print Setting to change the printer settings or click Print to print the image. See your online BJC-85 User’s Manual for details on the printer Properties you can select. Using the Scanner With Windows...
-
Page 56: Saving A Scanned Image
Saving a Scanned Image IS Scan Plus allows you to save a scanned image to a file under a new name. You can use the saved image for pasting into another document or for attaching to your e-mail or a home page on the Internet. - Page 57 Click the down-arrow for “Save as type” and select a format for the file. You can select one of the following file formats. • Bitmap .BMP • JPEG .JPG • TIFF .TIF Click the Save button. Saving a Scanned Image Using the Scanner With Windows...
-
Page 58: Using The Scanner With Macintosh
Using the Scanner With Macintosh Scanning Images With Application Software Using the Main IS Scan Dialog Box Scanning an Image Scanning Images With IS Scan Changing the Scanning Mode Customizing the Scanning Settings Copying a Scanned Image to the Clipboard Adjusting an Image Modifying an Image Applying Special Effects to an Image... - Page 59 I Selecting a TWAIN-compatible Device Before you scan images with application software, you must first select a TWAIN- compatible device using the BJC-85 driver. The basic procedure is described below (steps may vary based on your application software). Start the application software and then select New... from the File menu.
- Page 60 Using the Main IS Scan Dialog Box Menu Button Scan Button Save Button Halt Button Information Box Help Button Menu button Selects the IS Scan functions. Click this button to change the settings for a scanned image or to edit a scanned image. Image Control Panel Brightness...
- Page 61 Scan, Prescan, or Clear button Click this button to start scanning. This button switches to Prescan or Clear, depending on the setting or situation. Transfer or Save button Click this button to transfer a scanned image to an application. When using IS Scan only without an application software, this button says Save.
-
Page 62: Scanning An Image
Scanning an Image Click the Menu button and then select Settings. The Settings dialog box displays: Make the necessary settings for the image to be scanned. • Click on Paper Size to select a size that approximates the image to be scanned. - Page 63 Click the OK button and then close the Settings dialog box. Place the object to be scanned in the printer and then click the Prescan button. You see the image displayed in the Preview Area. If you only want to scan part of the object, drag the mouse within the Preview Area to select the part to be scanned.
- Page 64 • The minimum size of the selected area is 1" × 1" (25.4 mm by 25.4 mm). • The size of the selected range is displayed in the Image Control Panel. Place the image to be scanned in the printer and click the Scan button. Remember, only the range indicated by the Selection Box is scanned.
- Page 65 If the image displayed in the Preview Area is not what you expect, click the Clear button and start over. If you like the image, click the Transfer button. The scanned image is transferred to the application software. Edit the image data as required prior to printing or saving it.
- Page 66 You can use IS Scan as a stand-alone program to scan and edit images. I Starting IS Scan Turn on the printer and install the scanner cartridge. Double-click the IS Scan BJC-85 folder. Double-click the IS Scan BJC-85 icon. Using the Scanner With Macintosh...
- Page 67 Scanning Images With IS Scan IS Scan starts and the main dialog box displays. The contents of the main dialog box and the method you use to scan images are basically the same as when using TWAIN application software. Using the Scanner With Macintosh...
-
Page 68: Saving Scanned Images
Scanning Images With IS Scan I Saving Scanned Images Click the Save button. Using the Scanner With Macintosh... - Page 69 Make the necessary settings. • Select the location to which you want to save your image. • Enter a name for the image data in Name. • Click the up- or down-arrow in Format to select PICT or TIFF. Click the Save button. The image data is saved into a file. Scanning Images With IS Scan Using the Scanner With Macintosh...
- Page 70 Changing the Scanning Mode You can select a scanning mode according to your scanning purpose. Optimum settings, such as image type and resolution, are pre-assigned based on the contents of a scanning job. When you wish to customize the settings for special scanning jobs, click the Custom button.
- Page 71 Scanning Mode Text Recommended when scanning a document consisting entirely of text, such as a document created with a typewriter or word processor Scans by converting a monochrome image into the data suitable for facsimile transmission Scans by converting a monochrome image into the data suitable for OCR input Custom...
- Page 72 Note • The Settings dialog box displays when you select Settings after you click the Menu button in the main dialog box. • When you select FAX or OCR, the document is scanned and processed as a grayscale image and converted to monochrome binary image data. This process eliminates unnecessary image background and increases the quality of the scanned text and line art.
- Page 73 Customizing the Scanning Settings When you select Custom for Scanning Mode in the Settings dialog box, you can specify the scanning settings. Click the Menu button in the main dialog box and then select Settings. Click the up- or down-arrow in Scanning Mode and then select Custom. Using the Scanner With Macintosh...
- Page 74 finer the image you can get, although the amount of data will be large. In general, 90 dpi is sufficient for home pages, while 180 dpi is good for output to a printer. Settings are 90, 180, 200, 300, 360. Threshold This function is valid only when Image Type is set to Black &...
- Page 75 This is disabled for prescan. Click the OK button. The main dialog box displays. Place the image to be scanned in the printer, then click the Prescan button or Scan button to start scanning. Customizing the Scanning Settings...
- Page 76 Copying a Scanned Image to the Clipboard If you copy a scanned image to the clipboard, you can use the image easily with other application software. This is particularly useful when you want to paste an image into documents created with application software that is not TWAIN-compatible. I Copying an Image Click the Menu button in the main dialog box.
-
Page 77: Adjusting The Brightness And Contrast
Adjusting an Image If you are not satisfied with a scanned image, you can perform fine adjustment using a range of functions. Image data can be processed so that the brightness of the image changes or so that the image appears sharper or softer. I Adjusting the Brightness and Contrast Click the Brightness and Contrast button in the main dialog box. - Page 78 Move each slide bar to the right or left to adjust the image. Brightness Moving the Brightness slide bar to the left makes the entire image darker, while moving it to the right makes the image brighter. Contrast Moving the slide bar to the left reduces the contrast of the entire image, while moving it to the right increases the contrast.
- Page 79 Modifying an Image You can modify a scanned image so that it looks sharper or softer. Also, a Despeckle function allows you to remove speckling and make a scanned image appear cleaner. A function for inverting colors to produce a negative film is also available. Click the Menu button in the main dialog box, select Image, and then select the desired function from the submenu.
- Page 80 Applying Special Effects to an Image Special effects such as edge emphasis, line emphasis, pixelization, posterization, and low relief can be applied to a scanned image, creating an image with a feeling different from that of the original. Click the Menu button in the main dialog box, select Enhance, and then select the desired function from the submenu.
- Page 81 Applying Special Effects to an Image Select a desired function from the list. The following is an example of the screen displayed when you select Edges. The operation is the same when any other function is selected. You can check the approximate result of the selection in the Preview Area. For details of each function, refer to the explanation displayed when you click the Help button.
- Page 82 Once you are satisfied with the adjustment, click the OK button. Note To cancel an adjustment you have made, click the Menu button and then select Undo. Then, select either of the following: Last Only the function applied immediately before is cancelled. If you perform editing two or more times, only the function that you selected most recently is cancelled.
- Page 83 Place the white calibration sheet in the printer and then click the OK button. The calibration sheet is scanned and the calibration is performed.
-
Page 84: Using The Online Help
Other IS Scan Functions I Using the Online Help Clicking the Help button on the main dialog box displays helpful explanations of the functions of IS Scan. You can also display the Help by clicking the Menu button, then Help, and Help again. Using the Scanner With Macintosh... -
Page 85: Using The Copy Utility
I Installing the Copy Utility To use the Copy Utility, you must first copy the folder including the necessary files to any location. Load the printer driver CD-ROM into the CD-ROM driver on your Macintosh. Double-click on the Copy Utility folder. - Page 86 Drag the Copy Utility for BJC-85 folder and copy it to any location. Now you can start the Copy Utility at any time. Note To use the Copy Utility, the printer driver and IS Scan scanner driver must also be installed.
- Page 87 Using the Copy Utility Click the Copy Utility icon. The Copy Utility starts and the main dialog box displays: Using the Scanner With Macintosh...
- Page 88 Set Brightness, as necessary. Move the slide bar to the right and left to set the brightness. Place the image to be copied in the printer, then click the Copy button. Scanning starts. When the message appears, remove the scanner cartridge and replace it with a BJ cartridge according to the printing settings.
- Page 89 Note • To print the same image again, click the Reprint button. • To copy another document with the same settings, click the Copy button and follow the instructions on the screen. • To perform copying with different settings, click the Reset button and follow the instructions on the screen.
-
Page 90: Scanner Problems
Scanner Problems Scanning Result Is Unsatisfactory Scanner Cannot Be Used With a TWAIN-compatible Application Program Other Scanner Problems Scanner Problems... -
Page 91: Scanning Result Is Unsatisfactory
Scanning Result Is Unsatisfactory Scanned Image Blurred or Distorted Quality of Scanned Image Is Uneven White Portion Becomes Grayish Parts of an Image Missing or Not Aligned Properly Image Contains Unexpected Colors, or Is Too Light or Too Dark Scanner Problems... -
Page 92: Scanned Image Blurred Or Distorted
If the scanning holder is scratched or damaged, replace it. Note You can purchase a scanning holder for A4/LTR-size images. Visit the Canon Web site to find out about accessories and supplies (www.ccsi.canon.com). HECK RE YOU SCANNING THICK PAPER The image being scanned must be thinner than 0.25 mm. - Page 93 I Quality of Scanned Image Is Uneven The scanned image is coarse and/or blurry. HECK S THE RESOLUTION SETTING HIGH ENOUGH Resolution determines the precision of the scanned image. The greater the number of dots used to draw an image, the higher the precision and the quality of the scanned image becomes.
- Page 94 I White Portion Becomes Grayish HECK ID YOU PERFORM Use White Level Calibration to maintain the correct color balance of scanned images. Using the White Calibration Sheet HECK ID YOU ADJUST THE BRIGHTNESS AND CONTRAST Depending on the image you scan, a white portion is not recognized as white because the scanner detects and scans even the small differences of the density between white and other colors.
- Page 95 HECK ID YOU SCAN A MONOCHROME IMAGE USING THE RAYSCALE SETTING If the Scanning Mode is set to Color or Grayscale, the scanner detects and scans even the grades of the density, and white may not be recognized as white. When you scan a monochrome image, always set Black &...
- Page 96 I Parts of an Image Missing or Not Aligned Properly HECK ID YOU PLACE AN IMAGE WITHIN THE PROPER SCANNING AREA Check that the image you wish to scan is placed in the proper scanning area. HECK ID YOU SPECIFY THE SCANNING AREA CORRECTLY If the Paper Size setting is smaller than the size of the image you scan, parts of the image will be missing.
- Page 97 I Image Contains Unexpected Colors, or Is Too Light or Too Dark The appearance of the scanned image is not what you expected, or the image is too light or too dark. HECK S THE NUMBER OF DISPLAY COLORS SET TO OLOR Windows Check the number of display colors as follows.
- Page 98 HECK OLOR The colors displayed on your display may not match the actual scanned colors. Color Matching attains the best match between the colors displayed on your display and the actual colors in the scanned image. You can enable Color Matching when the Scanning Mode is set for Color. Windows Check that Color Matching is enabled.
-
Page 99: Application Program
Scanner Cannot Be Used With a TWAIN-compatible Application Program Cannot Launch IS Scan From Within the TWAIN-compatible Graphics Application Program Cannot Transfer to TWAIN-compatible Graphics Application Program Scanner Problems... - Page 100 I Cannot Launch IS Scan From Within the TWAIN-compatible Graphics Application Program HECK OES THE YOU ARE USING SUPPORT THE LATEST SPECIFICATIONS OR LATER Windows When IS Scan is used as a TWAIN interface, you must use the latest 32-bit TWAIN-compatible graphics application program.
- Page 101 I Cannot Transfer to TWAIN-compatible Graphics Application Program HECK OES THE YOU ARE USING SUPPORT THE FILE FORMAT TYPE AND RESOLUTION OF THE IMAGE DATA Some TWAIN-compatible graphics application programs support specific file format types and resolution settings only. For example, the resolution settings of some OCR (optical character reader) application programs are limited to 300 or 400 dpi.
-
Page 102: Other Scanner Problems
Other Scanner Problems Cannot Install Scanner Driver Does Not Launch With Default Settings Windows Improper Colors Displayed in the Dialog Box Scanning Too Slow Communication Error Occurs Error Message Appears Scanner Problems... - Page 103 I Cannot Install Scanner Driver HECK ID YOU FOLLOW THE SCANNER DRIVER INSTALLATION INSTRUCTIONS Installing the IS Scan Software Windows If an error occurred during installation and you had to shut down the installation procedure, you may not be able to install the scanner driver because Windows is no longer stable.
- Page 104 The printer driver CD-ROM may be damaged. On the Windows desktop, double-click the My Computer icon then double-click the CD-ROM icon. If Windows cannot read the CD-ROM, call the Canon Customer Care Center for help. See your online BJC-85 User’s Manual for details.
-
Page 105: Does Not Launch With Default Settings
I Does Not Launch With Default Settings HECK ID YOU LAUNCH APPLICATION PROGRAM This problem occurs when IS Scan is launched from a TWAIN-compatible graphics application program. Depending on the TWAIN-compatible graphics application program, Previous Settings selected in the Standard Value box under the Custom Settings dialog box may be cleared, and standard settings characteristic of the TWAIN-compatible program you are using may be used when launching IS Scan. - Page 106 I Improper Colors Displayed in the Dialog Box HECK S THE NUMBER OF DISPLAY COLORS SET TO OLOR Windows This problem occurs when IS Scan is launched from a TWAIN-compatible application program. If the problem is not solved, change the number of display colors of your computer.
- Page 107 I Scanning Too Slow Scanning is requiring an unusually long time. HECK RE YOU USING A HIGHER RESOLUTION THAN REQUIRED In order to scan an image, your computer must be able to receive a large amount of data. Therefore, the scanning speed varies according to the performance of the computer.
-
Page 108: Communication Error Occurs
Do not attempt to launch IS Scan or IS Scan Plus again immediately after it is closed. Wait for a few seconds and then launch again. HECK S THE PRINTER PLUGGED IN AND READY Check that the printer is plugged in and ready. HECK RE YOU USING THE INDOWS... -
Page 109: Error Message Appears
I Error Message Appears HECK EFER TO THE ONLINE Windows From the main IS Scan screen, select Contents from the Help menu, or press F1. Macintosh Open the online Help. Other Scanner Problems Scanner Problems...
Need help?
Do you have a question about the BJC-85 and is the answer not in the manual?
Questions and answers