Table of Contents
Advertisement
Quick Links
Advertisement
Table of Contents

Related Manuals for Blastrac BMS-150


Summary of Contents for Blastrac BMS-150
- Page 1 Original instructions in English OPERATING INSTRUCTIONS BMS-150 VERSION 1.1...
-
Page 2: Inspection Comments
Inspection comments Inspection before initial operation on: __________________________________________ __________________________________________ Date of initial operation: __________________________________________ Serial number & Year of manufacture: __________________________ _____________ Recurring inspections / maintenance log Date / Hour counter Findings Repairs / Cleaning Test *Competent person... -
Page 3: Table Of Contents
Adjust foot frame Transport bracket 5 Operation Electric controls Controlling the machine Driving the machine Electric cable Connect the electric cable Folding the BMS-150 Start up the machine 6 Blades Blade choice Working method Blade changing Cutting head & Blades Blade sharpening... -
Page 4: Introduction
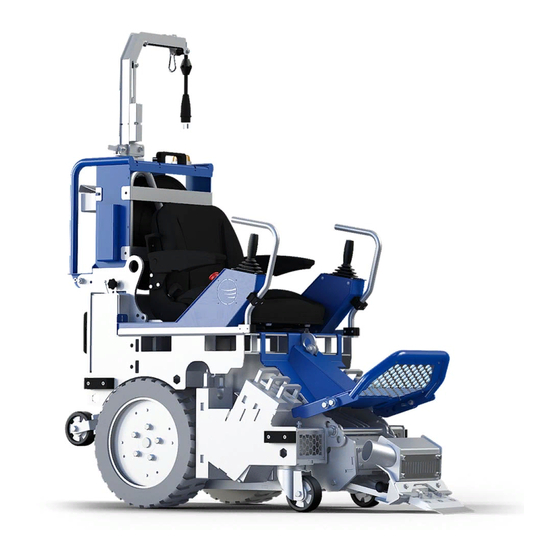
Always use common sense when working with machines. 2. Machine description The Blastrac BMS-150 stripper is ideally suited for small and medium sized applications. The machine has a strong electric drive system which is very easy to operate. The machine has forward, backward and speed control functions. -
Page 5: General Safety Rules
3. General Safety Rules Warning! Read all safety warnings and all instructions. Failure to follow the warnings and instructions may result in electric shock, fire, explosions and / or serious injuries. Only authorized and trained personnel may operate this machine. This machine is not intended for use by persons (including children) with reduced physical, sensory or mental capabilities, or lack of experience and knowledge. -
Page 6: Personal Safety
Do not stand on the machine. Do not add extra weight on the machine. Except the optional weights. Dust collector safety a) Always use a Blastrac dust collector to ensure a dust-free operation of the machine and clean air at the workspace. -
Page 7: Transport Safety
The weight of the BMS-150 is 480 kg without the extra weights. Use preferably appropriate appliances as a lift, crane or a forklift truck. Use the existing lifting points to lift the machine. Or the special holes for... - Page 8 Lifitng points for the use of a forklift truck.
-
Page 9: Signs On The Machine
Signs on the machine The following stickers are placed on the machine. Meanings of these symbols are: Wear a dust mask class FFP2 or ! Danger Hazardous voltage in motor higher. even when solid state controller is OFF. Disconnect main power before servicing motor, controller or associated wiring. -
Page 10: Initial Operation
4. Initial operation Before using the machine it is of great importance to inspect the machine every day. It is not permitted to use the machine if the machine safety is not according the checkpoints below. 4.1 Checkpoints Electrical safety Any damage to electric cables is not permitted. -
Page 11: Adjust Foot Frame
Never wear twisted seat belts. Excessive forces will be transferred from the belt to the wearer, in a collision, resulting in serious personal injury. At least once each month, inspect the seat belt webbing for any cuts, tears, or other signs of wear (such as fraying along the edges). -
Page 12: Transport Bracket
The transport bracket will come down. Stand on the transport bracket, the BMS-150 will be lifted up by your weight. The lever (1) will lock the transport bracket. The lever will make a “clicking” sound, when it locks the transport bracket. -
Page 13: Operation
5. Operation 5.1 Electric controls Move blade up Move blade down Joystick drive motor (Left) Joystick drive motor (Right) Lights on/ off Tool position switch (Dual lift) Emergency break button “On” button “Off” button High speed (Hare) -
Page 14: Controlling The Machine
Correcting direction while moving is accomplished by slightly reducing pressure on one joystick or the other while moving. Note: If there is 20 seconds of no activity, the BMS-150 will shut down. You have to restart the BMS-150 with the “On” button (6). -
Page 15: Electric Cable
Electrical cable The BMS-150 has a 25 meter electric cable on an automatic reel. To prevent that the cable gets pulled out and get damaged, there are 2 safety devices that will indicate you reached the end of the electric cable. -
Page 16: Folding The Bms-150
5.6 Folding the BMS-150 STEP 1. Folding the rotating cable arm. Push the locking lever up. Now you can fold the rotating cable arm. - Page 17 STEP 2. Folding the cable system. Screw the bolts back, to fix the cable system.
- Page 18 STEP 3. Folding the Foot rest. Remove the 2 bolts, pointed by the green arrows. Fold the foot frame. Remove the tool holder. (see chapter 6.3 Blade changing)
- Page 19 BMS-150 FOLDED...
-
Page 20: Start Up The Machine
5.7 Start up machine Before start-up the operating personnel must be familiar with the safety regulations given in this manual. Before switching on the machine make sure that no-one can be endangered when the machine starts Persons who are not operating the machine must not be permitted to stay in the surrounding area of at least 5 meter from the machine. -
Page 21: Blades
6. Blades 6.1 Blade choice Proper blade size and placement, depending on the material and sub-floor type, affects the performance. 2” 4” 6” 8” 10” 12” 14” Width 51mm 101mm 152mm 203mm 254mm 305mm 350mm Self-Scoring Blade E14932 E14934 E09530-1 E09533-1 Premium Blade E09510... -
Page 22: Working Method
6.2 Working method For soft materials like carpet, vinyl and PVC it is possible to use self-scoring blades: It’s important to keep the “wings” sharp. They can be sharpened in the same way like the other blades. For removal of tiles and wood, it is recommended to use chisels. Carry out floor stripping in parallel tracks away from off the power supply in such way that the (optional) dust hose and the electrical power supply cable do not become twisted around the swivel arm. -
Page 23: Blade Changing
6.3 Blade changing Dull blades greatly reduce cutting ability. Re-sharpen or replace as needed. - Always wear protecting cut-resistant gloves when changing the blades. - Use an extended wrench to keep hands safely away from the edge of the blade. - Make sure the main plug is pulled out of the power source before changing the blades. -
Page 24: Cutting Head & Blades
6.4 Cutting head & Blades Cutting head angle The cutting head is able to adjust with the “Dual lift” button (4) on the LH console. If there is no dual lift option, there are 3 positions which can be adjusted with the metal bar. Set the cutting head angle to where the material comes up the easiest. -
Page 25: Blade Sharpening
6.5 Blade sharpening Always wear protecting, cut-resistant gloves and safety glasses. It is not necessary to remove the bolts. Sharpen the blade mounted to the machine using a hand grinder. Sharpen the blade with a 10 cm diameter disk with 120 or finer grit. WARNING! Be careful, make sure the disc does not catch the edge or corner of blade. - Page 26 Saving time with extra blades, blade holders and tool holders The machine is supplied with one tool holder. Having additional tool holders, blade holders and blades will save time on the job. When the blade is dull, instead of taking the time to replace it or sharpen it on the job, replace it with another prepared set.
-
Page 27: Types Of Tear Outs
6.6 Types of tear outs Keep blades sharp! Keep your work area clean and clear of debris. Always wear personal Protective equipment when working with the machine. VCT – Vinyl Composition Tile [Super duty or Chisel] Never use a blade wider than the size of the tile being removed. If goods being removed still do not come up clean or the machine jumps on top of goods, reduce blade size to a smaller blade until proper blade size is found or use a smaller portion of the blade. -
Page 28: Maintenance
Operational safety and service life of the stripper depends, among other things, on proper maintenance. The following table shows recommendations about time, inspection and maintenance for the normal use of the stripper. BMS-150 Operating hours/ Inspection points, maintenance instructions time period 12 h after repairing Check all accessible screw connections and other fasteners for tight seat. - Page 29 Store the cleaned and dry machine in a dry and humid free room. Protect the electrical motors from moisture, heat, dust and shocks. All repair work must to be done by qualified Blastrac personnel, this to guarantee a safe and reliable machine. Any guarantee on the machine expires when: Non original Blastrac parts have been used ...
-
Page 30: Trouble Shooting
Reset the thermal overload Thermal overload protector of the cable reel protector. is on. Start BMS-150 up again. BMS-150 switches off after 15 seconds of inactivity. Defective Component. Find fault and replace defective component. (Chapter 7.1). Open the electrical cover and check the fault code. - Page 31 Pull out the transport bracket Unscrew the 4 bolts.
- Page 32 Motor short circuit Short-circuit at drive Check the cables connecting output. to the motor, and the motor’s insulation. Note: If the problem cannot be solved or another fault code appears, write down the fault code and contact your local Blastrac dealer.
-
Page 33: Technical Data
Relative humidity of max. 95% The electrical diagrams of the electrical system are placed inside of the control panel. Design and specifications are subject to change without notice by Blastrac B.V. The BMS-150 230V can be used in 50hz and 60 Hz. -
Page 34: Dimensions Of The Machine
8.1 Dimensions of the machine... -
Page 36: Sound And Vibration Data
Declaration in conformance with EN 12096: 1997 Measurement in conformance with EN-ISO 2631-1 and EN 1032 as far as applicable. The measurements of the sound and vibration level are taken from a similar machine within the Blastrac company. IMPORTANT NOTES: The measurement are from a similar machine The indicated values are measured on new machines. -
Page 37: Options
8.3 Options Extra weight kit, placed on both sides. Total amount of weight: 115 kg STEP 1. 3 extra weights can be placed on each side. - Page 38 STEP 2. Place one extra weight part at the time.
- Page 39 STEP 3. Place the weight lock. STEP 4. Secure the extra weight parts with the weight lock by screwing the knob.
- Page 40 Extra wheel weight kit, placed on both wheels. Total amount of weight 85 kg (10x8,5 kg) Use 5 pieces on each side. STEP 1. Place the 5 pieces inside the wheel...
- Page 41 STEP 2. Mount the extra wheel weights. Using 4x M10 x 120 bolts, use loctite 243. STEP 3. Mount the wheel back. Using 5x M12 x40 mm, lock washer and plain washer. Use loctite 243.
- Page 42 BLASTRAC EUROPE WE’RE READY TO ASSIST YOU! BLASTRAC THE NETHERLANDS BLASTRAC POLAND BLASTRAC FRANCE EUROPEAN HEAD OFFICE SALES & SERVICE CENTRE SALES & SERVICE CENTRE Utrechthaven 12 Golina, ul. Dworcowa 47E ZI - 29, Av. des Temps Modernes NL - 3433 PN Nieuwegein...
Need help?
Do you have a question about the BMS-150 and is the answer not in the manual?
Questions and answers