Electrolux SMART Operating Instructions Manual
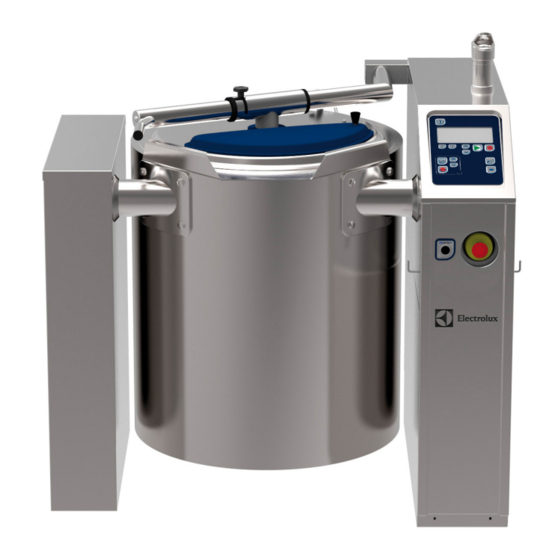
Boiling pan , 600 mm tilting height
Hide thumbs
Also See for SMART:
- Service manual (93 pages) ,
- Installation instructions manual (40 pages)

Subscribe to Our Youtube Channel
Related Manuals for Electrolux SMART


Summary of Contents for Electrolux SMART
- Page 1 OPERATING INSTRUCTIONS BOILING PAN , 600 mm TILTING HEIGHT SMART, SMART VARIOMIX, SMART PROMIX READ BEFORE USE! DOC N ST0 9184-02 EDITION 2 | EN | 12-2014...
- Page 3 OPERATING INSTRUCTIONS | SMART LINE | BOILING PAN WE’RE THINKING OF YOU Thank you for choosing an Electrolux product. This is a product that comes with decades of pro- fessional experience and innovation; a sophisticated product that is intelligently designed and de- veloped with your needs in mind.
-
Page 4: Table Of Contents
OPERATING INSTRUCTIONS | SMART LINE | BOILING PAN TABLE OF CONTENTS SAFETY INSTRUCTIONS FOR SAFETY AND USE ....... . . 6 Safety instructions for handling electrical appliances . - Page 5 OPERATING INSTRUCTIONS | SMART LINE | BOILING PAN OPERATING INSTRUCTIONS OPERATING INSTRUCTIONS ..........19 13.1...
-
Page 6: Safety
OPERATING INSTRUCTIONS | SMART LINE | BOILING PAN SAFETY 1. INSTRUCTIONS FOR SAFETY AND USE IMPORTANT! • Before cleaning, the appliance must be discon- Danger of fire, explosion and death nected from the power supply and cooled down completely to avoid the risk of scalding or elec- • This appliance is intended for use only for the... -
Page 7: Installation And Initial Operation
OPERATING INSTRUCTIONS | SMART LINE | BOILING PAN Obligations of the operator IMPORTANT! Danger of fire, explosion and death Responsibility for and guarantee of the perman- ent correct operation of all safety-related compon- • Do not place any other objects apart from cook- ents lie with the responsible manager. -
Page 8: Residual Risk
OPERATING INSTRUCTIONS | SMART LINE | BOILING PAN Residual risk Residual risks that cannot be avoided completely during development or are eliminated with the use of suitable safety devices, are marked on the machine. When the machine is installed, ensure there is suf- ficient free space around it to reduce the residual risks. -
Page 9: Technical Specification
OPERATING INSTRUCTIONS | SMART LINE | BOILING PAN TECHNICAL SPECIFICATIONS 2. MODELS Smart Line boiling pans Heating Total power Voltage Frequency Max. phase current F. Mod. Kg/h V / neutral conductor 232218 SM6B50 400 V / 3N 50/60 232219 SM6B100 22.5... -
Page 10: Testing / Certification
OPERATING INSTRUCTIONS | SMART LINE | BOILING PAN Smart Line boiling pans with dual connection Voltage Weight Total power V / neutral Frequency Max. phase current F. Mod. conductor 232222 + 928091 SM6B300 25 / 25 400 V / 3N... -
Page 11: Appliance Identification
OPERATING INSTRUCTIONS | SMART LINE | BOILING PAN 4. APPLIANCE IDENTIFICATION 4.1 Rating plate The illustration shows an example of an unlabelled The eight-digit serial number (Ser. No.) on the rating rating plate and may differ from the one on your plate contains the following information: appliance. -
Page 12: General Information
OPERATING INSTRUCTIONS | SMART LINE | BOILING PAN GENERAL INFORMATION 6. PACKAGING ENVIRONMENT Help protect our environment All packaging materials used are environment- ally-friendly. They may be stored without risk, taken to a recycling centre or incinerated in special waste incineration plants. -
Page 13: Responsibility / Liability
OPERATING INSTRUCTIONS | SMART LINE | BOILING PAN 7. ESPONSIBILITY / LIABILITY 7.1 Liability 7.2 Storing the operating instructions The manufacturer is exempted from all liability for These installation and operating instructions must the product in the following cases: be kept intact for the whole life cycle of the appli- ance up until it is disposed of. -
Page 14: Customer Service, Repair And Maintenance
OPERATING INSTRUCTIONS | SMART LINE | BOILING PAN OPERATING INSTRUCTIONS | SMART LINE | BOILING PAN 8. CUSTOMER SERVICE, REPAIR AND MAINTENANCE Service, repair and maintenance work must • Repairs and service on the appliances must be only be carried out by Electrolux Professional carried out when heating elements have cooled or Electrolux partner dealers. -
Page 15: Cleaning
OPERATING INSTRUCTIONS | SMART LINE | BOILING PAN OPERATING INSTRUCTIONS | SMART LINE | BOILING PAN 9. CLEANING 9.1 Handling stainless steel The types of stainless steel used on industrial kit- swarf from cables, iron-rich water) this can lead chen appliances are highly sophisticated, tried and to corrosion. -
Page 16: Transport, Handling And Storage
OPERATING INSTRUCTIONS | SMART LINE | BOILING PAN 10. TRANSPORT, HANDLING AND STORAGE 10.3 Notes on handling The transport, handling and storage of the appli- ances must be carried out only by specialist work- ers who: Observe the following precautions to ensure safe handling: • Have specific technical training and experience... -
Page 17: Safety System
OPERATING INSTRUCTIONS | SMART LINE | BOILING PAN 11. SAFETY SYSTEM 11.2 Checking of safety valve WARNING! OVERHEATING Observe If overheating occurs, a buzzer will sound and the following text will appear in the display ELEMENT OVERHEATED The heat will shut off in the event of a fault to the ele- ment sensor. -
Page 18: Control Panel
OPERATING INSTRUCTIONS | SMART LINE | BOILING PAN 12. CONTROL PANEL Variomix agitator Promix agitator On/Off Display Menu forwards Menu back Increase value Decrease value Start Stop Agitator start Agitator stop Increase speed Decrease speed Tilting Tip return Emergency stop Main switch Fig. -
Page 19: Operating Instructions
OPERATING INSTRUCTIONS | SMART LINE | BOILING PAN 13. OPERATING INSTRUCTIONS 13.1 Instant start BOILING (Fig.3) BOILING • Press On/Off for 1.5 seconds. Display lights. BOILING/HOT KEEP The following text appears in the display: BOILING/COOLING MENU SETTINGS COOLING • Press Decrease value . The cursor moves down. -
Page 20: Delayed Start
OPERATING INSTRUCTIONS | SMART LINE | BOILING PAN 13.4 Delayed start If the display shows - h -- min, this means that there is unrestricted time and the pan must be switched off using STOP (if the flow sensor and/or mat temp. sensor op- • Confirm by pressing Menu forwards... -
Page 21: Boiling/Hot Keep
OPERATING INSTRUCTIONS | SMART LINE | BOILING PAN 13.6 BOILING/HOT KEEP • Confirm by pressing Menu forwards once. The following text appears in the display: (if the mat temp. sensor option has been selected) DELAY XXh XXmin Xh XXmin XX°C BOILING WATER XXX+XXX BOILING/HOT KEEP... -
Page 22: Boiling/Cooling
OPERATING INSTRUCTIONS | SMART LINE | BOILING PAN 13.7 BOILING/COOLING When boiling time is over, it transfers to hot keep. The following text appears in the display: (if the jacket cooling and mat temp. sensor options have been selected) BOILING/HOT KEEP XXX°C... -
Page 23: Cooling
OPERATING INSTRUCTIONS | SMART LINE | BOILING PAN 13.8 COOLING When the countdown to start is ready or if delayed start is not selected, the following text appears in the display: (if the jacket cooling option has been selected) BOILING/COOLING BOILING Xh XXmin XXX°C... -
Page 24: Changes In Food Preparation Program
OPERATING INSTRUCTIONS | SMART LINE | BOILING PAN 13.10 Name the food For unlimited cooling/ without food temp.sensor, preparation program switch off the pan manually in the following way: Press STOP The food preparation program to be named is to... -
Page 25: Agitator
OPERATING INSTRUCTIONS | SMART LINE | BOILING PAN 14. AGITATOR 14.1.2 AGITATION WITHOUT GRID 14.1 Agitator Variomix (SMARTMIX) NOTE: When the agitator is rotating This function is used to rotate the agitator when the • The measuring stick must not be in the pan grid is open and in the event of tilting. -
Page 26: Whip
OPERATING INSTRUCTIONS | SMART LINE | BOILING PAN 14.2.2 WHIP 14.2.3 Programming of own agitator program The fixed program WHIP is used to whip more • lighter products such as cream. A whip implement Press Increase speed once. can be used with good results*. -
Page 27: Name Agitator Program
OPERATING INSTRUCTIONS | SMART LINE | BOILING PAN • 14.2.4 Name agitator program Press Increase value once and the following text flashes. • Press Increase speed to select agitator TIME PAUSE program. XX:XX J XX:XX 1 • Press Increase value... -
Page 28: Agitator Promix
OPERATING INSTRUCTIONS | SMART LINE | BOILING PAN 14.3 Agitator Promix 14.3.3 Preset agitator program NOTE: When the agitator is rotating • The measuring stick must not be in the pan • Do not insert the measuring stick down in the There are 1 fixed agitator programs and 5 positions for own programs •... -
Page 29: Programming Of Own Agitator Program
OPERATING INSTRUCTIONS | SMART LINE | BOILING PAN 14.4 Programming of own agitator 14.4.1 Name agitator program program • Press Increase speed to select agitator • Press Increase speed once. program. • The following text appears in the display: Press Increase value... -
Page 30: Change Values During Operation
OPERATING INSTRUCTIONS | SMART LINE | BOILING PAN 14.5 Change values during operation Temperature settings: (if the mat temp. sensor option has been selected) The status of the pan appears in the display: Keeping hot when boiling/keep hot BOILING -h --min XXX°C... -
Page 31: Tilting Of Pan
OPERATING INSTRUCTIONS | SMART LINE | BOILING PAN SELECTION OF 14.6 Tilting of pan PROGRAMMING • Press Tilting and keep the button pressed until the pan reaches the desired position or OPTIONS stops at max. tilted position. NOTE: Tilting can only be done when the lock and grid are raised. -
Page 32: Tools And Accessories
OPERATING INSTRUCTIONS | SMART LINE | BOILING PAN 17. TOOLS AND 18. AGITATOR ACCESSORIES MAINTENANCE 17.1 Agitator tool Variomix The agitator bearing is filled with grease from the factory. Refilling grease should take place during in- Gate agitators are used to mash, mix or whip the stallation and then at least twice per year. -
Page 33: Messages And Error Codes
OPERATING INSTRUCTIONS | SMART LINE | BOILING PAN 19. MESSAGES AND ERROR CODES Message Cause Action Red LED in START flashes. The following The pan is not in working position. Press Tilt return text appears in the display: TILTING Xh XXmin XXX°C... -
Page 34: Cleaning
OPERATING INSTRUCTIONS | SMART LINE | BOILING PAN 20. CLEANING 20.2 Cleaning the lid (Fig. 5) Following usage and for daily cleaning of the pan: • The lid (1) can be rotated 90 degrees to be rinsed • Use a neutral detergent and hot water. off so the water flows down into the vessel. Re- • Run t he a gitator f or 1 0-30 m inutes a t a s peed o f 3 0- move the lid with knob (5). -
Page 35: Maintaenance Of The Vessel Bearings
OPERATING INSTRUCTIONS | SMART LINE | BOILING PAN 21. MAINTENANCE OF VESSEL BEARINGS The vessel bearings should be inspected and greased once a year. Grease nipple Fig.6 22. OTHER DOCUMENTATION Manufacturer’s Declaration Installation Instructions Service Manual* Spare Parts Catalogue* * Not supplied. May be ordered from the supplier or the supplier’s representative. - Page 36 MODELS 232218 232230 232242 232219 232231 232243 232220 232232 232244 Electrolux Professional 232221 232233 232245 232222 232234 232223 232235 232224 232236 232225 232237 232226 232238 232227 232239 232228 232240 232229 232241...
Need help?
Do you have a question about the SMART and is the answer not in the manual?
Questions and answers