OHAUS Defender Series Instruction Manual
Low profile floor platform
Hide thumbs
Also See for Defender Series:
- User manual ,
- Instruction manual (76 pages) ,
- Assembly instructions manual (55 pages)
Table of Contents
Advertisement
Available languages
Available languages
Quick Links
Defender Series
Low Profile Floor Platform
Instruction Manual(DFD)
Serie Defender
Plataforma de Piso de Bajo Perfil
Manual de Instrucciones (DFD)
Série Defender
Plate-forme de pesage au sol
Manuel d'instructions(DFD)
Defender Serie
Bodenwaage
Bedienungsanleitung(DFD)
Serie Defender
Piattaforma a pavimento a profilo basso
Istruzioni per l'uso (DFD)
Advertisement
Chapters
Table of Contents

Related Manuals for OHAUS Defender Series


Summary of Contents for OHAUS Defender Series
- Page 1 Defender Series Low Profile Floor Platform Instruction Manual(DFD) Serie Defender Plataforma de Piso de Bajo Perfil Manual de Instrucciones (DFD) Série Defender Plate-forme de pesage au sol Manuel d’instructions(DFD) Defender Serie Bodenwaage Bedienungsanleitung(DFD) Serie Defender Piattaforma a pavimento a profilo basso...
-
Page 3: Table Of Contents
Defender Series Floor Scale EN-1 Table of Contents Introduction ....................2 1.1. Safety Instructions ................2 1.2. Connecting an Indicator ..............3 Internal structure and working principle ............. 4 2.1. Internal structure ................4 2.2. Working principle ................5 Basic requirements and installation ............6 3.1. -
Page 4: Introduction
Defender Series Floor Scale 1. Introduction This manual contains installation, operation and maintenance instructions for the Defender Series Floor Scale. 1.1. Safety Instructions Please follow these safety precautions: Position the power cord so that it does not pose a potential ... -
Page 5: Connecting An Indicator
Defender Series Floor Scale EN-3 1.2. Connecting an Indicator When connecting the base to TD52 indicator , push the base connector onto the indicator connector and turn the locking ring clockwise to lock it in place. When connecting the base to an indicator that does not have the matching connector, install the optional load cell cable adapter (P/N 30429931 sold separately) to the indicator. -
Page 6: Internal Structure And Working Principle
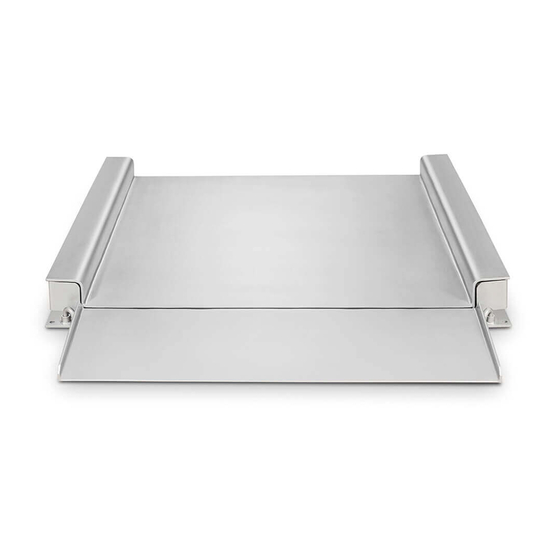
EN-4 Defender Series Floor Scale 2. Internal structure and working principle 2.1. Internal structure Figure2-1.Floor scale DFD series floor scales are made up of components demonstrated above. Connect the double shielded cable to the weighing instrument and turn on the power to use. -
Page 7: Working Principle
Defender Series Floor Scale EN-5 2.2. Working principle Put an object on the weighing platform. Under gravity, the load cell elastomer deforms and makes the impedance of the strain gauge bridge adhered to the elastomer by the strain gage out of balance. As a result, a voltage signal proportional to the weight value is outputted. -
Page 8: Basic Requirements And Installation
EN-6 Defender Series Floor Scale 3. Basic requirements and installation 3.1. Basic requirements Ensure that the installation is performed according to the instructions, and the surface is flat in the area where the scale will be positioned, The Height difference of the surface must not exceed 1mm. The maximum weight capacity of the surface at the four cell feet position should be higher than the maximum allowed weight of the cell. -
Page 9: Accessory Installation
Defender Series Floor Scale EN-7 3.3. Accessory installation Stop bar Take out the stop bar and the matching bolts. On the opposite side of the ramp, use two M8 bolts to secure the stop bar to the scale body and insert rubber plugs into the two round holes. -
Page 10: Operation
EN-8 Defender Series Floor Scale 4. Operation 4.1. Operation Instruction After installation, if you need to use the scale for trade, you need to give the scale to local metrology department or national metrology department for verification before use. -
Page 11: Maintenance
5.3. Service information If error diagnosis fails to solve or describe your problem, please contact an Authorized Ohaus Service Agent. Please visit our website www.ohaus.com to locate the Ohaus office nearest you, or contact us by the information on the warranty card. -
Page 12: Technical Data
304 stainless steel plate, with table Material thickness 6mm top thickness 6mm 1000x1000mm 1250X1250mm 1000x 1000 1250 x 1250 mm Table top size Net weight 136 kg 195 kg 136 kg 195 kg TABLE 6-1. Defender series floor scale specification... -
Page 13: Dimensions
Defender Series Floor Scale EN-11 7. Dimensions Figure 7-1. Floor scale dimensions Models A (mm) B (mm) C (mm) D (mm) E (mm) DFD600HR 1000 1000 1238 DFD1500HL 1250 1250 1488 DFD600WR 1000 1000 1238 DFD1500WL 1250 1250 1488 TABLE 7-1. Floor scale dimensions... -
Page 14: Compliance
EN-12 Defender Series Floor Scale 8. Compliance Compliance to the following standards is indicated by the corresponding mark on the product. Mark Standard This product complies with the applicable harmonized standards of EU Directives 2011/65/EU (RoHS). The EU Declaration of Conformity is available online at www.ohaus.com/ce. - Page 15 Ohaus. In lieu of a properly returned warranty registration card, the warranty period shall begin on the date of shipment to the authorized dealer.
- Page 17 Báscula de Sobresuelo Serie Defender ES-1 Í ndice Introducción ....................2 1.1. Instrucciones de Seguridad ............2 1.2. Conectar un Indicador ..............3 Estructura interna y principio de funcionamiento ........4 2.1. Estructura interna ................4 2.2. Principio de funcionamiento ............5 Requisitos básicos e instalació...
-
Page 18: Introducción
ES-2 Báscula de Sobresuelo Serie Defender 1. Introducción Este manual contiene instrucciones de instalación, operación y mantenimiento para la báscula de sobresuelo Serie Defender. 1.1. Instrucciones de Seguridad Siga estas precauciones de seguridad: Coloque el cable de alimentación de manera que no represente un obstáculo potencial o un peligro de desconexión. -
Page 19: Conectar Un Indicador
Báscula de Sobresuelo Serie Defender ES-3 1.2. Conectar un Indicador Al conectar la base al indicador TD52, presione el conector de la base sobre el conector del indicador y gire el anillo de bloqueo en el sentido de las agujas del reloj para asegurarlo en su lugar. -
Page 20: Estructura Interna Y Principio De Funcionamiento
ES-4 Báscula de Sobresuelo Serie Defender 2. Estructura interna y principio de funcionamiento 2.1. Estructura interna Caja de conexión Célula de carga Rampa Soporte para pie Barra de tope Plataforma Figura 2-1. Báscula de sobresuelo Las básculas de sobresuelo de la serie DFD están formadas por los componentes mostrados anteriormente. -
Page 21: Principio De Funcionamiento
Báscula de Sobresuelo Serie Defender ES-5 2.2. Principio de funcionamiento Coloque un objeto en la plataforma de pesaje. Bajo el efecto de la gravedad, las galgas extensométricas conectadas al puente de Wheatstone y colocadas en la célula de carga cambian su impedancia. Como resultado, se emite una señal de voltaje proporcional al valor del peso. -
Page 22: Requisitos Básicos E Instalación
ES-6 Báscula de Sobresuelo Serie Defender 3. Requisitos básicos e instalación 3.1. Requisitos básicos Asegúrese de que la instalació n se realice de acuerdo con las instrucciones y que la superficie sea plana en el área donde se colocará la báscula. La diferencia de altura de la superficie no debe exceder 1 mm. -
Page 23: Instalación De Accesorios
Báscula de Sobresuelo Serie Defender ES-7 Conecte el cable de señal con el indicador. 3.3. Instalación de accesorios Barra de tope Extraiga la barra de tope y los tornillos correspondientes. En el lado opuesto de la rampa, use dos pernos M8 para asegurar la barra de tope al cuerpo de la báscula e inserte topes de goma en los dos orificios redondos. -
Page 24: Operación
ES-8 Báscula de Sobresuelo Serie Defender 4. Operación 4.1. Instrucciones de operación Después de la instalación, si necesita utilizar la báscula para realizar transacciones comerciales, antes de utilizarla tendrá que certificar el sistema, contactando con el organismo autorizado en su región o con un instalador calificado. -
Page 25: Mantenimiento
5.3. Información del servicio Si el diagnóstico de error no resuelve o describe su problema, comuní quese con un agente autorizado del Servicio Técnico de Ohaus. Visite nuestro sitio web www.ohaus.com para localizar la oficina de Ohaus más cercana o póngase en contacto con nosotros mediante la información de la tarjeta de... -
Page 26: Datos Técnicos
ES-10 Báscula de Sobresuelo Serie Defender 6. Datos Técnicos 6.1. Especificaciones Clasificación del equipo: Solo para uso en interiores Altitud: 2000 m Rango de temperatura de funcionamiento: de -10 a 40° C Humedad: Humedad relativa máxima del 80 % para temperaturas de hasta 31 °... -
Page 27: Dimensiones
Báscula de Sobresuelo Serie Defender ES-11 7. Dimensiones Figura 7-1. Dimensiones de la báscula de sobresuelo Modelos A (mm) B (mm) C (mm) D (mm) E (mm) DFD600HR 1000 1000 1238 DFD1500HL 1250 1250 1488 DFD600WR 1000 1000 1238 DFD1500WL 1250 1250 1488... -
Page 28: Conformidad
Directivas de la UE 2011/65 / UE (RoHS). La Declaración de conformidad de la UE está disponible en lí nea en www.ohaus.com/ce. Este producto cumple con la Directiva de la UE 2012/19/EU (RAEE). Deseche este producto de acuerdo con las regulaciones locales en el punto de recogida especificado para equipos eléctricos y electrónicos. - Page 29 Los productos Ohaus están garantizados contra defectos en materiales y de fabricación desde la fecha de entrega hasta la duración del perí odo de garantí a. Durante el perí odo de garantí a, Ohaus reparará o, a su criterio, reemplazará cualquier componente que demuestre ser defectuoso sin cargo, siempre que el producto sea devuelto, con flete prepagado, a Ohaus.
- Page 31 Balance au sol série Defender FR-1 Table des matières Introduction ....................2 1.1. Consignes de sécurité ..............2 1.2. Connecter un indicateur ..............3 Structure interne et principe de fonctionnement ........4 2.1. Structure interne ................4 2.2. Principe de fonctionnement ............5 Exigences de base et installation ..............
-
Page 32: Introduction
FR-2 Balance au sol série Defender 1. Introduction Ce manuel contient les instructions d’installation, d’utilisation et de maintenance de la balance au sol Série Defender. 1.1. Consignes de sécurité Veuillez suivre les consignes de sécurité suivantes : Positionnez le cordon d'alimentation de manière à ce qu'il ne constitue pas un obstacle potentiel ou qu'il y est un risque d'arrachement. -
Page 33: Connecter Un Indicateur
Balance au sol série Defender FR-3 1.2. Connecter un indicateur Lorsqu’on connecte la base à l’indicateur TD52, il faut pousser le connecteur de base sur le connecteur d’indicateur et tourner la bague de verrouillage dans le sens des aiguilles d’une montre pour le verrouiller. Lorsqu’on connecte la base à... -
Page 34: Structure Interne Et Principe De Fonctionnement
FR-4 Balance au sol série Defender 2. Structure interne et principe de fonctionnement 2.1. Structure interne Boî te de jonction Cellule de charge Rampe Pied Repose-pieds Barre d’arrêt Plate-forme Figure2-1. Balance au sol Les balances au sol de la série DFD sont composées des éléments ci-dessus. Connectez le câble à... -
Page 35: Principe De Fonctionnement
Balance au sol série Defender FR-5 2.2. Principe de fonctionnement Mettez un objet sur la plate-forme de pesage. Sous l’effet de la gravité, l’élastomère de la cellule de charge se déforme. Cela modifie l'impédance de la jauge de contrainte. Une tension proportionnelle à la valeur du poids est alors délivrée. -
Page 36: Exigences De Base Et Installation
FR-6 Balance au sol série Defender 3. Exigences de base et installation 3.1. Exigences de base Assurez-vous que l’installation se déroule selon les instructions et que la surface soit plate là où la balance sera placée. La différence de hauteur sur l'ensemble de la surface ne doit pas excéder 1 mm. -
Page 37: Installation Des Accessoires
Balance au sol série Defender FR-7 3.3. Installation des accessoires Barre d’arrêt Sortez la barre d’arrêt et leurs boulons. Du côté opposé de la rampe, utilisez deux boulons M8 pour bloquer la barre d’arrêt au corps de la balance et insérez les bouchons en caoutchouc dans les deux trous ronds. -
Page 38: Utilisation
FR-8 Balance au sol série Defender 4. Utilisation 4.1. Instructions d’utilisation Après installation, si vous voulez utiliser la plateforme pour le commerce, vous devez contacter le service de métrologie local ou le service de métrologie national pour vérification avant utilisation. ... -
Page 39: Maintenance
Si le message d'erreur ne permet pas de résoudre votre problème ou si il ne décrit pas le dysfonctionnement, veuillez contacter un technicien autorisé par Ohaus. Veuillez visiter notre site web www.ohaus.com pour localiser le revendeur le plus proche de chez vous, ou contactez-nous grâce aux... -
Page 40: Données Techniques
FR-10 Balance au sol série Defender 6. Données techniques 6.1. Spécifications Utilisation en intérieur uniquement. Altitude : 2000 m Température de fonctionnement : -10 à 40 ° C Humidité : humidité relative maximale de 80 % pour des températures allant jusqu'à... -
Page 41: Dimensions
Balance au sol série Defender FR-11 7. Dimensions Figure 7-1. Dimensions de la balance au sol Modè les A (mm) B (mm) C (mm) D (mm) E (mm) DFD600HR 1000 1000 1238 DFD1500HL 1250 1250 1488 DFD600WR 1000 1000 1238 DFD1500WL 1250 1250... -
Page 42: Conformité
équipements électriques et électroniques. Pour les instructions sur comment mettre ce produit au rebut en Europe, se reporter à www.ohaus.com/weee. ISO 9001 Enregistrement Le système de management régissant la production de ce produit est certifié ISO... - Page 43 FR-13 GARANTIE LIMITÉE Les produits Ohaus sont garantis contre les défauts de matériaux et de fabrication, à compter de la date de livraison et pendant toute la durée de la garantie. Pendant la période de garantie, Ohaus réparera, ou, à sa discrétion, remplacera tous les composants défectueux sans frais, à...
- Page 45 Defender Serie Bodenwaage DE-1 Inhaltsverzeichnis Einleitung ....................2 1.1. Sicherheitshinweise ............... 2 1.2. Anschluss des Anzeigeindikators ..........3 Der innere Aufbau und Funktionsweise ............. 4 2.1. Der innere Aufbau ................. 4 2.2. Funktionsprinzip ................5 Grundlegende Anforderungen und Zusammenbau ........6 3.1.
-
Page 46: Einleitung
DE-2 Defender Serie Bodenwaage 1. Einleitung Dieses Handbuch enthält Installations-, Bedienungs- und Wartungsanweisungen für die Bodenwaage der Defender-Serie. 1.1. Sicherheitshinweise Bitte beachten Sie die folgenden Sicherheitsvorkehrungen: Verlegen Sie das Netzkabel so, dass es kein potenzielles Hindernis oder eine Trennungsgefahr darstellt. ... -
Page 47: Anschluss Des Anzeigeindikators
Defender Serie Bodenwaage DE-3 1.2. Anschluss der Anzeigeindikators Wenn Sie die Plattform an die Anzeige TD52 anschließen, drücken Sie die Sockelverbindung auf den Anzeigestecker und drehen Sie den Sicherungsring im Uhrzeigersinn, um ihn zu verriegeln. Wenn Sie die Plattform an eine Anzeige ohne passenden Stecker anschließen, installieren Sie den optionalen Messzellen-Adapter (Art.-Nr. -
Page 48: Der Innere Aufbau Und Funktionsweise
DE-4 Defender Serie Bodenwaage 2. Der innere Aufbau und Funktionsweise 2.1. Der innere Aufbau Junctionbox Messzelle Rampe Standfuß Fussplatte Anschlagleiste Plattform Abbildung 2-1. Bodenwaage Die Bodenwaagen der DFD-Serie bestehen aus den oben gezeigten Komponenten. Schließen Sie das doppelt geschirmte Kabel an die Waage an und schalten Sie das Gerät ein. -
Page 49: Funktionsprinzip
Defender Serie Bodenwaage DE-5 2.2. Funktionsprinzip Legen Sie ein Gewicht auf die Waage. Anzeige. Dadurch wird ein zum Gewichtswert proportionales Spannungssignal ausgegeben. Das Signal wird dann von einem linearen Verstä rker verstä rkt und von einem Analog-Digital- Wandler in ein digitales Signal umgewandelt, kann direkt abgelesen werden. Die flachen Bodenwaagen haben keinen Rampenwiderstand und zeichnen sich durch ein präzises Wiegen aus. -
Page 50: Grundlegende Anforderungen Und Zusammenbau
DE-6 Defender Serie Bodenwaage 3. Grundlegende Anforderungen und Zusammenbau 3.1. Grundlegende Anforderungen Stellen Sie sicher, dass die Installation gemäß den Anweisungen durchgeführt wird und die Oberflä che in dem Bereich, in dem die Waage positioniert werden soll, eben ist. Die Höhendifferenz der Oberfläche darf 1 mm nicht überschreiten. -
Page 51: Zusammenbau Des Zubehörs
Defender Serie Bodenwaage DE-7 3.3. Zusammenbau des Zubehörs Anschlagleiste Entfernen Sie die Anschlagschiene und die passenden Schrauben. Verwenden Sie auf der gegenüberliegenden Seite der Rampe zwei Schrauben M8, um die Anschlagschiene am Waagengehäuse zu befestigen und Gummistopfen in die beiden runden Löcher einzusetzen. ERKLÄRUNG: c. -
Page 52: Bedienung
DE-8 Defender Serie Bodenwaage 4. Bedienung 4.1. Bedienungsanleitung Wenn Sie die Waage nach der Installation für den eichpflichten Verkehr verwenden möchten, müssen Sie sie vor der Verwendung das zuständige Eichamt kontaktieren. Die Waage muss auf Betriebstemperatur gebracht werden. Die Bedienung entnehmen Sie bitte dem technischen Handbuch der Waage. -
Page 53: Wartung
5.3. Serviceinformationen Wenn die Fehlerdiagnose Ihr Problem nicht löst oder beschreibt, wenden Sie sich bitte an einen Ohaus-Kundendienst. Bitte besuchen Sie auch unsere Website www.ohaus.com, um den Ohaus-Vertrieb in Ihrer Nähe zu finden, oder kontaktieren Sie uns uns, indem Sie die Kontaktdaten aus der... -
Page 54: Technische Daten
DE-10 Defender Serie Bodenwaage 6. Technische Daten 6.1. Technische Daten Geräteanforderungen: Nur fü r den Innenbereich geeignet Höhe: 2000m Betriebstemperatur: -10 bis 40° C Luftfeuchtigkeit: Maximale relative Luftfeuchtigkeit 80% für Temperaturen bis 31 ° C, linear abnehmend bis 50% relative Luftfeuchtigkeit bei 40° C. Verschmutzungsgrad: 2 Modelle DFD600HR... -
Page 55: Abmessungen
Defender Serie Bodenwaage DE-11 7. Abmessungen Abbildungen 7-1. Abmessungen der Bodenwaagen Modelle A (mm) B (mm) C (mm) D (mm) E (mm) DFD600HR 1000 1000 1238 DFD1500HL 1250 1250 1488 DFD600WR 1000 1000 1238 DFD1500WL 1250 1250 1488 TABELLE 7-1. Abmessungen der Bodenwaagen... -
Page 56: Konformität
Dieses Produkt entspricht den geltenden Normen der EU-Richtlinien 2011/65/EU (RoHS). Die EU- Konformitätserklärung ist im Internet unter www.ohaus.com/ce verfü gbar. Dieses Produkt entspricht der EU-Richtlinie 2012/19/EU (WEEE). Bitte entsorgen Sie dieses Produkt gemäß den lokalen Vorschriften an der fü r Elektro- und Elektronikgeräte vorgesehenen... - Page 57 Datum des Versands an den Vertragshändler. Die Ohaus Corporation übernimmt keine andere ausdrückliche oder stillschweigende Garantie. Die Ohaus Corporation haftet nicht für Folgeschäden. Da die Garantiebestimmungen länderspezifisch unterschiedlich sind, wenden Sie sich bitte an Ohaus oder Ihren lokalen Ohaus-Händler, um weitere Informationen zu erhalten.
- Page 59 Bilancia a pavimento – Serie Defender IT-1 Indice dei contenuti Introduzione ....................2 1.1. Istruzioni di sicurezza ..............2 1.2. Collegamento di un indicatore ............3 Struttura interna e principio di funzionamento ........... 4 2.1. Struttura interna ................4 2.2. Principio di funzionamento ............
-
Page 60: Introduzione
Bilancia a pavimento – Serie Defender IT-2 1. Introduzione Il manuale contiene le istruzioni per l'installazione, il funzionamento e la manutenzione della bilancia a pavimento della serie Defender. 1.1. Istruzioni di sicurezza Per favore, rispettare le seguenti precauzioni di sicurezza: ... -
Page 61: Collegamento Di Un Indicatore
Bilancia a pavimento – Serie Defender IT-3 1.2. Collegamento di un indicatore Quando si collega il basamento all'indicatore TD52 , spingere il connettore del basamento sul connettore dell'indicatore e ruotare l'anello di bloccaggio in senso orario per bloccarlo in posizione. Quando si collega il basamento ad un indicatore che non dispone di un connettore corrispondente, installare l'adattatore opzionale del cavo della cella di carico (codice 30429931 venduto separatamente) sull'indicatore. -
Page 62: Struttura Interna E Principio Di Funzionamento
Bilancia a pavimento – Serie Defender IT-4 2. Struttura interna e principio di funzionamento 2.1. Struttura interna Scatola di derivazione Cella di carico Rampa Piedino Piastra appoggio piedini Barra di arresto Piattaforma Figura 2-1. Bilancia a pavimento Le bilance a pavimento della serie DFD sono composte dai componenti sopra indicati. -
Page 63: Principio Di Funzionamento
Bilancia a pavimento – Serie Defender IT-5 2.2. Principio di funzionamento Posizionare un oggetto sulla piattaforma di pesatura. Sotto l'effetto della gravità gli estensimetri collegati a ponte di Wheatstone e posizionati sulla cella di carico cambiano la propria impedenza. Come risultato, viene emesso un segnale di tensione proporzionale al valore del peso. -
Page 64: Requisiti Di Base E Installazione
Bilancia a pavimento – Serie Defender IT-6 3. Requisiti di base e installazione 3.1. Requisiti di base Assicurarsi che l'installazione venga eseguita secondo le istruzioni e che nell'area dove verrà posizionata la bilancia la superficie sia piana. La differenza di altezza della superficie non deve superare 1 mm. La capacità di peso massimo della superficie nella posizione dei quattro piedi della cella deve essere superiore al peso massimo consentito della cella. -
Page 65: Installazione Degli Accessori
Bilancia a pavimento – Serie Defender IT-7 Collegare il cavo della piattaforma all’indicatore. 3.3. Installazione degli accessori Barra di arresto Estrarre la barra di arresto e i bulloni corrispondenti. Sul lato opposto della rampa, utilizzare due bulloni M8 per fissare la barra di arresto al corpo della bilancia e inserire dei tappi in gomma nei due fori rotondi. -
Page 66: Funzionamento
Bilancia a pavimento – Serie Defender IT-8 4. Funzionamento 4.1. Istruzioni per il funzionamento Dopo l'installazione, se la bilancia dovrà essere utilizzata per scopi commerciali, prima dell’uso sarà necessario omologare l'intero sistema contattando le autorità competenti/o l'installatore abilitato. La bilancia deve essere riscaldata per 30 minuti. -
Page 67: Manutenzione
5.3. Informazioni sul servizio assistenza Se la diagnosi degli errori non riesce a risolvere o descrivere il problema, si prega di contattare un centro di assistenza autorizzato Ohaus. Visitare il nostro sito web www.ohaus.com per trovare l'ufficio Ohaus più vicino, oppure... -
Page 68: Dati Tecnici
Bilancia a pavimento – Serie Defender IT-10 6. Dati tecnici 6.1. Specifiche Valori nominali dell'attrezzatura: Solo per uso interno Altitudine: 2000m Temperatura di funzionamento: da -10 a 40° C Umidità: umidità relativa massima 80% per temperature fino a 31 ° C in diminuzione lineare fino al 50% di umidità... -
Page 69: Dimensioni
Bilancia a pavimento – Serie Defender IT-11 7. Dimensioni Figura 7-1. Dimensioni della bilancia a pavimento Modelli A (mm) B (mm) C (mm) D (mm) E (mm) DFD600HR 1000 1000 1238 DFD1500HL 1250 1250 1488 DFD600WR 1000 1000 1238 DFD1500WL 1250 1250 1488... -
Page 70: Conformità
Questo prodotto è conforme alle norme armonizzate applicabili delle direttive UE 2011/65/UE (RoHS). La dichiarazione di conformità UE è disponibile online all'indirizzo www.ohaus.com/ce. Questo prodotto è conforme alla Direttiva UE 2012/19/UE (RAEE). Si prega di smaltire questo prodotto in conformità... - Page 71 Ohaus. Il periodo di garanzia inizia a decorrere dalla data di spedizione al rivenditore autorizzato piuttosto che da una scheda di registrazione della garanzia debitamente restituita.
- Page 72 With offices worldwide/ Oficinas en el mundo/ Avec des bureaux dans le monde entire/ Mit Niederlassungen weltweit/ Con uffici in tutto il mondo www.ohaus.com *30542378* P/N 30542378C © 2020 Ohaus Corporation, all rights reserved/ todos los derechos reservados/ tous les droits sont réservés/ alle Rechte vorbehalten/ tutti i diritti riservati...
Need help?
Do you have a question about the Defender Series and is the answer not in the manual?
Questions and answers