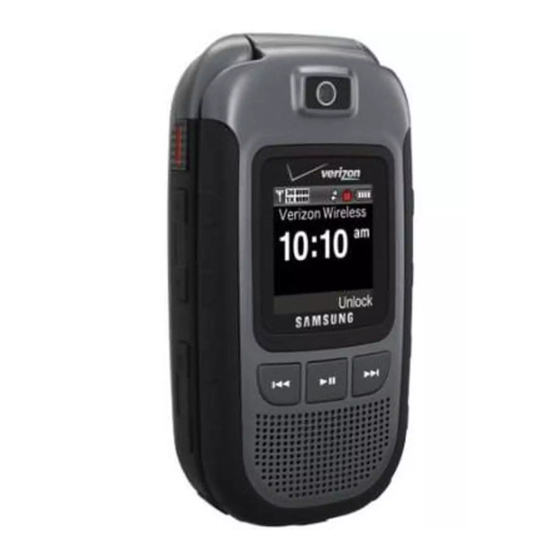
Samsung SCH-U640 User Manual
Portable all digital mobile phone
Hide thumbs
Also See for SCH-U640:
- User manual (105 pages) ,
- User manual (183 pages) ,
- User manual (105 pages)
Table of Contents
Advertisement
Advertisement
Table of Contents

Related Manuals for Samsung SCH-U640


Summary of Contents for Samsung SCH-U640
- Page 1 User Manual...
- Page 2 P O R T A B L E A l l D i g i t a l M O B I L E P H O N E User Manual Please read this manual before operating your phone, and keep it for future reference.
-
Page 3: Intellectual Property
Intellectual Property All Intellectual Property, as defined below, owned by or which is otherwise the property of Samsung or its respective suppliers relating to the SAMSUNG Phone, including but not limited to, accessories, parts, or software relating there to (the “Phone System”), is proprietary to Samsung and protected under federal laws, state laws, and international treaty provisions. - Page 4 GH68-22369A Printed in Korea T9 Text Input is licensed by Tegic Communications and is covered by U.S. Pat. 5,818,437; U.S. Pat. 5,953,541; U.S. Pat. 6,011,554 and other patents pending. ® ACCESS and NetFront™ are trademarks or registered trademarks of ACCESS Co., Ltd. in Japan and other countries. ®...
- Page 5 MANUAL SHALL BE CONSTRUED TO CREATE AN EXPRESS OR IMPLIED WARRANTY OF ANY KIND WHATSOEVER WITH RESPECT TO THE PRODUCT. IN ADDITION, SAMSUNG SHALL NOT BE LIABLE FOR ANY DAMAGES OF ANY KIND RESULTING FROM THE PURCHASE OR USE OF THE PRODUCT OR ARISING FROM THE BREACH OF THE EXPRESS WARRANTY, INCLUDING INCIDENTAL, SPECIAL OR CONSEQUENTIAL DAMAGES, OR LOSS OF ANTICIPATED PROFITS OR BENEFITS.
-
Page 6: Table Of Contents
Table of Contents Section 1: Getting Started ... 4 Understanding this User Manual ......4 Notes and Tips ........4 Dialogue boxes . - Page 7 Creating and Sending Voice Messages ....70 Receiving New Messages ......72 Message Folders .
- Page 8 Health and Safety Information ..... . . 148 Samsung Mobile Products and Recycling ....149 UL Certified Travel Adapter .
-
Page 9: Section 1: Getting Started
Section 1: Getting Started Understanding this User Manual The chapters of this manual generally follow the same order as the menus and sub-menus in your phone. A robust index for quick reference to most features begins on page 176. Also included is important safety information that you should know before using your phone. -
Page 10: Using The Battery
If you continue to operate the phone without charging, it shuts down. Samsung handsets do not support the use of a non-supported battery. When using a non-supported battery you will hear a series of beeps and you will see a warning message that indicates “NON... - Page 11 Use a coin or the Battery Cover Removal Tool included with you phone to remove the back cover. Insert into the slot on the back cover and turn it counter-clockwise to open the battery cover (as shown). *Included Use the grooves at the top of the cover to lift the cover up and away from the back of the phone.
- Page 12 Insert the top end of the battery into the phone housing using the directional arrow printed on the battery. The gold contacts at the battery end must align with contacts on the phone. Push bottom end of the battery down until it snaps into place.
- Page 13 Use a coin or the Battery Cover Removal Tool included with you phone to remove the back cover. Insert into the slot on the back cover and turn it counter-clockwise to open the battery cover (as shown). *Included Use the grooves at the top of the cover to lift the cover up and away from the back of the phone.
- Page 14 Lift the battery from the bottom end and remove. With the battery in position on the phone, place the cover back on the handset and turn the grooved dial clockwise until the cover locks. *Included Getting Started...
- Page 15 Your phone is powered by a rechargeable standard Li-ion battery. Only use Samsung-approved charging devices and batteries. Samsung accessories are designed to maximize battery life. Using other accessories may invalidate your warranty and may cause damage. Note: The phone can be used while charging but will charge faster when powered off.
-
Page 16: Turning Your Phone On And Off
Plug the Wall/USB Charger into a standard AC wall outlet. When the phone is completely charged (the battery icon becomes still), unplug the adapter from the power outlet. Remove the adapter end from the charging port cover and replace the charging port cover. Warning!: If your handset has a touch screen, it responds best to a light touch from the pad of your finger or a non-metallic stylus. -
Page 17: Setting Up Voicemail
Open the phone, then press and hold the End/Power Setting Up Voicemail Voicemail allows callers to leave voice messages. Note: Airtime and long distance charges apply. Mobile to Mobile minutes do not apply to Voicemail setup or retrievals. Voicemail Setup From the home screen, press and hold the Voicemail When the recorded announcement begins, press to interrupt (if applicable). -
Page 18: Inserting And Removing Your Memory Card
Inserting Your microSD™ Card Note: Your phone does not come with the microSD™ memory card, it must be purchased as an accessory. See your service provider for more information. Lift memory card cover and insert the memory card, with the contacts side down, into the memory card slot until it is fully seated. -
Page 19: Memory Card Formatting
Formatting a microSD™ Card using your Convoy™ From the home screen, press Settings & Tools. Press for Memory. Press for Card Memory. Press right soft key for Options. The Format Card option is highlighted. Press Highlight Yes and press For best playback of songs stored to the microSD™ memory card, reformat your memory card with PC format FAT32. -
Page 20: Section 2: Understanding Your Phone
Section 2: Understanding Your Phone This section outlines key features of your phone as well as screens and icons that display when the phone is in use. Features of Your Phone – High Speed Data (EvDo 1x Technology) – Global Positioning (GPS) Technology for VZ Navigator –... - Page 21 Camera Lens: Allows you to take photos and record video. Shortcut/Push To Talk (PTT): Press to launch a shortcut menu. Once Push-to-Talk is activated on your phone, press to initiate the Push-to-Talk feature. Volume Key: Allows you to adjust the master volume or adjust the voice volume during a call.
-
Page 22: Open View Of Your Phone (Portrait Mode)
The following illustration shows the main features of the phone. Earpiece: The earpiece allows you to hear the other caller. Internal LCD: Displays all the information needed to operate your phone. Directional Key: This key allow you to scroll through the phone menu options. -
Page 23: Command Keys
Right Soft Key: This key is used to navigate through menus and applications by selecting the choice indicated on the lower right area of the display screen. Voice Commands Key: Press to access Voice Commands. End/Power Key: Press to end call. Press and hold to turn device On or Off. - Page 24 Press to send an incoming call directly to Voicemail. • Send Key The Send key is used to answer calls, dial calls, and to recall the last number(s) dialed, received, or missed. Press to answer calls. • Enter a number and press to make a call.
-
Page 25: Understanding The Home Screen
The top annunciator line of your phone’s display contain icons that indicate network status, battery power, signal strength, connection type and more. The lower area of the home screen shows icons that indicate feature and function status. The following list contains icons that may appear in your display. - Page 26 3G Network: Appears when your phone is using the 3G protocol. Appears when your phone is on and indicates the current signal strength. More bars indicate a stronger signal. 1X: Indicates your phone is using the CDMA 1X protocol. Appears when your phone is on and indicates the current signal strength.
- Page 27 BT Connected: Indicates Bluetooth wireless technology is turned on and is paired with another Bluetooth-enabled device. BT Transfer: Indicates that Bluetooth wireless technology is connected to another device and receiving or pushing data. Service Alert & Settings Icons All Sounds Off: The ringer is silenced for all alerts, incoming calls, and incoming messages.
- Page 28 Ringtone Protected: Indicates a password-protected ringtone. Ringtone Locked: Indicates a ringtone that cannot be deleted. Ringtone in Card: Indicates that a ringtone is on the memory card. Sound: Indicates a sound file. Sound Protected: Indicates a password-protected sound. Sound Locked: Indicates a locked sound. Sound in Card: Indicates a sound that is on the memory card.
-
Page 29: Messaging Icons
Picture ID: Indicates the picture associated with the contact or group. Ringtone: Indicates the ring tone assigned to the contact. Address: Indicates the address of the contact. Note: Indicates a note added to the contact information. In Case of Emergency: Indicates the person to be contacted in case of an emergency. - Page 30 Multimedia Msg Draft: Indicates a draft of a multimedia message. High Priority: Indicates a message sent with a high priority. Name Card: Indicates a name card has been added. Lock: Indicates that the message has been locked. Settings & Tools Icons BT Headset: Indicates that Bluetooth is paired and connected to a headset.
- Page 31 Alert: Indicates an alert. Call Ended: Indicates that a call has ended. Connected To Group: Indicates a connection to a group. Connected To Individ: Indicates a connection to an individual. Connecting To Group: Indicates that a connection to a group is in progress.
-
Page 32: Section 3: Call Functions
Section 3: Call Functions This section describes how to make or answer a call. It also includes the features and functionality associated with making or answering a call. Making a Call Open the phone and enter the number to call using the numeric keypad and press Answering a Call You can answer calls with either the phone open or closed. -
Page 33: Recent Calls
Note: During a call turn on Whisper Mode when speaking softly or when the caller cannot hear your voice clearly. This mode is useful in meetings or public places. Press left soft key for Mute/Unmute to mute the call. Press again to unmute the call. Recent Calls When you place, miss, or receive a call, a record of the call is saved in Recent Calls, which is a listing of the different types of... -
Page 34: Creating/Updating Contacts Using Call History
Press right soft key for Options to display the following options: • Details: Displays when the contact is in your contact list. Details show the contact information provided in the contact list. • Save to Contacts: Save the number to your Contacts list. Note: If Save to Contacts doesn't appear, that entry is already in your Contacts list. - Page 35 If you selected Add New Contact, the following types are available. • Mobile 1 • Mobile 2 • Home • Work • If you selected Update Existing Contact, proceed to step 10. Press the Directional key up or down to highlight the desired entry type (Mobile 1, Mobile 2, Home, Work, or Fax) then press Enter a name for the entry using the keypad.
-
Page 36: Contacts
An CONTACT UPDATED or CONTACT SAVED pop-up screen with a selection list of entry types displays. Press the Directional key up or down to highlight the desired type then press . The number is added to the selected entry and saved to your Contacts. For Update Existing Contact, highlight the desired contact and press Press the... -
Page 37: Roaming
Press the Directional key up or down until the contact that you want to call is highlighted then press for VIEW. Details for the contact appear in the display. Note: To quickly locate a name, press (or multi-press) any key on the keypad that corresponds to the first, second, and/or third letters of the contact’s name. -
Page 38: Voice Commands
Voice Commands is advanced speech recognition software that can be used to access a variety of functions on your phone. Voice Commands software automatically voice activates all contacts for voice dialing and searching, no pre-recording or training needed. Speak phone numbers naturally to dial, and use voice commands to navigate phone menus. - Page 39 • Prompts: Allows you to select the following settings for Voice Command prompts: – Mode: Allows you to select the readout mode. Select one of the following: Prompts (which reads out prompts for the Voice Command system), Readout + Alerts (which reads out all the screen info, prompts and alerts for the Voice Command system), or Readout (which reads out all screen info and prompts for the Voice Command system), or...
-
Page 40: Call Digit/Name Dialing
Check <Item>: Provides details of your phone status, Voicemail, • Messages, Missed Calls, Time, Signal Strength, Battery Level, Volume Level, Balance, Minutes, Payment, and My Number. Contacts <Name>: Open the contact record for any name in your • Contacts List. Redial: Allows you to call the last number dialed. - Page 41 After a brief pause, a list of optional commands appears in the display and the audio prompt “Please say a command” plays through the earpiece or speakerphone. After the beep, say “Call” at a distance of 3-12 inches from the phone in a natural voice. “Please say the name, number, voice mail or last number”...
- Page 42 The contact name appears in the To: field. For more information, refer to “Creating and Sending Text Messages” on page 66. Send Picture Send Picture allows you to access the Picture Messaging menu. You can use entries stored in My Pictures or you can take a picture of an image using the camera.
-
Page 43: Checking Phone Status
Checking Phone Status Note: Checking Phone Status can be accessed closed or open position. From the home screen, press the Voice Commands A list of commands appears in the display and the audio prompt “Please say a command” plays through the earpiece or speakerphone. - Page 44 To perform a name lookup, you’ll need to have some entries in your Contacts list. From the home screen, press the Voice Commands A list of commands appears in the display and the audio prompt “Please say a command” plays through the speakerphone.
- Page 45 Check your Verizon Wireless account status by voice command. Note: This features launches the browser to your account page and requires a data plan and is subject to Verizon Wireless data coverage. Help Provides helpful information on how to use Voice Commands. From the home screen, press the Voice Commands A list of commands appears in the display and the audio prompt “Please say a command”...
-
Page 46: Section 4: Menu Navigation
Section 4: Menu Navigation This section explains the menu navigation for your phone. An outline of the available menus of your phone is included. Menu Navigation Access menus using these Directional keys in portrait mode, soft keys , or use a shortcut. Your Convoy™... - Page 47 See the following examples for standard menu navigation and number accelerators using the default Eclipse display theme, List main menu layout. Example using standard menu navigation: From the home screen, press Media Center menu is highlighted on the display screen. Press Press the Directional key Video and press...
-
Page 48: Menu Outline
From the home screen, press a Directional key to launch its corresponding application. For more information on personalizing directional shortcut keys, see “Set Shortcut Keys” on page 102. Mobile Web My Verizon Calendar *Press the Directional key to select a menu item. Menu Outline The following list shows the menu structure and indicates the accelerator number assigned to each option. - Page 49 6: Mobile IM 7: Email 1: Mobile Email 2: Mobile Web Mail 8: Chat Recent Calls 1: Missed 2: Received 3: Dialed 4: All 5: View Timers My Ringtones 1: Get New Ringtones 1: Get New Applications Media Center 1: Music & Tones 1: V CAST Music | Rhapsody 2: Get New Ringtones 1: Get New Applications...
- Page 50 My Pictures VZ Navigator Bluetooth 1: Add New Device Settings & Tools 1: My Verizon 2: Tools 1: Voice Commands 2: Calculator 1: Normal 2: Tip 3: Converter 1: Temperature 2: Length 3: Weight 4: Area 5: Volume 6: Currency 3: Calendar 4: Alarm Clock 5: Stop Watch...
- Page 51 2: Vibrate 3: Reminder 3: Voicemail 1: Tone 1: Get New Ringtones 1: Get New Applications 2: Vibrate 3: Reminder 4: Emergency Tone 5: Missed Call 6: Device Connect 7: PTT Alert (only when PTT is active) 4: Keypad Sounds 5: Keypad Volume 6: Digit Dial Readout 7: Service Alerts...
- Page 52 4: Shortcut 4 2: Set Directional Keys 1: Up Directional Key 2: Left Directional Key 3: Down Directional Key 3: Set Side Key 3: Voice Command Settings 1: TXT Msg Readout 2: Confirm Choices 3: Sensitivity 4: Adapt Voice 1: Adapt Voice 5: Prompts 1: Mode 2: Audio Playback...
- Page 53 9: Assisted Dialing 8: Memory 1: Save Options 1: Pictures 2: Videos 3: Sounds 2: Phone Memory 1: Phone Memory Usage 2: My Pictures 3: My Videos 4: My Ringtones 5: My Music 6: My Sounds 7: My Contacts 8: Move All To Card 3: Card Memory 1: Card Memory Usage 2: My Pictures...
-
Page 54: Section 5: Understanding Your Contacts
Section 5: Understanding Your Contacts This section allows you to manage your daily contacts by storing their name and number in your Address Book. Opening Contacts Menu The Contacts menu provides access to powerful features such as adding Groups, creating and sending vCards, and viewing the phone number assigned to your phone by Verizon Wireless. -
Page 55: Adding A Contact
Mobile 2: Enter a secondary mobile number for the entry in this field. IM Screen Name: Enter an IM name. Note: The name entered in this field will populate in the associated Instant Messaging application when Send IM is selected from View Contact->Options with the IM Screen Name highlighted. - Page 56 Press the Directional key up or down to highlight other type fields, if desired. Enter information using the keypad. To assign a Speed Dial location after entering the number, press right soft key Options. Highlight Set Speed Dial and press Highlight an unassigned location and press A confirmation message appears in the display, Yes is highlighted, press...
- Page 57 • Work • If you selected Update Existing Contact, proceed to Step 9. Press the Directional key up or down to highlight the desired entry type (mobile, home, work, etc.) then press Enter a name for the entry using the keypad. Press left soft for Abc if you wish to select a different method of text entry, such as T9 Word, Palabra, Abc, ABC, 123, or Symbols.
-
Page 58: Adding Pauses
Method 3 Storing Numbers After a Call Once you’ve finished a call, you can store the number of the caller to your Contact List. Note: If the call was incoming and Caller ID information was unavailable, then the store option is also unavailable. After you press to end your call, the call time, length of call and phone number appears in the display. -
Page 59: Contact Groups
You can place Contact entries into categories, called “Groups.” Groups allow you to search your Contacts faster, quickly send messages to one or more group members, and more. Note: Contacts can be a member of more than one group, so you must unmark any group previously selected to remove the Contact from that group. - Page 60 • Press the Directional key up or down to highlight the group where you wish to move the entry into, then press MARK or press right soft key for the entry. Press left soft key for Done. Press SAVE to complete the entry move. Create a New Group In addition to the four groups already in your phone, you can create additional groups (a maximum of 25).
- Page 61 Note: You can mark up to 10 members of a group for message distribution. If you try to mark an 11th member, you’ll be notified that “MAXIMUM NUMBER OF RECIPIENTS IS 10”. Press the Directional key down to place the cursor in the Text field.
- Page 62 Send a Video Message to Members of a Group Note: Only available within Verizon Wireless Enhanced Services Area. From the home screen, press Contacts Press for Groups. Your existing groups appear in the display. Highlight the desired group name and press right soft key Options.
-
Page 63: Finding A Contacts Entry
Use the Directional key down to highlight the contacts in the group to which you want to send a message. Press to place a checkmark next to each selection to send messages to. Press left soft key for Done after selecting up to 10 contacts. -
Page 64: Deleting A Contact Entry
Press and hold to erase all numbers in the highlighted field. Use the keypad to re-enter numbers, text, or symbols. When you are finished editing the entry, press SAVE. Your changes are saved. Deleting a Contact Entry From the home screen, press right soft key Contacts. -
Page 65: Speed Dialing
Speed Dialing Note: 1-Press, 2-Press, and 3-Press dialing allows you to call numbers stored in your Contact List quicker. Speed dialing allows you to press and hold a key (or keys) to dial the number associated with those key(s). There are three types of speed dialing;... -
Page 66: My Name Card
At the pop-up screen, highlight Yes or No and press Continue to assign speed dial entries or press return to the home screen. My Name Card My Name Card allows you to create a virtual business card. You can send the card to recipients as a vCard attachment. From the home screen, press ➔... - Page 67 Press for New Contact to enter a new contact as an emergency number. Enter Contact information and press for SAVE. The Emergency Contact is added and is displayed in the Contact List in red font. Unassign an Emergency Contact From the home screen, press right soft key Contacts.
-
Page 68: Section 6: Entering Text
Section 6: Entering Text This section outlines how to select the desired text input mode when entering characters into your phone. This section also describes how to use Word text entry system to reduce the amount of key strokes associated with entering text. Changing the Text Mode While composing a message, press left soft key cycle to the desired entry mode (except for Domain Extensions):... - Page 69 Use 123 mode to enter numbers into a text message. In the Text field, press left soft key mode 123. Enter the key that corresponds with the number that you wish to enter. For example, press number 4. When you are finished adding numbers, press left soft key to select a different method of text entry.
-
Page 70: Section 7: Messaging
Section 7: Messaging This section describes how to send or receive different types of messages. It also includes the features and functionality associated with messaging. Types of Messages Your phone is capable of sending email, text, picture, video, and voice messages. Send messages by simply entering the email address or the phone number of the recipient in the To: <...>... -
Page 71: Creating And Sending Text Messages
• Signature : Adds the signature text to each message sent. Choose from None or Custom. • Preferred Email: Allows you to set your email provider preferences. Creating and Sending Text Messages You can send text messages to another mobile phone or to an email address. -
Page 72: Creating And Sending Picture Messages
– Sound: Lists preloaded and downloaded sounds. – Name Card: Attach My Name Card information or information from one of your Contacts. • Edit Text Format: Allows you to change the size, alignment, style or text and background color. • Priority Level: Sends the message with a High or Normal priority. •... - Page 73 • Add Quick Text: Choose from up to 19 pre-loaded phrases. – Press left soft key for Erase to erase a quick text phrase. – Press right soft key for Options: New: creates a new quick text phrase. Edit: allows you to edit preloaded phrases. Move: changes the order of quick text phrases.
-
Page 74: Creating And Sending Video Messages
Press the Directional key down to highlight the Name Card field. Press left soft key My Name Card or an entry from your Contacts list. Follow the prompts and press to insert. Once all fields are complete, press Creating and Sending Video Messages You can send video messages to another mobile phone or to an email address. -
Page 75: Creating And Sending Voice Messages
• Press left soft key for Save to save the recording. • Press to send the recording in a video message. • Press right soft key for Erase to erase the video. Press the Directional key down to highlight the Subject field. - Page 76 • Remove Recording: Removes the voice recording. • Cancel Message: Cancels the message and allows you to save it in the Drafts folder. Note: Press left soft key Record to re-record a new voice recording, if needed. Press the Directional key down to highlight the Text field.
-
Page 77: Receiving New Messages
While text messages from other phones are delivered directly to your phone, Picture messages, Video Messages, Voice Messages and email will be stored in the Inbox of the message server and the server will alert you to new messages. Therefore you need to retrieve new messages to your phone and read them on the phone. -
Page 78: Receiving Video Messages
• Forward: Forward the message to another recipient. • Erase : Deletes the message. Only displays in menu when a sound byte is not attached to the message that was sent. • Save Picture/Video: Saves the picture in a Picture message to My Pictures. - Page 79 Press left soft key for Erase to erase the message or right soft key for Options. The following options may appear in the display: • Reply: Replies to the received message. • Forward: Forward the message to another recipient. • Reply w. Copy: Replies to the received message and allows you to send a copy of the message to another contact.
- Page 80 Press left soft key for Mute/Unmute (while an attached sound byte is playing), or right soft key Options. The following options may appear in the display: • Play Again : Replays the sound byte attached to a Picture Message. • Forward: Forward the message to another recipient. •...
-
Page 81: Message Folders
message that you would like to view later, highlight View Later and press . The message will be stored in the Inbox. To view the stored message, press left soft key ➔ Message for Inbox . Highlight the unopened message, then press OPEN. - Page 82 – Lock/Unlock: Locks or unlocks the entry to prevent accidental deletion. – Add To Contacts: Saves the number of the sender to your Contacts as a new entry or add to an existing entry. – Add To PTT Contacts: Saves the number of the sender to your PTT Contacts as a new entry or add to an existing entry.
- Page 83 – Reply w. Copy: Replies to the received message and allows you to send a copy of the message to another contact. – Erase: Deletes the message. Only displays in menu when a sound byte is attached to the message that was sent. –...
- Page 84 Message Type, Size and if a Picture, Sound or Name Card were included in the message. For Picture, Video and Voice messages, press REPLY to reply to the message. Note: When the Inbox exceeds 500 text messages, the first message in the list is replaced with the next incoming message.
- Page 85 • Add to Contacts: Save the number to your Contacts as a new entry or add to an existing entry. • Add to PTT Contacts: Save the number to your PTT Contacts as a new entry or add to an existing entry. Press the Directional key up or down to highlight the Contact name or number whose messages you want to...
- Page 86 • Add To PTT Contacts: Saves the number of the sender to your PTT Contacts as a new entry or add to an existing entry. • Message Info: Provides the following information: Send To Number (also provides the date and time the message was sent), Priority, Message Type, Size, Attachment(s) (if a Graphic, Sound or Name Card was attached), Status and Cause Code.
- Page 87 From the Sent menu, press left soft key delete the message from the Sent folder. Highlight Yes to delete, or No to return to the Sent menu. Drafts Draft messages are those that have been composed but never sent. You can return to the Drafts folder at any time to view, edit, or send a draft message.
- Page 88 • For Text Messages the following options may appear in the display: – Insert Quick Text: Choose from up to 19 pre-loaded messages. You can add 19 additional messages by pressing right soft key Options and press New, and press erase Quick Text messages by pressing left soft key –...
- Page 89 Note: The Add Slide option is available if no pictures have been attached from My Pics. If at least one picture has been attached, both the Add Slide and Remove Slide options are available. Preview : Allows you to preview the message. –...
- Page 90 Cancel Message : Cancels the message and allows you to save it in – the Drafts folder. Highlight the following fields for Voice Messages and press right soft key for Options to display the following options: • Voice: Shows the voice recording number/name if attached. Press left soft key to Record a new voice message.
-
Page 91: Voicemail
You can erase unlocked messages in your Inbox, Drafts folder, or Sent folder. Locked messages are not erased. To erase messages: From the Messaging menu, press The following options are available: • Erase Inbox: Erases unlocked messages in your Inbox. •... -
Page 92: Mobile Im
The Instant Messaging function allows you to send and receive instant messages using one of the following communities: • AOL® Instant Messenger™ • Windows Live Messenger • Yahoo!® Messenger Note: You must first create the Instant Message account before accessing it on your phone. -
Page 93: Chat
Follow the steps below to access Mobile Web Mail. From the home screen, press left soft key ➔ Message for Email. Press for Mobile Web Mail. Press the Directional key up or down, select one of the following email providers and press •... -
Page 94: Section 8: Changing Your Settings
Section 8: Changing Your Settings This section explains the sound and phone settings for your phone. It includes display settings, security settings, and extra settings associated with your phone. My Verizon The My Verizon menu connects to the Verizon Wireless Mobile Web. - Page 95 Actually, the Bluetooth specification is a protocol that describes how the short-range wireless technology works, whereas individual profiles describe the services supported by individual devices. Profiles reduce the chance that different devices will not work together. Your phone supports the following Bluetooth profile services: –...
-
Page 96: Bluetooth Settings
This option searches for a recognized Bluetooth wireless device. From the home screen, press Settings & Tools. Press for Bluetooth Menu. Add New Device is highlighted, press Note: If you have NOT already activated Bluetooth on the phone, the message: “TURN BLUETOOTH POWER ON?” displays. Highlight Yes to activate or No to exit and press The prompt: “PLACE DEVICE YOU ARE CONNECTING TO IN DISCOVERABLE MODE.”... - Page 97 Note: After selecting On, users have one minute to see your accessibility. After which Discovery Mode will automatically default back to off. • Supported Profiles: Displays a list of supported Bluetooth profiles. Highlight a profile and press • My Phone Info: Shows the handset information. •...
-
Page 98: Sounds Settings
The other device will ask to connect. Press “CONNECTING” appears in the display. When the information is exchanged, a message will appear that the transfer is complete. Note: ** All information will be transferred except for group name, ringtone, and Emergency (ICE) contact reference. Transferring vCalendar events via Bluetooth You can transfer vCalendar events via Bluetooth. - Page 99 Easy Set-up Easy Set-up allows you to quickly set five Sound Settings parameters: Calls Sounds, Keypad Volume, Text Message Alert, Multimedia Message Alert, and Voicemail Message Alert. From the home screen, press Settings & Tools. Press for Sounds Settings. Press for Easy Setup.
-
Page 100: Keypad Volume
Press for Alert Sounds. For the following options, you can set the tone for the message alerts. • TXT Message: Allows you to set a notification for text message. • Multimedia Message: Allows you to set a notification for multimedia messages. •... -
Page 101: Display Settings
From the home screen, press Settings & Tools. Press for Sounds Settings. Press for Digit Dial Readout. Select On or Off, and press Readout is set to On, you will hear the numbers called out as you dial each digit. Service Alerts From the home screen, press Settings &... - Page 102 Easy Set-Up From the home screen, press Settings & Tools. Press for Display Settings. Press for Easy Set-Up. You can scroll through the menu options to set up your Display Settings: Personal Banner, Display Backlight, Keypad Backlight, Main Wallpaper, Front Wallpaper, Display Themes, Menu Layout, Menu Type, Dial Fonts, Main Clock Format, and Front Clock Format.
-
Page 103: Front Contrast
Settings & Tools. Press for Display Settings. Press for Backlight. The menus listed appear in the display. • Display: The following options are for the Main LCD. Duration : Can be set to 7 seconds, 15 seconds, 30 seconds, or –... -
Page 104: Main Menu Settings
From the home screen, press Settings & Tools. Press for Display Settings. Press for Display Themes. Press left soft key for Preview. Press the Directional key left or right to cycle through thumbnails of the themes. Press left soft key for List to return to the list. -
Page 105: Dial Fonts
Select an icon and press displays. Select a menu to associate with the selected icon and press Position Menu Items Note: This menu is not available with the default Display Theme Eclipse. Change the location of the menu items for the menu display. From the home screen, press Settings &... -
Page 106: Clock Format
Press for Display Settings. Press for Menu Fonts. Press for Font Style, then press the Directional key left or right to highlight a font. Press Press for Size, then press the key up or down to highlight Normal or Large. Press Clock Format This menu allows you to have time displayed in digital or analog... -
Page 107: Phone Settings
To set the Front Clock display, use the following options: From the home screen, press Settings & Tools. Press for Display Settings. Press for Clock Format. Press for Front Clock. The following options appear in the display. • Digital12: Time appears in 12-hour digital format. Example: 8:00pm. -
Page 108: Voice Command Settings
From the home screen, press Settings & Tools. Press for Phone Settings. Press for Set Shortcuts. – or – From the home screen, press the right to launch My Shortcuts and press left soft key Settings. • Set My Shortcuts: Choose from 50 menu settings for each of the 4 shortcut options. - Page 109 Press for Voice Command Settings. For more information, refer to “Voice Commands Settings” on page 33. External Key Lock Change the duration of the key lock. From the home screen, press Settings & Tools. Press for Phone Settings. Press for External Key Lock. Choose from Always Off, 7 Seconds, 15 Seconds, or 30 Seconds, and press Language...
- Page 110 The Current Country menu allows you to select your current location. Note: If you travel to a different country, the network may not report the correct location. In that case, you will see a pop-up message that states “PLEASE VERIFY YOUR CURRENT LOCATION”. Press to access the country selection list.
- Page 111 The default lock code is the last four digits of your phone number. Use Edit Code to change the code to a lock code of your choice. From the home screen, press Settings & Tools. Press for Phone Settings. Press for Security.
- Page 112 • Messages • Dial-Up Modem Highlight an option and press Phone Lock Setting Phone Lock Setting restricts the use of your phone with the exception of emergency outgoing calls to 911. You must unlock the phone to place or receive a call. From the home screen, press Settings &...
- Page 113 Press for Security. You are prompted to enter the lock code. The default lock code is the last four digits of your telephone number. Press for Restore Phone. A prompt appears in the display asking if you wish to restore default settings and erase all user data including pictures, music, messages, contacts, and downloaded applications stored on the phone.
- Page 114 Note: Quick Search must be turn on to perform the procedures listed below. From the home screen, press the first three numeric keys that correspond to the letters of the contacts name. For example, to search for “Sally” you would enter: Press the Directional key up to search for Contacts.
-
Page 115: Call Settings
The Call Settings menu allows you to select the method for answering incoming calls, setting redial options, setting data options, voice privacy, and more. Answer Options The Answer Options menu allows you to select the method for answering incoming calls. From the home screen, press Settings &... - Page 116 Press for TTY Mode. The TTY Mode screen displays. A warning appears in the display stating “ENABLING TTY WILL DISABLE HEADSET AUDIO. CONTINUE?” Highlight Yes and press screen. Highlight No and press Settings menu. Press the down to select one of the following: •...
- Page 117 Press for Data Settings. Press for Select Port to select USB or Bluetooth, or No Connection. Press SET. Press for Port Speed to select the speed of the connection. Press DTMF Tones Use this menu to set DTMF settings to Normal, or Long. From the home screen, press Settings &...
-
Page 118: Memory
When selecting On, press the to highlight the Reference Country field, and then press left soft key for Set to choose from a list of countries that support assisted dialing. While on the screen with the list of Countries, press left soft key following options, if needed: •... -
Page 119: Usb Mode
USB Mode Your Convoy™ has the ability to automatically detect connection of a Samsung USB data cable from your computer to the phone. Refer to the illustration below for the Samsung data USB cable connection. -
Page 120: Phone Info
You may select the function you would like to enable when the USB data cable is connected from your computer to your phone. From the home screen, press Settings & Tools. Press for USB Mode. Press the Directional key to highlight any of the following options: •... -
Page 121: Section 9: Media Center
Section 9: Media Center This section describes how to download and play music and tones. It also outlines how to take, record and store images, sounds and ringtones using your phone. Note: All instructions on accessing or changing the features will begin from the Media Center menu. - Page 122 VCAST Music | Rhapsody ® (Subscription, Wireless and PC Downloads) Use this option to download music directly from the V CAST Music with Rhapsody catalog. Use this option to download new ringtones from the Internet. From the home screen, press Media Center.
-
Page 123: Picture & Video
Press for My Sounds. Record New is highlighted. Press NEW VOICE MEMO screen. Press During the recording, press left soft key pause the recording, if necessary. When finished recording, press recording is saved to My Sounds. You may also choose from a list of pre-loaded sounds. - Page 124 Media Center. Press for Picture & Video. Press for My Pictures. Press the Directional key in any direction to highlight a photo, and press highlighted picture. Press right soft key select from the following options (depending on whether you choose to highlight or highlight and view a photo): •...
-
Page 125: Take Pictures
My Pictures allows you to review the videos taken with the camera feature or downloaded and stored into your phone and/or microSD card. Note: You cannot send the preloaded/copywritten videos stored in the My Videos folder. From the home screen, press Media Center. - Page 126 The following categories are available under Settings: – Color Effects: Allows you to select from the following color options: Normal, Black & White, Antique, Negative, Aqua, and Green. – White Balance: Allows you to select the color temperature of the lighting conditions for your picture.
- Page 127 From the home screen, press Media Center. Press for Picture & Video. Press for My Pictures. Press right soft key for Options and press Manage My Pics: Select from the following options: • Erase: Allows you to erase selected picture files. •...
-
Page 128: Games
Press right soft key for Options. The following categories are available: • Settings: allows you to customize your image settings: – Color Effects: Normal, Black & White, Antique, Negative, Aqua, Green. – White Balance: Auto, Sunny, Cloudy, Tungsten, Fluorescent. – Memory: Allows you to select the location for saved pictures and videos. -
Page 129: Mobile Web
Choose the charge Either Subscription or Unlimited, then press . Follow in screen prompts to apply. Mobile Web From the home screen, press Media Center. Press for Mobile Web. The browser is launched and a pop up screen with available applications is displayed. Press the Directional key to browse the categories. -
Page 130: Extras
From the home screen, press Media Center. Press for Extras. Get New Applications is highlighted. Press Highlight the desired application to download and press Follow on screen subscription prompts and press The download process begins. At the “Extras App installed successfully. -
Page 131: Section 10: Music
Section 10: Music This section describes how to download and play music using your phone. Inserting and Removing the microSD card For more information, refer to “Inserting and Removing Your Memory Card” on page 13. Memory Card Formatting Formatting a microSD™ Card using your Convoy™ For more information, refer to “Formatting a microSD™... - Page 132 Open V CAST Music with Rhapsody. Don’t have V CAST Music with Rhapsody? Download it for free at www.verizonwireless.com/music. Sign in. Once logged in you can either purchase songs/albums or add subscription music to your library. To purchase music: • Browse the catalog and select the track or album you wish to purchase.
-
Page 133: Playing Music With Phone Closed/Open
The Music Player can be used to play music files that you have transferred from your PC. You can play your music with the phone open or closed. Playing Music with the Phone Closed The external keys which you will use are labeled below. Rewind Key With the phone closed, press the Play/Pause key ( Press the Play/Pause key (... - Page 134 • Playlists: Any playlists that you have created are displayed in this option. Press left soft key for New to create a new playlist. With a playlist highlighted, press right soft key add, view, edit, rename, create or erase the playlist. •...
- Page 135 • Help: Displays the help menu. During song playback, press the right to advance to the next song track in the current playlist, or press the Directional key left to skip to the previous song track. Creating a Playlist From the home screen, press Media Center.
-
Page 136: Section 11: Tools
Section 11: Tools The topics covered in this section allow you to schedule appointments, view the calendar, set an alarm, view time zones, take notes, and perform simple math calculations. Note: All instructions on accessing or changing the features will begin from the SETTINGS &... - Page 137 Press (=) to perform the calculation and view the result. Calculates the tip and determines how much each person should pay. From the home screen press Settings & Tools. ➔ Press for Tools for Tip. The Tip Calculator opens. Populate the following fields: •...
-
Page 138: Calendar
Note: Press to enter a decimal point. Press sign for a number to a negative. Press the Directional key left or right to select the To units of money or measure for the quantity you want converted. Calendar Schedule up to eight events for any day by indicating each event’s start and end time. - Page 139 • Reminder: Set a reminder before the event. Select: Off, Once, Every 2 Minutes, Every 15 Minutes. • Alert Time: Set the Alert Time to sound before the event takes place. Select: On Time, 5 Min. Before, 10 Min Before, 15 Min. Before, 30 Min.
-
Page 140: Alarm Clock
Your phone has an alarm clock that can be set to go off once, or recur daily at a specific time. Once set, the alarm clock is easy to change or turn off. Set An Alarm From the home screen press Settings &... -
Page 141: Stop Watch
If you selected Tone, press the down again to highlight the second field. Press the Directional key left or right to set the alert tone to VZW Default Tone, or select a tone from Alert Tone. When all fields have correct information entered, press for SAVE to save your settings. -
Page 142: World Clock
World Clock allows you to view the time of day or night in any part of the world. From the home screen press Settings & Tools. ➔ Press for Tools Use left soft key for Cities to display the 45 supported cities. - Page 143 ➔ Press for Tools Notepad menu opens. If you have any stored notes, they appear as a list in the display. Press the Directional key up or down to highlight a note. With a note highlighted, press right soft key Options.
-
Page 144: Section 12: Push-To-Talk (Ptt)
Section 12: Push-to-Talk (PTT) If you depend on instant communication, choose Verizon Wireless Push-to-Talk (PTT). Whether at home, in the office or across the country, you can quickly connect with one or multiple users at the same time with just a push of a button. Plus, you can make regular voice calls on America’s Most Reliable Wireless Network. -
Page 145: Making A Push-To-Talk Call
Alternatively, you can hold the button and speak after you first press and hear the tone. In this case, your voice will be broadcast instantly over the recipient’s speaker. Pinging the recipient’s phone by pressing and releasing may avoid unintentional interruptions. After the call has been accepted: •... -
Page 146: Answering Push-To-Talk Calls
Dialed: Indicates any outgoing calls made from your phone Received: Indicates any received calls that were answered. Missed Voice: Indicates any missed phone calls. These are routed to your voicemail. Outgoing: Indicates all PTT calls made. Incoming: Indicates any incoming PTT calls received. -
Page 147: Making Ptt Calls (Phone Closed)
Press the speakerphone button until “PTT Speaker mode on” is displayed on the Sub LCD screen. Press and release the PTT button to display the PTT Contact on the Sub LCD. Use the volume key to scroll through the list and highlight an entry. -
Page 148: Making A Group Call From History
When you are finished, press to end the call.(By default, when you end a Group call that you initiated, all other participants are dropped from the call. Making a Group Call From History ➔ Press for Menu Select a Group call entry and press the PTT button. Continue the Group call as described previously. -
Page 149: Adding Group Members To The Group
Scroll through the available entries and press after each entry you want to add to the Group. (A check mark will appear in the box next to the selected entry.) When you’ve marked all the entries you want to add, press left soft key for Continue. -
Page 150: Section 13: Mobile Web
Section 13: Mobile Web This section outlines the mobile web options available. Mobile Web Mobile Web allows you to surf the web from your wireless phone. If you receive a call while using Mobile Web, the web session is suspended during the call. Once the call ends, your Mobile Web session resumes where you left off. -
Page 151: Mobile Web Soft Keys
Note: This feature is currently unavailable outside of the United States. Only available within the Verizon Wireless Enhanced Services Area. At the bottom of the Mobile Web display contains the browser commands. The left and right are used to perform the commands in the display. These are called “soft keys”... -
Page 152: Links
Note: This feature is currently unavailable outside of the United States. Only available within the Verizon Wireless Enhanced Services Area. Links can serve several purposes, such as jumping to a different page, to a different site, or initiating a phone call. Links are underlined (__). -
Page 153: Section 14: Health And Safety Information
Section 14: Health and Safety Information This section outlines the safety precautions associated with using your phone. These safety precautions should be followed to safely use your phone. Health and Safety Information Exposure to Radio Frequency (RF) Signals Certification Information (SAR) Your wireless phone is a radio transmitter and receiver. -
Page 154: Samsung Mobile Products And Recycling
SAR for a particular phone. Additional product specific SAR information can also be obtained at www.fcc.gov/cgb/sar. Samsung cares for the environment and encourages its customers to recycle Samsung mobile phones and genuine Samsung accessories. Go to: https://fun.samsungmobileusa.com/recycling/index.jsp... -
Page 155: Consumer Information On Wireless Phones
The U.S. Food and Drug Administration (FDA) has published a series of Questions and Answers for consumers relating to radio frequency (RF) exposure from wireless phones. The FDA publication includes the following information: What kinds of phones are the subject of this update? The term wireless phone refers here to hand-held wireless phones with built-in antennas, often called "cell,"... - Page 156 In such a case, FDA could require the manufacturers of wireless phones to notify users of the health hazard and to repair, replace or recall the phones so that the hazard no longer exists. Although the existing scientific data do not justify FDA regulatory actions, FDA has urged the wireless phone industry to take a number of steps, including the following: Support needed research into possible biological effects of RF of the...
- Page 157 cancer-causing chemicals so as to be pre-disposed to develop cancer in absence of RF exposure. Other studies exposed the animals to RF for up to 22 hours per day. These conditions are not similar to the conditions under which people use wireless phones, so we don't know with certainty what the results of such studies mean for human health.
- Page 158 FDA and Cellular Telecommunications & Internet Association (CTIA) have a formal Cooperative Research and Development Agreement (CRADA) to do research on wireless phone safety. FDA provides the scientific oversight, obtaining input from experts in government, industry, and academic organizations. CTIA-funded research is conducted through contracts to independent investigators.
-
Page 159: Medical Equipment
risks from exposure to RF emissions? Since there are no known risks from exposure to RF emissions from wireless phones, there is no reason to believe that hands- free kits reduce risks. Hands-free kits can be used with wireless phones for convenience and comfort. These systems reduce the absorption of RF energy in the head because the phone, which is the source of the RF emissions, will not be placed against the head. -
Page 160: Road Safety
(IEEE). This standard specifies test methods and performance requirements for hearing aids and wireless phones so that no interference occurs when a person uses a compatible phone and a compatible hearing aid at the same time. This standard was approved by the IEEE in 2000. FDA continues to monitor the use of wireless phones for possible interactions with other medical devices. - Page 161 Position your wireless phone within easy reach. Be able to access your wireless phone without removing your eyes from the road. If you get an incoming call at an inconvenient time, let your voice mail answer it for you. Let the person you are speaking with know you are driving; if necessary, suspend the call in heavy traffic or hazardous weather conditions.
-
Page 162: Responsible Listening
"The wireless industry reminds you to use your phone safely when driving." For more information, please call 1-888-901-SAFE, or visit our web-site www.ctia.org. Important!: If you are using a handset other than a standard numeric keypad, please call 1-888-901-7233. Provided by the Cellular Telecommunications & Internet Association. - Page 163 Avoid using headphones after exposure to extremely loud noises, such • as rock concerts, that might cause temporary hearing loss. Temporary hearing loss might cause unsafe volumes to sound normal. Do not listen at any volume that causes you discomfort. If you •...
-
Page 164: Operating Environment
Remember to follow any special regulations in force in any area and always switch your phone off whenever it is forbidden to use it, or when it may cause interference or danger. When connecting the phone or any accessory to another device, read its user's guide for detailed safety instructions. - Page 165 The intent of the HAC Act is to ensure reasonable access to telecommunications services for persons with hearing disabilities. While some wireless phones are used near some hearing devices (hearing aids and cochlear implants), users may detect a buzzing, humming, or whining noise. Some hearing devices are more immune than others to this interference noise, and phones also vary in the amount of interference they generate.
-
Page 166: Potentially Explosive Environments
using their hearing aid with the particular wireless phone. "Normal usage" in this context is defined as a signal quality that is acceptable for normal operation. The M mark is intended to be synonymous with the U mark. The T mark is intended to be synonymous with the UT mark. The M and T marks are recommended by the Alliance for Telecommunications Industries Solutions (ATIS). -
Page 167: Emergency Calls
This phone, like any wireless phone, operates using radio signals, wireless and landline networks as well as user- programmed functions, which cannot guarantee connection in all conditions. Therefore, you should never rely solely on any wireless phone for essential communications (medical emergencies, for example). -
Page 168: Other Important Safety Information
NFPA (National Fire Protection Agency) 1 Batterymarch Park Quincy, Massachusetts USA 02169-7471 Internet: http://www.nfpa.org Cautions Any changes or modifications to your phone not expressly approved in this document could void your warranty for this equipment, and void your authority to operate this equipment. Only use approved batteries, antennas and chargers. -
Page 169: Availability Of Various Features/Ring Tones
If your phone is unable to find a signal after searching, a Power Save feature is automatically activated. If your phone is active, it periodically rechecks service availability or you can check it yourself by pressing any key. Anytime the Power Save feature is activated, a message displays on the screen. -
Page 170: Battery Standby And Talk Time
Use only Samsung-approved batteries and recharge your battery only • with Samsung-approved chargers. When a charger is not in use, disconnect it from the power source. Do not leave the battery connected to a charger for more than a week, since overcharging may shorten its life. -
Page 171: Care And Maintenance
For safe disposal options for Li-Ion batteries, contact your nearest Samsung authorized service center. Always recycle. Do not dispose of batteries in a fire. Care and Maintenance Your phone is a product of superior design and craftsmanship and should be treated with care. - Page 172 Do not drop, knock or shake the phone. Rough handling can break • internal circuit boards. Do not use harsh chemicals, cleaning solvents or strong detergents to • clean the phone. Wipe it with a soft cloth slightly dampened in a mild soap-and-water solution.
-
Page 173: Section 15: Warranty Information
Limited Warranty does not cover any battery if (i) the battery has been charged by a battery charger not specified or approved by SAMSUNG for charging the battery, (ii) any of the seals on the battery are broken or show evidence of tampering, or (iii) the battery has been used in equipment other than the SAMSUNG phone for which it is specified. - Page 174 SAMSUNG. If SAMSUNG determines that any Product is not covered by this Limited Warranty, Purchaser must pay all parts, shipping, and labor charges for the repair or return of such Product.
- Page 175 Limited Warranty. The agents, employees, distributors, and dealers of SAMSUNG are not authorized to make modifications to this Limited Warranty, or make additional warranties binding on SAMSUNG. Accordingly, additional...
-
Page 176: End User License Agreement For Software
Software. You may not rent, lease, lend, sublicense or provide commercial hosting services with the Software. 4. CONSENT TO USE OF DATA. You agree that Samsung and its affiliates may collect and use technical information gathered as part of the product support services related to the Software provided to you, if any, related to the Software. - Page 177 8. TERMINATION. This EULA is effective until terminated. Your rights under this License will terminate automatically without notice from Samsung if you fail to comply with any of the terms and conditions of this EULA. Upon termination of this EULA, you shall cease all use of the Software and destroy all copies, full or partial, of the Software.
- Page 178 WITH ANY PROVISION OF THIS EULA, HOWEVER CAUSED, REGARDLESS OF THE THEORY OF LIABILITY (CONTRACT, TORT OR OTHERWISE) AND EVEN IF SAMSUNG HAS BEEN ADVISED OF THE POSSIBILITY OF SUCH DAMAGES. SOME JURISDICTIONS DO NOT ALLOW THE LIMITATION OF LIABILITY FOR PERSONAL INJURY, OR OF INCIDENTAL OR CONSEQUENTIAL DAMAGES, SO THIS LIMITATION MAY NOT APPLY TO YOU.
- Page 179 To avoid unintended information leaks and other problems of this sort, it is recommended that the device be returned to Samsung’s Customer Care Center for an Extended File System (EFS) Clear which will eliminate all user memory and return all settings to default settings.
- Page 180 Phone: 1-888-987-HELP (4357) © 2009 Samsung Telecommunications America. All rights reserved. No reproduction in whole or in part allowed without prior written approval. Specifications and availability subject to change without notice. Warranty Information...
-
Page 181: Index
Index Numerics 1-press dialing 2-touch dialing 3-touch dialing Adding a New Contact Entry Alarm disable Alarm clock snooze turn off the alarm Answer options Assisted Dialing Auto retry Backup Assistant Battery charging indicator installing non-supported removing Battery Cover Removal Tool Bluetooth about menu... - Page 182 editing an existing contact entry speed dialing Dial Fonts Dialing one-press two-press Directional Keys Display backlight banner language Display Settings Display Themes Drafts folder Email mobile email mobile web mail Emergency Contacts Adding Emergency Contacts Unassign an Emergency Contact End key Entering Text changing text entry mode entering numbers...
- Page 183 Battery Level Bluetooth Active Bluetooth Computer Bluetooth Connected Bluetooth Handsfree Bluetooth Headset Bluetooth Mobile Phone Bluetooth On Bluetooth PDA Bluetooth Transfer Bluetooth Unknown Device Calendar Event D signal strength Data Call Device Connected Dialed Call Dormant E911 Event Date & Time Event name Go To IM Screen Name...
- Page 184 Language setting Left soft key Links Lock code, changing Lock Mode placing an emergency call Lock phone Main Menu Settings Making a call Manage My Pics Media Center Memory Card Formatting Menu Navigation menu outline Menu Number Accelerators Message Folders Drafts erase options inbox...
- Page 185 Removing battery Return to last menu Return to the previous menu Reviewing sent Right soft key Roaming definition options SAR values Security edit lock code lock phone voice privacy Security settings Send key Set an alarm Set Shortcut Keys Settings backlight banner display settings...
- Page 186 V CAST Music with Rhapsody® subscription system requirements V CAST Music with Rhapsody® (Subscription, Wireless and Downloads) Video clips Video Messages creating and sending receiving Voice Command Settings Voice Commands description digit dial name dial phone status send picture send text Voice Messages creating and sending Voice privacy...
Need help?
Do you have a question about the SCH-U640 and is the answer not in the manual?
Questions and answers