Doosan M0609 Installation Manual
Hide thumbs
Also See for M0609:
- Programming manual (392 pages) ,
- User manual (253 pages) ,
- Reference manual (202 pages)
Table of Contents
Advertisement
Quick Links
Advertisement
Table of Contents

Subscribe to Our Youtube Channel
Related Manuals for Doosan M0609


Summary of Contents for Doosan M0609
- Page 1 Manual Version 2.1 Software Version 2.7.1...
-
Page 2: Table Of Contents
Preface ....................10 Copyright ........................10 Open Source Software License Information (OSS) ..........10 1. Safety.................... 11 1.1 Manual Indication Conventions ..............11 1.2 Safety Symbols ....................12 1.3 General Instructions ..................13 1.4 Product Usage ....................15 1.5 Risk Assessment ....................16 1.6 Potential Risks .................... - Page 3 Basic Specification ..............................................27 2.5.1 Axis Specification ..............................................28 2.5.2 Robot operating space ............................................. 29 2.5.3 Max. Payload within operating space ..................................... 41 2.5.4 Tool Center Point (TCP) ..........................................44 2.5.5 2.6 Nameplate and Label ..................45 3. Installation ................... 46 3.1 Cautions during Installation ................
- Page 4 5. Robot Mode and State ............... 86 5.1 Manual Mode ..................... 86 5.2 Automatic Mode....................87 5.3 Other Mode ......................88 5.4 State and Flange LED Color for Each Mode ..........89 6. Safety Functions ................ 91 Doosan Robotics Installation Manual v2.1...
- Page 5 6.1 Introduction ....................... 91 6.2 Safety-Rated Stop Function ................92 Emergency Stop Function .......................................... 93 6.2.1 Protective Stop ................................................94 6.2.2 6.3 Safety Rated Monitoring Function ..............95 6.4 Safety-Rated I/O ....................97 7. Transportation ................98 7.1 Caution during Transportation ..............98 7.2 Pose for Robot Transportation ..............
- Page 6 11. Indemnification ................. 106 Annex A System Specification ............ 107 A.1 Manipulator ......................107 A.1.1 M0609 ......................................................107 A.1.2 M1509 ......................................................108 A.1.3 M1013 ......................................................109 A.1.4 M0617 ......................................................110 A.1.5 H2017 ......................................................111 A.1.6 H2515 ......................................................112 A.2 Controller ......................113 A.2.1 CS-01 (AC Controller) .............................................
- Page 7 C.1.3 Measurement Poses and Conditions ....................................133 C.2 M1013 ......................... 135 C.2.1 Stop Category 1 ................................................135 C.2.2 Stop Category 0 ................................................138 C.3 M0609 ......................... 139 C.3.1 Stop Category 1 ................................................139 C.3.2 Stop Category 0 ................................................142 C.4 M0617 ......................... 143 C.4.1 Stop Category 1 ................................................
- Page 8 Annex E IP Steel Controller (CS-01P) ......... 174 E.1 Product Introduction ..................174 E.1.1 Names and Functions ............................................174 E.1.2 System Configuration .............................................. 175 E.1.3 Nameplate and Label .............................................. 176 E.2 Installation ......................177 E.2.1 Cautions during Installation ..........................................177 Doosan Robotics Installation Manual v2.1...
- Page 9 E.2.2 Installation Environment ............................................178 E.2.3 Hardware Installation ..............................................179 Annex F H-Series Handling Guide..........186...
-
Page 10: Preface
The copyright and intellectual property rights of the contents of this manual are held by Doosan Robotics. It is therefore prohibited to use, copy, or distribute the contents without written approval from Doosan Robotics. In the event of abuse or modification of the patent rights, the user will be solely responsible for the consequences. -
Page 11: Safety
Safety This chapter provides safety information the user must be aware of before installing or operating the robot. All robot s have risks of high voltage, electricity and collision. Therefore, in order to minimize the risk of injuries and mechanical damage, one must observe the basic safety cautions while operating the robot and using related parts. -
Page 12: Safety Symbols
This symbol means dangerous situations can occur due to overheating. Failure to observe instructions with this symbol may result in serious accidents that may cause serious injury to the operator. Caution The product may become damaged or the operator may suffer injury. Caution Doosan Robotics Installation Manual v2.1... -
Page 13: General Instructions
General Instructions This chapter describes general danger and warning items related to operating the robot. Warning • If the robot is installed with electrical devices, install the robot referring to the Installation Manual. Warning • If a device is installed on the tool during robot installation, make sure to use appropriate bolts. •... - Page 14 Do not expose the robot to powerful magnetic fields. It may cause damage to the robot. • Do not use the controller being laid. To avoid getting a hand caught in the door by accident, make sure to keep it upright while working with the door open. Doosan Robotics Installation Manual v2.1...
-
Page 15: Product Usage
The following uses are considered inappropriate because they exceed the boundaries of the product’s intended purpose. Doosan Robotics will not be held responsible for any damage and malfunctioning of the robot, property losses and injuries to users due to such inappropriate uses. -
Page 16: Risk Assessment
Key items to note when performing risk assessment of the collaborative robot application are as follows: • Severity of individual potential collisions • Probability of individual potential collision occurrence • Probability of individual potential collision avoidance Doosan Robotics Installation Manual v2.1... - Page 17 If the robot is installed on a non-collaborative robot application that cannot sufficiently remove risks using its internal safety functions (e.g., use of dangerous tool), the system integrator must decide to install additional protection devices during risk assessment (e.g., use of protection devices capable of protecting the integrator during installation and programming).
-
Page 18: Potential Risks
Object falls from the tool due to inappropriate grip or sudden power shortage • Accidents that occur due to mistaking an emergency stop button of different equipment • Errors that occur due to unauthorized safety parameter modification Doosan Robotics Installation Manual v2.1... -
Page 19: Validity And Responsibility
Validity and Responsibility This manual does not provide information about the design, installation and operation methods of robot applications integrated with other system. In addition, this manual does not provide information that may influence the safety of the integrated system. The system administrator must install the robot in a way that observes various safety requirements according to the related national standards and regulations. -
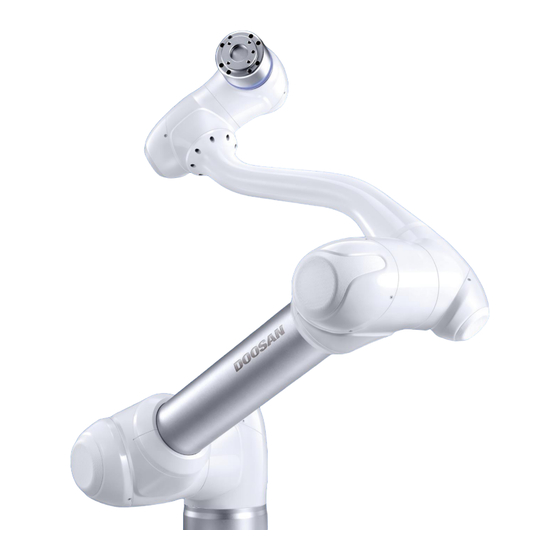
Page 20: Product Introduction
Product Introduction Component Check Manipulator Controller (Option : Refer to Appendix) Teach pendant Controller power supply cable Manipulator connection cable User manual / Quick guide Note Components may vary depending on the robot model. Doosan Robotics Installation Manual v2.1... -
Page 21: Names And Functions
Names and Functions 2.2.1 Manipulator Names of Parts Name Name Base Link2 Link1 Tool flange... - Page 22 For H-Series, an additional LED is installed on the 1 axis to indicate the same status and color. I/O port for tool control. Flange I/O (Digital input 3ch, output 3ch) Connector Used for supplying power to and communication of the robot. Doosan Robotics Installation Manual v2.1...
-
Page 23: Controller
2.2.2 Controller Item Description I/O connection Used to connect the controller or peripherals. terminal (internal) Teach pendant Used to connect the teach pendant cable with the controller. cable connection terminal Power switch Used to turn ON/OFF the main power of the controller. Manipulator cable connection Used to connect the... -
Page 24: Teach Pendant
Note If you need to protect and hold the Teach Pendant during work, you can use it more safely and easily with a soft cover supplied by Doosan Robotics. Doosan Robotics Installation Manual v2.1... -
Page 25: System Configuration
System Configuration Power Command/ Supply/ Monitoring Network Teach pendant Controller Manipulator • Teach pendant: It is a device that manages the overall system, and it is capable of teaching the robot specific poses and setting manipulator and controller related settings. •... -
Page 26: Product Specifications, General
Product Specifications, General M-Series Technical Data M0609 Refer to A.1.1 M0609 M0617 Refer to A.1.4 M0617 M1013 Refer to A.1.3 M1013 M1509 Refer to A.1.2 M1509 H-Series Technical Data H2017 Refer to A.1.5 H2017 H2515 Refer to A.1.6 H2515 Doosan Robotics Installation Manual v2.1... -
Page 27: Robot Specifications
< 65 dB Installation Dire Floor / Wall / Ceiling Floor Only ction Controller and Teaching Penda Doosan Controller & TP 10≤f< 57㎐ - 0.075mm amplitude Vibration and A cceleration 57≤f≤150㎐ – 1G Max Amplitude : 50㎨(5G) Impact * Time :30㎳ , Pluse : 3 of 3 (X,Y,Z) Operating Temp 0 ℃... -
Page 28: Axis Specification
225 °/s 225 °/s 225 °/s 225 °/s 180 °/s 180 °/s 225 °/s 225 °/s 225 °/s 225 °/s 180 °/s 180 °/s 225 °/s 225 °/s 225 °/s 225 °/s 180 °/s 180 °/s Doosan Robotics Installation Manual v2.1... -
Page 29: Robot Operating Space
2.5.3 Robot operating space M0609 ... - Page 30 Doosan Robotics Installation Manual v2.1...
- Page 31 M0617 ...
- Page 32 Doosan Robotics Installation Manual v2.1...
- Page 33 M1013 ...
- Page 34 Doosan Robotics Installation Manual v2.1...
- Page 35 M1509 ...
- Page 36 Doosan Robotics Installation Manual v2.1...
- Page 37 H2017 ...
- Page 38 Doosan Robotics Installation Manual v2.1...
- Page 39 H2515 ...
- Page 40 Doosan Robotics Installation Manual v2.1...
-
Page 41: Max. Payload Within Operating Space
2.5.4 Max. Payload within operating space The maximum payload of the robot within its operating space changes according to the distance from the center of gravity. Payload per distance is as follows: M0609 M0617 ... - Page 42 M1013 M1509 Doosan Robotics Installation Manual v2.1...
- Page 43 H2017 H2515 Note This load diagram assumes a small tool load volume. Tools with a larger volume will have greater limitations in payload above the tool’s center of gravity compared to a tool with an equal weight but smaller volume, and in such cases, vibration may occur.
-
Page 44: Tool Center Point (Tcp)
2.5.5 Tool Center Point (TCP) Refer to the figure below for TCP. Doosan Robotics Installation Manual v2.1... -
Page 45: Nameplate And Label
Nameplate and Label Be careful not to remove or damage labels attached to the robot and controller. Note If you have selected an optional controller, please check the appendix as the label attachment location may vary. -
Page 46: Installation
If this is not established, the robot may be damaged or the user may be injured. • For H-series, the robot can only be installed on the floor. To prevent safety accidents, consider the weight of the robot and refer to Handling Guide provided in this manual. Doosan Robotics Installation Manual v2.1... -
Page 47: Installation Environment
Installation Environment Secure sufficient space to allow the robot to move freely. Check the operating space of the robot to ensure that the robot does not collide with external elements. Installation Location Check Before installing the robot, make sure you have enough space and consider the following. •... -
Page 48: Robot Work Area Check
Therefore, it is not recommended to operate the tool passing through the cylindrical section on the top and bottom of the base. Doosan Robotics Installation Manual v2.1... -
Page 49: Hardware Installation
Hardware Installation Install the robot, controller and teach pendant, the key components of the system in the work area, and supply power to them before operating the robot. The installation of each component is as follows: 3.3.1 Securing the Robot Use M8 bolts in the four 9.0 mm holes on the manipulator base to secure the robot. - Page 50 The manipulator will be damaged if it comes in contact with water for an extended period of time. Do not operate the robot in conditions where it can get wet or under water. Doosan Robotics Installation Manual v2.1...
-
Page 51: Connecting The Robot And Tool
Connecting the Robot and Tool Item Tool Bracket Cable ㅇㄹㅇㄹㅇㄹ Tool flange Use four M6 bolts to secure the tool on the tool flange. It is recommended to use tightening torque of 9 Nm to tighten the bolts. Use a Φ6 place marker pin to accurately install the robot in a fixed location. -
Page 52: Connecting The Manipulator And Controller
When installing the controller on the floor, secure at least 50 mm of space on each side of the controller to enable ventilation. Make sure that connectors are properly connected before turning on the controller. Doosan Robotics Installation Manual v2.1... - Page 53 Note When configuring the system, it is recommended that a noise reducer be installed to prevent noise effects and malfunction of the system. If the controller is influenced by noise generated by electromagnetic waves, it is recommended to install a ferrite core on each side of manipulator cable to ensure normal operation. The installation location is as follows:...
-
Page 54: Connecting The Controller And Teach Pendant
Do not install the controller and teach pendant a in a dusty or wet environment. The controller and teach pendant must not be exposed to a dusty environment that exceeds IP20 ratings. Be especially careful in environments with conductive dust. Doosan Robotics Installation Manual v2.1... - Page 55 Note When configuring the system, it is recommended that a noise reducer be installed to prevent noise effects and malfunction of the system. If the teach pendant is influenced by noise generated by electromagnetic waves, it is recommended to install a ferrite core on the Teach Pendant connection side to ensure normal operation.
-
Page 56: Routing Of Manipulator Cable And Teach Pendant Cable
If the curvature radius is smaller than the minimum curvature radius (120 mm), cable disconnection or product damage may occur. In environments where electromagnetic noise can occur, proper cable installation must be taken to prevent malfunctions. Doosan Robotics Installation Manual v2.1... -
Page 57: Supplying Power To The Controller
3.3.6 Supplying Power to the Controller To supply power to the controller, connect the power cable of the controller to a standard IEC power outlet. • Use a cable with a standard power plug that matches the outlet of the country of use. •... - Page 58 (If you selected an optional controller, check the instructions in the appendix) Parameter Specification 100 – 240 VAC Input Voltage Input Power Fuse (@100-240V) 15 A 47 – 63 Hz Input Frequency Doosan Robotics Installation Manual v2.1...
-
Page 59: Interface
Interface Flange I/O The end flange cover of the robot has two M8 spec 8-pin connectors, and refer to the figure below for the location and shape. The two connectors supply power and control signals necessary to operate the gripper or sensors embedded within specific robot tools. - Page 60 Digital Output 3 +24V Digital Input 3 Digital Input 2 • ▪ X2 Setting (Digital I/O) Signal Digital Input 4 Digital Output 4 Digital Output 5 Digital Output 6 +24V Digital Input 6 Digital Input 5 Doosan Robotics Installation Manual v2.1...
- Page 61 Internal power of flange I/O is set to 24V, and refer to the table below for detailed power specifications during I/O connection. Parameter Unit Supply voltage Supply current Digital output Digital input Warning Set up the tool and gripper so that they do not cause any hazards when power is cut off. (e.g., workpiece falling from the tool) ...
-
Page 62: Flange Digital Output Specifications
The figure below is an example of a digital output setup, so refer to it while connecting the tool and gripper. Make sure to disconnect the power from the robot when setting up the circuit. Doosan Robotics Installation Manual v2.1... -
Page 63: Flange Digital Input Specifications
4.1.2 Flange Digital Input Specifications Flange digital input features a photo coupler input. The current based on 24V input is limited to 5mA by internal resistance. The electrical specifications of the digital input are as follows: Parameter Unit Input voltage Logical high Logical low Ω... -
Page 64: Connecting Controller I/O
Turn off the power when connecting terminals to the controller I/O to prevent product damage and breakdown. Doosan Robotics will not compensate any product damage caused by inappropriate terminal connection or user negligence. Make sure to turn off the external power source when turning off the controller power. -
Page 65: Setting The Terminal Block For Contact Input (Tbsft)
4.2.1 Setting the Terminal Block for Contact Input (TBSFT) The safety I/O of the controller consists of dual contact input terminals for connecting safety devices. These terminals are categorized into two groups depending on their use. • Two pairs of external emergency contact in on the left: Used to connect devices required for emergency stopping such as external emergency switch. -
Page 66: Setting The Terminal Block For Safety Contact Output (Tbsto)
The rated voltage/current of the safety controller relay connected to the contact output terminal is 250VAC/6A. Open → Close Close → Open Contact output different Max. Max. 1 sec. Max. 0.1 sec. allowed time Doosan Robotics Installation Manual v2.1... -
Page 67: Setting The Digital I/O Power Terminal (Tbpwr)
4.2.3 Setting the Digital I/O Power Terminal (TBPWR) VIO and GIO are power terminals used for the safety controller digital I/O located in the front of the controller, and they are separated from the VCC24V and GND, which supply SMPS inside the controller. -
Page 68: Setting The Configurable Digital I/O (Tbci1 - 4,Tbco1 - 4)
I/O Power (TBPWR), or if 24V power is not supplied to the VIO and GIO terminals through an external power supply, the configurable digital I/O does not work, and shuts off operating power to the robot. Doosan Robotics Installation Manual v2.1... - Page 69 If the configurable digital I/O is used as a general digital I/O, various low current operations such as solenoid valves for voltage and signal exchanges with PLC systems or peripherals can be performed. The following explains how to use the configurable digital I/O: •...
- Page 70 I/O power supply (VIO/GIO) of the Terminal Block for Digital I/O Power (TBPWR) and the internal power supply (VCC/GND), and an external power supply must be connected. Safety Controller Board FUSE 2A TBPWR SMPS Digital Isolator O01~O16 & Logic Voltage Source Output TBCO1~TBCO4 Doosan Robotics Installation Manual v2.1...
- Page 71 • If a negative common & sink type input device is connected If digital I/O output is connected to a sink type input device, connect the Oxx terminals of the TBCO1-TBCO4 terminal blocks to the input terminal of the external device, and connect the GIO to the negative common of the external device to establish a common ground.
- Page 72 If connection of safety devices or safety related I/O is required, make sure to set the corresponding terminal to dual safety I/O on the teach pendant. Doosan Robotics Installation Manual v2.1...
- Page 73 If the configurable digital I/O is used as a safety I/O, two neighboring I/O terminals, such as O01 & O02, … , O15 & O16, I01 & I02, ... I15 & I16, can use identical safety signals to form a dual safety I/O. While the Safety Contact Output Terminal (TBSFT) can only be connected with contact type (Dry Contact) signals, input set as safety I/O can connect with both contact type (Dry Contact) and voltage type (Wet Contact) signals Output set as safety I/O outputs voltage signals, but it can also output...
-
Page 74: Setting Analog I/O Terminal (Tbaio)
4 - 20 mA Current mode analog output [AOx-GND] Resistance 50M ohm [AOx-GND] Resolution 16 bit [AOx-GND] Voltage 0 - 10 V [AOx-GND] Current Voltage mode analog output [AOx-GND] Resistance 1 ohm [AOx-GND] Resolution 16 bit Doosan Robotics Installation Manual v2.1... - Page 75 • Voltage/current input It receives voltage or current signals from an external device between the Alx terminal of the TBAIO terminal block and the GND terminal. If the output of the device is a voltage signal, it receives a signal of 0-10Vdc.
-
Page 76: Setting Encoder Input Terminal (Tben1, Tben2)
To ensure maximum input accuracy, observe the following: Use shielded, twisted pair cables to reduce noise. • Connect the cable shield to the ground terminal inside the controller. • Connecting Incremental Encoder A, B, Z phase Doosan Robotics Installation Manual v2.1... - Page 77 • In the case of S phase inputs, connect a pull-up or pull-down resistance according to the sensor type(NPN/PNP) to prevent floating. • Connecting NPN Sensor • Connecting PNP Sensor...
-
Page 78: Network Connection
To perform object position measurement, it is necessary to have an image input and vision teaching of the target object using the vision sensor. Refer to the dedicated vision work setting program provided by the vision sensor manufacturer. Doosan Robotics Installation Manual v2.1... - Page 79 It is possible to connect/communication/control functions of the external vision sensor using Doosan Robot Language (DRL), and it is possible to set up the program in the Task Writer. Details and comprehensive examples of Doosan Robot Language (DRL) on external vision sensor...
-
Page 80: Connecting External Device - Dart Platform
If the connectible controller IP address, sub-controller version information and robot serial number search results are not displayed: Press the refresh button to search again and try to connect again according to the procedure above. Doosan Robotics Installation Manual v2.1... -
Page 81: Modbustcp Slave Setup
4.3.3 ModbusTCP Slave Setup robot The ModbusTCP Slave function of Doosan Robotics supports parameter monitoring, and General Purpose Register (GPR) (refer to 4.3.7 Using General Purpose Register (GPR)) function. This function robot automatically starts when the controller boots up normally. Therefore, the user can use it after... -
Page 82: Expanded Protocol - Profinet Io Device (Pnio Device) Setup
4.3.4 Expanded Protocol - PROFINET IO Device (PNIO device) Setup The robot controllers of Doosan Robotics support the PROFITNET IO Device (Slave) function, which allows data modification after reading the Parameters of the robot from an external device (PROFINET IO Controller/Master). (i.e., robot parameter monitoring, General Purpose Register (Bit, Int, Float) – refer to 4.3.7 Using General Purpose Register (GPR)). -
Page 83: Expanded Protocol - Ethernet/Ip Adapter (Eip Adapter) Setup
4.3.5 Expanded Protocol - EtherNet/IP Adapter (EIP adapter) Setup The robot controllers of Doosan Robotics support the EtherNet/IP Adapter (Slave) function, which allows data modification after reading the Parameters of the robot from an external device (EtherNet/IP Scanner / Master). (i.e., robot parameter monitoring, General Purpose Register (Bit, Int, Float) – refer to 4.3.7 Using General Purpose Register (GPR)). -
Page 84: Using Expanded Protocol
The following are descriptions of the implementation characteristics of general functions for Industrial Ethernet. The Industrial Ethernet function of Doosan Robotics controllers does not use a separate ASIC, but implements its function based on TCP/IP, so it does not support real-time performance. ... -
Page 85: Using General Purpose Register (Gpr)
4.3.7 Using General Purpose Register (GPR) The GPR function is the memory of the PNIO device and the EIP adapter predefined by the user for use. robot It allows exchange of user data between external devices and the Note The GPR function is only provided through DRL, and the DRLs used are as follows: For more information about DRL, please refer to the Programming Manual. -
Page 86: Robot Mode And State
Task Builder and Task Writer, and if the robot cannot be operated normally for reasons such as the robot exceeding the safety threshold, the Recovery function can be used to restore normal operation. Doosan Robotics Installation Manual v2.1... -
Page 87: Automatic Mode
Automatic Mode This is the mode in which the robot operates without direct user control. The robot will execute the programmed task or predefined sequence with a simple operation command and without additional user input. Task Builder or Task Writer can verify the programed task in virtual mode, execute it in actual operation. -
Page 88: Other Mode
Unlike normal modes such as manual mode and automatic mode, this is exceptional mode. This mode includes special states such as controller booting, initializing and states related to Backdrive at which you can push robot by hand without drive power.. Doosan Robotics Installation Manual v2.1... -
Page 89: State And Flange Led Color For Each Mode
State and Flange LED Color for Each Mode Flange and/or Mode State Description Base LED This is the default status of teaching. Workcell Manager, Task Builder and Task Writer can be used to configure the work condition or perform task Manual Standby Blue programming. - Page 90 Backdrive Red (M/H-Series) speed threshold during Backdrive Motion. Servo Off LED Off (A-Series) It is identical to Safe Torque Off (STO). The controller is booting and the robot is initialized. Initializing Red Blinking Doosan Robotics Installation Manual v2.1...
-
Page 91: Safety Functions
Safety Functions Introduction Robot’s from Doosan Robotics uses various safety-rated monitoring and safety-related electrical interfaces to protect users and devices, and this allows the integration of other devices and additional protection devices. The performance of each safety-rated monitoring and interface satisfies Category 3, Performance Level d(PL d) defined by ISO 13849-1 and Hardware Fault Tolerance 1, Safety Integrity Level 2 (SIL 2) defined by IEC 62061. -
Page 92: Safety-Rated Stop Function
Safety-Rated Stop Function This is the stop function and stop monitoring function of Doosan Robotics, and it uses the safety function defined in IEC 61800-5-2. Safety Function Function Description and Failure Detection PFHd PL, SIL Name Immediately cuts off the power supply to all joint module motors, and 2.54E-8... -
Page 93: Emergency Stop Function
6.2.1 Emergency Stop Function The user can use the emergency stop button to stop the system in emergency situations. In emergency situations, press the Emergency Stop button in the top right corner of the teach pendant to immediately stop the system. Note ... -
Page 94: Protective Stop
The robot is equipped with a protective stop function to stop the robot according to signals sent by protective devices. For information about protective device connection, refer to sections 4.2.1 Setting the Terminal Block for Contact Input (TBSFT) and 4.2.4 Setting the Configurable Digital I/O (TBCI1 - 4,TBCO1 - 4). Doosan Robotics Installation Manual v2.1... -
Page 95: Safety Rated Monitoring Function
Safety Rated Monitoring Function Doosan robot’s feature various safety rated monitoring functions that can be used as a risk reduction measure through risk assessment. The limits detected by each monitoring function can be set under robot > robot Limits in the Teach Pendant UI WCM. - Page 96 PL d Cat. 3 Momentum SS1 or threshold SIL 2 Limit STO, Robot If the mechanical power of the robot exceeds the 1.94E-7 PL d Cat. 3 SS1 or Power Limit configured threshold SIL 2 Doosan Robotics Installation Manual v2.1...
-
Page 97: Safety-Rated I/O
Safety-Rated I/O The robot’s of Doosan Robotics feature a safety-rated input interface capable of connecting protective stop signals from safety protective devices, external emergency stop signal input and 3-position Enable Switch. They also feature a safety-rated output interface capable of outputting internal status and area information. -
Page 98: Transportation
When transporting the robot using lifting equipment, make sure to observe all related national and regional regulations. • Doosan Robotics does not assume responsibility for any damages or losses that occur during transportation, so make sure to transport the robot safely according to the user manual. Doosan Robotics Installation Manual v2.1... -
Page 99: Pose For Robot Transportation
Pose for Robot Transportation Set the following poses to transport the robot: Model M0607 0° 0° 150° 0° 25° 0° M0617 0° 0° 165° 0° 15° 0° M1013 0° 0° 160° 0° 20° 0° M1509 0° 0° 150° 0° 25° 0°... -
Page 100: Package Specifications
742 mm 500 mm 400 mm M0617 1194 mm 500 mm 435 mm M1013 968 mm 500 mm 435 mm M1509 742 mm 500 mm 400 mm H2017 1040mm 1040mm 1585mm H2515 1040mm 1040mm 1500mm Doosan Robotics Installation Manual v2.1... -
Page 101: Maintenance
• Maintain the safety settings of the software during maintenance work. • If a particular part is defective, replace it with a new identical part or part approved by Doosan Robotics. • The replaced part must be returned to Doosan Robotics. -
Page 102: Disposal And Environment
Therefore, do not dispose of the system along with general industrial or household waste. When disposing of all or part of the system, the relevant laws and legislation must be complied with, and contact Doosan Robotics for detailed information related to the disposal of the system. Doosan Robotics Installation Manual v2.1... -
Page 103: Product Warranty And Responsibility
(hereinafter referred to as “Customer”). The warranty period is 1 year starting from the date when the robot was installed. The scope of this warranty limits the Manufacturer's only responsibility for all Doosan products and the Customer's only remedy to the repair or replacement of defective Doosan products. -
Page 104: Restrictions And Exceptions Of Warranty
• If parts or S/W not provided by Doosan are installed • If a Doosan Product is incorrectly repaired or maintained by an unofficial repair technician or unauthorized individuals • If the user modified a Doosan Product without prior approval from the Manufacturer •... -
Page 105: Transfer
10.3 Transfer This warranty is included in the warranty period, and if the Doosan robot is sold to a different individual through a private transaction, the warranty can also be transferred. However, the warranty is only valid if the Manufacturer is notified of this transaction, and the warranty period is still in effect. The assignee... -
Page 106: Indemnification
Doosan Robotics continues to upgrade product reliability and performance, and Doosan Robotics has the right to upgrade the product without notification. Doosan Robotics endeavors to ensure that all contents in this manual are accurate. However, it does not assume responsibility for errors or missing information. -
Page 107: Annex A System Specification
Annex A System Specification A.1 Manipulator A.1.1 M0609 Classification Item Specification Axis Structure Payload 6 kg Performance Max. Radius 900 mm TCP Speed 1 m/s Repeatability ± 0.05 mm J1 Range / Speed ±360° / 150°/s J2 Range / Speed ±360°... -
Page 108: M1509
Tool Flange & Connector Power Supply DC 24V/ Max. 3A Connector 1414229 (PHOENIX) Cable Teach Pendant (4.5 m) / Robot (6.0 m) Weight 32 kg Mounting Floor, Ceiling, Wall IP Rating IP 54 Noise < 65 dB Doosan Robotics Installation Manual v2.1... -
Page 109: M1013
A.1.3 M1013 Classification Item Specification Axis Structure Payload 10 kg Performance Max. Radius 1300 mm TCP Speed 1 m/s Repeatability ± 0.05 mm J1 Range / Speed ±360° / 120°/s J2 Range / Speed ±360° / 120°/s J3 Range / Speed ±160°... -
Page 110: M0617
Digital I/O – X2 IN-3ch / Out-3ch Tool Flange & Connector Power Supply DC 24V/ Max. 3A Connector 1414229 (PHOENIX) Weight 34 kg Mounting Floor, Ceiling, Wall IP Rating IP 54 Noise < 65 dB Doosan Robotics Installation Manual v2.1... -
Page 111: H2017
A.1.5 H2017 Classification Item Specification Axis Structure Payload 20 kg Performance Max. Radius 1700 mm TCP Speed 1m/s Repeatability ± 0.1mm J1 Range / Speed ±360° / 100°/s J2 Range / Speed ±130° / 80°/s J3 Range / Speed ±160° / 100°/s Joint Movement J4 Range / Speed ±360°/ 180°/s... -
Page 112: H2515
IN-3ch / Out-3ch Digital I/O – X2 IN-3ch / Out-3ch Tool Flange & Connector Power Supply DC 24V/ Max. 3A Connector 1414229 (PHOENIX) Weight 72 kg Mounting Floor IP Rating IP 54 Noise < 65 dB Doosan Robotics Installation Manual v2.1... -
Page 113: Controller
A.2 Controller A.2.1 CS-01 (AC Controller) Item Specification Weight 13 kg Dimensions 490 x 390 x 252 mm Protection Rating IP30 Interfaces Ethernet / USB / RS-232 I/O Port – Digital I/O 16/16 I/O Port – Analog I/O I/O power supply DC 24V ModbusTCP Master/Slave, ModbusRTU Master, Industrial Network... -
Page 114: Dc Controller)
I/O power supply DC 24V ModbusTCP Master/Slave, ModbusRTU Master, Industrial Network PROFINET IO Device, EtherNet/IP Adapter Rated supply voltage 22-60 VDC TP Cable: 2.5 m (Option: 4.5 m) Cable Length Robot Cable: 3 m (Option: 6 m) Doosan Robotics Installation Manual v2.1... -
Page 115: Cs-01P (Ac Controller)
A.2.3 CS-01P (AC Controller) Item Specification Weight 17 kg Dimensions 515 x 240 x 395 mm Protection Rating IP54 Interfaces Ethernet / USB / RS-232 I/O Port – Digital I/O 16/16 I/O Port – Analog I/O I/O power supply DC 24V ModbusTCP Master/Slave, ModbusRTU Master, Industrial Network PROFINET IO Device, EtherNet/IP Adapter... -
Page 116: Teach Pendant
A.3 Teach pendant A.3.1 TP-01 Item Specification Weight 0.8 kg Dimensions 264 x 218 x 42 mm Protection Rating IP40 Screen Size 10.1 inch i Cable Length 4.5 m (Option: 2.5 m) Doosan Robotics Installation Manual v2.1... -
Page 117: Dart Platform Installation Requirement (Minimum, Recommended)
A.4 DART Platform Installation Requirement (minimum, recommended) The minimum installation requirements for the DART Platform are as follows: • OS: Windows 7 Enterprise Service pack1 (64 bit) or higher • CPU: 2.20 GHz or higher • GPU: GMA 4500 and GMA HD (Intel) or equivalent specification •... -
Page 118: Annex B Declaration And Certification
Annex B Declaration and Certification B.1 Europe Declaration of Incorporation (Original) Doosan Robotics Installation Manual v2.1... -
Page 119: Europe Machinery Directive Attestation Of Conformity
B.2 Europe Machinery Directive Attestation of Conformity... - Page 120 Doosan Robotics Installation Manual v2.1...
-
Page 121: Europe Emc Directive Attestation Of Conformity
B.3 Europe EMC Directive Attestation of Conformity... -
Page 122: U.s. Nrtl Certification (U.s., Canada)
B.4 U.S. NRTL Certification (U.S., CANADA) Doosan Robotics Installation Manual v2.1... -
Page 124: Functional Safety Certification
B.5 Functional Safety Certification Doosan Robotics Installation Manual v2.1... -
Page 125: Voluntary Safety Confirmation Declaration (Kcs)
B.6 Voluntary Safety Confirmation Declaration (KCs) - Page 126 Doosan Robotics Installation Manual v2.1...
- Page 128 Doosan Robotics Installation Manual v2.1...
- Page 130 Doosan Robotics Installation Manual v2.1...
-
Page 131: Annex C Stop Distance And Stop Time
Annex C Stop Distance and Stop Time C.1 Measurement Methods and Conditions C.1.1 General Information ⚫ Stop distance is the angle traveled from the moment a stop signal is generated to the moment all manipulator stop operation. ⚫ Stop time is the time from the moment a stop signal is generated to the moment all manipulator stop operation. -
Page 132: Stop Category
Joint 1 measurement is performed with the rotating axis perpendicular to the ground and during horizontal movement. Joint 2 and Joint 3 measurements are performed with the rotating axis parallel to the ground and when the robot is stopped in a downward movement vertical to the ground. Doosan Robotics Installation Manual v2.1... -
Page 133: Measurement Poses And Conditions
C.1.3 Measurement Poses and Conditions Joint 1 Joint 2 Joint 3 100% extension Stop category 0 3% extension Stop category 1 66% extension Stop category 1 100% extension Stop category 1 Table C.1 the pose for 33%, 66%, and 100% of extension... - Page 134 �� ��1 Stop initiating position �� Joint2 ��2 �� �� ��3 Stop initiating position �� Joint3 �� ��3 �� ��2 Table C.2 the pose when the stop is initiated and the measured angle (�� �� Doosan Robotics Installation Manual v2.1...
-
Page 135: M1013
C.2 M1013 C.2.1 Stop Category 1 (a) Stop Distance at 33% of Max. Load (rad) (d) Stop Time at 33% of Max. Load (ms) (b) Stop Distance at 66% of Max. Load (rad) (e) Stop Time at 66% of Max. Load (ms) (c) Stop Distance at Max. - Page 136 (b) Stop Distance at 66% of Max. Load (rad) (e) Stop Time at 66% of Max. Load (ms) (c) Stop Distance at Max. Load (rad) (f) Stop Time at Max. Load (ms) Figure C.2: Stop Distance and Stop Time of Joint 2 (Shoulder) Doosan Robotics Installation Manual v2.1...
- Page 137 (a) Stop Distance at Max. Stretch Level (rad) (b) Stop Time at Max. stretch Level (ms) Figure C.3: Stop Distance and Stop Time of Joint 3 (Elbow)
-
Page 138: Stop Category 0
Joint 2 (�� 0.161 ��2 Joint 3 (�� 0.153 ��3 Distance (�� 0.279 ���� The joint 2 and joint 3 angles are refer to �� , �� , �� in table C.2 ��2 ��3 �� Doosan Robotics Installation Manual v2.1... -
Page 139: M0609
C.3 M0609 C.3.1 Stop Category 1 (a) Stop Distance at 33% of Max. Load (rad) (d) Stop Time at 33% of Max. Load (ms) (b) Stop Distance at 66% of Max. Load (rad) (e) Stop Time at 66% of Max. Load (ms) (c) Stop Distance at Max. - Page 140 (b) Stop Distance at 66% of Max. Load (rad) (e) Stop Time at 66% of Max. Load (ms) (c) Stop Distance at Max. Load (rad) (f) Stop Time at Max. Load (ms) Figure C.5: Stop Distance and Stop Time of Joint 2 (Shoulder) Doosan Robotics Installation Manual v2.1...
- Page 141 (a) Stop Distance at Max. Stretch Level (rad) (b) Stop Time at Max. stretch Level (ms) Figure C.6: Stop Distance and Stop Time of Joint 3 (Elbow)
-
Page 142: Stop Category 0
Joint 2 (�� 0.034 ��2 Joint 3 (�� 0.122 ��3 Distance (�� 0.151 ���� The joint 2 and joint 3 angles are refer to �� , �� , �� in table C.2 ��2 ��3 �� Doosan Robotics Installation Manual v2.1... -
Page 143: M0617
C.4 M0617 C.4.1 Stop Category 1 (a) Stop Distance at 33% of Max. Load (rad) (d) Stop Time at 33% of Max. Load (ms) (b) Stop Distance at 66% of Max. Load (rad) (e) Stop Time at 66% of Max. Load (ms) (c) Stop Distance at Max. - Page 144 (b) Stop Distance at 66% of Max. Load (rad) (e) Stop Time at 66% of Max. Load (ms) (c) Stop Distance at Max. Load (rad) (f) Stop Time at Max. Load (ms) Figure C.8: Stop Distance and Stop Time of Joint 2 (Shoulder) Doosan Robotics Installation Manual v2.1...
- Page 145 (a) Stop Distance at Max. Stretch Level (rad) (b) Stop Time at Max. stretch Level (ms) Figure C.9: Stop Distance and Stop Time of Joint 3 (Elbow)
-
Page 146: Stop Category 0
Joint 2 (�� 0.079 ��2 Joint 3 (�� 0.119 ��3 Distance (�� 0.185 ���� The joint 2 and joint 3 angles are refer to �� , �� , �� in table C.2 ��2 ��3 �� Doosan Robotics Installation Manual v2.1... -
Page 147: M1509
C.5 M1509 C.5.1 Stop Category 1 (a) Stop Distance at 33% of Max. Load (rad) (d) Stop Time at 33% of Max. Load (ms) (b) Stop Distance at 66% of Max. Load (rad) (e) Stop Time at 66% of Max. Load (ms) (c) Stop Distance at Max. - Page 148 (b) Stop Distance at 66% of Max. Load (rad) (e) Stop Time at 66% of Max. Load (ms) (c) Stop Distance at Max. Load (rad) (f) Stop Time at Max. Load (ms) Figure C.11: Stop Distance and Stop Time of Joint 2 (Shoulder) Doosan Robotics Installation Manual v2.1...
- Page 149 (a) Stop Distance at Max. Stretch Level (rad) (b) Stop Time at Max. stretch Level (ms) Figure C.12: Stop Distance and Stop Time of Joint 3 (Elbow)
-
Page 150: Stop Category 0
Joint 2 (�� 0.155 ��2 Joint 3 (�� 0.134 ��3 Distance (�� 0.258 ���� The joint 2 and joint 3 angles are refer to �� , �� , �� in table C.2 ��2 ��3 �� Doosan Robotics Installation Manual v2.1... -
Page 151: H2017
C.6 H2017 C.6.1 Stop Category 1 (a) Stop Distance at 33% of Max. Load (rad) (d) Stop Time at 33% of Max. Load (ms) (b) Stop Distance at 66% of Max. Load (rad) (e) Stop Time at 66% of Max. Load (ms) (c) Stop Distance at Max. - Page 152 (b) Stop Distance at 66% of Max. Load (rad) (e) Stop Time at 66% of Max. Load (ms) (c) Stop Distance at Max. Load (rad) (f) Stop Time at Max. Load (ms) Figure C.14: Stop Distance and Stop Time of Joint 2 (Shoulder) Doosan Robotics Installation Manual v2.1...
- Page 153 (a) Stop Distance at Max. Stretch Level (rad) (b) Stop Time at Max. stretch Level (ms) Figure C.15: Stop Distance and Stop Time of Joint 3 (Elbow)
-
Page 154: Stop Category 0
Joint 2 Extension=100%, Speed=100%, Payload=100% Stopping distance (rad) Stopping time (ms) Axis 2 0.09471 296.568 Axis 3 0.44703 Joint 3 Extension=100%, Speed=100%, Payload=100% Stopping distance (rad) Stopping time (ms) Axis 2 0.14045 178.785 Axis 3 0.12168 Doosan Robotics Installation Manual v2.1... -
Page 155: H2515
C.7 H2515 C.7.1 Stop Category 1 (a) Stop Distance at 33% of Max. Load (rad) (d) Stop Time at 33% of Max. Load (ms) (b) Stop Distance at 66% of Max. Load (rad) (e) Stop Time at 66% of Max. Load (ms) (c) Stop Distance at Max. - Page 156 (b) Stop Distance at 66% of Max. Load (rad) (e) Stop Time at 66% of Max. Load (ms) (c) Stop Distance at Max. Load (rad) (f) Stop Time at Max. Load (ms) Figure C.17: Stop Distance and Stop Time of Joint 2 (Shoulder) Doosan Robotics Installation Manual v2.1...
- Page 157 (a) Stop Distance at Max. Stretch Level (rad) (b) Stop Time at Max. stretch Level (ms) Figure C.18: Stop Distance and Stop Time of Joint 3 (Elbow)
-
Page 158: Stop Category 0
Joint 2 Extension=100%, Speed=100%, Payload=100% Stopping distance (rad) Stopping time (ms) Axis 2 0.09471 296.568 Axis 3 0.44703 Joint 3 Extension=100%, Speed=100%, Payload=100% Stopping distance (rad) Stopping time (ms) Axis 2 0.14045 178.785 Axis 3 0.12168 Doosan Robotics Installation Manual v2.1... -
Page 159: Annex D Dc Controller (Cs-02)
Annex D DC Controller (CS-02) D.1 Product Introduction D.1.1 Names and Functions D.1.1.1 DC Controller (CS-02) Item Description I/O connection Used to connect the controller or peripherals. terminal (internal) Used to turn ON/OFF the main power of the controller Power switch Teach pendant cable connection Used to connect the teach pendant cable to the... -
Page 160: System Configuration
It features various I/O ports that allow the connection and use of various equipment and devices. • Manipulator: It is an industrial collaborative robot that can perform transport or assembly tasks with various tools. Doosan Robotics Installation Manual v2.1... -
Page 161: Nameplate And Label
D.1.3 Nameplate and Label... -
Page 162: Installation
Check the input power supply when connecting power to the product. If the connected input power supply is different from the rated power input (22-60VDC), the product many not operate properly or the controller may be damaged. Doosan Robotics Installation Manual v2.1... -
Page 163: Installation Environment
D.2.2 Installation Environment the controller, consider the following When installing • Secure sufficient space before installing the controller. • The controller must be fixed. • Make sure no component is not fixed in the mobile vehicle. -
Page 164: Hardware Installation
After placing the controller, use M5 bolts in six 6 mm holes in the fixation plate to secure the controller.. (if the control is placed horizontally, use five M5 bolts) Caution Tighten the bolts all the way to to prevent loosening. Doosan Robotics Installation Manual v2.1... - Page 165 D.2.3.2 Connecting the Manipulator and Controller Connect the manipulator cable to the corresponding controller connector and place a securing ring on it to prevent the cable from becoming loose. Push the manipulator cable’s opposite end into the corresponding controller connector until a click is heard to prevent the cable from becoming loose. Connect the manipulator cable to the controller, place a securing ring Connect the manipulator cable’s opposite end to the controller connector...
- Page 166 If the controller is influenced by noise generated by electromagnetic waves, it is necessary to install a ferrite core to ensure normal operation. The installation location is as follows: Doosan Robotics Installation Manual v2.1...
- Page 167 D.2.3.3 Connecting the Controller and Teach Pendant Push the teach pendant cable into the corresponding controller connector until a click is heard to prevent the cable from becoming loose. Connect the teach pendant cable to the controller connecter Caution Make sure that the pins of the cable end are not damaged or bent before connecting the cable.
- Page 168 If the teach pendant is influenced by noise generated by electromagnetic waves, it is necessary to install a ferrite core to ensure normal operation. The installation location is as follows: Doosan Robotics Installation Manual v2.1...
- Page 169 D.2.3.4 Routing of Manipulator Cable and Teach Pendant Cable Ensure that the manipulator and teach pendant cable curvature radius is greater than the minimum curvature radius (120 mm). Caution Ensure that the curvature radius between the teach pendant cable and teach pendant connector is greater than the minimum curvature radius (120 mm).
- Page 170 Make sure that all cables are properly connected before supplying power to the controller. Always use the original cable included in the product package. Be careful not to connect the polarity of the input voltage incorrectly. Doosan Robotics Installation Manual v2.1...
- Page 171 Note When configuring the system, it is recommended to install a power switch that can turn off power to all devices in the system at once. If a controller for the AGV is used, the robot’s movement may be limited according to the load and motion.
-
Page 172: Interface
D.3 Interface D.3.1 Connecting Controller I/O controller controller External devices can be connected to the through the I/O terminal after removing the I/O connection plate. Doosan Robotics Installation Manual v2.1... -
Page 173: Network Connection
D.3.2 Network Connection External Internet network, TCP/IP equipment, Modbus equipment and SVM can be connected to the network router in the controller after removing the network connection plate. -
Page 174: Annex E Ip Steel Controller (Cs-01P)
Used to connect the teach pendant cable to the controller. terminal robot cable connection Used to connect the robot cable to the controller. terminal Power connection Used to connect the controller power supply. terminal Doosan Robotics Installation Manual v2.1... -
Page 175: System Configuration
E.1.2 System Configuration Power Command/ Supply/ Monitoring Network Teach pendant Controller Manipulator • Teach pendant: It is a device that manages the overall system, and it is capable of teaching the robot specific poses and setting robot and controller related settings. •... -
Page 176: Nameplate And Label
E.1.3 Nameplate and Label Doosan Robotics Installation Manual v2.1... -
Page 177: Installation
E.2 Installation E.2.1 Cautions during Installation Caution • Secure sufficient space for installation before installing the controller. If not enough space is secured, the controller may be damaged or the robot or teach pendant cable may have a shortage. • Check the input power supply when connecting power to the product. - Page 178 E.2.2 Installation Environment When installing the controller, consider the following. • Secure sufficient space for installation before installing the controller. • The controller must be fixed. Doosan Robotics Installation Manual v2.1...
- Page 179 E.2.3 Hardware Installation Install the robot, controller and teach pendant, the key components of the system, and supply power to them before operating the robot. Installation of each component is as follows: E.2.3.1 Connecting the Manipulator and Controller Connect the manipulator cable to the corresponding controller connector and place a securing ring on it to prevent the cable from becoming loose.
- Page 180 If the controller is influenced by noise generated by electromagnetic waves, it is necessary to install a ferrite core to ensure normal operation. The installation location is as follows: Doosan Robotics Installation Manual v2.1...
- Page 181 E.2.3.2 Connecting the Controller and Teach Pendant Push the teach pendant cable into the corresponding controller connector until a click is heard to prevent the cable from becoming loose. Connect the teach pendant cable to the controller connector Caution Make sure that the pins of the cable end are not damaged or bent before connecting the cable.
- Page 182 If the teach pendant is influenced by noise generated by electromagnetic waves, it is necessary to install a ferrite core to ensure normal operation. The installation location is as follows: Doosan Robotics Installation Manual v2.1...
- Page 183 E.2.3.3 Routing of Manipulator Cable and Teach Pendant Cable Ensure that the manipulator and teach pendant cable curvature radius is greater than the minimum curvature radius (120 mm).
- Page 184 Make sure that all cables are properly connected before supplying power to the controller. Always use the original cable included in the product package. Be careful not to connect the polarity of the input voltage incorrectly. Doosan Robotics Installation Manual v2.1...
- Page 185 Note When configuring the system, it is recommended to install a power switch that can turn off power to all devices in the system at once. If the input voltage is less than 195V, the robot’s movement may be limited according to the load and motion.
- Page 186 Annex F H-Series Handling Guide Doosan Robot H2515 | H2017 Handling Guide Doosan Robotics does not assume responsibility for any damages caused by the use of lifting equipment. robot robot If the is transported by packaging it with packaging materials, store the...
- Page 187 Quick Guide Thank you for choosing this Doosan Robotics product. This guide provides the minimum amount of information required for three handling methods for relocation and installation of the H-Series robot safely. Make sure to follow the instructions in this guide when handling the robot.
- Page 188 ◼ When installation, relocate the using the lower packaging materials while taking cautio robot n to avoid damage to the Insertion of Forklift Insertion of Forklift Doosan Robotics Installation Manual v2.1...
- Page 189 When Lifting Equipment is Unavailable robot ◼ If you need to relocate the due to the unavailability of lifting equipment, relocate the robot complying with the regional and national transport work standards. ◼ It is recommended to use the lower packaging materials as handles as below. Carrying Handle Carrying Handle Note...
- Page 190 Doosan Robotics Installation Manual v2.1...
Need help?
Do you have a question about the M0609 and is the answer not in the manual?
Questions and answers