Table of Contents
Advertisement
Quick Links
AF-5, AF-5U Quick Start Guide
AF-5, AF-5U Quick Start Guide
Package Contents
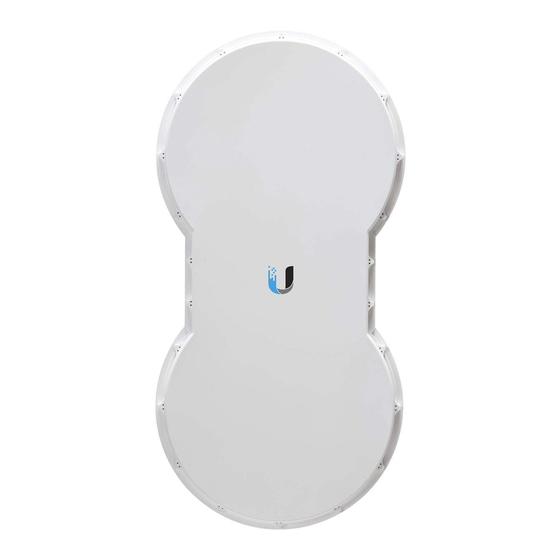
airFiber AF-5/AF-5U
I-Bracket
Upper Mount Bracket with
Elevation Rod
Lower Mount Bracket
Pole Clamps (Qty. 2)
M10x150 Carriage Bolts (Qty. 4)
M10x100 Carriage Bolts (Qty. 2)
Serrated Flange Bolts (Qty. 4)
Stabilizer Brackets (Qty. 2)
Serrated Flange Nuts (Qty. 6)
Zip Ties (Qty. 2)
Gigabit PoE (50V, 1.2A)
https://dl.ubnt.com/qsg/AF-5_AF-5U/AF-5_AF-5U_EN.html[2/17/2020 12:42:26 PM]
Advertisement
Table of Contents

Related Manuals for Ubiquiti airFiber AF-5


Summary of Contents for Ubiquiti airFiber AF-5
- Page 1 AF-5, AF-5U Quick Start Guide AF-5, AF-5U Quick Start Guide Package Contents airFiber AF-5/AF-5U I-Bracket Upper Mount Bracket with Elevation Rod Lower Mount Bracket Pole Clamps (Qty. 2) M10x150 Carriage Bolts (Qty. 4) M10x100 Carriage Bolts (Qty. 2) Serrated Flange Bolts (Qty. 4) Stabilizer Brackets (Qty.
-
Page 2: Hardware Overview
AF-5, AF-5U Quick Start Guide Power Cord Hardware Overview Reset Button To reset to factory defaults, press and hold the Reset button for more than five seconds while the unit is powered on. Remote Display Displays the received signal strength in dBm of the remote airFiber radio. Local Display Displays the received signal strength in dBm of the local airFiber radio. - Page 3 AF-5, AF-5U Quick Start Guide 10/100 Mbps, secured port for configuration. By default, this is the only port that can monitor, configure, and/or update firmware. Aux Port Port for audio tone aiming. Data Port 10/100/1000 Mbps port handles all user traffic. GPS LED No GPS synchronization Operational (strong signal)
- Page 4 AF-5, AF-5U Quick Start Guide Normal Flash Beaconing Long Flash Registering Operational Overload LED Fast Flash Overload condition (Unlabeled) LED 10x (1024QAM MIMO) 8x LED 256QAM MIMO 6x LED 64QAM MIMO 4x to 0.25x LED 16QAM MIMO Long Flash QPSK MIMO Normal Flash 1x QPSK xRT Short Flash...
-
Page 5: Installation Requirements
AF-5, AF-5U Quick Start Guide Data Port Activity LED No Ethernet link. Ethernet link established. Random Flashing Ethernet activity. Data Port Speed LED 10/100 Mbps 1000 Mbps Short Flash (1:3 on/off cycle), Normal Flash (1:1 on/off cycle), Long Flash (3:1 on/off cycle) xtreme Range Technology Installation Requirements Pre-Assembly Tool... -
Page 6: Installation Overview
AF-5, AF-5U Quick Start Guide Note: For guidelines about grounding and lightning protection, follow your local electrical regulatory codes. Outdoor, shielded Category 6 (or above) cabling and shielded RJ45 connectors are required for all wired Ethernet connections. Installation Overview We recommend that you configure your paired airFiber radios before mounting. Below is an overview of the installation with specific details in the following instructions: Connect Power over Ethernet to the Data port, and connect an Ethernet cable between your computer and the Management port. -
Page 7: Airfiber Configuration
AF-5, AF-5U Quick Start Guide airFiber Configuration This section explains how to access the airFiber Configuration Interface and configure the following settings: Wireless Mode Configure one airFiber radio as the Master and the other as the Slave. Duplex The airFiber radio supports both half-duplex and full-duplex operation. Half- duplex operation provides more frequency planning options at the cost of higher latency and throughput. - Page 8 AF-5, AF-5U Quick Start Guide the Slave, and vice versa. 1. Connect an Ethernet cable from your computer to the Management port on the airFiber radio. 2. Configure the Ethernet adapter on your computer with a static IP address on the 192.168.1.x subnet.
- Page 9 AF-5, AF-5U Quick Start Guide Note: U.S. product versions are locked to the U.S. Country Code to ensure compliance with FCC regulations. 5. The Main tab will appear. Click the Tools drop-down and select Link Calculator. This tool will guide you on how to best minimize bandwidth and power/interference issues. Note: If you do not see the Link Calculator, upgrade the firmware on your airFiber radios.
- Page 10 AF-5, AF-5U Quick Start Guide 8. Enter the Basic Wireless Settings: a. For one airFiber radio, select Master as the Wireless Mode. For the other airFiber radio, keep the default, Slave. b. Enter a name in the Link Name field. This should be the same on both the Master and the Slave.
-
Page 11: Hardware Installation
AF-5, AF-5U Quick Start Guide IP Address. (If the airFiber radios use the same IP Address, you may lose access to the airFiber radios via the Data ports.) Click the Network tab. a. For the Management IP Address option: DHCP Keep the default, DHCP, to use DHCP reservation on your router to assign a unique IP Address. - Page 12 AF-5, AF-5U Quick Start Guide Note: Ensure that the orientation of the Upper Mount Bracket matches the illustration below, with the Elevation Rod on the correct side. https://dl.ubnt.com/qsg/AF-5_AF-5U/AF-5_AF-5U_EN.html[2/17/2020 12:42:26 PM]...
- Page 13 AF-5, AF-5U Quick Start Guide https://dl.ubnt.com/qsg/AF-5_AF-5U/AF-5_AF-5U_EN.html[2/17/2020 12:42:26 PM]...
- Page 14 AF-5, AF-5U Quick Start Guide https://dl.ubnt.com/qsg/AF-5_AF-5U/AF-5_AF-5U_EN.html[2/17/2020 12:42:26 PM]...
-
Page 15: Pole Mounting
AF-5, AF-5U Quick Start Guide Pole-Mounting https://dl.ubnt.com/qsg/AF-5_AF-5U/AF-5_AF-5U_EN.html[2/17/2020 12:42:26 PM]... - Page 16 AF-5, AF-5U Quick Start Guide https://dl.ubnt.com/qsg/AF-5_AF-5U/AF-5_AF-5U_EN.html[2/17/2020 12:42:26 PM]...
- Page 17 AF-5, AF-5U Quick Start Guide https://dl.ubnt.com/qsg/AF-5_AF-5U/AF-5_AF-5U_EN.html[2/17/2020 12:42:26 PM]...
- Page 18 AF-5, AF-5U Quick Start Guide https://dl.ubnt.com/qsg/AF-5_AF-5U/AF-5_AF-5U_EN.html[2/17/2020 12:42:26 PM]...
- Page 19 AF-5, AF-5U Quick Start Guide Install a Ground Wire https://dl.ubnt.com/qsg/AF-5_AF-5U/AF-5_AF-5U_EN.html[2/17/2020 12:42:26 PM]...
-
Page 20: Connecting Ethernet
AF-5, AF-5U Quick Start Guide Secure the other end of the ground wire to a grounded mast, pole, tower, or grounding bar. WARNING: Failure to properly ground your airFiber units will void your warranty. Note: The ground wire should be as short as possible and no longer than one meter in length. -
Page 21: Surge Protection
Surge Protection For added protection, install two surge suppressors, such as the Ubiquiti Ethernet Surge Protector, model ETH-SP, at the end of each link. Install the first surge protector within one meter of the airFiber DATA port, and install the second surge protector at the ingress point of the location housing the wired network equipment. - Page 22 AF-5, AF-5U Quick Start Guide Alignment Tips To accurately align the airFiber radios for best performance, you MUST align only one end of the link at a time. For more convenient alignment, you may consider using long-range scopes (not included) temporarily attached to your airFiber radios.
-
Page 23: Establishing A Link
AF-5, AF-5U Quick Start Guide GPS and Master LEDs are solidly lit Note: The GPS LED may not be lit if there is a weak GPS signal. A GPS signal is not required for alignment. Link Status LED flashes (Normal Flash 1:1) Remote and Local LED Displays show a double dash Note: The Local LED Display may briefly flash a large number (such as 95) when there... - Page 24 AF-5, AF-5U Quick Start Guide 2. Ensure that the pole mount fits snugly while keeping the four Serrated Flange Nuts on the Pole Clamps loose enough to allow rotation around the pole for azimuth alignment. https://dl.ubnt.com/qsg/AF-5_AF-5U/AF-5_AF-5U_EN.html[2/17/2020 12:42:26 PM]...
- Page 25 AF-5, AF-5U Quick Start Guide Master Visually aim the Master at the Slave. To adjust the Master's position: a. Rotate the airFiber radio on the pole to align the azimuth. b. Use the hex nut on the Elevation Rod to adjust the elevation. https://dl.ubnt.com/qsg/AF-5_AF-5U/AF-5_AF-5U_EN.html[2/17/2020 12:42:26 PM]...
- Page 26 AF-5, AF-5U Quick Start Guide Note: Do NOT make simultaneous adjustments on the Master and Slave. Slave Visually aim the Slave at the Master. To adjust the Slave's position: a. Rotate the airFiber radio on the pole to align the azimuth. b.
-
Page 27: Installer Compliance Responsibility
LED Display of the Master. Note: If the Overload LED lights up, refer to the airFiber AF-5/AF-5U User Guide at: ui.com/download/airfiber 8. Repeat steps 6 and 7 until you achieve a symmetric link, with the signal levels within 1 dB of each other. -
Page 28: Specifications
The Frequency and Output Power fields are provided to the professional installer to assist in meeting regulatory requirements. Specifications airFiber AF-5/AF-5U Dimensions 938.4 x 468.4 x 281.4 mm (36.94 x 18.44 x 11.08") -
Page 29: Safety Notices
AF-5, AF-5U Quick Start Guide (42-58VDC) Mounting Pole Mount Kit (Included) Wind Loading 863 N @ 200 km/hr (194 lbf @ 125 mph) Wind Survivability 200 km/hr (125 mph) Operating Temperature -40 to 55° C (-40 to 131° F) Certifications CE, FCC, IC Networking Interface Data Port... -
Page 30: Limited Warranty
AF-5, AF-5U Quick Start Guide Limited Warranty ui.com/support/warranty The limited warranty requires the use of arbitration to resolve disputes on an individual basis, and, where applicable, specify arbitration instead of jury trials or class actions. Compliance Changes or modifications not expressly approved by the party responsible for compliance could void the user’s authority to operate the equipment. - Page 31 AF-5, AF-5U Quick Start Guide licence. L’exploitation est autorisée aux deux conditions suivantes : 1. l’appareil ne doit pas produire de brouillage; 2. l’appareil doit accepter tout brouillage radioélectrique subi, même si le brouillage est susceptible d’en compromettre le fonctionnement. Le présent émetteur radio a été...
-
Page 32: Weee Compliance Statement
Operation in the 5.8 GHz frequency band is prohibited in BFWA member states. Other countries listed may use the 5.8 GHz frequency band. WEEE Compliance Statement Declaration of Conformity Online Resources © 2020 Ubiquiti Inc. All rights reserved. https://dl.ubnt.com/qsg/AF-5_AF-5U/AF-5_AF-5U_EN.html[2/17/2020 12:42:26 PM]...
Need help?
Do you have a question about the airFiber AF-5 and is the answer not in the manual?
Questions and answers