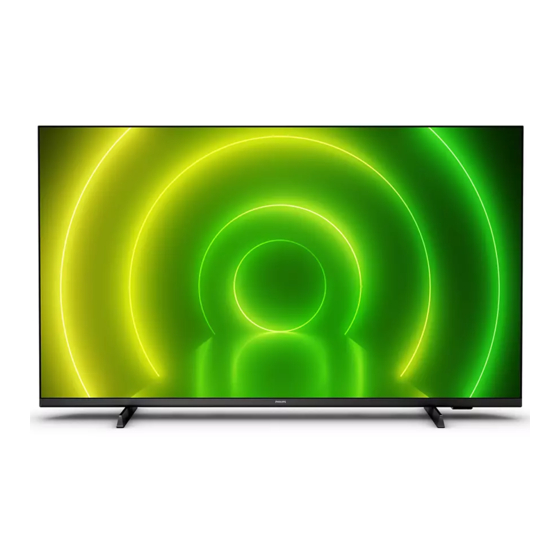
Philips 7406 Series User Manual

Philips 7406 Series User Manual

Hide thumbs Also See for 7406 Series:

Advertisement

Quick Links

Smart Display
7406 Series
User Manual
43PUH7406
43PUH7466
Register your product and get support at
www.philips.com/TVsupport

Advertisement

Table of Contents
loading

Summary of Contents for Philips 7406 Series

  • Page 1 Smart Display 7406 Series User Manual 43PUH7406 43PUH7466 Register your product and get support at www.philips.com/TVsupport...
  • Page 2: Table Of Contents

    Contents 1 Home Screen 11.1 From a USB Connection 1.1 Home Screen and Programs 11.2 Play your Videos 1.2 Open the Home Screen 11.3 View your Photos 11.4 Play your Music 2 Setting Up 2.1 Read Safety 11.5 View your Text 2.2 Display Stand and Wall Mounting 12 Smartphones and Tablets 2.3 Tips on Placement...
  • Page 3: Home Screen

    right corner. Home Screen Accessing USB flash drive from Home To view the files from the USB flash drive, you need to add the MMP (MultiMediaPlayer) app to the Home page first. Press Home, clicking the Apps icon at the Home Screen and Programs left end of the Apps row.
  • Page 4: Setting Up

    In case you lost this guide, you can dust regularly to avoid getting dust into the display. download it from www.philips.com. Use the model number of the display to look for the Quick Start Guide to download.
  • Page 5: Remote Control

    Middle Remote Control Key Overview 1 - OK key To confirm a selection or setting. To open the program list while watching display. 2 - Back • To return to previous menu or display source. 1 - Power (Standby / On) •...
  • Page 6: Pair Your Remote Control To Display

    1 - EXIT the PAIR key (approximate for 3 seconds) for To leave from current menu or App. pairing. 2 - Volume Alternatively, go Settings > Remote & Press + or - to adjust the volume level. Accessories > Add Accessory, then follow the on- screen instructions.
  • Page 7: Cleaning

    Remove the batteries if you are not using the remote control for a long time. Safely dispose of your old batteries according to the end of use directions. For more information, in Help, select Keywords and look up End of use. Cleaning Your remote control is treated with a scratch-resistant coating.
  • Page 8: Switching On And Off

    Switching On and Make sure the display is connected to the mains AC power. The indicator light at the bottom of the display lights up. Switch on Press Power on the remote control to switch the display on. You can also press the small joystick key on the bottom of the display to switch the display on in case you can't find the remote control or its batteries are empty.
  • Page 9: Connect Devices

    Connect Devices About Connections Connectivity Guide Always connect a device to the display with the highest quality connection available. Also, use good quality cables to ensure a good transfer of picture and sound. HDMI CEC When you connect a device, the display recognizes its type and gives each device a correct type Connect HDMI CEC-compatible devices to your name.
  • Page 10: Home Theatre System - Hts

    > HDMI EDID Version. Audio to video synchronisation (sync) If the sound does not match the video on screen, you can set a delay on most Home Theatre Systems with CEC Device List a disc player to match the sound with the video. Check the connected HDMI CEC device list.
  • Page 11: Audio Device

    Copy protection HDMI ports support HDCP (High-bandwidth Digital USB Hard Drive Content Protection). HDCP is a copy protection signal that prevents copying content from a DVD disc or Blu- ray Disc. Also referred to as DRM (Digital Rights Installation Management). Before you can pause or record a broadcast, you must connect and format a USB Hard Drive.
  • Page 12: Usb Flash Drive

    To stop watching the USB flash drive content, Formatting press EXIT or select another activity. Exit the MMP app before you disconnect the flash drive. Before you can pause or record a broadcast, or store To remove the USB flash drive safely… apps, you must connect and format a USB Hard Drive*.
  • Page 13: Bluetooth

    Select a Device Bluetooth To select a wireless device… 1 - Press MENU > options > Settings > Remote What You Need & Accessories and press OK. 2 - In the list, select the wireless device and You can connect a wireless device with Bluetooth® to press OK.
  • Page 14: Connect Your Android Display

    successful. Connect your Problems Android Display Wireless network not found or distorted • Microwave ovens, DECT phones or other Wi-Fi 802.11b/g/n devices in your proximity might disturb Network and Internet the wireless network. • Make sure that the firewalls in your network allow access to the display's wireless connection.
  • Page 15: Google Account

    IP addressing, set the display to Static IP. Google Account Sign In To enjoy the full capabilities of your Philips Android Display, you can sign in to Google with your Google Account. By signing in you'll be able to play your favourite games across phone, tablet and display.
  • Page 16: Apps

    Find more information on www.support.google.com/androidtv Apps Music About Apps With YouTube Music you can play your favourite music on display and buy new music on your You can find your favourite Apps on Apps row in the computer or mobile device. Or, on your display, you Home menu.
  • Page 17: Start Or Stop An App

    4 - When done, press Back repeatedly or Payments press EXIT or stop the app with its dedicated exit/stop button. To make a payment on Google Play on display, you If the App is not on you Home screen, you can add must add a form of payment - a credit card (outside via the Apps page or by the Add app to favourites the United States) - to your Google Account.
  • Page 18: Sources

    Sources Switch to a device From the list of Sources, you can switch to any of the connected devices. You can switch to a tuner to watch display or switch to your connected devices to watch their programme, a digital receiver or a Blu-ray Disc player.
  • Page 19: Settings

    Dolby Vision Notification Settings MENU > options > Picture > Dolby Vision Notification and press OK. 10.1 Switch On or Off the Dolby Vision notification Display Options when Dolby Vision content begins to play on your display. Press MENU while watching display, press Navigation keys up or down to select one of below menus.
  • Page 20: Sound Settings

    when the game content is notified by source. Other Picture Settings MENU > options > Picture and press OK. Colour Tuner Backlight Fine tune the colour setting yourself. Adjust the video backlight intensity. 11 Point White Balance Alignment Brightness Customize the whitepoint balance based on the Set the level of brightness of the picture signal.
  • Page 21: Power Settings

    For some Home Theatre Systems you might need to off. adjust the audio sync delay to synchronise the audio * If you use the display as a display or use a digital to the video. Select 0 if a sound delay is set on your receiver to watch display (a Set-Top Box - STB) and Home Theatre System.
  • Page 22: Reboot

    Location Keyboard Set the location status. Set the on-screen keyboard type. Usage & Diagnostics Inputs Set to on for automatically send diagnostic information to Google, such as crash reports and Rename the Inputs name and adjust the settings for usage data from your device, apps and Chromecast Consumer Electronic Control (CEC).
  • Page 23: Factory Reset

    10.8 Factory Reset Reset all settings value to original Display settings Home > Settings > Device Preferences > About > Factory reset. This will erase all data from your device's internal storage, including: your Google account, system app data, download apps, and settings. All settings will be reset and installed programs will be erased.
  • Page 24: Videos, Photos, Music & Text

    11.3 View your Photos Videos, Photos, Music & Text View Photos View a photo 11.1 1 - Press Home, select MMP from the Apps list and From a USB Connection press OK. 2 - Use Navigation keys to select Photo. 3 - Select one of the photos, and press OK.
  • Page 25: Play Your Music

    Display the information of the picture file. Press OK to play or pause the text file preview. Photo Frame image Repeat Set the picture as Photo Frame image. Preview the text files repeatedly or once. Picture Shuffle On, Shuffle Off Adjust the picture settings.
  • Page 26: Smartphones And Tablets

    Smartphones and Tablets 12.1 Google Cast What You Need If an app on your mobile device has Google Cast, you can cast your app on this display. On the mobile app, look for the Google Cast icon. You can use your mobile device to control what's on display.
  • Page 27: Netflix

    Netflix If you have a Netflix membership subscription, you can enjoy Netflix on this display. Your display must be connected to the Internet. In your region, Netflix might only come available with future software updates. To open Netflix, press NETFLIX on the remote control to open the Netflix App.
  • Page 28: Software

    Software 14.1 Update Software Local Updates You need a computer with an high-speed Internet connection and a USB flash drive to upload the software on the display. Use a USB flash drive with at least 2GB free space. Make sure that write protection is switched off.
  • Page 29: Specifications

    Please take time to learn more about the different recycling processes for electrical and electronic Specifications products in your local area. Please ensure to follow local regulations, do not 15.1 dispose of your old products together with general Environmental household waste. Disposing of your old electronic products correctly will minimise any negative impact on the environment and the health of others.
  • Page 30: Display Type

    • Dolby Dialogue Enhancement 15.4 • Dolby Volume (AVL/Night Mode) Display Type • AI Sound Diagonal screen size • 108 cm / 43 inch 15.8 Multimedia Display resolution • 3840 x 2160 Connections • USB 2.0 15.5 • Ethernet LAN RJ-45 Display Input Resolution •...
  • Page 31: Help And Support

    No picture / distorted picture Go to www.philips.com/TVsupport • Make sure that the antenna is properly connected to the display. • Make sure that the correct device is selected as the 16.2...
  • Page 32 • Make sure that the audio and picture file formats are Sound supported by the display. Choppy playback of USB files No sound or poor sound quality • The transfer performance of the USB storage device If no audio signal is detected, the display may limit the data transfer rate to the display which automatically switches the audio output off —...
  • Page 33: Online Help

    16.3 Online Help To solve any Philips display related problem, you can consult our online support. You can select your language and enter your product model number. Go to www.philips.com/TVsupport On the support site you can find your country's telephone number to contact us as well as answers to frequently asked questions (FAQs).
  • Page 34: Safety And Care

    RoHS regulatory requirements High-gain directional aerials can only be used in fixed point-to-point systems. Device name: Philips LED-backlit smart display Model (type): 43PUH7406/96 43PUH7466/96 Risk of Electric Shock or Fire • Do not expose the display to rain or water.
  • Page 35 • Parts of this product are made of glass. Handle with medical attention. care to avoid injury or damage. • Risk of fire or explosion if the battery is replaced by an incorrect type. Risk of damage to the display ! •...
  • Page 36: Screen Care

    17.2 Screen Care • Never touch, push, rub or strike the screen with any object. • Unplug the display before cleaning. • Clean the display and frame with a soft damp cloth and wipe gently. Avoid touching the Ambilight* LEDs on the backside of the display.
  • Page 37: Terms Of Use

    Errors reported to Philips will be adapted and published on the Philips support website as soon as possible. Terms of warranty - Risk of injury, damage to display or void of warranty! Never attempt to repair the display yourself.
  • Page 38: Copyrights

    Copyrights 19.1 HDMI 19.4 Wi-Fi Alliance HDMI The terms HDMI, HDMI High-Definition Multimedia Interface, and the HDMI Logo are trademarks or Wi-Fi registered trademarks of HDMI Licensing The Wi-Fi CERTIFIED® Logo is a registered trademark Administrator, Inc. of Wi-Fi Alliance®. 19.2 19.5 Dolby Vision and Dolby...
  • Page 39 Disclaimer regarding services and/or software offered by third parties Services and/or software offered by third parties may be changed, suspended, or terminated without prior notice. TP Vision does not bear any responsibility in these sorts of situations.
  • Page 40: Index

    Wi-Fi Bluetooth, Devices Wired connection Bluetooth, Remove device Wireless connection Bluetooth, Select device Connectivity Guide Consumer Care Contact Philips Display mode Disposal of display or batteries End of use Factory Reset Home Media Media files, from a USB drive Network connection...

This manual is also suitable for:

43puh740643puh7466

Table of Contents