
Related Manuals for HELIX V TWELVE DSP MK2


Summary of Contents for HELIX V TWELVE DSP MK2
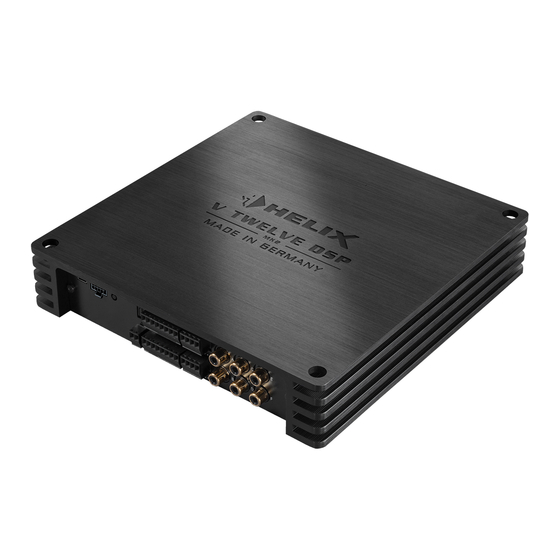
- Page 1 V TWELVE DSP 12-Kanal Verstärker mit integriertem DSP 12-channel amplifier with integrated DSP...
-
Page 2: Herzlichen Glückwunsch
überzeugende Anwendung ausgereifter Technolo- gien aus. Audiotec Fischer setzt mit der HELIX V TWELVE DSP MK2 neue Maßstäbe im Bereich der Verstärkertechnik. Dabei profitieren Viel Freude an diesem Produkt wünscht Ihnen das Sie als Kunde direkt von unserer mehr als 30-jäh-... -
Page 3: Anschluss- Und Bedienelemente
Hochpegel-Lautsprechereingang zum An- schluss von Werksradios oder Radios ohne Vorverstärkerausgänge. SCP (Smart Control Port) Multifunktionsanschluss – dient zum An- schluss einer Fernbedienung und weiterem Line Input HELIX Zubehör. Cinch-Eingänge Anschluss eines Vorverstärkersignals. Control Taster Dient zum Umschalten der Sound Setups Status LED oder zum Resetten des Gerätes. -
Page 4: Optical Input
NanoFit Adapter 3 Control Taster 5 Highlevel Input Die V TWELVE DSP MK2 bietet 10 interne Speicher- 12-Kanal Hochpegel-Lautsprechereingang. Mit Hil- plätze für Sound Setups. Mit Hilfe des Control fe dieses Eingangs kann der Verstärker direkt an die Tasters lässt sich zwischen zwei Speicherplätzen Lautsprecherausgänge eines Werks- / Nachrüstra-... -
Page 5: Line Input
Verwenden Sie in jedem Fall die- sen Ausgang, wenn Sie weitere Verstärker an den 6 Line Input Line Output der V TWELVE DSP MK2 anschließen, 6-Kanal Vorverstärkereingang zum Anschluss von da es ansonsten zu Störgeräuschen kommen kann. Signalquellen, z.B. Radios. Die Eingangsempfind- Dieser Ausgang aktiviert sich automatisch, sobald lichkeit ist für alle Kanäle ab Werk auf 2,8V Volt... -
Page 6: Line Output
Ausgangsspannung beträgt 3 Volt. Wenn Der Remote-Eingang dient zum Einschalten der Sie diesen Ausgang verwenden, ist es zwingend V TWELVE DSP MK2, sofern die am Highlevel- erforderlich, den Remote-Ausgang (Rem. Out) zum Eingang angeschlossene Signalquelle die automa- Einschalten des / der an den Line Output ange- tische Einschaltung nicht aktiviert oder der Verstär-... - Page 7 Einbau und Installation Die HELIX V TWELVE DSP MK2 wird wie nach- den. Achten Sie bitte auf eine korrekte Polung! folgend beschrieben angeschlossen. Wenn Sie einen oder mehrere Anschlüsse ver- polen, kann dadurch die Funktion des Verstär- Achtung: Für die Durchführung der nachfolgenden kers beeinträchtigt werden.
- Page 8 Sollten Sie sich bzgl. der Ausgangsspannung mit Hilfe der Jumper im Inneren des Geräts. Ihrer Signalquelle nicht sicher sein, kontaktie- 2. Feineinstellung mit Hilfe der DSP PC-Tool ren Sie Ihren HELIX Fachhändler. Software. Jumper-Steckpositionen Low Voltage Range Zu 1: Der werkseitig für alle Kanäle voreinge-...
- Page 9 Hauptsicherung abgesichert werden. Der Wert der Sicherung errechnet sich aus der maximalen Stromaufnahme der gesamten Car- Hifi Anlage (V TWELVE DSP MK2 = max. 80 A Advanced Gain Setup: Bei diesem Verfah- RMS bei 12 V Bordnetz). Verwenden Sie bei ren ist sowohl eine globale Einstellung aller kurzen Leitungen (<...
- Page 10 Folge. Der Pluspol ist bei den meisten Lautspre- schaltung über den Hochpegel-Lautsprecher- chern gekennzeichnet. Die Impedanz pro Kanal eingang der HELIX V TWELVE DSP MK2 akti- darf 2 Ohm nicht unterschreiten, da sonst die viert. Um die automatische Einschaltung zu Schutzschaltung des Verstärkers aktiviert wird.
- Page 11 Abbildung 1 – Low Voltage Range: Abbildung 2 – High Voltage Range: Wertebereich: Highlevel 4 - 16 Volt Wertebereich: Highlevel 8 - 32 Volt Cinch 1 - 4 Volt Cinch 2 - 8 Volt Für weitere Anwendungsfälle kontaktieren Sie bitte Ihren HELIX-Fachhändler.
- Page 12 Rear R Low – Tieftöner HR signal A bis D Amp Out K Subwoofer 1 – Subwoofer Subwoofer 1 (K) Amp Out L Subwoofer 2 – Subwoofer SFX - Augmented Bass Processing Für weitere Anwendungsfälle kontaktieren Sie bitte Ihren HELIX-Fachhändler.
-
Page 13: Anschluss An Den Computer
Anschluss an den Computer Die HELIX V TWELVE DSP MK2 kann mit Hilfe der Im folgenden Abschnitt lesen Sie die wichtigsten DSP PC-Tool Software frei konfiguriert werden. Die Schritte zum Anschluss und der ersten Inbetrieb- Software stellt alle Funktionen übersichtlich und nahme: 1. - Page 14 Virtual Channel Processing (VCP) Das Bedienkonzept des VCP Im Gegensatz zu bisherigen Methoden ist das Virtual Channel Processing (VCP) ein mehrstufiges Signalverarbeitungs-Konzept, welches die perfekte Konfiguration komplexer Soundsysteme ermöglicht und somit ganz neue Möglichkeiten des Klangtunings eröffnet. Die Funktion erweitert den bisherigen Umfang des Gerätes um eine neue Ebene an prozessierten Kanälen, welche sich zwischen den Ein- und Ausgängen befindet.
- Page 15 – Kanalübergreifender Gruppen-Equalizer Beispielanwendung: Aktives Mehrwege- System Wird ein Eingangssignal (bspw. Vorne links) erst auf einen virtuellen Kanal geroutet (Front L Full) und dieses Signal anschließend auf ein aktives Mehrwege-System geroutet (bspw. Vorne links – Hochtöner, Mitteltöner und Tieftöner), so ist es möglich, mit Hilfe des Equalizers des virtuellen Kanals alle nachgeschalteten einzelnen Kanäle gleichzeitig in ihrer Tonalität zu beeinflussen.
- Page 16 Konfiguration des Virtual Channel Processing (VCP) Um das VCP zu konfigurieren, muss zuerst das „Virtual Channel Processing“ im DCM-Menü der DSP PC- Tool Software eingeschaltet werden. Gehen Sie dazu in den „Virtual Channel Processing“-Tab und klicken auf die rechte Box mit der VCP-Grafik. Anschließend erfolgt die Konfiguration in drei Schritten – hier am Beispiel einer 3-Wege Konfiguration mit einem 2-Wege Eingangssignal erläutert.
- Page 17 Workflow-Schritt 2 – Ausgangsrouting Nachdem alle genutzten Eingangssignale in den jeweiligen Signal-Routing-Matrizen konfiguriert wurden, müssen die virtuellen Kanäle nun den physischen Ausgangskanälen zugeordnet werden. Hierbei kann ein virtuelles Signal (bspw. Front L Full) mehreren Ausgängen zugewiesen werden, wie beispielsweise dem vorderen linken Hochtöner, Mitteltöner und Tieftöner.
- Page 18 Um in den Genuss der DSP-Soundeffekte zu kommen, müssen bei der Hard- und Softwarekonfiguration bestimmte Einstellungen vorgenommen werden. Hinweis: Die DSP-Soundeffekte stehen bei der V TWELVE DSP MK2 nur im Virtual Channel Processing zur Verfügung. Dieses kann im DCM-Menü der DSP PC-Tool Software aktiviert werden.
- Page 19 2. Wechseln Sie in die „Virtual to Output Routing“ Matrix und routen den Kanal „Virtual E – Front Center Full“ auf den oder die gewünschten Ausgangskanäle (wie im Workflow-Schritt 2 beschrieben), auf wel- che das Center Processing angewendet werden soll. Hinweise zum Eingangsrouting siehe Workflow-Schritt 1 3.
- Page 20 DSP PC-Tool Software aktiviert und je nach Modell konfiguriert werden. Bei nicht aktiviertem VCP ist die Subwoofer-Fernbedienung bei der V TWELVE DSP MK2 fest den Ausgangs kanälen K und L (Output Channels) zugeordnet. In diesem Fall ist es nicht entscheidend, welcher Ausgang in der IO-Routingmatrix mit „Subwoofer“...
- Page 21 ACO Plattform-Features Neben den einzigartigen DSP-Sound effekten bietet Remote Output Configuration die ACO-Plattform des V TWELVE DSP MK2 zu- An dieser Stelle kann festgelegt werden, ob der sätzlich eine Vielzahl an System-Features. Remote-Ausgang, der die angeschlossenen End- Im DCM Menü der DSP PC-Tool Software können stufen ein- bzw.
- Page 22 Einbau einer HELIX Extension Card Der HELIX V TWELVE DSP MK2 Verstärker kann 6. Achten Sie auf den richtigen Sitz des HEC Mo- durch die Montage einer HELIX Extension Card duls und darauf, dass alle Kontaktstifte vollstän- (HEC) um weitere Funktionen erweitert werden –...
- Page 23 Mikrocontroller-gesteuerten ADEP.3-Schalt- Start-Stopfähigkeit kreis auch zukünftig auf Änderungen bei Diagno- Das Netzteil im HELIX V TWELVE DSP MK2 Ver- sesystemen von Werksradios anpassen zu können oder das Gerät um weitere Schnittstellen zu er- stärker stellt die interne Spannungsversorgung weitern.
-
Page 24: Technische Daten
Technische Daten Leistung RMS ≤ 1% THD+N - @ 4 Ohm ................ 12 x 75 Watt - @ 2 Ohm ................ 12 x 120 Watt Max. Leistung pro Kanal* ..........Bis zu 160 Watt RMS @ 2 Ohm Verstärkertechnologie ............Pure Class GD Eingänge ................ -
Page 25: General Instructions
HELIX dealer. ble cross-section for the connection of HELIX Install your HELIX V TWELVE DSP MK2 in a dry lo- V TWELVE DSP MK2. The fuses may only be re- placed by identically rated fuses (2 x 30 A) to cation with sufficient air circulation for proper cooling avoid damage of the amplifier. - Page 26 Connectors and control units USB Input Highlevel Input Connects the HELIX V TWELVE DSP MK2 Highlevel speaker inputs for connecting a to your PC. factory radio or an aftermarket radio without lowlevel line outputs. SCP (Smart Control Port) Multifunction interface for e.g. an optional Line Input remote control or other HELIX accessory.
-
Page 27: Usb Input
This completely erases the internal memory and is V TWELVE DSP MK2 using the provided USB ca- indicated by a continuous red glowing and constant ble. The required PC software to configure this am- green flashing of the Status LED. -
Page 28: Initial Start-Up And Functions
/ off additional amplifiers that are connected to damage to the lowlevel line outputs of your car ra- the Line Output of the HELIX V TWELVE DSP MK2. dio. Nevertheless it is possible to use the Highlevel This is essential to avoid any interfering signals. - Page 29 (Rem. Out) of the min. 16 mm² / AWG 6. V TWELVE DSP MK2. Never directly control the external amps by a signal from the ignition switch of your car! Additionally this output will be turned off when the “Power Save Mode”...
-
Page 30: Installation
Keep in mind that this Highlevel and lowlevel Line Input of an individ- will lead to full level on the outputs of the HELIX ual channel at the same time as this may cause V TWELVE DSP MK2 and your connected amplifiers. - Page 31 Low Voltage Range jumper plug-in positions (by sensitivity (Highlevel 11.3 Volts; RCA / Cinch default): 2.8 Volts) of the V TWELVE DSP MK2 are ap- Value range: Highlevel 4 - 16 Volts propriate for the most common radios. As soon...
- Page 32 The value of the fuse is calculated from the maximum total current draw of the whole car audio system (V TWELVE DSP MK2 = max. Advanced Gain Setup: With this method, 80 A RMS at 12 V power supply). If your power both a global setting of all channels and wires are short (less than 1 m / 40”) then a wire...
- Page 33 7. Configuration of the remote input directly to the wires of the loudspeakers. Never The V TWELVE DSP MK2 will be turned on au- connect any of the loudspeaker cables with the tomatically if the Highlevel Input is used or if a chassis ground as this will damage your ampli- fier and your speakers.
- Page 34 Figure 2 – High Voltage Range: Value range: Highlevel 4 - 16 Volts Value range: Highlevel 8 - 32 Volts RCA / Cinch 1 - 4 Volts RCA / Cinch 2 - 8 Volts For further applications please contact your HELIX specialist dealer.
-
Page 35: Configuration Examples
Rear R Low – mid-woofer RR A to D Amp Out K Subwoofer 1 – subwoofer Subwoofer 1 (K) Amp Out L Subwoofer 2 – subwoofer SFX - Augmented Bass Processing For further applications please contact your HELIX specialist dealer. - Page 36 USB driver are installed! the DSP PC-Tool software have been made. Es- pecially if the V TWELVE DSP MK2 will be used in In the following the most important steps how to fully active applications, a wrong setup can destroy connect and the first start-up are described: your speakers right away.
- Page 37 Virtual Channel Processing (VCP) Operating concept of the VCP In opposite to previous methods the Virtual Channel Processing (VCP) is a multi-stage signal processing concept that enables the perfect configuration of complex sound systems, opening up completely new possibilities for sound tuning. The function extends the previous scope of the device by an additional layer of processed channels, which is located between the inputs and outputs.
- Page 38 Virtual Channel Processing (VCP) – Cross-channel group equalizer Example application: Active multi-way speaker configuration If an input signal (e.g. front left) is first routed to a virtual channel (Front L Full) and this signal is then routed to an active multi-way system (e.g. front left – tweeter, midrange and woofer), the group equalizer of the virtual channel will influence all assigned output channels in their tonality.
- Page 39 Configuration of the Virtual Channel Processing (VCP) To configure the VCP, you first have to enable “Virtual Channel Processing” in the DCM menu of the DSP PC-Tool software. Therefore, go to the “Virtual Channel Processing” tab in the DCM menu and click on the right box with the VCP graphic.
- Page 40 Configuration of the Virtual Channel Processing (VCP) Workflow step 2 – Output routing After all the input signals used in the respective signal routing matrix have been configured, the virtual channels must now be assigned to the physical output channels. Here, a virtual signal (e.g. Front L Full) can be assigned to multiple outputs, such as “front left”...
- Page 41 Note: The DSP sound effects are only available in the V TWELVE DSP MK2 when “Virtual Channel Pro- cessing” is enabled. “VCP” can be activated in the DCM menu of the DSP PC-Tool software.
- Page 42 Configuration of the Virtual Channel Processing (VCP) 2. Change to the “Virtual to Output Routing” matrix and route the “Virtual E – Front Center Full” channel to the desired output channels (as described in workflow step 2) to which the center processing shall be applied.
- Page 43 DSP PC-Tool software and configured, depending on the model. If the VCP is not activated, the subwoofer remote control of the V TWELVE DSP MK2 is permanently assigned to the output channels K and L (Output Channels). In this case it does not matter which output is named “Subwoofer”...
- Page 44 ACO platform features Beside the unique DSP sound effects the Remote Output Configuration V TWELVE DSP MK2 provides a bunch of new sys- This function controls if the remote output (which tem features. switches on and off the connected amplifiers) will...
- Page 45 USB audio input. To install a HELIX Extension Card it is necessary to remove the side panel of the V TWELVE DSP MK2 and replace it by the new side panel that comes with the HEC module.
- Page 46 Unique Features of the HELIX V TWELVE DSP MK2 Pure Class GD amplifier technology Power Save Mode Audiotec Fischers proprietary Pure Class GD con- The Power Save Mode is incorporated in the ba- sic setup. It allows to significantly reduce the power...
-
Page 47: Technical Data
Technical Data Power RMS ≤ 1% THD+N - @ 4 Ohms ................12 x 75 Watts - @ 2 Ohms ................12 x 120 Watts Max. output power per channel* .........Up to 160 Watts RMS @ 2 Ohms Amplifier technology ............Pure Class GD Inputs .................. - Page 48 Audiotec Fischer GmbH Hünegräben 26 · 57392 Schmallenberg · Germany Tel.: +49 2972 9788 0 · Fax: +49 2972 9788 88 E-mail: helix@audiotec-fischer.com · Internet: www.audiotec-fischer.com...
Need help?
Do you have a question about the V TWELVE DSP MK2 and is the answer not in the manual?
Questions and answers