
Related Manuals for Philips NeoPix Ultra 2TV+


Summary of Contents for Philips NeoPix Ultra 2TV+
- Page 1 User Manual NeoPix Ultra 2 Home projector Register your product and get support at www.philips.com/support...
-
Page 2: Table Of Contents
Table of contents Introduction �������������������������������������������������3 5 Connect to playback devices ����������� 13 Dear customer ...............3 Connect to devices through HDMI ....... 13 About this user manual ..........3 Connect to devices through USB-C ..... 13 What’s in the box ............3 Connect to devices through AV ......13 Customer service centre ..........3 Connect to devices through SPDIF ......14 General safety information ���������������... -
Page 3: Introduction
You can find the support hotlines on the CAUTION! warranty card or online: Damage to the product or loss of data! Web: www.philips.com/support This symbol gives warning of damage Mail: philips.projector.eu@screeneo.com to the product and possible loss of International Phone: +41 215 391 665 data. -
Page 4: General Safety Information
If the product gets too hot or emits smoke, shut it down immediately and unplug the power cable. Have your product checked by an authorised service centre. Keep the product away from open flames (e.g. candles). Philips · NeoPix Ultra 2... -
Page 5: Power Supply
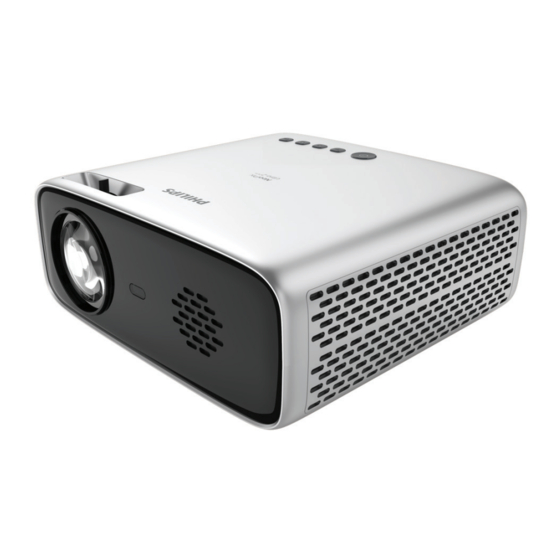
2 Overview Power supply Use only a power adapter which is certified for this product (see Technical data, page 21). Top view Check whether the mains voltage of the power supply matches the mains voltage available at the setup location. This product complies with the voltage type specified on the product. -
Page 6: Front View
Access the Android TV home screen. Connect to an AC power supply. Navigation buttons (Up, Down, Left, Right) • Navigate items on the screen. • Press / to move backward or forward in the current video . Philips · NeoPix Ultra 2... -
Page 7: Initial Setup
3 Initial setup LED indicator • Each time you press a button on the remote control, the LED lights up briefly Notice then off. Make sure all devices are disconnected • Blue light indicates the remote control from their power supplies before is in Android TV mode and navigation of establishing or changing any Android TV interface is possible. -
Page 8: Prepare The Remote Control
LED turns from white to red. To fully shut down the projector, disconnect the power cable from the electrical socket. • The distance between the projector and the projection surface determines the actual screen size. Philips · NeoPix Ultra 2... -
Page 9: Placement
Image focus adjustment Placement To adjust image focus, turn the focus You can install the projector in four different adjustment knob at the top of the projector. configuration. Follow the guidelines below for different projector placement. Notice For overhead mounting on ceiling, purchase a projector mount recommended by an installation professional and follow the instructions... -
Page 10: Set Up Android Tv
On your phone, open the Google app If not in the correct projection orientation, and sign in if you haven't already. press to access the settings options Type or say “set up my device.” Philips · NeoPix Ultra 2... -
Page 11: Use Android
4 Use Android TV Follow the instructions on your phone until you get a code. Enter the code on your Android TV. You will see the Android TV home screen similar On your phone, tap the name of your to the one below after completing the setup. Android TV when it shows up. -
Page 12: Configure Android Tv
Google Assistant is not available in certain Select your Bluetooth device. languages and countries. When your Android TV says, “Pair with this device?”, choose Pair. The device will be paired within a few seconds. Philips · NeoPix Ultra 2... -
Page 13: Connect To Playback Devices
5 Connect to Connect to devices through USB-C playback devices You can connect a playback device (e.g. a mobile phone or PC) to the projector through Notice USB-C connection. With this connection, Make sure all devices are disconnected images are shown on the projection screen, from their power supplies before and audio is played on the projector. -
Page 14: Connect To Devices Through Spdif
The SPDIF input on a digital device might be labeled OPTICAL or OPTICAL HDMI SPDIF HDMI SPDIF After connecting the speakers or headphones, press the volume control buttons on the remote control to adjust the volume to the desired level. Philips · NeoPix Ultra 2... -
Page 15: Change Settings
6 Change settings • View all the installed and system apps, and the storage used by each app. • Set various permissions for the installed This section helps you change the settings of apps, e.g. location, contacts, camera, the following two systems: microphone, phone and SMS. -
Page 16: Chang Projector Settings
Go to Sleep Timer to select a time option which • Android TV: Select it when no playback enables the projector to automatically turn off device is connected. at a specified period of time. Philips · NeoPix Ultra 2... -
Page 17: Maintenance
Update software The latest software for the projector can be found on www.philips.com/support for you to get the best features and support from the projector. Before you update the software of the projector, check the current software version: •... - Page 18 USB flash drive. Connect the USB flash drive (FAT32 formatted) to the projector. Press to access the settings options and go to Firmware Upgrade. Follow the on-screen instructions to complete the update. Philips · NeoPix Ultra 2...
-
Page 19: Troubleshooting
8 Troubleshooting Power cycling If a problem occurs and you cannot resolve it using the instructions in this user manual, try the following steps to resolve the problem. Turn the projector off by pressing twice. Wait at least ten seconds. Turn the projector on by pressing once. - Page 20 What to do if the projector does not work • Check that the HDMI cable is plugged in correctly. when connecting to a notebook PC? • Make sure that the notebook PC has been switched to projector display. Philips · NeoPix Ultra 2...
-
Page 21: Appendixes
9 Appendixes Internal 4K Android TV™ CPU ........... Amlogic S905Y2 Operating system ......Android™ 10.0 Technical data DRAM .............DDR 2GB Technology/optical Flash ............eMMC 8GB Display technology ..........LCD Light source ............LED Product details Color space ........100% REC 709 Dimensions (W × D × H) ..391 x 351 x 203 mm Weight ..............4.3 kg Resolution ........ -
Page 22: Ce Statement
The Declaration of Compliance can be • Consult the dealer or an experienced radio/ consulted on the site www.philips.com. TV technician for help. Frequency bands Maximum output power During operation, the separation distance... -
Page 23: Other Notice
Packaging: The presence of the logo (green other than those designated as original dot) means that a contribution is paid to an Screeneo Innovation SA/PHILIPS products or approved national organisation to improve Screeneo Innovation SA/PHILIPS approved package recovery and recycling infrastructures. - Page 24 Screeneo Innovation SA Route de Lully 5c - 1131 Tolochenaz - Switzerland Philips and the Philips Shield Emblem are registered trademarks of Koninklijke Philips N.V. used under license. Screeneo Innovation SA is the warrantor in relation to the product with which this booklet was packaged.
Need help?
Do you have a question about the NeoPix Ultra 2TV+ and is the answer not in the manual?
Questions and answers