
Related Manuals for Philips NeoPix Ultra 2


Summary of Contents for Philips NeoPix Ultra 2
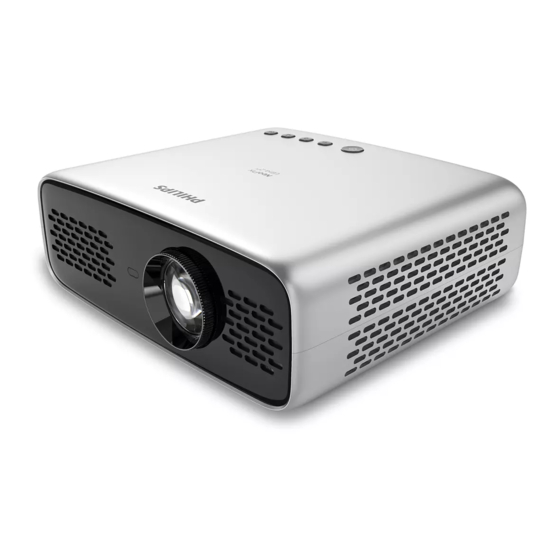
- Page 1 User Manual NeoPix Ultra 2 Home projector Register your product and get support at www.philips.com/support...
-
Page 2: Table Of Contents
Table of contents Introduction �������������������������������������������������3 9 Change settings ���������������������������������� 15 Dear customer ...............3 Android TV system settings ........15 About this user manual ..........3 Projector system settings ........16 10 Service ��������������������������������������������������18 What’s in the box ............3 Customer service centre ..........3 Cleaning .................18 General safety information ���������������... -
Page 3: Introduction
Introduction What’s in the box NeoPix Ultra 2 projector (NPX643/INT) Remote control with 2 AAA batteries Dear customer Lens cover Thank you for purchasing this projector. Quick Start Guide We hope you enjoy this product and the many AC power cable with plug x 3... -
Page 4: General Safety Information
If the product gets too hot or emits smoke, shut it down immediately and unplug the CAUTION power cable. Have your product checked by RISK OF ELECTRIC SHOCK an authorised service centre. Keep the product DO NOT OPEN! Philips · NeoPix Ultra 2TV... -
Page 5: Power Supply
2 Overview Power supply Before connecting the power plug to the mains socket, check whether the mains voltage of Top view the power supply matches the mains voltage available at the setup location. This product complies with the voltage type specified on the product. -
Page 6: Front View
Rear IR sensor Quick access to Netflix service. Mains socket Connect to the power supply. Quick access to Prime Video service. Access or exit projector system settings options. Return to a previous menu screen. Philips · NeoPix Ultra 2TV... -
Page 7: Initial Setup
3 Initial setup Access the Android TV home screen. Navigation buttons Notice Navigate menu options. Make sure all devices are disconnected LED indicator from the power outlet before establishing • Each time you press a button on the or changing any connections. remote control, the LED lights up briefly then off. -
Page 8: Prepare The Remote Control
WiFi network as your phone. confirmation message pops up. The LED on the projector turns from white to red. • The distance between the projector and the screen determines the actual size of the image. Philips · NeoPix Ultra 2TV... -
Page 9: Operation
4 Operation Image setup Screen size adjustment Height adjustment Foot release The projection screen size (or size of images) is foot slider determined by the distance between the lens of the projector and the projection surface. This projector has the projection distance from Lock the foot when the desire screen height 80 cm to 200 cm, and thus creates projection is reached. -
Page 10: Placement
This is the most common Rear table way to position the projector for quick setup and portability. Place the projector on a table behind the projection screen. A special rear projection screen is required. Philips · NeoPix Ultra 2TV... -
Page 11: Use Home Screen
5 Use home screen The home screen provides direct access to Android TV service and setup on the projector. The projector automatically adjusts for the correct projection orientation. If not in the correct projection orientation, press to access the settings options and go to Projection Direction - Rear. -
Page 12: Use Wired Keyboard/Mouse
Copy-protected (DRM) content cannot be streamed. Google, Google Play, YouTube, Android TV and other marks are trademarks of Google LLC. Google Assistant is not available in certain languages and countries. Philips · NeoPix Ultra 2TV... -
Page 13: Connect To Playback Devices
7 Connect to Notice When the projector is connected playback devices to an HDMI device and switched to HDMI input, volume adjustment is not possible through the remote control. Notice Press to access the settings Make sure all devices are disconnected options and go to Volume for volume from the power outlet before establishing adjustment. -
Page 14: Other Features
Charge a USB device You can charge a USB device (e.g. smartphone, MP3 player or other mobile device). Using a USB-A cable, connect your USB Philips · NeoPix Ultra 2TV... -
Page 15: Change Settings
9 Change settings • List downloaded/system/running apps, and memory used by each app • Set various permissions for the installed This section helps you change the following apps, e.g. location, contacts, camera, two system settings: microphone, phone and SMS, etc. •... -
Page 16: Projector System Settings
Storage: Check the total and used space for internal storage. Image options You can access the following image setting options. • Picture Preset: Select a predefined color brightness setting for picture and video display, or select User to customize color Philips · NeoPix Ultra 2TV... - Page 17 values on brightness, contrast, saturation and sharpness. • Color Temperature: Set to Warm to enhance hotter colors such as red; set to Cool to make picture bluish; set to User to customize color values in RGB mode. • Geometry Corrections: Select an option to correct keystone or distorted images to be rectangular or square.
-
Page 18: Service
Follow the on-screen instructions to complete the update. Update software The latest software of the projector can be found on www.philips.com/support for you to get the best features and support from the projector. Before you update the software of the projector, check the current software version: •... -
Page 19: Troubleshooting
Troubleshooting Turn the projector off by pressing Wait at least ten seconds. Power cycling Turn the projector on by pressing once. If the problem persists, please contact our If a problem occurs that cannot be corrected technical service centre or your dealer. with the instructions in this user manual, follow the steps given here. - Page 20 What to do if the projector does not work • Check that the HDMI cable is plugged in correctly. when connecting to a notebook PC? • Make sure that the notebook PC has been switched to projector display. Philips · NeoPix Ultra 2TV...
-
Page 21: Appendix
11 Appendix Product details Dimensions (W × D × H) ..277 x 310 x 111 mm Weight ..............2.7 kg Technical data Operating temperature......5 °C - 35 °C Storage temperature ........< 60 °C Technology/optical Display technology ..........LCD Package content Light source ............LED NeoPix Ultra 2TV projector, remote control with... -
Page 22: Ce Statement
Connect the equipment into an outlet on a circuit different from that to which the The Declaration of Compliance can be receiver is connected. consulted on the site www.philips.com. • Consult the dealer or an experienced radio/ Limits TV technician for help. -
Page 23: Other Notice
Packaging: The presence of the logo (green other than those designated as original dot) means that a contribution is paid to an Screeneo Innovation SA/PHILIPS products or approved national organisation to improve Screeneo Innovation SA/PHILIPS approved package recovery and recycling infrastructures. - Page 24 Screeneo Innovation SA Route de Lully 5c - 1131 Tolochenaz - Switzerland Philips and the Philips Shield Emblem are registered trademarks of Koninklijke Philips N.V. used under license. Screeneo Innovation SA is the warrantor in relation to the product with which this booklet was packaged.
Need help?
Do you have a question about the NeoPix Ultra 2 and is the answer not in the manual?
Questions and answers