
Related Manuals for Philips PicoPix PPX3414


Summary of Contents for Philips PicoPix PPX3414
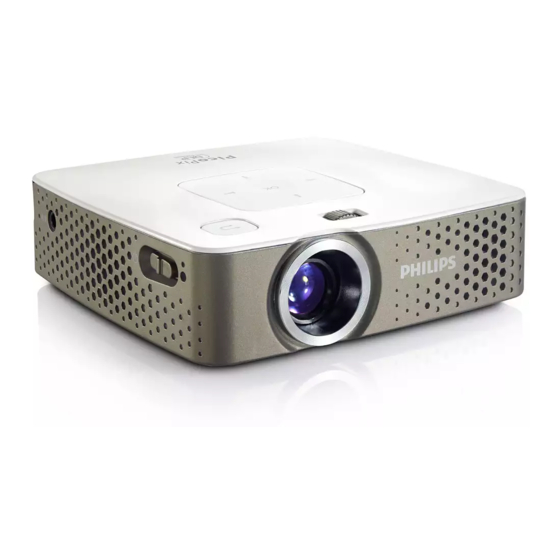
- Page 1 Register your product and get support at www.philips.com/welcome PPX3414 User Manual...
-
Page 2: Table Of Contents
7 Settings ..........21 8 Service..........23 Care Instructions for the Battery ........ 23 Battery deep discharge ........... 23 Cleaning ................24 Device overheated ............24 Troubleshooting ............... 25 9 Appendix..........26 Technical Data ..............26 Accessories ................ 26 Philips · PPX3414... -
Page 3: Overview
Overview Dear Customer Thank you for purchasing our Pocket Projector. We hope you enjoy your device and its many functions! About this User Manual With the installation guide on the following pages, you can start using your device quickly and easily. Detailed descriptions can be found in the following sections of this user manual. -
Page 4: General Safety Information
Batteries (battery pack or batteries installed) must not be exposed to flame or excessive heat including from direct sunshine or the like. Attention should be drawn to the environment aspects of battery disposal. Philips · PPX3414... - Page 5 DANGER! Risk of explosion with incorrect type of batteries Only replace the batteries with the same or comparable batteries. There is a risk of explosion if the incor- rect battery type is used. Switch the device on or off using the power switch before removing the power supply from the socket.
-
Page 6: Overview
À/Á—Navigating / during music playback: adjust vol- (CVBS) output via an adapter cable ume level / during video playback review, cue (10) —Connection for a USB storage medium Bottom of the Device Tripod socket Pico Station connector (3) Pico Station connection socket Philips · PPX3414... -
Page 7: Remote Control
Remote Control —Standby / Activate the device —Magnify still. Pan using the navigation keys ( , À/Á) —One menu step back, one directory level back / cancelling a function Direction Buttons à—Confirms selection , À/Á—Navigation keys / navigate the menu / modify settings —Modify settings / during music playback select previous, next title... -
Page 8: Overview Of The Menu Functions
The chosen storage appears highlighted in white. —USB storage medium —Memory card —Internal memory —Charge level of the internal battery The icon will flash red, when the battery needs to be recharged. If the power supply is connected, no symbol is displayed. Philips · PPX3414... -
Page 9: Initial Operation
3 Initial Operation Setting up the Device Initial Installation You can position the device so that it lies flat on a table 1 Switch the device on using the on/off switch on the in front of the projection surface; it is not necessary to side. -
Page 10: Installing Or Changing The Batteries Of The Remote Control
2 Insert the new batteries into the battery compart- ment with the positive and negative poles as shown on the back of the remote control. Make sure the polarities(+ and -) are aligned correctly. Philips · PPX3414... -
Page 11: Using The Remote Control
Using the Remote Control Point the remote control at the remote sensor on the back of the device. The remote can be used within an angle of 60 degrees and up to 16.4 feet from the device. When using the remote control, no obstacle should be placed between the remote control and remote sensor. -
Page 12: Connect To The Playback Device
640 x 480 60 Hz SVGA 800 x 600 60 Hz 1024 x 768 60 Hz Note Screen Resolution You can obtain the best results with the 800¦×¦600 (60Hz) resolution. 4 Select Menu > Source and switch to VGA. Philips · PPX3414... -
Page 13: Connecting Using Audio/Video (Cvbs) Adaptor Cable
Connecting using Audio/ Connecting using Video (CVBS) Adaptor Component-Video (YPbPr/ Cable YUV) Cable Use the projector's audio/video adaptor cable (A/V Please use this type of connection to obtain the highest cable) to connect camcorders, DVD players or digital possible image quality. This cable is available as an acces- cameras. -
Page 14: Connecting The Headphones
This could lead to the risks of hearing damage. Before connecting the headphones, turn down the volume on the device. After connecting the headphones, increase the vol- ume to a comfortable level. Philips · PPX3414... -
Page 15: Memory Card / Usb Storage Medium
5 Memory card / USB storage medium Inserting a Memory Card Connecting USB Storage Medium 1 Connect the USB storage medium directly to the USB socket on the left side of the device. 1 Insert a memory card with the contacts facing upwards into the slot at the back of the device. -
Page 16: Media Playback
H.263 *.rm, *.rmvb Real video *.dat, *.vob MPEG-1, MPEG-2 *.mpg, *.mpeg MPEG-1, MPEG-2 Note Displaying video files Only those videos that are compatible with the Pocket Projector will be dis- played. 8 Press à to start playback. Philips · PPX3414... -
Page 17: Photo Playback
Video Playback (Mini-HDMI 3 Use the navigation keys to select Pictures. 4 Confirm with à. socket) 5 With an inserted memory card or USB stor- 1 Connect the audio/video output of the external age device: Select the internal memory, the USB device to the Pocket Projector's mini-HDMI socket. -
Page 18: Music Playback
Press T to stop or continue playback. Press to return to the selection. During playback you can adjust the volume using N/ O on the remote control. Press or N repeatedly to shut off the volume completely. Philips · PPX3414... -
Page 19: Delete Files
11 Select with Copy. 3 Use the navigation keys to select Folder View. 4 Confirm with à. 5 With an inserted memory card or USB stor- age device: Select the internal memory, the USB storage medium or the memory card using the keys 6 Confirm with à. - Page 20 (if inserted) and the internal memory. Zoom in / Zoom out You can enlarge the displayed image during the slide show using the key. Use the À/Á keys to move around the magnified image. Philips · PPX3414...
-
Page 21: Settings
7 Settings Brightness—Adjust brightness 1 Switch the device on using the on/off switch on the side. Contrast—Adjust contrast 2 After the initial screen the main menu appears. Saturation—Adjust colour saturation Sound Settings: Volume—Adjust the volume Bass—Set the playback of the low frequencies Treble—Set the playback of the high frequencies Key tones—Turn key tones on and off Video Settings... - Page 22 Keep the device connected to a power outlet for the duration of the firmware update. Information—Display free space in the internal mem- ory and information on the device (Capacity: / Free space: / Firmware Version / Device name: / Model / Mcu Version) Philips · PPX3414...
-
Page 23: Service
8 Service Care Instructions for the Battery deep discharge Battery When the battery is in deep discharge or the device is not used for a longer period, proceed as followed: The capacity of the battery diminishes with time. You 1 Connect the device to the power supply (see also can prolong the life of the battery if you observe the fol- chapter Connecting power supply / Charging bat- lowing points:... -
Page 24: Cleaning
Use a brush or lens cleaning paper for cleaning the lens of the projector. DANGER! Do not use any liquid cleaning agents Do not use any liquid cleaning agents for cleaning the lens, to avoid damaging the coat- ing film on the lens. Philips · PPX3414... -
Page 25: Troubleshooting
Troubleshooting 1 Switch the device off using the on/off switch on the side. 2 Wait at least ten seconds. Power Cycling 3 Switch the device on using the on/off switch on the If a problem occurs that cannot be corrected with the side. -
Page 26: Appendix
/ iPhone /iPad cable ....PPA 1280 / 253447091 MHL to mini-HDMI cable...PPA 1240 / 253520048 Pico Station ........PPA 7300 / 253529749 All data are provided for reference purposes only. Sagemcom Documents SAS reserves the right to make any changes without prior notice. Philips · PPX3414... - Page 27 Sagemcom Documents SAS / harmful interference in a residential installation. This PHILIPS products or Sagemcom Documents SAS / device generates, uses, and can radiate radio frequency PHILIPS approved products. energy and, if not installed and used in accordance with...
- Page 28 PHILIPS and the PHILIPS’ Shield Emblem are registered trademarks of Koninklijke Philips N.V. and are used by Sagemcom Documents SAS under license from Koninklijke Philips N.V. È 201 Sagemcom Documents SAS All rights reserved Sagemcom Documents SAS Documents Business Unit...
Need help?
Do you have a question about the PicoPix PPX3414 and is the answer not in the manual?
Questions and answers