
Related Manuals for Daikin FTXF-C


Summary of Contents for Daikin FTXF-C
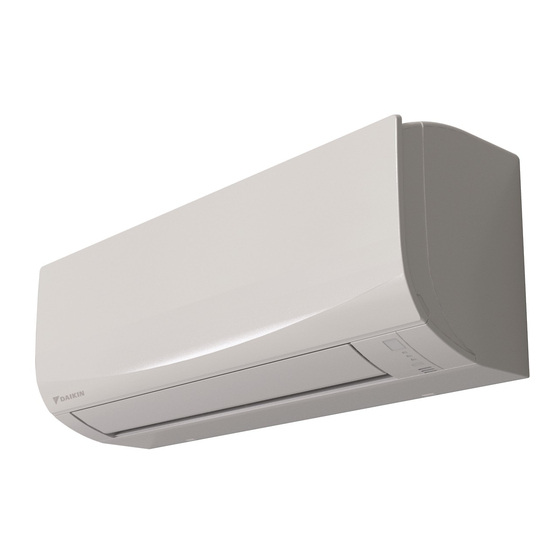
- Page 1 Installer reference guide Daikin room air conditioner FTXF20C5V1B FTXF25C5V1B FTXF35C5V1B FTXF42C5V1B ATXF20C5V1B ATXF25C5V1B ATXF35C5V1B ATXF42C5V1B...
-
Page 2: Table Of Contents
To insulate the drain piping, refrigerant piping and interconnection cable..............42 To pass the pipes through the wall hole ........................42 To fix the unit on the mounting plate ..........................43 Installer reference guide FTXF20~42C5V1B + ATXF20~42C5V1B Daikin room air conditioner 4P519439-9J – 2021.06... - Page 3 To perform a test run in winter season ......................47 12 Hand-over to the user 13 Disposal 14 Technical data 14.1 Wiring diagram................................50 14.1.1 Unified wiring diagram legend ........................50 15 Glossary FTXF20~42C5V1B + ATXF20~42C5V1B Installer reference guide Daikin room air conditioner 4P519439-9J – 2021.06...
-
Page 4: About The Documentation
The original documentation is written in English. All other languages are translations. Technical engineering data ▪ A subset of the latest technical data is available on the regional Daikin website (publicly accessible). ▪ The full set of latest technical data is available on the Daikin Business Portal (authentication required). -
Page 5: Installer Reference Guide At A Glance
Hand‑over to the user What to give and explain to the user Disposal How to dispose of the system Technical data Specifications of the system Glossary Definition of terms FTXF20~42C5V1B + ATXF20~42C5V1B Installer reference guide Daikin room air conditioner 4P519439-9J – 2021.06... -
Page 6: General Safety Precautions
Indicates a situation that could result in minor or moderate injury. NOTICE Indicates a situation that could result in equipment or property damage. INFORMATION Indicates useful tips or additional information. Symbols used on the unit: FTXF20~42C5V1B + ATXF20~42C5V1B Installer reference guide Daikin room air conditioner 4P519439-9J – 2021.06... -
Page 7: For The Installer
Improper installation or attachment of equipment or accessories could result in electrical shock, short-circuit, leaks, fire or other damage to the equipment. ONLY use accessories, optional equipment and spare parts made or approved by Daikin. WARNING Make sure installation, testing and applied materials comply with applicable legislation (on top of the instructions described in the Daikin documentation). -
Page 8: Installation Site
Corrosion of copper pipes or soldered parts may cause the refrigerant to leak. ▪ In bathrooms. Instructions for equipment using R32 refrigerant WARNING: MILDLY FLAMMABLE MATERIAL The refrigerant inside this unit is mildly flammable. FTXF20~42C5V1B + ATXF20~42C5V1B Installer reference guide Daikin room air conditioner 4P519439-9J – 2021.06... - Page 9 WARNING Make sure installation, servicing, maintenance and repair comply with instructions from Daikin and with applicable legislation and are executed ONLY by authorised persons. WARNING If one or more rooms are connected to the unit using a duct system, make sure: ▪...
- Page 10 Then use the graph or table for… <1.8 m Floor-standing units 1.8≤x<2.2 m Wall-mounted units ≥2.2 m Ceiling-mounted units 3 Use the graph or table to determine the minimum floor area. FTXF20~42C5V1B + ATXF20~42C5V1B Installer reference guide Daikin room air conditioner 4P519439-9J – 2021.06...
-
Page 11: Refrigerant - In Case Of R410A Or R32
Make sure the field piping and connections are NOT subjected to stress. WARNING During tests, NEVER pressurise the product with a pressure higher than the maximum allowable pressure (as indicated on the nameplate of the unit). FTXF20~42C5V1B + ATXF20~42C5V1B Installer reference guide Daikin room air conditioner 4P519439-9J – 2021.06... - Page 12 ONLY use tools exclusively for the refrigerant type used in the system, this to ensure pressure resistance and prevent foreign materials from entering into the system. ▪ Charge the liquid refrigerant as follows: FTXF20~42C5V1B + ATXF20~42C5V1B Installer reference guide Daikin room air conditioner 4P519439-9J – 2021.06...
-
Page 13: Electrical
If NOT factory installed, a main switch or other means for disconnection, having a contact separation in all poles providing full disconnection under overvoltage category III condition, MUST be installed in the fixed wiring. FTXF20~42C5V1B + ATXF20~42C5V1B Installer reference guide Daikin room air conditioner 4P519439-9J – 2021.06... - Page 14 After finishing the electrical work, confirm that each electrical component and terminal inside the electrical components box is connected securely. ▪ Make sure all covers are closed before starting up the unit. FTXF20~42C5V1B + ATXF20~42C5V1B Installer reference guide Daikin room air conditioner 4P519439-9J – 2021.06...
- Page 15 ON and OFF while the product is operating, attach a reversed phase protection circuit locally. Running the product in reversed phase can break the compressor and other parts. FTXF20~42C5V1B + ATXF20~42C5V1B Installer reference guide Daikin room air conditioner 4P519439-9J – 2021.06...
-
Page 16: Specific Installer Safety Instructions
Do NOT reuse piping from previous installations. ▪ NEVER install a drier to this R32 unit to guarantee its lifetime. The drying material may dissolve and damage the system. FTXF20~42C5V1B + ATXF20~42C5V1B Installer reference guide Daikin room air conditioner 4P519439-9J – 2021.06... - Page 17 NEVER directly touch any accidental leaking refrigerant. This could result in severe wounds caused by frostbite. Electrical installation (see "8 Electrical installation" [ 38]) WARNING Appliance MUST be installed in accordance with national wiring regulations. FTXF20~42C5V1B + ATXF20~42C5V1B Installer reference guide Daikin room air conditioner 4P519439-9J – 2021.06...
- Page 18 DANGER: RISK OF ELECTROCUTION All electrical parts (including thermistors) are powered by the power supply. Do NOT touch them with bare hands. FTXF20~42C5V1B + ATXF20~42C5V1B Installer reference guide Daikin room air conditioner 4P519439-9J – 2021.06...
- Page 19 Please note that some sections of the electric component box are hot. ▪ Make sure you do NOT touch a conductive section. ▪ Do NOT rinse the unit. This may cause electric shocks or fire. FTXF20~42C5V1B + ATXF20~42C5V1B Installer reference guide Daikin room air conditioner 4P519439-9J – 2021.06...
- Page 20 MUST NOT be supplied through an external switching device, such as a timer, or connected to a circuit that is regularly turned ON and OFF by the utility. FTXF20~42C5V1B + ATXF20~42C5V1B Installer reference guide Daikin room air conditioner 4P519439-9J – 2021.06...
-
Page 21: About The Box
Prepare the path along which you want to bring the unit inside in advance. 4.2 Indoor unit INFORMATION The following figures are just examples and may NOT completely match your system layout. 4.2.1 To unpack the indoor unit FTXF20~42C5V1B + ATXF20~42C5V1B Installer reference guide Daikin room air conditioner 4P519439-9J – 2021.06... -
Page 22: To Remove The Accessories From The Indoor Unit
"9.3 To fix the unit on the mounting plate" [ 43]. e Dry battery AAA.LR03 (alkaline) for user interface f User interface holder g User interface h Mounting plate FTXF20~42C5V1B + ATXF20~42C5V1B Installer reference guide Daikin room air conditioner 4P519439-9J – 2021.06... -
Page 23: About The Unit
A safety device might stop the operation of the system if the unit runs outside its operation range. Condensation and water dripping might occur if the unit runs outside its operation range. FTXF20~42C5V1B + ATXF20~42C5V1B Installer reference guide Daikin room air conditioner 4P519439-9J – 2021.06... -
Page 24: Unit Installation
(example: open flames, an operating gas appliance or an operating electric heater). WARNING Make sure installation, servicing, maintenance and repair comply with instructions from Daikin and with applicable legislation and are executed ONLY by authorised persons. 6.1.1 Installation site requirements of the indoor unit INFORMATION Also read the precautions and requirements in the "2 ... -
Page 25: Opening The Indoor Unit
(mm) 6.2 Opening the indoor unit 6.2.1 To remove the front panel 1 Hold the front panel by the panel tabs on both sides and open it. FTXF20~42C5V1B + ATXF20~42C5V1B Installer reference guide Daikin room air conditioner 4P519439-9J – 2021.06... -
Page 26: To Re-Install The Front Panel
4 We recommend opening the flap before removing the front grille. 5 Place both hands under the centre of the front grille, push it up and then toward you. FTXF20~42C5V1B + ATXF20~42C5V1B Installer reference guide Daikin room air conditioner 4P519439-9J – 2021.06... -
Page 27: To Re-Install The Front Grille
6.2.6 To open the service cover 1 Remove 1 screw from the service cover. 2 Pull out the service cover horizontally away from the unit. a Service cover screw FTXF20~42C5V1B + ATXF20~42C5V1B Installer reference guide Daikin room air conditioner 4P519439-9J – 2021.06... -
Page 28: Installing The Indoor Unit
NOTICE Be sure to seal the gaps around the pipes with sealing material (field supply), in order to prevent water leakage. FTXF20~42C5V1B + ATXF20~42C5V1B Installer reference guide Daikin room air conditioner 4P519439-9J – 2021.06... -
Page 29: To Remove The Pipe Port Cover
6.3.5 To provide drainage Make sure condensation water can be evacuated properly. This involves: ▪ General guidelines ▪ Connecting the drain piping to the indoor unit FTXF20~42C5V1B + ATXF20~42C5V1B Installer reference guide Daikin room air conditioner 4P519439-9J – 2021.06... - Page 30 1 Insert the drain hose in the drain pipe as shown in the following figure, so it will NOT be pulled out of the drain pipe. FTXF20~42C5V1B + ATXF20~42C5V1B Installer reference guide Daikin room air conditioner 4P519439-9J – 2021.06...
- Page 31 4 mm hexagonal wrench 3 Insert the drain hose on the left side and do not forget to tighten it with the fixing screw; otherwise water leakage may occur. FTXF20~42C5V1B + ATXF20~42C5V1B Installer reference guide Daikin room air conditioner 4P519439-9J – 2021.06...
- Page 32 To check for water leaks 1 Remove the air filters. 2 Gradually pour approximately 1 l of water in the drain pan, and check for water leaks. FTXF20~42C5V1B + ATXF20~42C5V1B Installer reference guide Daikin room air conditioner 4P519439-9J – 2021.06...
-
Page 33: Piping Installation
Depending on the applicable legislation and the maximum working pressure of the unit (see "PS High" on the unit name plate), larger piping thickness might be required. FTXF20~42C5V1B + ATXF20~42C5V1B Installer reference guide Daikin room air conditioner 4P519439-9J – 2021.06... -
Page 34: Refrigerant Piping Insulation
7.2.2 Precautions when connecting the refrigerant piping INFORMATION Also read the precautions and requirements in the following chapters: ▪ General safety precautions ▪ Preparation DANGER: RISK OF BURNING/SCALDING FTXF20~42C5V1B + ATXF20~42C5V1B Installer reference guide Daikin room air conditioner 4P519439-9J – 2021.06... -
Page 35: Guidelines When Connecting The Refrigerant Piping
▪ Coat the flare inner surface with ether oil or ester oil when connecting a flare nut. Tighten 3 or 4 turns by hand, before tightening firmly. FTXF20~42C5V1B + ATXF20~42C5V1B Installer reference guide Daikin room air conditioner 4P519439-9J – 2021.06... -
Page 36: Pipe Bending Guidelines
3 Remove the flare nut from the stop valve and put the flare nut on the pipe. 4 Flare the pipe. Set exactly at the position as shown in the following figure. FTXF20~42C5V1B + ATXF20~42C5V1B Installer reference guide Daikin room air conditioner 4P519439-9J – 2021.06... -
Page 37: To Connect The Refrigerant Piping To The Indoor Unit
Liquid pipe e Liquid pipe insulation f Finishing tape g Drain hose NOTICE Make sure to insulate all refrigerant piping. Any exposed piping might cause condensation. FTXF20~42C5V1B + ATXF20~42C5V1B Installer reference guide Daikin room air conditioner 4P519439-9J – 2021.06... -
Page 38: Electrical Installation
WARNING Do NOT connect the power supply to the indoor unit. This could result in electrical shock or fire. FTXF20~42C5V1B + ATXF20~42C5V1B Installer reference guide Daikin room air conditioner 4P519439-9J – 2021.06... -
Page 39: Guidelines When Connecting The Electrical Wiring
Stranded conductor wire with round crimp-style terminal a Terminal b Screw c Flat washer Allowed NOT allowed Tightening torques Item Tightening torque (N•m) M4 (X1M) M4 (earth) FTXF20~42C5V1B + ATXF20~42C5V1B Installer reference guide Daikin room air conditioner 4P519439-9J – 2021.06... -
Page 40: Specifications Of Standard Wiring Components
Provide adequate measures to prevent that the unit can be used as a shelter by small animals. Small animals that make contact with electrical parts can cause malfunctions, smoke or fire. FTXF20~42C5V1B + ATXF20~42C5V1B Installer reference guide Daikin room air conditioner 4P519439-9J – 2021.06... - Page 41 9 Pull the wires to make sure that they are securely attached, then retain the wires with the wire retainer. 10 Shape the wires so that the service cover fits securely, then close the service cover. FTXF20~42C5V1B + ATXF20~42C5V1B Installer reference guide Daikin room air conditioner 4P519439-9J – 2021.06...
-
Page 42: Finishing The Indoor Unit Installation
Insulation tape e Mounting plate (accessory) NOTICE ▪ Do NOT bend refrigerant pipes. ▪ Do NOT push the refrigerant pipes onto the bottom frame or the front grille. FTXF20~42C5V1B + ATXF20~42C5V1B Installer reference guide Daikin room air conditioner 4P519439-9J – 2021.06... -
Page 43: To Fix The Unit On The Mounting Plate
3 Press the bottom edge of the indoor unit with both hands until it is firmly caught by the mounting plate hooks. 4 Secure the indoor unit to the mounting plate using 2 indoor unit fixing screws M4×12L (accessory). FTXF20~42C5V1B + ATXF20~42C5V1B Installer reference guide Daikin room air conditioner 4P519439-9J – 2021.06... -
Page 44: Configuration
1 minute before turning the power supply back on. 4 Press simultaneously: Model Buttons FTXF, ATXF 5 Press: Model Button FTXF, ATXF 6 Select: Model Symbol FTXF, ATXF 7 Press: Model Button FTXF, ATXF FTXF20~42C5V1B + ATXF20~42C5V1B Installer reference guide Daikin room air conditioner 4P519439-9J – 2021.06... - Page 45 9 When the setting is complete, press: Model Button FTXF, ATXF Result: The user interface will return to the previous screen. FTXF20~42C5V1B + ATXF20~42C5V1B Installer reference guide Daikin room air conditioner 4P519439-9J – 2021.06...
-
Page 46: Commissioning
There are NO damaged components or squeezed pipes on the inside of the indoor and outdoor units. There are NO refrigerant leaks. The correct pipe size is installed and the pipes are properly insulated. FTXF20~42C5V1B + ATXF20~42C5V1B Installer reference guide Daikin room air conditioner 4P519439-9J – 2021.06... -
Page 47: To Perform A Test Run
Some of the functions CANNOT be used in the test run operation mode. If a power failure occurs during operation, the system automatically restarts immediately after power is restored. FTXF20~42C5V1B + ATXF20~42C5V1B Installer reference guide Daikin room air conditioner 4P519439-9J – 2021.06... -
Page 48: Hand-Over To The User
Explain the user how to properly operate the system and what to do in case of problems. ▪ Show the user what to do for the maintenance of the unit. FTXF20~42C5V1B + ATXF20~42C5V1B Installer reference guide Daikin room air conditioner 4P519439-9J – 2021.06... -
Page 49: Disposal
Do NOT try to dismantle the system yourself: dismantling of the system, treatment of the refrigerant, oil and other parts MUST comply with applicable legislation. Units MUST be treated at a specialised treatment facility for reuse, recycling and recovery. FTXF20~42C5V1B + ATXF20~42C5V1B Installer reference guide Daikin room air conditioner 4P519439-9J – 2021.06... -
Page 50: Technical Data
Technical data 14 Technical data ▪ A subset of the latest technical data is available on the regional Daikin website (publicly accessible). ▪ The full set of latest technical data is available on the Daikin Business Portal (authentication required). 14.1 Wiring diagram The wiring diagram is delivered with the unit, located inside of the outdoor unit (bottom side of the top plate). - Page 51 Number of passes through ferrite core Pulse-amplitude modulation PCB* Printed circuit board Power module Switching power supply PTC* PTC thermistor Insulated gate bipolar transistor (IGBT) Circuit breaker FTXF20~42C5V1B + ATXF20~42C5V1B Installer reference guide Daikin room air conditioner 4P519439-9J – 2021.06...
- Page 52 (IGBT) power module Wireless remote controller Terminal Terminal strip (block) Electronic expansion valve coil Y*R, Y*S Reversing solenoid valve coil Ferrite core ZF, Z*F Noise filter FTXF20~42C5V1B + ATXF20~42C5V1B Installer reference guide Daikin room air conditioner 4P519439-9J – 2021.06...
-
Page 53: Glossary
Optional equipment Equipment made or approved by Daikin that can be combined with the product according to the instructions in the accompanying documentation. Field supply Equipment NOT made by Daikin that can be combined with the product according to the instructions in the accompanying documentation. - Page 56 DAIKIN ISITMA VE SOĞUTMA SİSTEMLERİ SAN.TİC. A.Ş. Gülsuyu Mahallesi, Fevzi Çakmak Caddesi, Burçak Sokak, No:20, 34848 Maltepe İSTANBUL / TÜRKİYE Tel: 0216 453 27 00 Faks: 0216 671 06 00 Çağrı Merkezi: 444 999 0 Web: www.daikin.com.tr 4P519439-9J 2021.06 Verantwortung für Energie und Umwelt...
Need help?
Do you have a question about the FTXF-C and is the answer not in the manual?
Questions and answers