Daikin Siesta ATXF20C5V1B Installation Manual
Hide thumbs
Also See for Siesta ATXF20C5V1B:
- Operation manual (16 pages) ,
- Installer's reference manual (56 pages)

Related Manuals for Daikin Siesta ATXF20C5V1B


Summary of Contents for Daikin Siesta ATXF20C5V1B
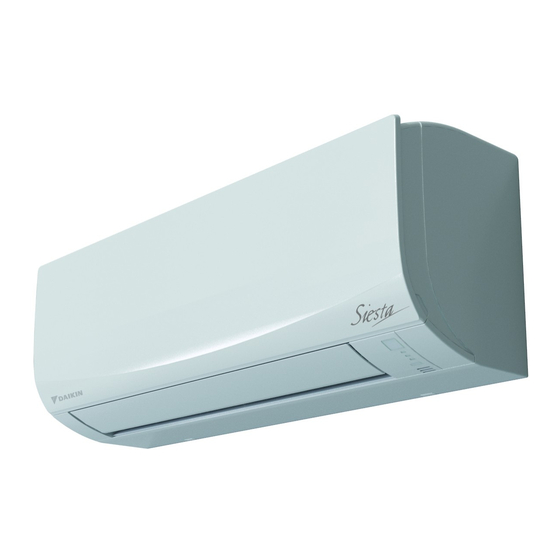
- Page 1 Installation manual Daikin room air conditioners ATXF20C5V1B ATXF25C5V1B Installation manual ATXF35C5V1B English Daikin room air conditioners ATXF42C5V1B...
- Page 2 3P516375-15Q...
-
Page 3: Table Of Contents
WARNING 4 About the unit Make sure installation, servicing, maintenance, repair and System layout................applied materials follow the instructions from Daikin and, in Operation range ................ addition, comply with applicable legislation and are 5 Unit installation performed by qualified persons only. In Europe and areas Preparing the installation site ............ - Page 4 They can cause overheating, electrical shock or fire. ▪ Do NOT install a phase advancing capacitor, because this unit is equipped with an inverter. A phase advancing capacitor will reduce performance and may cause accidents. Installation manual ATXF20~42C5V1B Daikin room air conditioners 3P519299-11X – 2020.12...
-
Page 5: About The Box
Do NOT insert fingers, rods or other objects into the air ▪ Indoor humidity: ≤80% inlet or outlet. Do NOT remove the fan guard. When the fan is rotating at high speed, it will cause injury. ATXF20~42C5V1B Installation manual Daikin room air conditioners 3P519299-11X – 2020.12... -
Page 6: Unit Installation
Result: The front panel shaft on 1 side will be disconnected. Make sure installation, servicing, maintenance and repair 3 Disconnect the front panel shaft on the other side in the same comply with instructions from Daikin and with applicable manner. legislation (for example national gas regulation) and are executed only by authorised persons. -
Page 7: To Re-Install The Front Grille
Wall embedded pipe Putty Wall hole cover 4 After completing wiring, refrigerant piping and drain piping, do Service cover screw NOT forget to seal the gap with putty. Service cover ATXF20~42C5V1B Installation manual Daikin room air conditioners 3P519299-11X – 2020.12... -
Page 8: To Remove The Pipe Port Cover
▪ Install the drain hose with a downward slope. insulation tape. ▪ Traps are NOT permitted. ▪ Do NOT put the end of the hose in water. Right-side piping Right-bottom piping Right-back piping Installation manual ATXF20~42C5V1B Daikin room air conditioners 3P519299-11X – 2020.12... -
Page 9: Piping Installation
Take the following guidelines into account when connecting pipes: ▪ Coat the flare inner surface with ether oil or ester oil when connecting a flare nut. Tighten 3 or 4 turns by hand, before tightening firmly. ATXF20~42C5V1B Installation manual Daikin room air conditioners 3P519299-11X – 2020.12... -
Page 10: To Connect The Refrigerant Piping To The Indoor Unit
▪ Do NOT use locally purchased electrical parts inside the product. ▪ Do NOT branch the power supply for the drain pump, etc. from the terminal block. This could result in electrical shock or fire. Installation manual ATXF20~42C5V1B Daikin room air conditioners 3P519299-11X – 2020.12... -
Page 11: Specifications Of Standard Wiring Components
Provide adequate measures to prevent that the unit can be mounting plate. used as a shelter by small animals. Small animals that make contact with electrical parts can cause malfunctions, smoke or fire. ATXF20~42C5V1B Installation manual Daikin room air conditioners 3P519299-11X – 2020.12... -
Page 12: To Fix The Unit On The Mounting Plate
In case 2 indoor units are installed in 1 room, different addresses for After cutting with nippers 2 user interfaces can be set. 1 Remove the batteries from the user interface. 2 Cut the address jumper. Installation manual ATXF20~42C5V1B Daikin room air conditioners 3P519299-11X – 2020.12... -
Page 13: Commissioning
There are NO damaged components or squeezed pipes on the inside of the indoor and outdoor units. There are NO refrigerant leaks. The correct pipe size is installed and the pipes are properly insulated. ATXF20~42C5V1B Installation manual Daikin room air conditioners 3P519299-11X – 2020.12... -
Page 14: Technical Data
▪ A subset of the latest technical data is available on the regional monitor green) Daikin website (publicly accessible). HIGH VOLTAGE High voltage ▪ The full set of latest technical data is available on the Daikin Intelligent eye sensor Business Portal (authentication required). IPM* Intelligent power module... - Page 15 12 Technical data Symbol Meaning Terminal strip (block) Electronic expansion valve coil Y*R, Y*S Reversing solenoid valve coil Ferrite core ZF, Z*F Noise filter ATXF20~42C5V1B Installation manual Daikin room air conditioners 3P519299-11X – 2020.12...
- Page 16 DAIKIN ISITMA VE SOĞUTMA SİSTEMLERİ SAN.TİC. A.Ş. Gülsuyu Mahallesi, Fevzi Çakmak Caddesi, Burçak Sokak, No:20, 34848 Maltepe İSTANBUL / TÜRKİYE Tel: 0216 453 27 00 Faks: 0216 671 06 00 Çağrı Merkezi: 444 999 0 Web: www.daikin.com.tr 3P519299-11X 2020.12 Verantwortung für Energie und Umwelt...
Need help?
Do you have a question about the Siesta ATXF20C5V1B and is the answer not in the manual?
Questions and answers