
Related Manuals for Sony RHT-G5


Summary of Contents for Sony RHT-G5
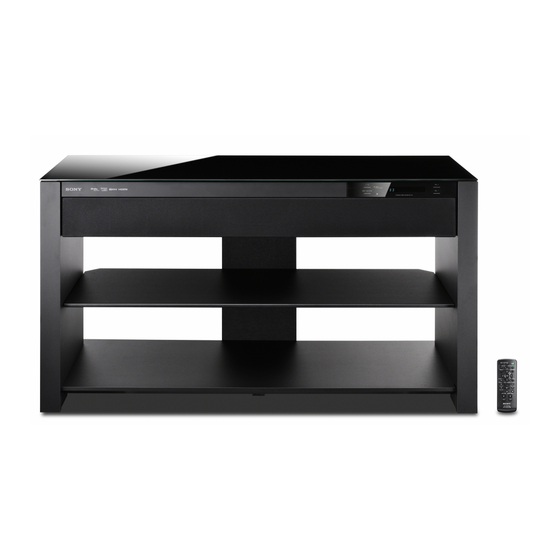
- Page 1 4-170-065-12(1) Theatre Stand System Operating Instructions RHT-G5 ©2010 Sony Corporation...
- Page 2 EU directives. The manufacturer of this product is Sony Corporation, 1-7-1 Konan Minato-ku Tokyo, 108-0075 Japan. The Authorized Representative for EMC and product safety is Sony Deutschland GmbH, Hedelfinger Strasse 61, 70327 Stuttgart, Germany.
-
Page 3: Table Of Contents
Table of Contents WARNING ...4 CAUTION...5 Precautions ...6 Getting Started Supplied accessories ...7 Setting this stand ...8 Connecting the TV and player ...9 Connecting satellite tuner or cable television tuner ...11 Connecting other components...12 Connecting the AC power cord (mains lead) ...13 Setting up the sound output of the connected component ...13... -
Page 4: Warning
WARNING Do not lean on or hang from the TV when the TV is placed on the stand. The TV may fall from the stand causing an accident resulting in serious injury or death. Do not move the stand with the TV or other equipment installed on it. -
Page 5: Caution
CAUTION Do not place any heated objects such as a hot pan or a kettle on the stand. A top glass panel may break and cause injury. Or, it may cause damage to the stand. Do not step on the stand. You may fall, or break the glass and cause injury. -
Page 6: Precautions
Before connecting other components, be sure to turn off and unplug the stand. If you have any question or problem concerning your stand, please consult your nearest Sony dealer. Copyrights This stand incorporates Dolby* Digital and Pro Logic Surround and the DTS** Digital Surround System. -
Page 7: Getting Started
Getting Started Supplied accessories • Remote commander (RM- ANU032) (1) • Size AA (R6) batteries (2) Inserting batteries into the remote You can control the stand using the supplied remote. Insert two size AA (R6) batteries by matching the + and – ends on the batteries to the markings inside the compartment. Notes •... -
Page 8: Setting This Stand
Preventing the TV from falling Secure the TV to provide a protective measure against earthquakes, etc. Perform the following steps if you have a Sony LCD TV. Place the TV on the stand. The TV should be placed in the center of the stand, aligning the rear edge of the TV’s... -
Page 9: Connecting The Tv And Player
Connect the TV and/or player with HDMI jacks to the stand using an HDMI cable. By connecting Sony “BRAVIA” Sync-compatible components using HDMI cables, operation can be simplified when you set the Control for HDMI function for the TV. See ““BRAVIA” Sync Features”... - Page 10 OPT/INPUT COAX and HDMI jacks. • Even if the stand is turned off (active standby mode), the HDMI signal will be sent from the connected component to the TV via the HDMI connection. You can enjoy image and sound from the component on the TV. Notes on HDMI connections •...
-
Page 11: Connecting Satellite Tuner Or Cable Television Tuner
Connecting satellite tuner or cable television tuner When connecting a satellite tuner or cable television tuner that does not have an HDMI jack, set “CTRL HDMI” to “OFF” in the AMP menu of the stand (page 24). Satellite tuner or cable television tuner, etc., with an HDMI jack HDMI OUT Digital Audio OUT... -
Page 12: Connecting Other Components
Connecting other components When connecting components that do not have HDMI jacks, such as a “PlayStation 2” or a DVD player, etc., set “CTRL HDMI” to “OFF” in the AMP menu of the stand (page 24). Even if “CTRL HDMI” is set to “ON,” you can enjoy a video cassette recorder, etc., that does not have surround channels by connecting its audio and video output jacks directly to the TV instead of the stand. -
Page 13: Connecting The Ac Power Cord (Mains Lead)
• If you have poor FM reception, use a 75-ohm coaxial cable (not supplied) to connect the stand to an outdoor FM antenna (aerial) as shown below. Rear of the stand Notes • Be sure to fully extend the FM wire antenna (aerial). •... -
Page 14: Playback Options
Playback Options Index to parts and controls For more information, see the pages indicated in parentheses. Front panel buttons and indicator Front panel buttons and indicator A INPUT SELECTOR Press to select the input source to play back. Each time you press the button, the input source changes cyclically as follows: TV t BD t DVD t SAT/CATV t AUDIO t FM t DMPORT t TV... - Page 15 Front panel display About the indications in the front panel display A Audio format indicators Light up according to the audio format that is being input to the stand. D : Dolby Digital PLII : Dolby Pro Logic II LPCM : Linear PCM B NIGHT (29) Lights up in NIGHT MODE.
- Page 16 Remote control INPUT SELECTOR CENTER SUBWOOFER LEVEL DISPLAY AMP MENU RETURN PRESET NIGHT DIMMER TUNING TUNING MUTING VOLUME SOUND FIELD Buttons for the operation of this stand A ?/1 (on/standby) B LEVEL Press to adjust the level of the center signal and subwoofer.
-
Page 17: Enjoying Tv
Enjoying TV INPUT SELECTOR INPUT CENTER SUBWOOFER SELECTOR +/– LEVEL DISPLAY AMP MENU RETURN MENU PRESET NIGHT DIMMER PRESET TUNING TUNING MUTING VOLUME SOUND FIELD VOLUME +/– Turn on the TV and choose a program. Refer to the operating instructions of your TV for details. - Page 18 For video components, change the TV’s input to the HDMI input you chose in step 3. For details, refer to the operating instructions of your TV. Adjust the volume by pressing VOLUME +/–. Tips • The sound may be output from the TV’s speaker. In this case, turn the volume of the TV’s speaker down to minimum.
-
Page 19: Tuner Functions
Tuner Functions Presetting radio stations You can preset 20 FM stations. Before tuning, make sure to turn down the volume to minimum. INPUT SELECTOR INPUT CENTER SUBWOOFER SELECTOR +/– LEVEL DISPLAY AMP MENU C, X, x, c, RETURN MENU PRESET NIGHT DIMMER PRESET... -
Page 20: Naming Preset Stations
To turn off the radio Press "/1 to turn off the stand. To change to another function, press INPUT SELECTOR +/–. To listen to non-preset radio stations Use manual or automatic tuning in step 2. For manual tuning, press TUNING +/– repeatedly. -
Page 21: Using The Radio Data System (Rds)
Viewing the station name or frequency in the front panel display When the stand is set to “FM,” you can check the frequency using the front panel display. Press DISPLAY. Each time you press DISPLAY, the station name and the frequency alternate in the front panel display. -
Page 22: Surround Function
• The sound field default setting for “DMPORT” is “P.AUDIO,” and for other sources, “STANDARD.” • If you press the THEATRE button on a Sony TV remote when “CTRL HDMI” is set to “ON,” the sound field changes to “MOVIE” (some Sony TVs excluded). -
Page 23: Bravia" Sync Features
To use “BRAVIA” Sync, set the Control for HDMI function to on for the connected components. When you connect a Sony TV with the Control for HDMI function, the Control for HDMI function for the stand and the connected components can be set simultaneously by setting the Control for HDMI function of the TV. -
Page 24: Enjoying Blu-Ray Disc/Dvd
If “COMPLETE” does not appear after performing the steps above Set the Control for HDMI function to on for both the stand and the connected component individually. Press AMP MENU. Press repeatedly until “SET HDMI” appears, then press Press repeatedly until “CTRL HDMI”... -
Page 25: (One-Touch Play) Enjoying The Tv Sound From The Stand
Enjoying the TV sound from the stand (System Audio Control) You can enjoy the TV sound from the speakers of the stand by means of a simple operation. You can also adjust the volume and turn off the sound of the stand using the TV remote. For details, refer to the operating instructions of the TV. -
Page 26: Using The Power Saving Function
Using the power saving function (HDMI PASS THRU) If a “BRAVIA” Sync-compatible TV is connected to the stand, and the TV is turned off, HDMI signal transmission stops, and power consumption is reduced. The default setting is “AUTO.” Note • This function is available only when “CTRL HDMI” is set to “ON.”... -
Page 27: Advanced Settings
Advanced Settings Settings and adjustments using the amplifier menu Using the AMP menu You can set the following items with AMP MENU on the remote. The default settings are underlined. AMP MENU LEVEL LEVEL SW LEVEL AUDIO TONE BASS TREBLE AUDIO A/V SYNC DUAL... - Page 28 • These settings are retained even if you disconnect the AC power cord (mains lead). The following pages show details for each setting. Setting the speaker level (CNT LEVEL, SW LEVEL) You can adjust the level and the balance of the speaker and subwoofer.
- Page 29 Enjoying multiplex broadcast sound (DUAL MONO) You can enjoy multiplex broadcast sound when the stand receives an AC-3 multiplex broadcast signal. Note • To receive an AC-3 signal, you need to connect a digital satellite tuner to the stand with an optical cable or coaxial cable, and set the digital output mode of the digital satellite tuner to AC-3.
- Page 30 Changing the display setting (DISPLAY) You can change the display behavior of the front panel display. Select “SYSTEM” in the AMP menu, or c. then press Select “ DISPLAY,” then press Select the setting. • ON: The display stays turned on. •...
-
Page 31: Additional Information
If you experience any of the following difficulties while using the stand, use this troubleshooting guide to help remedy the problem before requesting repairs. Should any problem persist, consult your nearest Sony dealer. POWER The power is not turned on. - Page 32 No sound or only a very low-level sound of the connected component is heard from the stand. • Press VOLUME + and check the volume level. • Press MUTING or VOLUME + to cancel the muting function. • Check that the input source is correctly selected.
-
Page 33: Specifications
If the cause of the problem cannot be found even after checking the above item, consult your nearest Sony dealer. If the stand still does not operate properly after performing the above measures, reset the stand as follows: Use buttons on the stand for the operation. - Page 34 Formats supported by this stand Digital input formats supported by this stand are as follows. Format Supported/Not supported Dolby Digital Linear PCM-2ch* Linear PCM-7.1ch 48k* (Only via HDMI) Linear PCM-7.1ch 96k Dolby Digital Plus Dolby True HD DTS-HD * Linear PCM accepts sampling frequencies of no more than 48 kHz.
- Page 35 General Power requirements 220 – 240 V, 50/60 Hz Power consumption On: 80 W Active Standby (Power consumption increases when the HDMI function is activated and the TV connected to the stand is turned on, even if the stand is turned off.): 3.5 W or less Standby: 0.3 W or less Dimensions (approx.) 1,000 mm ×...
-
Page 36: Index
12 Digital optical cord 9 DIMMER 29 DISPLAY 21 DUAL MONO 29 INPUT MODE 29 INPUT SELECTOR 14 Sony Corporation Printed in Malaysia NIGHT MODE 29 Preventing the TV from falling 8 PROTECTOR 33 Radio 19 Radio stations 19...
Need help?
Do you have a question about the RHT-G5 and is the answer not in the manual?
Questions and answers