Table of Contents
Advertisement
Quick Links
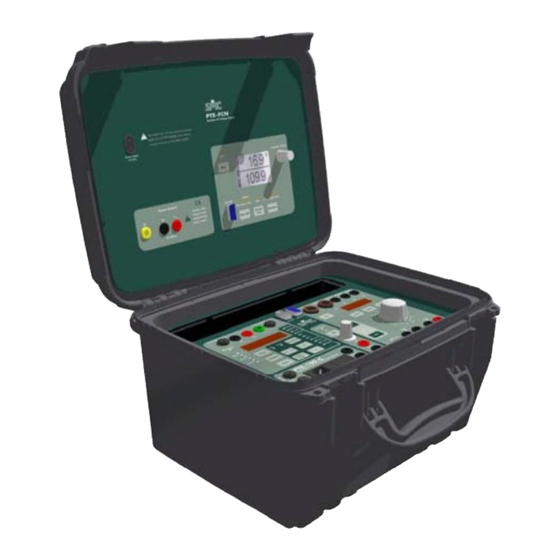
PTE-50-CE Pro
Quality is the core reference for EuroSMC's activities, aimed to fully satisfy our
customers' needs and expectations.
DISCLAIMER
SINGLE PHASE RELAY TEST EQUIPMENT
The information, product specifications, and technical data contained in this
User's Manual
document imply no contractual binding to EuroSMC's responsibility. The user is the
sole responsible for the application of the products mentioned in this document.
EuroSMC explicitly exonerates itself from liability to accidents or unwanted results,
directly or indirectly derived from mistakes made in the writing of this document.
Copying or reproducing all or part of this document is not allowed without the
explicit written permission from EuroSMC. Due to continuing development and
quality improvements, EuroSMC reserves the right to make changes in their products
without notice.
PTE-50-CE Pro
REFERENCE: FAFVMV02PR
EDITION: DECEMBER 2017
VERSION: 2
2
Advertisement
Table of Contents

Related Manuals for SMC Networks PTE-50-CE Pro


Summary of Contents for SMC Networks PTE-50-CE Pro
- Page 1 PTE-50-CE Pro Quality is the core reference for EuroSMC’s activities, aimed to fully satisfy our customers’ needs and expectations. DISCLAIMER SINGLE PHASE RELAY TEST EQUIPMENT The information, product specifications, and technical data contained in this User’s Manual document imply no contractual binding to EuroSMC’s responsibility. The user is the sole responsible for the application of the products mentioned in this document.
-
Page 2: Table Of Contents
Operation Manual PTE-50-CE Pro 5.4. EXTERNAL REFERENCE INPUT ............58 INDEX 5.5. SIGNAL MONITORS ..............58 PACKING LIST ............... 5 5.6. AVAILABLE REFERENCES .............. 59 1. INTRODUCTION ............... 7 5.7. CASE ................... 59 1.1. MAIN FUNCTIONAL FEATURES ............8 ... -
Page 3: Packing List
Operation Manual PTE-50-CE Pro PACKING LIST Module PTE-FCN Unit PTE-50-CE. PTE-FCN module PTE-FCN Unit Nylon cover. AC supply cord Voltage supply cable type Schuko. Connection cables (1 black, 1 red) Interconnection cables 2.5 mm section (2 red and 2 black). -
Page 4: Introduction
Operation Manual PTE-50-CE Pro 1.1. MAIN FUNCTIONAL FEATURES 1. INTRODUCTION The following are the more outstanding functions/features that the PTE-50-CE has: The PTE-50-CE is designed as a Portable Single phase unit that allows the user a) TIMER MEASUREMENT to test, as stand alone unit or in combination with others, all type of protective relays. -
Page 5: Applications
Operation Manual PTE-50-CE Pro f) RS-232 COM PORT Single phase distance relays. Directional power relays (single and three phase). Used to control the equipment from an external computer, can be used to Maximum and minimum voltage relays. perform the following: Dynamic test. -
Page 6: Operational Principle
Operation Manual PTE-50-CE Pro 2. OPERATIONAL PRINCIPLE 2.1. GENERAL In this section a general overview of the operational basic principles on which the PTE-50-CE is based, are given in this section. The PTE-50-CE unit has 3 main functional independent blocks, they are: Front Panel. -
Page 7: Intelligent Generator Module
Operation Manual PTE-50-CE Pro 2.3. INTELLIGENT GENERATOR MODULE Essentially, the IGM is a linear power amplifier, controlled by its internal microprocessor. It produces the sinusoidal signal in the frequency and the phase selected. This is amplified and adapted by a transformer in the selected output range. -
Page 8: Controls Description
Operation Manual PTE-50-CE Pro 3. CONTROLS DESCRIPTION 3.1. MAIN SUPPLY SECTION 3.1.1. MAIN VOLTAGE SUPPLY This section describes one by one and in detail all of the controls, indicators, displays, and connection taps on the front panel of the PTE-50-CE. As well as The unit is supplied with SCHUKO type plug 2 poles with earth. -
Page 9: Timer Section: Chronometer
Operation Manual PTE-50-CE Pro FIXED 110 V c.a. VOLTAGE SUPPLY 3.2. TIMER SECTION: CHRONOMETER This output is located in the lower central section to the right of the power supply The Timer is located on the left-hand side of the unit and clearly marked from switch. - Page 10 Operation Manual PTE-50-CE Pro 3.2.1. CONTROL KEYS AND KNOBS: Selecting the function mode 3.2.2. VISUAL INDICATORS AND DISPLAYS This section describes how to select the timer mode for the starting/stopping of Function mode indication the timer, the timer reading, and how to reset it. The keyboard for the timer is as follows: There are 6 green LED’s of 3 mm.
- Page 11 Operation Manual PTE-50-CE Pro Activating ON/OFF in any channel. When the upper LED is lit, it indicates that the Timer will stop when the Signal Monitor is activated. When this LED is flashing it indicates that Activating a Step to 2 Value in any channel.
-
Page 12: Power Outputs
Operation Manual PTE-50-CE Pro 3.3. POWER OUTPUTS The equipment has an output and phase channels. In each one of them can be CONTROL KNOBS AND PRESS KEYS selected the desired output level as well as the phase angle. a) Selecting the digit to be used. - Page 13 Operation Manual PTE-50-CE Pro d) Selecting the 2nd value Selecting the output range and output selection When this key is pressed it allows the selection of a 2 value and it is shown in the display. This selection does not cancel This key has two function modes: the value already selected in the output at the moment.
- Page 14 Operation Manual PTE-50-CE Pro o VISUAL AND DISPLAY INDICATORS These three, 3 mm LEDs (red), indicate the digit selection for regulation. Only one will be lit and it indicates the digit a) LED Indicator for 2nd Value selection above it to be regulated. These are situated above the press key.
- Page 15 Operation Manual PTE-50-CE Pro To selected the desired output current or voltage, is made by pressing the TAP 3.3.2. PHASE ANGLE SECTION I/V key This is situated to the right of the unit and is perfectly identified. It contains all the...
- Page 16 Operation Manual PTE-50-CE Pro d) Activating 2 value CONTROL KNOBS AND PRESS KEYS This key works in a sequential way. When pressed the phase a) selecting the digit to be used angle in the output changes to the 2 value, when it is...
-
Page 17: Power Output Application
Operation Manual PTE-50-CE Pro 3.4. POWER OUTPUT APPLICATION INPUT TAPS 3.4.1. Use External reference input taps Taking note that the output channel, of PTE-50-CE, can supply a maximum of These taps are situated in the upper 100 VA.. This means that the output tap we have a voltage value that cannot be... - Page 18 Operation Manual PTE-50-CE Pro 3.4.2. CONNECTING IN PARALLEL WITH OTHER EQUIPMENT To use the three power outputs as one, we will select the Master-Slave-Slave configuration, and then we just have to turn the channel 1 output on. If we want to connect various PTE-50-CE outputs to obtain a higher output in Note: Of course, we can connect only two channels.
-
Page 19: Control Section
Operation Manual PTE-50-CE Pro a) Activating the BOOSTER mode: The BOOSTER key has two modes, ACTIVATED and 3.5. CONTROL SECTION DEACTIVATED. When the unit is turned on is in the DEACTIVATED mode. When it is activated, the maximum This part of the equipment refers to the general control. The unit contains several voltage is double in each output range. - Page 20 Operation Manual PTE-50-CE Pro Slave. When the equipment is selected in the Slave mode, is Bus: the reference is another PTE unit connected via BUS- controlled by the unit selected as Master, and changes and PTE. Normally the PTE-300-V or PTE-100-V. If the led is controls are taken from the Master unit.
- Page 21 Operation Manual PTE-50-CE Pro To change the fuse you must do the following: Disconnect the main supply. Open carefully the Front Panel: extract the four screws and take care of not disconnecting any other cables inside the equipment. Figure 10: Monitor input taps Check the correspondent fuses and change the broken one.
-
Page 22: Use And Descriptions
Operation Manual PTE-50-CE Pro The unit is supplied with a connecting cable ready to connect directly to this 4.1.1. SIGNAL MONITOR output, to any type of computer or serial input printer. It is here where the timer receives the signals from the relay being tested and this is shown in the VISUAL LED indicator marked MONITOR. -
Page 23: Level Selection: Power Output
Operation Manual PTE-50-CE Pro 4.2.2.OUTPUT MODE SELECTION (I/V) As mentioned before, the PTE-50-CE can be used as a current or voltage Mode 4: source. When the unit is turned on it will be in the current mode. The voltage Start: By output disconnection. - Page 24 Operation Manual PTE-50-CE Pro selected) the LED indicator will flash slowly indicating that there is no reference. If there is no reference in the BUS and the output is turned on, the unit will In this case, if you increase the level with the output ON, overload alarms may synchronize automatically to the last valid reference (LINE).
-
Page 25: Phase Angle Section
Operation Manual PTE-50-CE Pro a) EUROPEAN DIRECTION: 4.2.7. DYNAMIC TESTS: STEP TO A 2ND VALUE The display shows, in hexadecimal degrees (0-359.9), the phase angle between the OUTPUT and the selected reference source (Freq., The PTE-50-CE allows the operator to make dynamic tests, by allowing jumps... -
Page 26: General Control Section
Operation Manual PTE-50-CE Pro 4.3.2. DYNAMIC TEST: STEP TO A 2 VALUE The current input should be connected to the black tap marked “0” and the green tap marked 0.1 - 25 A. The voltage input should be connected to the The PTE-50-CE allows the operator to make dynamic tests, by allowing jumps black tap marked “0”... -
Page 27: Comunications In The Bus-Pte
Operation Manual PTE-50-CE Pro 4.5. COMUNICATIONS IN THE BUS-PTE 4.5.2. EVENTS TRANSMITTED BY A PTE-50-CE 4.5.1. EVENTS IN THE BUS-PTE A PTE-50-CE sends to the BUS-PTE the following events: The PTE range equipment has been designed in such a way that the test... -
Page 28: Specifications
Operation Manual PTE-50-CE Pro 5. SPECIFICATIONS 4.6.2. FAILURE DETECTION The PTE-50-CE contains the following outputs and features: The PTE-50-CE incorporates a self-check function that is active every time the One independent power output up to 50 A in current mode and 150 unit is turned ON. -
Page 29: Internal Timer
Operation Manual PTE-50-CE Pro Output mode: floating, completely isolated of the rest and o Operation modes: the ground. START by: Output distortion: a) Internal signal: Typical: < 0.5 % Any output ON/OFF. Maximum: 1 % Any step or change to 2 value. -
Page 30: Available References
Operation Manual PTE-50-CE Pro Another works with dry contacts and live voltage signals from 5 to 250 6. THE PTE-FCN VOLTAGE MODULE V ac. o dc to stop the timer. The PTE-50-C Pro includes the PTE-FCN module, an electronically controlled 5.6. - Page 31 Operation Manual PTE-50-CE Pro adjustable output voltage’s frequency, which is generated by the PTE-FCN module and, therefore, is no longer referenced BUTTONS AND LEDS to the main unit’s current or voltage outputs. The rotary knob adjusts the parameter that you have previously selected here.
- Page 32 Operation Manual PTE-50-CE Pro 6.1.4. PTE-FCN TECHNICAL CHARACTERISTICS POWER-UP STATE Upon connection to the supply source, the unit will have these settings: Power supply 110 Vac 10 % Output: OFF. Output voltage regulation 0.0 – 140.0 Vac ...
-
Page 33: After Sales Service And Warranty
Operation Manual PTE-50-CE Pro 6.1.5. PTE-FCN FRONT PANEL 7. AFTER SALES SERVICE AND WARRANTY 7.1. WARRANTY This is an expression of trust that our products obtain, based on the reliability and functionality standards that our customers expect. The warranty covers the free replacement or repair of defective components for one year in the terms specified in the supplied warranty statement and registration card. - Page 34 Operation Manual IMPORTANT...
Need help?
Do you have a question about the PTE-50-CE Pro and is the answer not in the manual?
Questions and answers