
Related Manuals for Cub Cadet CC-1000PS


Summary of Contents for Cub Cadet CC-1000PS
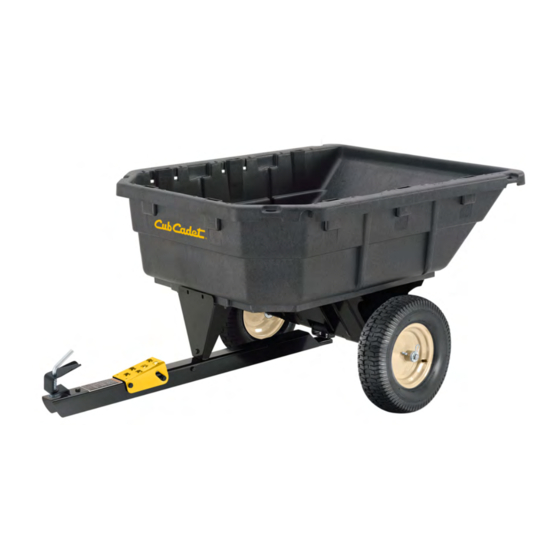
- Page 1 CC-1000PS 15 cu ft POLY SWIVEL DUMP CART U.S. Patent No. 8,496,298 & 9,242,588 READ AND FOLLOW ALL SAFETY RULES AND OPERATING INSTRUCTIONS BEFORE USING THIS EQUIPMENT 6004279 - REV B 09/19...
-
Page 2: Safety Rules
Safety Rules This is the safety alert symbol. It is used to alert you to potential personal injury hazards. Obey all safety messages that follow this symbol to avoid possible injury or death. Read and understand all safety rules and operating instructions before using this tractor attachment. -
Page 3: Warranty
Warranty IF YOU ARE MISSING PARTS DO NOT RETURN TO STORE Email cs@ohiosteel.com or call 1-800-652-2321, ext. 212 Before you call, please email our customer service team at cs@ohiosteel.com with the following: A description of the issue you are having Photos of the issue that include an overall view and detailed view from multiple angles If applicable, a short video showing the issue... -
Page 4: Tools Required For Assembly
Carton Contents 2 (x1) 1 (x1) 4 (x12) 3 (x12) 5 (x1) (x1) 6 (x1) 22 (x2) 24 (x4) 23 (x1) 25 (x2) 26 (x2) TOOLS REQUIRED FOR ASSEMBLY: • 1/2" Wrench or Socket • Grease Gun... - Page 5 Assembly Instructions Hold Poly Body (1) on side as shown. Insert Hex Bolts (3) as shown. Flip Poly Body (1) to expose bolts. Tape Tape Tape TIP: Bolt heads can be secured with tape to aid in asembly. Install Undercarriage (2) over top of Hex Bolts. Install and tighten all Locknuts (4).
- Page 6 Assembly Instructions Attach Front Support (5) to Poly Body (1) and tighten Lock Nuts (4). Center Spacer (23) inisde Swivel Clevis (10) on Drawbar Assembly. Insert Axle (6) halfway into Undercarriage (2). Push Axle (6) through Swivel Clevis (10) and Spacer (23) and then through rest of Undercarriage (2).
- Page 7 Assembly Instructions Slide in order: 1" Washers (24), 2" Spacers (25) and then Wheels (22) onto Axle (6) and secure with Hairpins (26). Depress Foot Pedal (14), insert Drawbar Assembly into Front Support (5) . When Drawbar is locked in place, flip cart upright onto wheels.
- Page 8 Operating Instructions Before Using Dump Cart: Apply grease to wheels using grease gun until grease can be seen squeezing out from both sides of the wheel. Check tire pressure and inflate to 28 psi if needed. Read all Safety Rules found on page 1. How to Use Dump Cart: Attach Dump Cart to your tractor using the supplied hitch pin.
- Page 9 Do-It-Yourself Accessories 35.13 31.63 USE 1/2" PLYWOOD 35.25 USE STANDARD 2 X 4 34.00 13.00 45.00 13.00 13.00 USE NOMINAL GRADE C 1 X 3...
-
Page 10: Exploded View
EXPLODED VIEW 24 25 ITEM PART NO DESCRIPTION QTY ITEM PART NO DESCRIPTION 311161 POLY BODY 3/8-16 x 3" HEX BOLT 6000404-B2 UNDERCARRIAGE 3/8-16 x 3-1/2" HEX BOLT 5/16-18 x 1-1/2" HEX BOLT BUSHING KIT 6004321 5/16-18 LOCK NUT LATCH 6001663-BY 6000310-B2 Front Support LATCH SPRING... - Page 11 Designed And Tested In Columbus, Ohio Manufactured In The U.S.A. From Domestic And Imported Components MODEL # CC-1000PS (800) 652-2321 (800) 652-2321...
Need help?
Do you have a question about the CC-1000PS and is the answer not in the manual?
Questions and answers