Advertisement
Available languages
Available languages
Quick Links
Examine all packaging material for small parts that may have come loose during shipment. Periodic checks are recommended to insure that all components
are in proper posi�on, �ght and free from damage. Keep this assembly instruc�on for future reference. Adult assembly is required.
CODE
QTY
1
16
9.5 x 25mm Allen Bolts
2
3
6.3 x 50mm Allen Bolts
3
8
6.3 x 60mm Allen Bolts
4
14
6.3 x 38mm Allen Bolts
5
1
M4 Allen Wrench
6
16
#8 Spring Washers
7
16
#8 Flat Washers
8
4
10.5 x 90mm Metal Dowel Pins
9
56
4 x 30mm Wood Screws
• Do not let any sharp objects touch or rub the surface of the product.
• When assembling, do not let children play around the working area.
• Please confirm all parts are correct before star�ng the assembly process.
• Do not �ghten all bolts and screws completely un�l the en�re unit has been assembled and set up.
• Be careful if using power tools as they can over �ghten screws and strip threads.
CARE & MAINTENANCE: The touch of a so� cloth is all the maintenance the finish will ever need. Please do not use harsh or abrasive cleaners for polishing, as they may
cause damage to the finish. Periodic checks are recommended to make sure that all hardware is securely �ghtened.
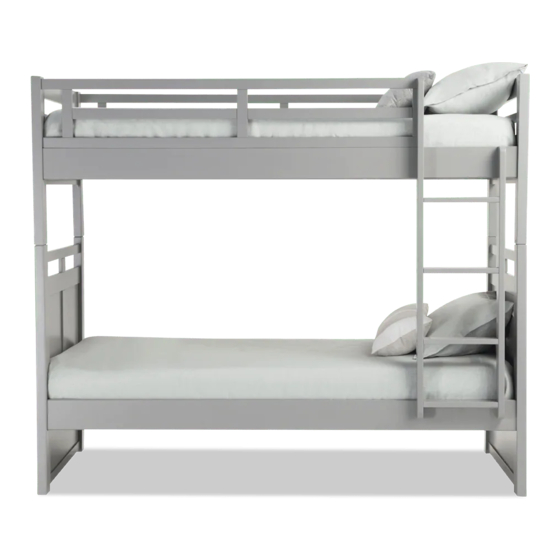
TT Bunk Bed
HARDWARE
WARNING
CODE
QTY
COMPONENTS
A
1
Le� Lower Side Panel
C
1
Front Lower Bed Rail
E
1
Le� Top Side Panel
G
1
Front Top Bed Rail
I
1
Front Guardrail
K
1
Upper Slat Sec�on
M
1
Right Ladder Panel
Date: 10-20-2016
Page 1 of 6
CODE
QTY
COMPONENTS
B
1
Right Lower Side Panel
D
1
Rear Lower Bed Rail
F
1
Right Top Side Panel
H
1
Rear Top Bed Rail
J
1
Rear Guardrail
L
1
Lower Slat Sec�on
N
1
Le� Ladder Panel
O
4
Ladder Rungs
Advertisement

Related Manuals for Bob's Discount Furniture CHADWICK TWIN-TWIN BUNK BED 20040427


Summary of Contents for Bob's Discount Furniture CHADWICK TWIN-TWIN BUNK BED 20040427
- Page 1 TT Bunk Bed Date: 10-20-2016 Page 1 of 6 Examine all packaging material for small parts that may have come loose during shipment. Periodic checks are recommended to insure that all components are in proper posi�on, �ght and free from damage. Keep this assembly instruc�on for future reference. Adult assembly is required. CODE HARDWARE CODE...
- Page 2 TT Bunk Bed Date: 10-20-2016 Page 2 of 6 FIGURE 1 STEP 1 - Figure 1 Begin assembly by a�aching each Lower Bed Rail (C & D) to the inside of each Le� and Right Lower Side Panel (A & B) by using 2 Allen Bolts (1), 2 Spring Washers (6) and 2 Flat Washers (7) per post.
- Page 3 TT Bunk Bed Date: 10-20-2016 Page 3 of 6 STEP 3 - Figure 3 Next a�ach Front Guardrail (I) to Front Top Bed Rail (G) using Bolts (3). Repeat process to a�ach Rear Guardrail (J) to Rear Top Bed Rail (H). Do not fully �ghten bolts for this step.
- Page 4 TT Bunk Bed Date: 10-20-2016 Page 4 of 6 FIGURE 5 STEP 5 - Figure 5 Insert Dowel Pins (8) into corners of Le� Lower Side Panel (A) and Right Lower Side Panel (B). Line up the holes of Le� Top Side Panel (E) and Right Top Side Panel (F) with the pins and carefully slide top assembly down onto bo�om...
- Page 5 TT Bunk Bed Date: 10-20-2016 Page 5 of 6 STEP 6 - Figure 6 Secure Ladder Rungs (O) in between Le� Ladder Panel (N) and Right Ladder Panel (M) using 2 Bolts (4) per rung. Tighten all FIGURE 6 bolts with Allen Wrench (5) provided. STEP 7 - Figure 7 Secure Le�...
- Page 6 TT Bunk Bed Date: 10-20-2016 Page 6 of 6 STEP 9 - Figure 9 A�ach Upper Slat Sec�on (K) to the inside of each Front & Rear Top Bed Rail (I & J) by se�ng in place and securing with 14 Wood Screws (9) on each end of stats.
- Page 7 Lit Superposé TT Date: 10-20-2016 Page 1 of 6 Examinez tous les matériaux d'emballage pour les petites pièces qui peuvent avoir été lâche pendant le transport. Des contrôles périodiques sont recommandées afin d'assurer que tous les composants sont en bonne position, tendu et sans dommages. Gardez ces instructions de montage pour référence future. Assemblage par un adulte est requise.
- Page 8 Lit Superposé TT Date: 10-20-2016 Page 2 of 6 FIGURE 1 ÉTAPE 1 - Figure 1 Commencez l'assemblage en fixant chaque rail de lit inférieur (C & D) à l'intérieur de chaque panneau latéral gauche et droit (A et B) à l'aide de 2 boulons Allen (1), 2 rondelles élas�ques (6) et 2 rondelles plates (7 ) par la poste.
- Page 9 Lit Superposé TT Date: 10-20-2016 Page 3 of 6 ÉTAPE 3 - Figure 3 Ensuite, a�achez le garde-corps avant (I) au rail de lit supérieur avant (G) à l'aide des boulons (3). Répétez le processus pour a�acher le garde-corps arrière (J) au rail supérieur du lit supérieur (H).
- Page 10 Lit Superposé TT Date: 10-20-2016 Page 4 of 6 FIGURE 5 ÉTAPE 5 - Figure 5 Insérez les goujons (8) dans les coins du panneau latéral inférieur gauche (A) et du panneau latéral inférieur droit (B). Alignez les trous du panneau latéral supérieur gauche (E) et du panneau latéral supérieur droit (F) avec les broches et faites glisser l'ensemble supérieur vers le bas.
- Page 11 Lit Superposé TT Date: 10-20-2016 Page 5 of 6 ÉTAPE 6 - Figure 6 Fixez les réglages de l'échelle (O) entre le panneau de l'échelle gauche (N) et le panneau de l'échelle droite (M) à l'aide de 2 boulons (4) par FIGURE 6 échelon.
- Page 12 Lit Superposé TT Date: 10-20-2016 Page 6 of 6 ÉTAPE 9 - Figure 9 Fixez la sec�on de lame supérieure (K) à l'intérieur de chaque rail de lit avant et arrière (I & J) en le me�ant en place et en vous fixant avec 14 vis à...
Need help?
Do you have a question about the CHADWICK TWIN-TWIN BUNK BED 20040427 and is the answer not in the manual?
Questions and answers