Table of Contents
Advertisement
Owner's Manual
Instructions for Assembly, Testing, Operation,
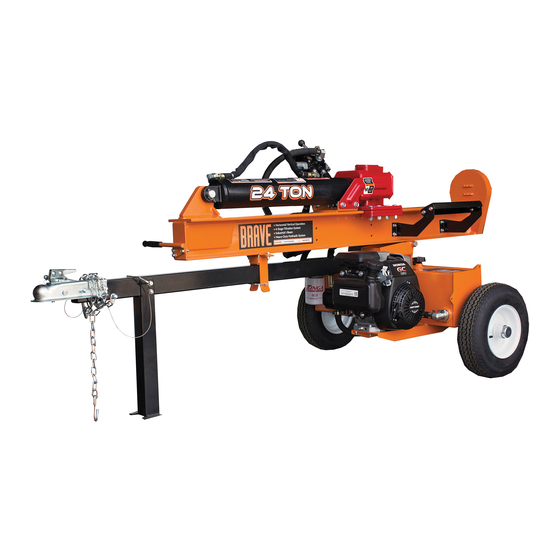
24, 30, & 37 Ton Log Splitters: Outdoor hydraulic powered machine
READ and UNDERSTAND this manual completely before using log splitter.
All operators of this equipment must read and completely understand all safety information, operating instructions, maintenance
and storage instructions. Failure to properly operate and maintain the log splitter could result in serious injury to the operator and
bystanders from moving parts that can crush or cut, flying objects, burns, fire or explosion, escaping high pressure hydraulic fluid,
or carbon monoxide poisoning in particular, be aware of the following hazards.
Crush and Cut Hazards
Moving parts can crush and cut hands and fingers. Keep hands clear of endplate, wedge, logs, and log dislodger/strippers
while splitting.
High Pressure Hydraulic Fluid Hazards
High fluid pressures and temperatures are developed in hydraulic log splitters. Hydraulic fluid escaping through even a pin-
size hole opening can puncture skin and cause severe blood poisoning. Inspect hydraulic system regularly for possible leaks.
Never check for leaks with your hand while the system is pressurized. Seek medical attention immediately if injured by
escaping fluid.
Fire Hazards
If your log splitter is intended for use near an ignitable forest, brush, or grassy covered land, the engine exhaust should be
equipped with a spark arrestor. See the "Specifications" section of this manual to determine if your splitter already has a spark
arrestor. If not equipped, call Brave Product Support for ordering information.
Keep a class ABC fire extinguisher with you.
ADD OIL TO ENGINE BEFORE USING: Engine is shipped without oil. DO NOT start log splitter without first adding oil.
ADD HYDRAULIC OIL: Your log splitter was shipped without hydraulic oil. Refer to Periodic Maintenance section of this manual
PRIME THE PUMP: The pump on your log splitter needs to be primed before use. Refer to Initial Setup section for instructions.
INSPECT COMPONENTS: Closely inspect to make sure no components are missing or damaged.
See Initial Unpacking and Set-up for instructions and for whom to contact to report missing or damaged parts.
Any Questions, Comments, Problems or Parts Orders
MVH1724A.2
MODELS:
VH1724GC
VH1730GC
VH1737GX
Servicing and Storage
that splits wood logs.
for instructions on filling the hydraulic reservoir
Call Brave Product Support 1-800-350-8739
ITEM NUMBER: __________________
SERIAL NUMBER: ________________
WARNING
STOP!
1
Advertisement
Table of Contents

Related Manuals for Brave VH1724GC


Summary of Contents for Brave VH1724GC
- Page 1 If your log splitter is intended for use near an ignitable forest, brush, or grassy covered land, the engine exhaust should be equipped with a spark arrestor. See the "Specifications" section of this manual to determine if your splitter already has a spark arrestor. If not equipped, call Brave Product Support for ordering information. ...
-
Page 2: Hazard Signal Word Definitions
Hazard Signal Word Definitions... -
Page 3: Table Of Contents
Table of Contents Hazard Signal Word Definitions ................................2 Table of Contents ....................................... 3 About Your Log Splitter .................................... 4 Safety Label Locations ....................................5 Machine Component Identification ................................7 Initial Setup ........................................ 8 Moving and Towing to the Job Site ................................. 10 Before Each Use –... -
Page 4: About Your Log Splitter
Follow all safety precautions presented throughout this manual. A summary of important safety information can be found at the end of this manual. Contact Brave Product Support at 1-800-350-8739 for any questions about the appropriate use of this log splitter and/or optional accessories. -
Page 5: Safety Label Locations
Safety Label Locations Always make sure safety labels are in good condition. If a safety label is missing or not legible, order new labels or unsafe operation could result. Contact Brave Product Support at 1-800-350-8739 Ref# Part # Description 787944... - Page 6 Safety Label Locations SPLIT CONTROL LEVER OPERATION...
-
Page 7: Machine Component Identification
Machine Component Identification Ref # Description Ref # Description Return Line Filter Engine On/Off Split Control Lever Horizontal Lock End Plate Vertical Lock Beam Support Leg 2” Ball Coupler Wedge Log Dislodger Safety Chains Cylinder Hydraulic Reservoir Cap Engine Suction Strainer Fuel On/Off... -
Page 8: Initial Setup
Initial Setup IMPORTANT! Engine is shipped without oil. DO NOT start the engine before adding oil. See Assembly Instructions section of this manual on page 37 to assemble the log splitter before setup. Closely inspect all log splitter components. Step One: (See Machine Components section of this manual for diagram of components.) Inspect Log Splitter ... - Page 9 Initial Setup 5. Disconnect the spark plug wire from the spark plug. This prevents the engine from Step Three: starting until the hydraulic pump and cylinder are completely filled with oil. Make Add Hydraulic Oil sure the spark plug wire is held away from the spark plug with string or other to Reservoir nonconductive material.
-
Page 10: Moving And Towing To The Job Site
Moving and Towing to the Job Site WARNING The log splitter is heavy. It can crush and cause serious injury if it rolls out of control or tips over. Follow the instructions below for safely moving and towing the log splitter. Moving the log splitter: Place in Make sure the log splitter is locked in the horizontal position with horizontal... - Page 11 Moving and Towing to the Job Site Towing: 1. Read Review towing safety instructions in your vehicle manual. Instructions 2. Check Make sure tires are fully inflated and in good repair. Tires WARNING: Do not over-inflate tires. Serious injury can occur if tire explodes. ...
- Page 12 Moving and Towing to the Job Site 5. Attach to Hitch Attach log splitter to vehicle hitch. (2" ball) Attach log splitter's coupler to a class 2 or higher hitch with 2" ball (only). Adjust coupler to ball by raising locking lever and turning lock nut with wrench. Proper adjustment is obtained when coupler is as tight as possible on ball and locking lever can still be opened and closed.
- Page 13 Moving and Towing to the Job Site 7. Lock Support To provide adequate ground clearance while towing, secure the support leg in the UP Leg UP position. Lock support leg in UP position 8. Tow to Desired Tow log splitter carefully to desired work site. (See Step Three: Before Each Use –...
-
Page 14: Before Each Use - Inspection/Maintenance
Before Each Use – Inspection/Maintenance Step One: Inspect and maintain log splitter before each use If the log splitter has been used previously, it must be inspected and maintained BEFORE EACH SUBSEQUENT USE. WARNING ALWAYS shut off the engine, disconnect the spark plug, and relieve system pressure before inspecting, cleaning, adjusting, or repairing the splitter. - Page 15 Before Each Use – Inspection/Maintenance 5. Hydraulic System Check the hydraulic system carefully: Visually inspect all hoses, tubing, clamps/fittings, pump, and cylinder for cracks, fraying, kinks, or other damage. Check all components for oily residue, which may indicate a leak. Do NOT operate the log splitter if there is any indication of damage or oily residue.
- Page 16 Before Each Use – Inspection/Maintenance 8. Spark Arrestor If the engine is equipped with a spark arrestor muffler, clean and inspect it regularly Muffler (follow spark arrestor manufacturer's service instructions). Replace if damaged. 9. Tires Make sure tires are fully inflated and in good repair if you will be towing the splitter. See tire sidewall for recommended tire pressure.
-
Page 17: Before Each Use - Fueling
Before Each Use – Fueling Step Two: Fueling WARNING Gasoline is highly flammable and explosive. You can be burned or seriously injured when handling fuel. Use extreme care when handling gasoline. 1. Engine Off and The engine must be off and allowed to cool at least two minutes before adding fuel. Cool WARNING: A running engine is hot enough to ignite fuel. -
Page 18: Before Each Use - Work Site Selection And Set-Up
(See the "Specifications" section of this manual to determine if your splitter already has a spark arrestor. Contact Brave Product Support at 1-800-350-8739 for information about obtaining a spark arrestor for your log splitter if it is unequipped.) 2. -
Page 19: Splitting Operation
Splitting Operation WARNING Before starting this log splitter, review the following instructions and safety information for safe operation of the log splitter. Failure to follow these rules may result in serious injury to the operator or bystanders from moving parts that crush, cut, or entangle from flying objects, burns, fire, falling or tripping, or from carbon monoxide poisoning. - Page 20 Splitting Operation 1. Put on Wear the following protective clothing and safety gear: Protective 1. Eye protection. Always wear safety glasses or goggles when operating the machine. Pieces Clothing / of log may fly out and serious eye injury can occur. Gear 2.
- Page 21 Splitting Operation b) Set to 1. Pull out horizontal lock catch pin, grasp lifting handle and lift beam until it rotates into Vertical vertical position. Position Crush hazard. The beam is heavy – do not let it just drop. It could crush WARNING: fingers or cause damage to the splitter.
- Page 22 Splitting Operation Load log onto beam with a cut end against the endplate – positioned for a lengthwise cut. 5. Load Log Notes: a) The log splitter is designed only for cutting lengthwise with the grain, NOT for cutting across the grain. b) This log splitter is designed for cutting logs only up to a maximum of 16"...
- Page 23 Splitting Operation 6. Extend Wedge Move Split Control Lever toward endplate to extend wedge and split log. SPLIT CONTROL LEVER OPERATION Operator Position- Horizontal Operator Position- Vertical Important safety instructions: Operator position. ALWAYS operate the log splitter from the manufacturer's indicated OPERATOR POSITION.
- Page 24 Splitting Operation 8. Important If a log does not split completely and becomes stuck on the wedge, follow the instructions below to STUCK LOG remove the log. Procedure A log can become stuck to the wedge if the wedge becomes embedded in the log and the log doesn't split and separate.
-
Page 25: Storage
Storage WARNING Gasoline vapors can ignite and cause a fire. Select a well-ventilated storage away from sources of heat, flame, or sparks. Follow the instructions below for storing your log splitter between uses 1. Retract Wedge Retract the wedge completely to keep the rod protected from corrosion. 2. -
Page 26: Periodic Maintenance
Periodic Maintenance In addition to the maintenance performed with each use, periodic maintenance should also be performed according to the following schedule. WARNING ALWAYS shut off the engine, disconnect the spark plug, and relieve system pressure before cleaning, adjusting, or repairing the splitter. Relieve system pressure by moving Split Control Lever back and forth several times. - Page 27 Periodic Maintenance 7. Reinstall drain plug 2. Hydraulic 8. Remove suction strainer and wipe off debris with a dry cloth. Oil Change 9. Apply thread sealant and reinstall suction strainer (continued) 10. Dispose of used oil at an oil-recycling center. Used hydraulic oil is hazardous waste. 11.
-
Page 28: Troubleshooting
I- Internal control valve leak Return control valve for authorized repair J- Damaged cylinder piston Return cylinder for authorized repair K- Internally damaged cylinder Return cylinder for authorized repair Any Questions, Comments, Problems or Parts Orders Call Brave Product Support 1-800-350-8739... -
Page 29: Specifications
The manufacturer reserves the right to make improvements in design and/or changes in specifications at any time without incurring any obligation to install them on units previously sold. Any Questions, Comments, Problems or Parts Orders Call Brave Product Support 1-800-350-8739... -
Page 30: Parts Breakdown - Exploded View - Rev A
Parts Breakdown – Exploded View – Rev A... - Page 31 Parts Breakdown – Exploded View – Rev A Unit Key: A = VH1724GC, B = VH1730GC, C = VH1737GX Part Description Unit Part Description Unit 17141 3/4" Hose Clamp 788243 Latch Rod, Short GC160 Honda GC160 Engine 790897 Latch Rod, Long...
-
Page 32: Summary Of Important Safety Information For Operation
Summary of Important Safety information for Operation WARNING Carefully read and make sure you understand the following safety information before using the log splitter. Improper use or maintenance of the log splitter can result in serious injury to the operator or bystanders from moving parts that can crush or cut, flying objects, burns, fire or explosion, escaping high pressure hydraulic fluid, or carbon monoxide poisoning. - Page 33 Summary of Important Safety information for Operation Tires. Be sure the tires are fully inflated and in good repair before towing the log splitter. When adding air to the tires, do not over-inflate – serious injury could occur if tire explodes. ...
- Page 34 Summary of Important Safety information for Operation Do not check for leaks with your hand. Leaks can be located by holding a piece of cardboard or wood (at least two feet long) with your hand at one end and passing the other end near the suspected area (wear eye protection).
- Page 35 Summary of Important Safety information for Operation Safety – During Use General Safety During Use WARNING Before starting this log splitter, review the following rules for safe operation. Failure to follow these rules may result in serious injury to the operator or bystanders. ...
- Page 36 Summary of Important Safety information for Operation Loading/Unloading Unsplit log pile. Do not pile logs to be split in a place that will make you reach across the log splitter in order to load them Hold bark side. Hold the bark side of logs when loading or positioning, never the ends. Never place your hands or any part of your body between a log and any part of the log splitter.
-
Page 37: Assembly Instructions
Assembly Instructions Dismantle shipping crate and remove parts from any boxes. Remove nuts and lag bolts holding the beam assembly, engine assembly, and axle assembly in place in the crate. Fasteners used for packaging can be discarded. Cut all zip ties and remove packaging materials from all components. - Page 38 Assembly Instructions Parts Bag Contents Part # 82563 M6-1.00 Nut Qty: 3 Part # 82280 M8-1.25 x 40mm Part # 791219 Qty: 4 Valve Inlet Fitting Qty: 1 Part # 82281 M8-1.25 Nut Qty: 13 Part # 778642 Valve Outlet Fitting Qty: 1 Part # 780599 White Plastic...
- Page 39 Assembly Instructions Step 1 – Wheels to Axle Assembly Tools Needed Remove everything from the axle (protective wrap, nut, washer, and Torque Wrench Pliers cotter key). Slide wheel onto axle with valve stem facing out. Hammer ...
- Page 40 Assembly Instructions Step 2 – Tow bar Assembly to Axle Assembly Tools Needed Remove bolts and nuts from the beam mount on top of the axle Ratchet Torque Wrench assembly. Slide tow bar assembly into the beam mount on top of the axle ...
- Page 41 Assembly Instructions Step 3 – Install Filter Tools Needed CAUTION: Never back off an installed pipe fitting to achieve proper (2) Adjustable alignment. Loosening installed pipe fittings will corrupt the seal and Wrenches Oil Filter Wrench contribute to leakage and failure. ...
- Page 42 Torque to 21 ft.-lb. 13mm Wrench Fasteners Needed from Parts Bag: Part # 82280 Part # 82281 M8-1.25 x 40mm M8-1.25 Nut Qty: 4 Qty: 4 VH1724GC & VH1730GC VH1737GX Engine Mounting Pattern Engine Mounting Pattern Engine Mount...
- Page 43 Assembly Instructions Step 5 – Attach suction hose Tools Needed 8mm socket Remove the suction hose from the beam assembly (zip tied to side). Ratchet Slide one end of the hose onto the elbow fitting on the axle assembly. ...
- Page 44 Assembly Instructions Step 6 – Stand beam upright Tools Needed CAUTION: Beam assembly is top heavy. None Carefully stand beam assembly in vertical position on solid, level ground. Assistance from a second person is required. WARNING Make sure beam assembly is standing on flat, level area. Have another person steady the beam to prevent it from tipping over.
- Page 45 Assembly Instructions Step 7 –Beam Assembly to Axle Assembly Tools Needed Remove pivot pin from the top of the axle assembly after removing Hammer the cotter pin. Carefully align the axle assembly with the beam assembly. Have a person hold the beam in place while maneuvering any assembly.
- Page 46 Assembly Instructions Step 8 – Beam rest to beam Tools Needed Ratchet Loop the lanyard of the catch pin around the beam rest ear. Torque Wrench Align beam rest with beam rest mounting bracket with the horizontal ...
- Page 47 Assembly Instructions Step 9 – Block and Rotate Tools Needed None Block the wheels and rotate the beam assembly to the horizontal position. Insert the catch pin through the beam rest to lock the beam in the horizontal position.
- Page 48 Assembly Instructions Step 10 – Handle to Beam Tools Needed Ratchet Align handle weldment with holes in the front plate of the beam. Torque Wrench Install (3) bolts and (3) nuts. 13mm Socket Torque to 21 ft.-lb. ...
- Page 49 Assembly Instructions Step 11 – Install Valve Tools Needed Phillips Remove all plastic plugs from the valve. Looking at straight fitting from end with nut/washer/O-ring assembly, Screwdriver Torque Wrench turn upper nut clockwise until it meets the lower nut. ...
- Page 50 Assembly Instructions Step 12 – Install Handle on Valve Tools Needed Slide the valve handle into the clevis slots on the valve. Pliers Align the holes in the handle with the clevis holes. Insert the supplied pins through the holes and secure with the supplied bridge clips.
- Page 51 Assembly Instructions Step 13 – Install Valve Outlet Fitting Tools Needed (2) Adjustable Lubricate O-ring and threads on fitting with clean oil Looking at fitting from end with nut/washer/O-ring assembly, turn nut Wrenches Torque Wrench clockwise as far as possible ...
- Page 52 Assembly Instructions Step 14 – Install Cylinder Hose Fitting Tools Needed (2) Adjustable Lubricate O-ring and threads on fitting with clean oil. Looking at fitting from end with nut/washer/O-ring assembly, turn nut Wrenches Torque Wrench clockwise as far as possible. ...
- Page 53 Assembly Instructions Step 15 – Install Valve Inlet Fitting Tools Needed (2) Adjustable Lubricate O-ring and threads on fitting with clean oil Looking at fitting from end with nut/washer/O-ring assembly, turn nut Wrenches Torque Wrench clockwise as far as possible ...
- Page 54 Assembly Instructions Step 16 – Install Cylinder Hose Tools Needed (2) Adjustable Route the cylinder hose to the cylinder hose fitting on the valve. Screw finger-tight cylinder hose to the cylinder hose fitting. Wrenches Wrench-tighten the fitting. NOTE: This connection is self-sealing and does not require any type of sealing material.
- Page 55 Assembly Instructions Step 17 – High Pressure Hose Tools Needed Remove hose with fittings and sleeving from hose guides. (2) Adjustable Remove plastic plug from pump outlet with pliers (plastic plug is the Wrenches Pliers outer most fitting). ...
- Page 56 Assembly Instructions Step 18 – Install Log Cradles Tools Needed Ratchet Insert (2) bolts in lower holes in the beam and install (2) nuts on bolts Torque Wrench leaving them loose enough to install the cradles. 13mm Socket ...
- Page 57 Assembly Instructions Step 19 – Low Pressure Return Hose Tools Needed Route the low pressure return hose from return filter fitting to valve 8mm Socket outlet fitting leaving it run through the hose guides on beam. Ratchet ...
-
Page 58: Available Accessories
Available Accessories Fender Kit (Item# 795171) Fits all VH17 models Engine Guard (Item# 795172) Fits all VH17 models Any Questions, Comments, Problems or Parts Orders Call Brave Product Support 1-800-350-8739... - Page 59 This page is intentionally left blank...
-
Page 60: Limited Warranty
1-800-350-8739 prior to having any service or warranty work performed, as some services performed by parties other than Brave approved service centers may void this warranty. This limited warranty is in lieu of any other warranty expressed or implied, written or oral and Brave assumes no other responsibility or liability outside that expressed within this limited warranty. -
Page 61: Product Registration
Serial # (i.e. VH1724GCA012345678) Signature: IMPORTANT WARRANTY INFORMATION To activate your Brave log splitter warranty, please fill out the information in the form below and mail to: Brave, 20195 S. Diamond Lake Rd., STE 100, Rogers, MN 55374 or go online to www.braveproducts.com... - Page 62 20195 S. Diamond Lake Rd, Ste 100 Rogers, MN 55374 1-800-350-8739...
Need help?
Do you have a question about the VH1724GC and is the answer not in the manual?
Questions and answers