Table of Contents
Advertisement
Available languages
Available languages
Quick Links
Advertisement
Table of Contents

Subscribe to Our Youtube Channel
Related Manuals for Beko WTE12726W


Summary of Contents for Beko WTE12726W
- Page 1 Washing Machine User Manual WTE12726W Document Number : 2820528917_EN/ 08-09-20.(22:50)
- Page 2 General safety instructions This section contains safety instructions that will help protect from risk of personal injury or property damage. Failure to follow these instructions shall void any warranty. 1.1 Life and property safety Never place the product on a carpet-covered floor. Otherwise, lack of airflow beneath the machine will cause electrical parts to overheat.
- Page 3 1.2 Children's safety This product can be used by children at and above 8 years old and by persons whose physical, sensory or mental capabilities were not fully developed or who lack experience and knowledge provided that they are supervised or trained on the safe usage of the product and the risks it brings out.
- Page 4 Never touch the power cable plug with wet hands! Never unplug by pulling on the cable. Always press on the plug with one hand and pull out the plug by grabbing with the other hand. Product should be unplugged during installation, maintenance, cleaning and repair procedures.
- Page 5 Important instructions for environment 2.1 Compliance with WEEE Directive This product complies with EU WEEE Directive (2012/19/EU). This product bears a classification symbol for waste electrical and electronic equipment (WEEE). This product has been manufactured with high quality parts and materials which can be reused and are suitable for recycling.
- Page 6 Technical specifications Supplier name or trademark Beko Model name WTE12726W Rated capacity (kg) Maximum spin speed (rpm) 1400 Built-in Height (cm) Width (cm) Depth (cm) Single Water inlet / Double Water inlet • / - • Available Electrical input (V/Hz)
- Page 7 4.1 Installation • Apply to the nearest authorised service agent for the installation of your product. • Preparation of the location and electrical, tap water and waste water installations at the place of installation is under customer's responsibility. • Make sure that the water inlet and discharge hoses as well as the power cable are not folded, pinched or crushed while pushing the product into its place after installation or cleaning procedures.
- Page 8 4.1.4 Connecting water supply It is necessary to have 10 – 80 liters of water flowing from the fully open tap in one minute to have your machine run smoothly. Attach a pressure reducing valve if water pressure is higher. CAUTION: Models with a single water inlet should not be connected to the hot water tap.
- Page 9 4.1.6 Adjusting the feet CAUTION: In order to ensure that the product operates more silently and vibration-free, it must stand level and balanced on its feet. Balance the machine by adjusting the feet. Otherwise, the product may move from its place and cause crushing and vibration problems.
- Page 10 4.2 Preparation 4.2.1 Sorting the laundry • Sort laundry according to type of fabric, colour, and degree of soiling and allowable water temperature. • Always observe the instructions given on the garment care labels. 4.2.2 Preparing laundry for washing • Laundry items with metal attachments such as, underwiring, belt buckles or metal buttons will damage the machine.
- Page 11 4.2.6 Using detergent and softener When using detergent, softener, starch, fabric dye, bleach and descaling agents; read the manufacturer's instructions written on the package and follow the dosages specified. Use measuring cup if available. The detergent drawer is composed of three compartments: –...
- Page 12 If the product is equipped with a liquid detergent part: • When you want to use liquid detergent, pull the apparatus towards yourself. The part that falls down will serve as a barrier for the liquid detergent. If required, clean the apparatus with water when it is in place or by removing it.
- Page 13 4.2.7 Tips for efficient washing Clothes Light Colours and Black/Dark Delicates/ Colours Whites Colours Woollens/Silks (Recommended (Recommended (Recommended temperature (Recommended temperature temperature range temperature range range based on soiling level: range based on soiling level: based on soiling level: based on soiling level: 40-90°C) cold -40°C) cold -40°C)
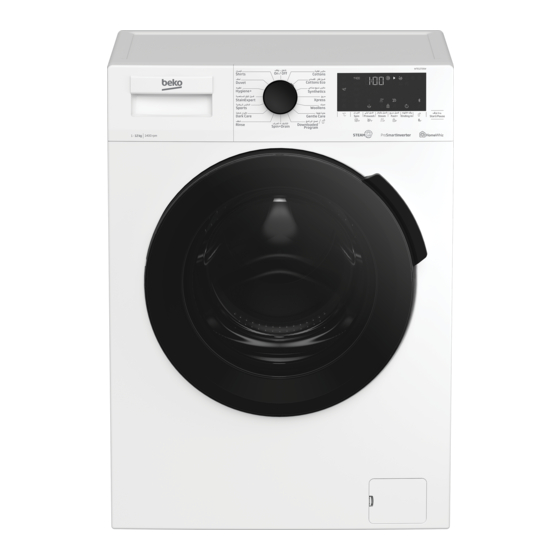
- Page 14 4.3 Operating the product 4.3.1 Control panel 1 - Programme Selection knob 7 - End Time Setting button 2 - Temperature level lights 8 - Auxiliary Function button 3 3 - Spin level indicator lights 9 - Auxiliary Function button 2 4 - Display 10 - Auxiliary Function button 1 5 - Start / Pause button...
-
Page 15: Table Of Contents
4.3.3 Programme and consumption table Auxiliary functions Selectable Programme temperature range °C Cold - 90 2,95 1400 • • • • • Cottons Cold - 90 2,30 1400 • • • • • Cold - 90 1,20 1400 • • •... -
Page 16: Cottons
The auxiliary functions in the table may vary according to the model of your machine. Water and power consumption may vary subject to the changes in water pressure, water hardness and temperature, ambient temperature, type and amount of laundry, selection of auxiliary functions and spin speed, and changes in electric voltage. You can see the washing duration on the display of your machine while selecting a programme. -
Page 17: Gentle Care
Allergy UK is the brand of the British Allergy Association. Seal of Approval is created to guide people that require recommendation about a product that the related product restricts / reduces / eliminates the allergens or reduces the allergen content significantly in the ambient where allergy patients exist. -
Page 18: Lingerie
• Lingerie You can use this programme to wash delicate garments that are suitable for hand wash and delicate women's underwear. Small amount of garments must be washed in a washing net. Hooks, buttons etc. must be done up and zips must be zipped up. •... -
Page 19: Towel
• Towel Use this program to wash durable cotton laundry such as towels. Load the towels into the machine paying attention to place them in a way that they will not contact the bellow or the glass. 4.3.6 Temperature selection Whenever a new programme is selected, the recommended temperature for the programme appears on the temperature indicator. - Page 20 If you want to spin the laundry held in water, adjust the Spin Speed and press Start / Pause button. The programme will resume. Water is drained, laundry is spun and the programme is completed. 4.3.8 Auxiliary function selection Select the desired auxiliary functions before starting the programme. Whenever a programme is selected, icons of the auxiliary function symbol that is selected together with it illuminates.
- Page 21 • Customized Programme This auxiliary function can only be used for Cotton and Synthetics programmes together with the HomeWhiz application. When this auxiliary function is activated, you can add up to 4 auxiliary rinsing steps to the programme. You can select and use some auxiliary functions even though they are not found on your product. You can increase and decrease the time of the Cottons and Synthetics programmes within a safe range.
- Page 22 To deactivate the Child Lock: Press and hold Auxiliary Function button 3 for 3 seconds. After the countdown as “3-2-1" on the display is over, child lock symbol disappears. • Bluetooth 3’’ You can use the bluetooth connection function to pair your machine with your smart device. This way, you can use your smart device to get information about your machine and control it.
- Page 23 4.3.10 Starting the programme 1 Press Start / Pause button to start the programme. 2 The Start / Pause button's light which was off before starts to illuminate steadily now, indicating that the programme has started. 3 Loading door is locked. The door lock symbol appears on the display after the loading door is locked. 4 Programme follow-up indicator lights on the display will show the current programme step.
- Page 24 • Remove the loading door emergency handle behind the filter cover with a tool. • Open the loading door by pulling the loading door emergency handle downwards. • Try to pull the handle downwards again if the loading door is not opened. •...
- Page 25 You can also change the speed and temperature settings. See "Speed selection" and "Temperature selection". The loading door will not open if the water temperature in the machine is high or the water level is above the loading door baseline. 4.3.13 Cancelling the programme The programme is cancelled when program selection knob is turned to a different programme or machine is turned off and on again using the program selection knob.
- Page 26 • When the appliance is in HomeWhiz setup mode, you will see an animation on the display and the bluetooth icon will flash until your machine gets paired with smart device. Only programme knob will be active in this mode. Other buttons will be inactive. On the screen you see on the app, select the washing machine and press next.
- Page 27 WARNING: When the bluetooth connection is on in your product, Remote Control function will be selectable. If the Remote Control function cannot be selected, check the connection status. If the connection cannot be established, repeat the initial set-up settings on the appliance. WARNING: For safety reasons, the product’s door will remain locked while the Remote Control function is enabled, independently of the operating mode.
- Page 28 4.4 Maintenance and cleaning Service life of product extends and frequently experienced problems will be reduced if it is cleaned at regular intervals. 4.4.1 Cleaning the detergent drawer Clean the detergent drawer at regular intervals (every 4-5 washing cycles) as shown below in order to prevent accumulation of powder detergent in time.
- Page 29 4.4.5 Draining remaining water and cleaning the pump filter The filter system in your machine prevents solid items such as buttons, coins and fabric fibres clogging the pump impeller during discharge of washing water. Thus, the water will be discharged without any problem and the service life of the pump will extend.
- Page 30 Troubleshooting Problem Cause Solution Programmes do not start after the Start / Pause / Cancel button is not pressed. • Press Start / Pause / Cancel button. loading door is closed. It may be difficult to close the loading door in case of •...
- Page 31 Problem Cause Solution Washing takes longer than Water pressure is low. • Product waits until taking in adequate amount specified in the user manual.(*) of water to prevent poor washing quality due to the decreased amount of water. Therefore, the washing time extends.
- Page 32 Problem Cause Solution Washing performance is poor: Insufficient amount of detergent is used. • Use the recommended amount of detergent Stains persist or the laundry is not appropriate for water hardness and the laundry. whitened. (**) Excessive laundry is loaded in. •...
- Page 33 Problem Cause Solution Detergent residue in the detergent Detergent was put in wet drawer. • Dry the detergent drawer before putting in drawer. (**) detergent. Detergent has gotten damp. • Keep detergents closed in an environment free of humidity and do not expose them to excessive temperatures.
- Page 34 الحل السبب المشكلة رمكنقأنقرؤديقاستخداوقكمرةقغريقكسفرةقمنقالمنظفقمعق ق .توقاستخداوقكمرةقمنظفقغريقكسفرة )**( .تيبس المالبس بعد الغسيل المسءقالعسيقإلىقتربسقالمالبسقمعقميميقالمثت.قاستخدوق .الكمرةقالمنسسبةقمنقالمنظفقمف ًسقلديجةقعسيقالمسء إذاقتوقمضعقالمنظفقفيقم صميةقالخسلةقالتحضريرةق ق .توقمضعقالمسحمققفيقم صميةقخسطئة علىقاليغوقمنقعدوقاخترسيقدميةقالخسلةقالتحضريرة،ق رمكنقأنقت موقالخسسلةقبسحبقهذاقالمنظفقأقنسءقخطمةق الشطفقأمقال م ُنعو.قضعقالمسحمققفيقالم صميةق .الصحرحة القتخلطقالمنظفقبسلمنعو.قثوقبخسلقالديجقمتنظرفهقبسلمسءق ق .توقخلطقالمنظفقبسلمنعو .السسخن إذاقتوقمضعقالمنظفقفيقم صميةقالخسلةقالتحضريرةق ق .توقمضعقالمسحمققفيقم صميةقخسطئة )**( .ال تنبعث من المالبس رائحة ال م ُنعم علىقاليغوقمنقعدوقاخترسيقدميةقالخسلةقالتحضريرة،ق...
- Page 35 الحل السبب المشكلة لنقر موقمؤشيقالمؤثتقبسلعدقالتنسزليقحتىقتمتلئقالخسسلةق ق رمكنقأنقرتمثفقالمؤثتقأقنسءقسحبقالمسء.ق .العد تنازلي لوقت البرنامج ال يعمل بسلكمرةقالمنسسبةقمنقالمسء.قتنتظيقالخسسلةقحتىقتتمافيق )*( )(األنواع المزودة بشاشة الكمرةقالمنسسبةقمنقالمسءقلتجنبقنتسئجقغسرلقغريقميضرةق بسبقن صقالمسء.قسمفقرستأنفقمؤشيقالمؤثتقالعدق .التنسزليقبعدقذلك لنقر موقمؤشيقالمؤثتقبسلعدقالتنسزليقحتىقتصلقالخسسلةق ق رمكنقأنقرتمثفقالمؤثتقأقنسءقخطمةقالتسخرن.ق .إلىقديجةقالحيايةقالمحددة ثدقرتوقتفعرلقنظسوقالكشفقالتل سئيقعنقالحملقغريقالمتزنق ق رمكنقأنقرتمثفقالمؤثتقأقنسءقخطمةقالعصي.ق .نترجةقالتمزرعقغريقالمتمازنقللمالبسقفيقالخسسلة ثدقرتوقتفعرلقنظسوقالكشفقالتل سئيقعنقالحملقغريقالمتزنق ق .ثدقركمنقهنسكقحملقغريقمتمازنقفيقالخسسلة )*( .العد تنازلي لوقت البرنامج ال يعمل .نترجةقالتمزرعقغريقالمتمازنقللمالبسقفيقالخسسلة...
- Page 36 اهحالصإو ءاطخألا فاشكتسا الحل السبب المشكلة .البرامج ال تبدأ بعد إغالق باب التحميل ق(بدءقStart2Pause2Cancelاضخطقعلىقالزيق ق ق(بدءقStart2Pause2Cancelلوقرتوقالضخطقعلىقزيق .)التشخرل2إر سفقمؤثت2إلخسء .)التشخرل2إر سفقمؤثت2إلخسء احيصقعلىقت لرلقكمرةقالخسرلقمتح ققمنقأنقبسبق ق .ثدقركمنقمنقالصعبقغلققبسبقالتحمرلقعندقاإلفياطقفيقالتحمرل .التحمرلقمخلققبشكلقصحرح .ال يمكن بدء تشغيل البرنامج أو اختياره إللخسءقالبينسمج،قأديقم بضقتحدردقالبينسمجقلتحدردق ق انت سلقالخسسلةقإلىقمضعقالحمسرةقالذاترةقبسببقمشكلةقفيقاإلمدادق بينسمجقآخي.قسرتوقإلخسءقالبينسمجقالسسبق.ق(ياجعق"إلخسءق .)(علىقسبرلقالمقسلقجهدقالترسيقأمقضخطقالمسء،قمغريقذلك )"البينسمج...
- Page 37 5.4.4 تصريف الماء المتبقي وتنظيف فلتر المضخة رعملقنظسوقالفلتيقبسلخسسلةقعلىقمنعقميميقالشمائبقالصلبةقمقلقاألزيايقمالعمالتقماألنسجةقالتيقتعلققبسلمضخةقأقنسءق .تصيرفقمسءقالخسرل.قمبذلك،قرتوقتصيرفقالمسءقدمنقظهميقأرةقمشكلةقممسقرطرلقمنقعميقالمضخة إذاقفشلتقالخسسلةقفيقتصيرفقالمسء،قف دقركمنقفلتيقالمضخةقمسدم د ً ا.قمرجبقتنظرفقالفلتيقفيقحسلةقانسدادهقأمقكلق3قأشهي.ق .رنبخيقتصيرفقالمسءقبسلكسملقأم ال ً قمنقأجلقتنظرفقفلتيقالمضخة بسإلضسفةقلذلك،قثبلقن لقالخسسلةق(علىقسبرلقالمقسل،قعندقن لهسقإلىقمنزلقآخي)قمفيقحسلةقتجمدقالمسء،قرجبقتصيرفقالمسءق .تمس م ًس :تنبيه .رمكنقأنقتتسببقالممادقالخيربةقالمتب رةقفيقفلتيقالمضخةقفيقتلفقالخسسلةقأمقتتسببقفيقمشكلةقالضمضسء :تنبيه إذاقلوقرتوقاستخداوقالمنتجقلفتية،قثوقبإر سفقالصنبمي،قمازلقأنبمبقاإلمدادقمثوقبتصيرفقالمرسهقداخلقالخسسلةقكيقالقتتعيضقللتجمدق .المحتمل :تنبيه بعدقكلقاستخداو،قثوقبإغالققصنبميقالمرسهقالمتصلقبسلخيطموقاليئرسي :لتنظيف الفالتر المتسخة وتصريف الماء .ق افصلقثسبسقالخسسلةقمنقمصديقالترسي :تنبيه...
- Page 38 4.4 الصيانة والتنظيف .تمتدقفتيةقخدمةقالخسسلةقمت لقمماجهةقالمشكالتقالمتكييةقإذاقتوقتنظرفهسقعلىقفتياتقمنتظمة 1.4.4 تنظيف درج المنظف ثوقبتنظرفقديجقالمنظفقعلىقفتياتقمنتظمةق(كلق0قإلىق5قدمياتقغسرل)قكمسقهمقممضحق .بسألسفلقلمنعقتيسبقمسحمققالخسرلقبميميقالمثت ايفعقالجزءقالخلفيقمنقالسرفمنقإلزالتهقكمسقهمقممضح.ق .فيقحسلةقبدءقتجمعقكمرةقمنقالمسءقمال م ُنعوقبشكلقزائدقفيقثسوقال م ُنعو،قرنبخيقتنظرفقالسرفمن قاضخطقعلىقالدائيةقالمن طةقفيقثسوقيشقالمسءق(السرفمن)قب سوقال م ُنعوقماسحبهقبستجسهكقحتىقرخيجقهذاقال سوقمنق ق .الخسسلة اغسلقديجقمسحمققالخسرلقمالسرفمنقبكمرةقمفريةقمنقالمسءقالفستيقفيقالحمض.قلحمسرةقبشيتكقمنقمالمسةقالفضالت،ق . ق .ثوقبتنظرفهقبفيشسةقمنسسبةقمعقايتداءقثفسزات .قأدخلقالديجقميةقأخيىقفيقممضعهقبعدقالتنظرفقمالتأكدقمنقمضعهقبصميةقجردة 3 ق 2.4.4 تنظيف باب التحميل واألسطوانة بسلنسبةقالالتقالخسرلقالتيقتتمفيقعلىقبينسمجقتنظرفقحلةقالخسسلة،قريجىقمياجعةقكرفرةقالتشخرل-قبيامجقالخسسلة.ق .كييقعملرةقتنظرفقالحلةقكلقشهيرن .استخدوقمضسدقاليماسبقالمنسسبقللخسسالت .تأكدقمنقعدوقتيكقأيقممادقغيربةقفيقالحلةقبعدقكلقغسلة...
- Page 39 البينسمج2التحكوقعنقبعد)قفيقلمحةقالتحكوقفيقالخسسلة.قعندمسقرتوقالمصملقإلىقالمنتجقالخسصقبك،قستيىقشسشةقمشسبهةقلمسق .رلي عندقتشخرلقخسصرةقالتحكوقعنقبعد،قسرمكنكقال رسوقبإر سفقالتشخرلقماإلدايةقمعملرستقمتسبعةقالحسلةقف طقمنقخاللقالخسسلة.ق .متمكنقإدايةقجمرعقالمظسئفقبسستقنسءقثفلقالتأمرنقضدقعبثقاألطفسلقمنقخاللقالتطبرق .تمكنكقمتسبعةقإذاقمسقكسنتقمظرفةقالتحكوقعنقبعدقفيقمضعقالتشخرلقأمقاإلر سفقمنقخاللقمؤشيقالمظرفةقالممجمدقعلىقالزي إذاقكسنتقمظرفةقالتحكوقعنقبعدقفيقمضعقإر سفقالتشخرل،قرتوقالتعسملقمعقجمرعقالعملرستقمنقالخسسلةقمرسمحقف طقبمتسبعةقالحسلةق .فيقالتطبرق فيقحسلةقتعذيقتشخرلقمظرفةقبدءقالتشخرلقعنقبعد،قسرصديقالجهسزقصمتقتحذريقعندقالضخطقعلىقالزي.قثدقرحدثقذلكقفيق حسالتقمقلقعندمسقرتوقتشخرلقالجهسزقمالقرمجدقجهسزقذكيقم تينقعبيقالبلمتمث.قرعتبيقتمثفقتشخرلقإعداداتقالبلمتمثقأمقفتحق .بسبقالخسسلةقمنقاألمقلةقعلىقهذهقالحسالت بمجيدقتنشرطقهذهقالمظرفةقعلىقالخسسلة،قفستظلقمم ك َّ نةقبخضقالنظيقعنقظيمفقمعرنةقمرسمحقلكقبسلتحكوقفيقالخسسلةقعنقبعدق .عنقطيرققالبلمتمث :فيقبعضقالحسالت،قرتوقإلخسءقتنشرطهقألسبسبقتتعلققبسلسالمة .عندمسقتتعيضقغسسلةقالمالبسقالن طسعقالترسيقالكهيبسئي ق ق .عندمسقرتوقتشخرلقم بضقالبينسمجقماخترسيقبينسمجقمختلفقأمقرتوقإر سفقتشخرلقالخسسلة ق 4.51.3.4 استكشاف األخطاء وإصالحها ثوقبمسقرليقفيقحسلةقمجمدقمشكلةقفيقالتحكوقأمقاالتصسل.قالحظقإذاقمسقاستميتقالمشكلةقأوقالقبعدقاإلجياءقالذيقثمتقبه.قثوقبمسق .رليقإذاقلوقرتوقحلقالمشكلة .تح ققمنقاتصسلقجهسزكقالذكيقبسلشبكةقالمنزلرةقذاتقالصلة ق...
- Page 40 ،قستيىقيس م ًسقمتحي ك ً سقعلىقالشسشةقمسرممضقيمزقبلمتمثقحتىقرتوقHomeWhizعندمسقركمنقالجهسزقفيقمضعقإعدادق • ق .إثيانقالخسسلةقبسلجهسزقالذكي.قم بضقالبينسمجقف طقهمقالذيقسركمنقنشط ً سقفيقهذاقالمضع.قستكمنقاألزيايقاألخيىقغريقنشطة .علىقالشسشةقالتيقتياهسقعلىقالتطبرق،قحددقالخسسلةقماضخطقعلىقالتسلي • ق قعنقالمنتجقالذيقتيغبقفيقتمصرلهقHomeWhizتسبعقثياءةقالتعلرمستقالتيقتظهيقعلىقالشسشةقحتىقرسألكقتطبرقق ق .بسلجهسزقالذكي قمانتظيقحتىقركتملقاإلعداد.قعندقاكتمسلقاإلعداد،قثوقبتسمرةقالخسسلة.قاآلن،قرمكنكقالن يقHomeWhizايجعقإلىقتطبرقق ق 2HomeWhizميؤرةقالمنتجقالذيقأضفتهقفيقتطبرقق إذاقلوقتتمكنقمنقإجياءقاإلعدادقبنجسحقخاللق5قدثسئق،قفسرتوقإر سفقالخسسلةقتل سئ ر ًس.قفيقهذهقالحسلة،قسركمنقعلركقالبدءقمجد د ً اقفيقإجياءق .اإلعداد.قإذاقاستميتقالمشكلة،قفستصلقبمكرلقالخدمةقالمعتمد قعلىقالجهسزقالذكيقاآلخيقأر ض ًس.قعندقتشخرلقHomeWhizرمكنكقاستخداوقالخسسلةقمعقأكقيقمنقجهسزقذكيقماحد.قلل رسوقبذلك،قنزلقتطبرقق التطبرق،قستحتسجقإلىقتسجرلقالدخملقبسستخداوقالحسسبقالذيقثمتقبإنشسئهقمسب ً سقمإثيانقالخسسلة.قبخالفقذلك،قتيجىقثياءةق"إعدادقغسسلةقمتصلةق ."بحسسبقشخصقآخي...
- Page 41 تغيير الوظيفة المساعدة والسرعة ودرجة الحرارة بنس ء ًقعلىقالخطمةقالتيقمصلقإلرهسقالبينسمج،قرمكنكقإلخسءقالمظسئفقاإلضسفرةقأمقتفعرلهس.قياجعق"اخترسيقالمظرفةقاإلضسفرة".ق ."رمكنكقأرض س ً قتخرريقإعداداتقالسيعةقمديجةقالحياية.قياجعق"تحدردقالسيعة"قم"تحدردقديجةقالحياية .لنقرمكنكقفتحقبسبقالتحمرلقإذاقكسنتقديجةقالحيايةقفيقالخسسلةقعسلرةقج د ً اقأمقإذاقكسنقمستمىقالمرسهقأعلىقمنقفتحةقالبسب 31.3.4 إلغاء البرنامج رتوقإلخسءقالبينسمجقعندقتشخرلقم بضقاخترسيقالبينسمجقإلىقبينسمجقمختلفقأمقرتوقإر سفقتشخرلقالجهسزقمتشخرلهقميةقأخيىق .بسستخداوقم بضقاخترسيقالبينسمج إذاقثمتقبإدايةقم بضقاخترسيقالبينسمجقأقنسءقتشخرلقال فلقضدقعبثقاألطفسل،قفلنقرتوقإلخسءقالبينسمج.قعلركقإلخسءقثفلقاألطفسلقأمال ً .ق إذاقأيدتقفتحقبسبقالتحمرلقبعدقإلخسءقالبينسمجقملكنقتعذيقفتحقبسبقالتحمرلقألنقمستمىقالمرسهقفيقالخسسلةقأعلىقمنقفتحةقبسبقالتحمرل،قف وق .)قمثوقبتصيرفقالمرسهقالممجمدةقفيقالخسسلةPumpق+قSpin(بتدمريقم بضقتحدردقالبينسمجقإلىقبينسمجقتصيرفقمعصيق 41.3.4 انتهاء البرنامج ."قعلىقالشسشةقعندقانتهسءقالبينسمجEnd"تظهيق إذاقلوقت وقبسلضخطقعلىقأيقزيقلمدةق- قدثسئق،قفستتحملقالخسسلةقإلىقمضعقإر سفقالتشخرل.قرتوقإر سفقتشخرلقالشسشةقمكسفةق المؤشيات.ق...
- Page 42 • .أزلقم بضقالطمايئقلبسبقالتحمرلقالممجمدقخلفقغطسءقالفلتيقبسستخداوقأداة • قافتحقبسبقالتحمرلقبسحبقم بضقالطمايئقلبسبقالتحمرلقلألسفل.ق • .قحسملقسحبقالم بضقلألسفلقميةقأخيىقإذاقلوقرفتحقبسبقالتحمرل • .قأعدقم بضقالطمايئقلبسبقالتحمرلقإلىقمضعهقاألصليقبعدقفتحقبسبقالتحمرل 21.3.4 تغيير التحديدات بعد بدء تشغيل البرنامج إضافة الغسيل بعد بدء البرنامج (بدء/إيقاف مؤقت)،قفسرتوقإلخسءقتنشرطقStart/Pauseإذا كان مستوى الماء في الغسالة مناس ب ً ا عند الضغط على زر ق ثفلقالبسبقمسرتوقفتحقالبسب،قممسقرسمحقلكقبإضسفةقالمالبس.قرنطفئقيمزقثفلقالبسبقالممجمدقعلىقالشسشةقعندقإلخسءقتنشرطقثفلق...
- Page 43 01.3.4 بدء تشغيل البرنامج .ق(بدءقالتشخرلق2قاإلر سفقالمؤثت)قلبدءقتشخرلقالبينسمجStart / Pauseق اضخطقعلىقالزيق (بدء التشغيل / اإليقاف المؤقت)مالذيقكسنقمنطف ئ ً سقسربدأقاآلنقفيقاإلضسءةقبقبستقمشريً اقإلىقStart / Pauseق ضمءقزيق بدءقالبينسمج.ق .3 ق مرتوقغلققبسبقالتحمرل.قتظهيقعبسيةق"غلققالبسب"قعلىقالشسشةقعندمسقرتوقغلققبسبقالتحمرل .0 ق سرضيءقمؤشيقمتسبعةقالبينسمجقعلىقالشسشةقلعيضقخطماتقالبينسمجقالحسلرة 11.3.4 قفل باب التحميل .هنسكقنظسوقثفلقعلىقبسبقتحمرلقالخسسلةقرمنعقفتحقبسبقالتحمرلقفيقالحسالتقالتيقركمنقفرهسقمستمىقالمسءقغريقمنسسب .تظهيقعبسيةق"البسبقمخلق"قعلىقالشسشةقعندمسقركمنقبسبقالتحمرلقمخل ً س ق(بدءقالتشخرلقعنقبعد)قعنقطيرققStartقRemoteإذاقتوقتحدردقمظرفةقالتحكوقعنقبعد،قفسر فلقالبسب.قلفتحقالبسب،قرجبقإلخسءقتنشرطقمظرفةق .ق(بدءقالتشخرلقعنقبعد)قأمقتخرريقممضعقالبينسمجRemoteقStartالضخطقعلىقزيق :فتح...
- Page 44 ’’3 • بلوتوث رمكنكقاستخداوقمظرفةقاتصسلقالبلمتمثقإلثيانقالخسسلةقبجهسزكقالذكي.قبهذهقالطير ة،قرمكنكقاستخداوقجهسزكقالذكيقللحصملقعلىقمعلممستقحملق .الخسسلةقمالتحكوقفرهس :لتفعيل اتصال البلوتوث اضغط مطو ال ً على زر وظيفة التحكم عن بعدقلمدةق3ققمان.قسرتوقعيضقالعدقالتنسزليق“1-2-3”،ققوقسرظهيقيمزق“بلمتمث”ق علىقالشسشة.قحييقزر وظيفة التحكم عن بعد.قسرممضقيمزقالبلمتمثقأقنسءقإثيانقالمنتجقمعقالجهسزقالذكي.قإذاقنجحقاالتصسل،ق .فسرظلقاليمزقمضر ئ ً س :إللغاء تفعيل اتصال البلوتوث اضغط مطو ال ً على زر وظيفة التحكم عن بعدقلمدةق3ققمان.قسرتوقعيضقالعدقالتنسزليق“1-2-3”،ققوقسرظهيقيمزق“بلمتمث”ق .علىقالشسشة...
- Page 45 • التحكم عن بعد رمكنكقاستخداوقمفتسحقالمظرفةقاإلضسفرةقهذاقلتمصرلقالخسسلةقبأجهزةقذكرة.قللحصملقعلىقمعلممستقمفصلة،قياجعق5 2320ق .قممظرفةقالتحكوقعنقبعدHomeWhizمرزةق • البرنامج المخصص قاأللرسفقالصنسعرةقمعقتطبرققSyntheticsقالمالبسقال طنرةقمCottonرمكنقاستخداوقهذهقالمظرفةقاإلضسفرةقف طقفيقبيامجق .قعندمسقرتوقتنشرطقهذهقالمظرفةقاإلضسفرة،قرمكنكقإضسفةقمسقرصلقإلىق0قخطماتقشطفقإضسفرةقللبينسمج.قHomeWhiz رمكنكقاخترسيقماستخداوقبعضقالمظسئفقاإلضسفرةقحتىقإذاقكسنتقغريقممجمدةقفيقالخسسلة.قرمكنكقزرسدةقمت لرلقمثتقبيامجق .قاأللرسفقالصنسعرةقضمنقنطسققآمنSyntheticsقالمالبسقال طنرةقمCottons .عندقاخترسيقالمظرفةقاإلضسفرةقللبينسمجقالمخصص،قفسركمنقأداءقالخسلقماستهالكقالطسثةقمختلفرنقعنقال رمةقالمعلنة ٍ 2.8.3.4 الوظائف / البرامج المختارة عن طريق الضغط على مفاتيح الوظيفة لمدة 3 ثوان +• تنظيف حلة الغسالة اضخطقماستميقبسلضخطقعلىقزيقالمظسئفقاإلضسفرةق قلمدةق3ققمان ٍ قلتحدردقالبينسمج.قاستخدوقهذاقالبينسمجقبشكلقمنتظوق(ميةق كلقشهيقإلىقشهيرن)قلتنظرفقحلةقالخسسلةقمتمفريقالنظسفةقالالزمة.قرستخدوقالبخسيقثبلقالبينسمجقلتخفرفقاليماسبقفيقالحلة.ق...
- Page 46 إيقاف الشطف إذاقلوقتكنقتيغبقفيقتفيرغقالخسرلقبعدقانتهسءقالبينسمجقمبسشي ة ً ،قفرمكنكقاستخداوقمظرفةقتعلرققالشطفقماإلب سءقعلىقالمالبسق 2"ق(بدءStart2Pause"فيقمرسهقالشطفقاألخرية؛قلتجنبقتجعدقالمالبسقبسببقعدوقمجمدقمسءقفيقالخسسلة.قاضخطقعلىقزيق تمثفقمؤثت)قبعدقهذهقالعملرةقإذاقأيدتقتصيرفقالمسءقدمنقعصيقالخسرل.قرستميقالبينسمجقفيقالعمل،قمركتملقبعدقتصيرفق .المسء ق(بدءق2قStartق2قPauseق(سيعةقالعصي)قماضخطقزيقSpinقSpeedإذاقكنتقتيردقعصيقالخسرلقالذيقبسلمسء،قفسضبطق .)إر سفقمؤثت .سمفقرتوقاستئنسفقتشخرلقالبينسمج.قرتوقتصيرفقالمسء،قمرتوقعصيقالخسرلقماكتمسلقالبينسمج 8.3.4 اختيار الوظائف اإلضافية ثوقبتحدردقالمظسئفقاإلضسفرةقالمطلمبةقثبلقبدءقتشخرلقالبينسمج.قعندمسقرتوقتحدردقبينسمج،قرضيءقيمزقالمظرفةقاإلضسفرةقالتيق .رمكنقتحدردهسقمعقهذاقالبينسمج .عﻨﺪقالﻀخﻂقعلىقزيقالﻮﻇﻴفةقاإلضسفرةقالتيقالقرﻤﻜﻦقاخترسيهسقبسلﺒﺮنسمجقالﺤسلي،قسﺘ ﻮوقالخﺴسلةقبإصﺪايقصﻮتقتﺤﺬرﺮ .كمسقستظلقإطسياتقالمظرفةقاإلضسفرةقالمحددةقللبينسمجقالحسليقمضرئةقبعدقبدءقالخسرل بعضقالمظسئفقالقرمكنقتحدردهسقم ع ًس.قعندقاخترسيقمظرفةقإضسفرةققسنرةقتتعسيضقمعقالمظرفةقاألملىقثبلقتشخرلقالخسسلة،قفست موقالخسسلةقبإلخسءق المظرفةقاألملىقبرنمسقتستميقالمظرفةقالقسنرةقفيقالعمل.قعلىقسبرلقالمقسل،قإذاقتوقتحدردقمظرفةقالخسلقالسيرعقبعدقتحدردقمظرفةقالمرسهقاإلضسفرة،ق .رتوقإلخسءقمظرفةقالمرسهقاإلضسفرةقمتب ىقمظرفةقالخسلقالسيرعقثردقالتفعرل )"القرمكنقاخترسيقمظرفةقإضسفرةقالقتتمافققمعقالبينسمجقالذيقتوقتحدرده.ق(ياجع،ق"جدملقالبيامجقماالستهالك بعضقالبيامجقبهسقمظسئفقإضسفرةقالبدقمنقتشخرلهسقفيقمثتقمتزامن.قهذهقالمظسئفقالقرمكنقإلخسؤهس.قلنقرممضقإطسيقالمظرفةقاإلضسفرةقبلق .سرممضقالجزءقالداخليقف ط 1.8.3.4 الوظائف اإلضافية ) (غسيل أوليPrewash • تكمنقالخسلةقالتحضريرةقمجدرةقف...
- Page 47 6.3.4 اختيار درجة الحرارة عندقاخترسيقبينسمجقجدردقرتوقعيضقديجةقالحيايةقالمنسسبةقلهذاقالبينسمجقعلىقمؤشيقديجةقالحياية.قمنقالممكنقأالقتكمنقثرمةقديجةقالحيايةق .الممصىقبهسقهيقأثصىقديجةقحيايةقرمكنقتحدردهسقللبينسمجقالحسلي ق(ضبطقديجةقالحياية)قلتخرريقديجةقالحياية.قرتوقخفضقديجةقالحيايةقTemperature Adjustmentاضخطقعلىقزيق .بشكلقتديرجي .القرمكنقإجياءقتخررياتقعلىقالبيامجقالتيقالق ر ُسمحقفرهسقبتخرريقديجستقالحياية رمكنكقأر ض ًسقتخرريقديجةقالحيايةقبعدقبدءقالخسرل.قرمكنقأنقرتوقهذاقالتخرريقإذاقسمحتقخطماتقالخسرلقبذلك.قالقرمكنقإجياءق التخررياتقإذاقلوقتسمحقالخطماتقبذلك.ق إذاقثمتقبسلتميريقإلىقخرسيقالخسرلقعلىقالبسيدقمثمتقبسلضخطقعلىقزيقضبطقديجةقالحيايةقميةقأخيى،قستظهيقديجةقالحيايةقالممصىقبهسق .ق(ضبطقديجةقالحياية)قميةقأخيىTemperatureقAdjustmentللبينسمجقالمختسيقعلىقالشسشة.قلخفضقديجةقالحياية،قاضخطقعلىقزيق 7.3.4 اختيار سرعة الدوران 2عندقتحدردقبينسمجقجدرد،قرتوقعيضقسيعةقالعصيقالممصىقبهسقللبينسمجقالمحددقعلىقمؤشيقسرعة العصر .ثدقتكمنقثرمةقسيعةقالعصيقالممصىقبهسقلرستقالسيعةقال صمىقالتيقرمكنقاخترسيهسقللبينسمجقالحسلي (ضبط سرعة العصر)لتخرريقسيعةقالعصي.قرتوقخفضقسيعةقالعصيقSpin Speed Adjustmentاضخطقعلىقالزيق .بشكلقتديرجي ق "ق(بدمنقNoقSpin"ق ق-ق "ق(إر سفقالشطف)قمRinseقHold"بعدقذلك،قبنس ء ًقعلىقطيازقالخسسلة،قرظهيقالخرسيانق .عصي)قعلىقالشسشة...
- Page 48 • المالبس الداخلية استخدوقهذاقالبينسمجقلخسلقالمالبسقاليثر ةقالمنسسبةقللخسرلقالردميقمالمالبسقالداخلرةقالنسسئرةقاليثر ة.قرجبقأنقتخسلقكمرةق .المالبسقالصخريةقفيقشبكةقالخسرل.قرجبقأنقتخلققالمشسبكقماألزيايقمالسمستقمغريهس ) (المالبس الرياضيةSports • رمكنكقاستخداوقهذاقالبينسمجقلخسلقالمالبسقاليرسضرةقممالبسقالهماءقالطلققالتيقتحتميقعلىقخلرطقمنقال طنق2قاأللرسفق الصنسعرةقماألغطرةقالمضسدةقللمسءقمقلقغميتكسقمغريهس.قفهمقرضمنقغسلقمالبسكقبصميةقلطرفةقبفضلقحيكستقدميانق .خسصة ) (غسيل البقع المستعصيةStainExpert • الخسسلةقمزمدةقببينسمجقعصيقخسصقرترحقإمكسنرةقالتخلصقمنقمختلفقأنماعقاللطخقبطير ةقأكقيقفعسلرة.قاستخدوقهذاقالبينسمجقف طق لخسرلقالممادقال طنرةققسبتةقاأللمان.قالقت وقبخسلقالمالبسقالمصبمغةقمالنسعمةقمالخسرلقفيقهذاقالبينسمج.قثبلقال رسوقبسلخسل،قرتعرنق أنقرتوقفحصقملص ستقالمالبسق(ممصىقبهقلل مصسنقمالسيامرلقمالشميتستقال طنرةقمالتيقشريتقممالبسقاألطفسلقمالبجسمستق مالمآزيقممالبسقالمسئدةقممالءاتقاألسيةقمأغطرةقاأللحفةقاليرشقمفيشقاألسيةقمالمسسداتقممنسشفقالحمسوقمالفمطقمالجمايبق مالمالبسقالداخلرةقال طنرةقالمنسسبةقللخسلقفيقديجستقحيايةقالمرسهقالميتفعةقلفتيةقطمرلة).قرمكنكقإجياءقالخسرلقلعددق0 قنم ع ًسق “ق(الخسرلقالسيرع).قرمكنكقأنقتيىقQuickقWash„منقالعصيقتن سوقإلىق3قمجممعستقمختلفةقرمكنقاخترسيهسقمعقزيقإعدادق ق(الخسرلقالسيرع).قبسالستنسدقإلىقمجممعةقQuick„قWash„أدنسهقمجممعستقالعصيقالتيقرمكنقاخترسيهسقبسستخداوقزيقإعدادق .العصيقالمختسيةقفسمفقرتوقتعدرلقبينسمجقعصيقخسصقلفتيةقال...
- Page 49 "قهمقاسوقالمؤسسةقالبيرطسنرةقللحسسسرة.قرشريقختوقإثيايقالمماف ةقعلىقمنتجقمسقAllergyقUK"ق إلىقأنقذلكقالمنتجقرعملقعلىقالحدقمن2قت لرل2قإزالةقالممادقالمسببةقللحسسسرةقمنقالبرئةقالتيقرعرشق فرهسقميرضقالحسسسرة.قفهمقرهدفقإلىقتمفريقضمسنقأنقالمنتجستقتوقاختبسيهسقعلم ر ًسقأمقتوقفحصهسق .بطير ةقتمفريقنتسئجقثسبلةقلل رسس ) ( لحافDuvet • رتوقاستخداوقهذاقالبينسمجقلخسرلقاللحسفقالمصنمعقمنقاأللرسفقالذيقرحملقعالمةق"ثسبلقللخسرلقفيقالخسسلة".قتأكدقمنقتحمرلق اللحسفقبشكلقصحرحقكيقالقرتلفقاللحسفقالخسسلة.قأزلقغطسءقاللحسفقثبلقتحمرلقاللحسفقفيقالخسسلة.قثوقبطيقاللحسفقميترنق ثبلقمضعهقفيقالخسسلة.قثوقبتحمرلقاللحسفقفيقالخسسلةقمعقمياعسةقمضعهقبطير ةقالقرتالمسقفرهسقمعقالجزءقالمطسطيقأمق الزجسجيقبسلبسب.ق بسإلضسفةقإلىقذلك،قرمكنكقاستخداوقهذاقالبينسمجقلخسلقالمعسطفقمالصديرستقمالستياتقممسقإلىقذلكقالتيقتحتميقعلىقاليرشق ."مبهسقملصقق"ثسبلقللخسلقفيقالخسسلة .)القتحملقأكقيقمنقلحسفقمزدمجقماحدقم سسق(-- ق×ق-- قسو .القتخسلقاللحسفقمالمسسئدقممسقإلىقذلكقالتيقتحتميقعلىقأثطسنقفيقالخسسلة :تحذير .القتخسلقاألنماعقبخالفقاللحسفقمقلقالسجسدقمالبسسطقممسقإلىقذلكقفيقالخسسلة.قف دقرحدثقتلفقدائوقبسلخسسلة ) (التنشيف + الصرفSpin+Drain • .رمكنكقاستخداوقهذهقالمظرفةقللتخلصقمنقالمرسهقالممجمدةقمعقالمالبسقفيقالخسسلة ) (شطفRinse • .استخدوقهذاقالبينسمجقعندقاليغبةقفيقالشطفقأمقالتنشرةقبشكلقمنفصل • الستائر استخدوقهذاقالبينسمجقلخسلقالمالبسقالمصنمعةقمنقالحيريقمالستسئي.قحرثقإنقنسرجهسقالشبكيقرسببقيغمةقزائدة،قضعق...
- Page 50 .ثدقتختلفقالمظسئفقاإلضسفرةقفيقالجدملقمف ً سقلطيازقالخسسلة ثدقتختلفقثديةقاستهالكقالمسءقمالكهيبسءقتب ع ًسقللتخررياتقفيقضخطقالمسء،قمديجةقعسيقالمسءقمديجةقحيايةقالمسءقمديجةقحيايةقالبرئةقالمحرطةق .منمعقمكمرةقحمملةقالخسرلقممف ً سقالخترسيقالمظسئفقاإلضسفرةقمسيعةقالعصيقمالتخرياتقفيقجهدقالكهيبسء رمكنكقيؤرةقمثتقالخسرلقعلىقشسشةقالخسسلةقأقنسءقتحدردقبينسمج.قاعتمس د ً اقعلىقكمرةقالمالبسقالتيقثمتقبتحمرلهسقفيقالخسسلة،قثدقركمنقهنسكقاختالفق .منق52 4 قسسعةقبرنقالمدةقالتيقتظهيقعلىقالشسشةقمالمدةقالفعلرةقلدميةقالخسرل.قسرتوقتحدرثقالمدةقتل سئ ر ًسقبعدقمثتقثصريقمنقبدءقالخسرل .""رمكنقتخرريقأنمسطقاالخترسيقللمظسئفقالمسسعدةقمنقخاللقالشيكةقالمصنعة.قرمكنقإضسفةقأمقإزالةقأنمسطقاخترسيقجدردة "."ثدقتختلفقسيعةقدميانقغسسلتكقحسبقالبينسمجقالذيقتوقتحدرده.قممعقذلكقالقرمكنقأنقتتجسمزقهذهقالسيعةقالحدقاألثصىقلسيعةقدميانقغسسلتك 4.3.4 اختيار البرنامج ."ق حددقالبينسمجقالمنسسبقللنمعقمالكمرةقمديجةقاتسسخقالمالبسقمف ً سقلـ"جدملقاالستهالكقمالبينسمج .البيامجقمحددةقبأعلىقسيعةقعصيقمنسسبةقلهذاقالنمعقالمحددقمنقالنسرج .عندقاخترسيقبينسمج،قياعيقدائ م ًسقنمعقالنسرجقماأللمانقمديجةقاالتسسخقمديجةقحيايةقالمسءقالمسممحقبهس .ثوقدائ م ًسقبسخترسيقأثلقديجةقحيايةقمطلمبة.قتمقلقالحيايةقالعسلرةقاستهالكقأكقيقللطسثة ق حددقالبينسمجقالمطلمبقبسستخداوقم بضق"اختيار البرنامج".ق 5.3.4 برامج الغسيل )...
- Page 51 3.3.4 جدول البرامج واالستهالك مظرفةقمسسعدة ديجةقالحياية االلبينسمج 914بسيد -,95 مالبسقثطنرة -,31 914بسيد 914بسيد غسرلقثطنقإثتصسدي 114بسيد ,3-1 **11 114بسيد مالبسقنسرجقصنسعي 114بسيد 914بسيد -,51 سيرع 914بسيد 1,-1 914بسيد غسرلقسيرعق 1, 5 سيرعق+ق 914بسيد صمف 1,15 -14بسيد عنسرةقلطرفة -14بسيد األلمانقالداكنة -14بسيد المالبسقاليرسضرة 1,85 -14بسيد...
- Page 52 3.4 تشغيل المنتج 1.3.4 لوحة التحكم ق-قم بضقاخترسيقالبينسمج 0ق-قزيقإعدادقمثتقاالنتهسء ق-قمصبسحقمؤشيقديجستقالحياية 38ق-قزيقالمظرفةقاإلضسفرةق 3ق-قمصبسحقمؤشيقمستمىقالدميان 9ق-قزيقالمظرفةقاإلضسفرةق 0ق-قشسشةقالعيضق - ق-قزيقالمظرفةقاإلضسفرةق )ق(البدءق2قإر سفقمؤثتStart2Pause5ق-قزيق ق-قزيقضبطقسيعةقالدميان .2ق-قزيقالتحكوقعنقبعد ق-قزيقضبطقديجةقالحياية 2.3.4 رموز الشاشة 90 ˚ 1200 1000 60 ˚ 40 ˚ 30 ˚ 20 ˚ مؤشيقبدءقالتشخرلقالمتأخي قj مؤشيقديجستقالحياية ...
- Page 53 7.2.4 إرشادات للغسيل الفعال المالبس Delicates /""المالبس الرقيقة Woolens /األلوان الداكنة األلوان الفاتحة والمالبس األلوان /"األصواف السوداء البيضاء المالبس الحريرية Silks (نطسققديجةقالحيايةق (نطسققديجةقالحيايةق (نطسققديجةقالحيايةقال م ُمصىقبهسق (نطسققديجةقالحيايةقال م ُمصىقبهسق ال م ُمصىقبهسقبنسءقعلىق ال م ُمصىقبهسقبنسءقعلىق بنسءقعلىقمستمىقاالتسسخ:قبسيدق بنسءقعلىقمستمىقاالتسسخ:ق-94-0ق مستمىقاالتسسخ:قبسيدق مستمىقاالتسسخ:قبسيدق )-04قديجةقمئمرة )ديجةقمئمرة...
- Page 54 استخدام مساحيق غسيل سائلة :إذا كانت الغسالة مزودة بكوب للمنظف السائل ." "ضعقحسمرةقالمنظفقالسسئلقفيقالم صميةقيثوق ق .إذاقف دقال م ُنعوقسرملتهقف وقبتخفرفهقبسلمسءقثبلقمضعهقفيقديجقمسحمققالتنظرف ق ق :إذا كان المنتج م ُ جهز ً ا بجزء للمنظف السائل عندقيغبتكقفيقاستخداوقمنظفقسسئل،قاسحبقالجهسزقبستجسهك.قحرثقسرعملقالجزءقالذيقسرهبطقلألسفلقكحسجزق ق للمنظفقالسسئل.قمعندقالحسجة،قنظ ِّ فقالجهسزقبسلمسءقأقنسءقمجمدهقفيقمكسنهقأمقبإزالته.قفيقحسلةقاستخداوقمسحمقق .تنظرف،قرجبقإحكسوقتقبرتقالجهسزقفيقالممضعقالعلمي...
- Page 55 6.2.4 استخدام مسحوق التنظيف وال م ُ نعم عندقاستخداوقالمنظفقأمقالمنعوقأمقالنشسقأمقصبسغةقاألثمشةقأمقالمبرضقأمقمزرلقاأللمانقأمقمزرلقالكلس،قاثيأقتعلرمستقجهةقالتصنرعقالمكتمبةق .علىقالعبمةقماتبعقالم سدريقالمحددة.قاستخدوقكمبقالمعسريةقإنقمجد :رتكمنقديجقمسسحرققالتنظرفقمنققالثقم صميات -ق( )قللخسلةقالتحضريرة -ق( )قللخسلةقاليئرسرة -ق(3)قللمنعمست .-ق( )قبسإلضسفةقإلىقذلك،قتمجدقثطعةقسرفمنقفيقم صميةقالمنعو مسحوق التنظيف وال م ُ نعمات ومواد التنظيف األخرى . ق أضفقمسحمققالخسرلقمال م ُنعمستقثبلقبدءقتشخرلقبينسمجقالخسرل ! ق أقنسءقدميةقالخسرل،قالقتتيكقديجقالمنظفقمفتمحً س ق عندقاستخداوقأحدقالبيامجقبدمنقالخسلةقالتحضريرة،قالقرنبخيقمضعقمسحمققغسرلقفيقحجيةقالخسلةقالتحضريرةق(حجيةق يثوق"...
- Page 56 2.4 اإلعداد 1.2.4 تصنيف الغسيل .ق ثوقبتصنرفقالخسرلقمف ً سقلنمعقاألنسجةقماللمنقمديجةقاالتسسخقمديجةقحيايةقالمسءقالمسممحقبهس . ق اتبعقدم م ًسقالتعلرمستقالممجمدةقبملص ستقالمالبس 2.2.4 تجهيز المالبس للغسيل ق ثدقتلحققالمالبسقمالمخسمالتقالميفققبهسقممادقمعدنرةقمقلقحمسالتقالصديقمإبزروقاألحزمةقماألزيايقالمعدنرةقالضييق .بسلخسسلة.قثوقبإزالةقاألجزاءقالمعدنرةقأمقاغسلقتلكقالمالبسقعنقطيرققمضعهسقفيقكرسقالخسرلقأمقكرسقمخدة ق ق أخيجقجمرعقالممادقبسلجرمبقمقلقالعمالت،قماألثالو،قممشسبكقاألمياققماثلبقالجرمبقمنقالداخلقللخسيجقمنظفهس.قثدق .تتسببقهذهقاألشرسءقفيقإلحسققالضييقبسلخسسلةقمتتسببقفيقحدمثقضمضسء . ق ضعقالمالبسقصخريةقالحجوقمقلقجمايبقاألطفسلقمالجمايبقالنسرلمنقفيقكرسقغسرلقأمقكرسقمخدة . ق ضعقالستسئيقداخلقالخسسلةقدمنقالضخطقعلرهس.قأزلقاألشرسءقالملح ةقبسلستسئي . ق أغلققالسمستق(األبسزرو)قمثوقبتقبرتقاألزيايقغريقالمحكمةقمإصالحقالق مبقمالتمزثست .ق ثوقبخسلقالمنتجستقالممرزةقبملص ستق"ثسبلةقللخسرلقبسلخسسلة"قأمق"تخسلقردم ر ًس"قبسستخداوقالبينسمجقالمنسسب ق...
- Page 57 6.1.4 ضبط األرجل :تنبيه رجبقأنقتمضعقغسسلتكقفيقمضعقمستميقممتمازنقعلىقأثدامهسقحتىقتعملقبصمتقمبدمنقاهتزاز.قثوقبممازنةقالجهسزقعنقطيرقق .ضبطقاألثداو.قمإال،قف دقتتحيكقالخسسلةقمنقمكسنهسقمتسببقمشكالتقالتصسدوقماالهتزاز :تنبيه .القتستخدوقأيقأدماتقلفكقصمامرلقال فل.قمإالقف دقتتعيضقللتلف .ثوقبفكقصمامرلقال فلقعندقاألثداوقردم ر ًس ق . ٍ اضبطقاأليجلقحتىقر فقالجهسزقفيقمضعقمستم ٍ قممتمازن ق .أحكوقجمرعقصمامرلقاألثفسلقبسلردقميةقأخيى 3 ق 7.1.4 التوصيالت الكهربية ثوقبتمصرلقالمنتجقبمنفذقمؤيضقمحميقبصمسوقكهيبيق2 قأمبري.قلنقتكمنقالشيكةقمسئملةقعنقأيقتلفقثدقرحدثقعندق .استخداوقالخسسلةقدمنقتأيرضققحسبقمسقرتفققمعقال ماعدقالمحلرة . ق رنبخيقأنقتتمافققالتمصرالتقمعقال ماعدقالمحلرةقللتمصرل ق رجبقأنقتكمنقتمصرالتقاألسالكقلدائيةقالمأخذقالكهيبسئيقكسفرةقلتلبرةقاحترسجستقاألجهزة.قرمصىقبسستخداوقثسطعقالدائيةق 2 GFCI(الكهيبسئرةقالمعربةق...
- Page 58 4.1.4 توصيل مصدر إمداد الماء ضخطقإمدادقالمسءقالمطلمبقلتشخرلقالخسسلةقرتيامحقمنق قإلىق- قبسيق( 2-ق–ق- قملليقبسسكسل).قرلزوقتدفققمنق- قإلىق-8قلتيقمسءقفيق الدثر ةقمنقالصنبميقمفتمحقبشكلقكسملقلكيقتعملقالخسسلةقبطير ةقسلسة.قثوقبتمصرلقصمسوقخفضقضخطقالمسءقإنقكسنقضخطقالمسءقأعلىقمنق .ذلك :تنبيه مرياعىقعدوقتمصرلقالخسسالتقذاتقمنفذقدخملقالمسءقالفيديقبصنبميقالمسءقالسسخن.قمفيقهذهقالحسلةقسرتلفقالخسرلقأمقستتحملق .الخسسلةقإلىقمضعقالحمسرةقملنقتعمل :تنبيه .القتستخدوقخياطروقمداخلقالمسءقال درمةقأمقالمستخدمةقفيقالخسسلةقالجدردة.قحرثقأنهسقثدقتتسببقفيقحدمثقب عقبسلمالبس .أحكوقتقبرتقصمامرلقالخيطموقبسلرد.قالقتستخدوقأداةقعندقيبطقالصمامرل ق عندقإتمسوقتمصرلقالخيطمو،قتح ققمسقإذاقكسنقهنسكقمشكالتقفيقالتسيبق ق عندقن سطقالتمصرلقبفتحقالصنبميقتمسم س ً .قمفيقحسلةقمجمدقأيقتسيربقأغلقق الصنبميقمأزلقالصمملة.قأعدقيبطقالصسمملةقبإحكسوقبعدقالكشفقعلىقالعسزل.ق لمنعقتسيبقالمرسهقمالتلفرستقالنستجةقعنقذلك،قحسفظقعلىقالصنسبريقمخل ةقعندمسق .القتستخدوقالجهسز 5.1.4 توصيل خرطوم الصرف بفتحة الصرف ق...
- Page 59 1.4 التركيب ق قاستعنقبأثيبقمكرلقخدمةقمعتمدقلتيكربقالمنتج.ق ق قإعدادقالمكسنقمالتجهرزاتقالكهيبرةقمتجهرزاتقإمدادقالمسءقمتصيرفهقفيقمكسنقالتيكربقرعدقمنقمسئملرةقالعمرل.ق ق ق قتأكدقمنقعدوقانقنسءقمدخلقالمسءقمخياطروقالتصيرفقمأر ض ًسقكبلقالطسثة،قأمقانحشسيهسقأمقتش هسقأقنسءقدفعقالمنتجقفيقمكسنهق بعدقإجياءاتقالتيكربقأمقالتنظرف.ق ق قتأكدقمنقإجياءقالتيكربقمالتمصرالتقالكهيبسئرةقللجهسزقمنقخاللقفنيقخدمةقمعتمد.قجهةقالتصنرعقغريقمسؤملةقعنق األعطسلقالمتيتبةقعنقإجياءاتقر موقبهسقشخصقغريقمعتمد.ق ق ثبلقالتيكرب،قرجبقالتأكدقبصي ر ًسقمنقخلمقالمنتجقمنقالعرمب.قمفيقحسلةقمجمدقعرمبقالقت وقبتيكربه.قرمكنقأنقتمقلق .المنتجستقالتسلفةقخطيً اقعلىقسالمتك 1.1.4 المكان المالئم للتركيب . ق ضعقالجهسزقعلىقأيضرةقصلبةقممستمرة.قالقتضعهقعلىقالسجسدقذمقالمبيقالكقرفقأمقأسطحقمشسبهة ق ثدقرصلقالمزنقاإلجمسليقللخسسلةقمالمجففق-فيقحسلةقامتالئهمس-قممضعهمسقفمققبعضقإلىق-8 قكجوقت ير ب ًس.قضعقالخسسلةق !علىقأيضرةقصلبةقمقسبتةقتستطرعقتحملقق...
- Page 60 المواصفات الفنية اسوقالمميدقأمقالعالمةقالتجسيرة Beko 0 2W اسوقالممدرل السعةقالم ديةق(كجو)ق )أثصىقسيعةقللعصيق(لفةقفيقالدثر ة مدمج ال )االيتفسعق(سو )العيضق(سو )العمقق(سو مدخلقمرسهقمحردق2قمدخلقمرسهققنسئي - ق2ق قمتسح )الترسيقالكهيبيق(فملت2هيتز 230قV05ق2قHz )إجمسليقالترسيق(بسألمبري )الطسثةقالكلرةق(مات كمدقالممدرلقاألسسسي :تحذير .تنطبققثروقاالستهالكقعلىقالحسالتقالتيقركمنقفرهسقاتصسلقالشبكةقالالسلكرةقمتمث ف ً س ﺟدول اﻟرﻣوز Extra Rinse ﻣﯾﺎه إﺿﺎﻓﯾﺔ ﺗﺣدﯾد اﻟﻣﻘدار ﺗﻠﻘﺎﺋ ﯾ ّ ً ﺎ...
- Page 61 تعليمات هامة للسالمة والبيئة WEEE 1.2 االلتزام بتوجيهات ).ققرحملقهذاقالجهسزقيمزقتمضرحيقEU22012219(قاألميمبرةقWEEEقرتمافققهذاقالجهسزقمعقتمجرهستق 2 WEEE(لنفسرستقاألجهزةقالكهيبسئرةقماإللكتيمنرةق توقتصنرعقهذاقالمنتجقبسستخداوقأجزاءقمممادقعسلرةقالجمدةقرمكنقإعسدةقاستخدامهسقبسإلضسفةقإلىقمنسسبةقإلعسدةق التدمري.قملذا،قالقتتخلصقمنقهذاقالمنتجقمعقالنفسرستقالمنزلرةقالعسدرةقفيقنهسرةقصالحرتهقللعمل.قمعلركقأنق تأخذهقإلىقميكزقتجمرعقخسصقبإعسدةقتدمريقاألجهزةقالكهيبرةقماإللكتيمنرة.قريجىقاستشسيةقالجهستقالمحلرةق لمعيفةقأثيبقميكزقتجمرع.ق 48oHSالتمافققمعقتمجرهستق ).ققمالقرحتميقعلىقممادقEUقRoHS25621102)قEUرتمافققالجهسزقالذيقثمتقبشياؤهقمعقتمجرهستق .ضسيةقأمقمحظميةقمنقتلكقالمايدةقبسلتمجرهست 2.2 بيانات التعبئة توقتصنرعقممادقالتعبئةقالخسصةقبسلمنتجقمنقممادقثسبلةقإلعسدةقالتدمريقبمسقرتفققمعق"ثمانرنقالبرئةقال ممرة".قالقتتخلصقمنقممادق التعبئةقمعقالنفسرستقالمنزلرةقأمقالنفسرستقاألخيى.قعلركقأنقتأخذهسقإلىقمياكزقتجمرعقممادقالتعبئةقالمخصصةقبماسطةقالجهستق .المحلرة الغرض من االستخدام .ق قهذاقالمنتجقمصموقلالستخداوقالمنزلي.قمغريقمنسسبقلالستخداوقالتجسييقمرجبقأالقرستخدوقفيقغريقالخيضقالمخصصقله .ق قتستخدوقهذهقالخسسلةقف طقلخسلقمتجفرفقالمالبسقالمحددةقفيقهذاقالدلرل .ق قتخليقجهةقالصنعقطيفهسقمنقأيقمسؤملرةقمتيتبةقعلىقاالستخداوقأمقالن لقغريقالصحرح .ق قعميقخدمةقالجهسزق- قسنمات.قخاللقهذهقالفتية،قسرتوقاستبدالقثطعقالخرسيقاألصلرةقلتشخرلقالجهسزقبشكلقسلرو 280ق2ق الخسسلةق2قدلرلقالمستخدو...
- Page 62 ق األجهزةق الكهيبرةق خطيةق علىق األطفسل.ق لذا،ق ابقق األطفسلق بعر د ً اق عنق الخسسلةق ق أقنسءقتشخرلهس.قمالقتسمحقلهوقبسلعبثقفيقالخسسلة.قاستخدوقثفلقاألطفسلقلمنعقاألطفسلقمنق العبثقبسلخسسلة.ق .ق القتنسقإغالققبسبقالتحمرلقعندقتيكقمكسنقمجمدقالخسسلة ق ق ثوق بتخزرنق كسفةق المنظفستق ماإلضسفستق فيق مكسنق آمنق بعر د ً اق عنق متنسملق ق...
- Page 63 تعليمات السالمة العامة رحتمىقهذاقال سوقعلىقإيشسداتقالسالمةقالتيقتسسعدقفيقالحمسرةقمنقاإلصسبستقالشخصرةق .ماألضيايقالمسدرة.قمثدقرؤديقعدوقإتبسعقهذهقاإليشسداتقإلىقإلخسءقالضمسن 1.1 سالمة الحياة والمنشآت ق الق تضعق المنتجق علىق أيضرةق مخطسةق بسلسجسد.ق مإال،ق فإنق الن صق فيق تدفقق ق الهماءق أسفلق الجهسزق سمفق رتسببق فيق ازدرسدق سخمنةق األجزاءق الكهيبرة.ق مهمق مسق ثدق .رتسببقفيقحدمثقمشكالتقبسلخسسلة...
- Page 64 الغسالة دلرلقالمستخدو Washing Machine User Manual WTE12726W EN / AR مقر ةقيثو 24-0 2084-94 -/282 8 -5 89 0...
Need help?
Do you have a question about the WTE12726W and is the answer not in the manual?
Questions and answers