Table of Contents
Advertisement
Quick Links
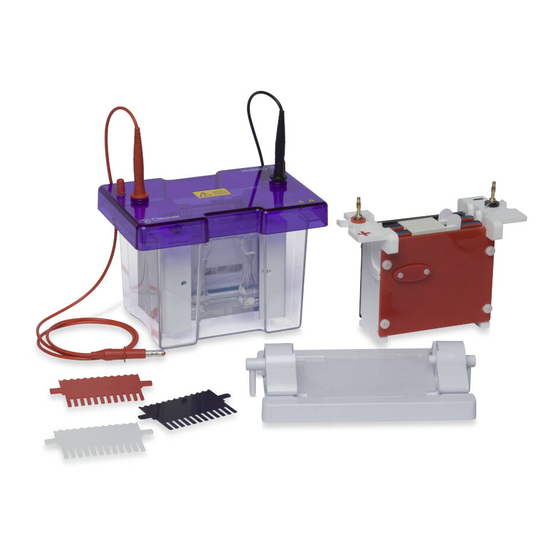
omniPAGE Mini
Vertical
Electrophoresis and
Electroblotting Units
Instruction Manual
Catalogue Numbers
CVS10CBS
02/09/2021
SB10
Record the following for your records:
Model _____________________
Catalogue No. _____________________
Date of Delivery _____________________
Warranty Period _____________________
Serial No. _____________________
Invoice No. _____________________
Purchase Order No. _____________________
Page 1
Advertisement
Table of Contents

Subscribe to Our Youtube Channel
Related Manuals for Cleaver Scientific CVS10CBS


Summary of Contents for Cleaver Scientific CVS10CBS
-
Page 1: Instruction Manual
Mini Vertical Electrophoresis and Electroblotting Units Instruction Manual Catalogue Numbers CVS10CBS SB10 Record the following for your records: Model _____________________ Catalogue No. _____________________ Date of Delivery _____________________ Warranty Period _____________________ Serial No. _____________________ Invoice No. _____________________ Purchase Order No. _____________________... -
Page 2: Table Of Contents
Contents Instruction Manual Catalogue Numbers Contents Safety Information Packing List Care and Maintenance Operating Instructions Usage Guidance and restrictions Setting up the Gel Tanks Protein Electrophoresis Casting Unit Preparation Gel Preparation Preparation of denatured protein samples for loading Gel Pouring Gel Running Protein Blotting Setting up the blot sandwich... -
Page 3: Safety Information
Safety Information When used correctly, these units pose no health risk. However, these units can deliver dangerous levels of electricity and are to be operated only by qualified personnel following the guidelines laid out in this instruction manual. Anyone intending to use this equipment should read the complete manual thoroughly. -
Page 4: Packing List
The unit should be checked for damage when received. Cleaver Scientific is liable for all missing or damaged parts / accessories within 7 days after customers have received this instrument package. Please contact Cleaver Scientific immediately regarding this issue. If no response within such period is received from the customer, Cleaver Scientific will no longer be liable for replacement/damaged parts. -
Page 5: Care And Maintenance
Care and Maintenance Cleaning the Unit Units are best cleaned using warm water and a mild detergent. Water at temperatures above 60 C can cause damage to the unit and components. The tank should be thoroughly rinsed with warm water or distilled water to prevent build up of salts but care should be taken not to damage the enclosed electrode and vigorous cleaning is not necessary or advised. -
Page 6: Operating Instructions
Operating Instructions Further information (including videos) regarding setting up and running the omniPAGE units can be found at www.cleaverscientific.com Usage Guidance and restrictions: • Maximum altitude 2,000m. • Temperature range between 4°C and 65°C. • Maximum relative humidity 80% for temperatures up to 31 C decreasing linearly to 50% relative humidity at 40 •... -
Page 7: Protein Electrophoresis
Protein electrophoresis Casting Unit Preparation Cleaning the Glass Plates Clean a set of glass plates for each gel first with distilled water and then with 70 % ethanol. One set of glass plates constitutes one notched glass plate and one plain glass plate with bonded spacers. When using a triple glass plate sandwich, two notched glass plates are required, one set of free spacers and a set of plain glass plates with bonded spacers. - Page 8 pressure bars will need to be in the completely open position and it is advise to use the screws clamping system instead of the clamps. 2. Position the Slab Gel Insert on a flat surface. Insert the glass plates into the Slab Gel Insert between the pressure bar and the blue gasket.
-
Page 9: Gel Preparation
NOTE: It is best to turn the cams in opposite directions to each other. Do not overturn as this will cause the glass plates to push upwards and the assembly will be more likely to leak. The unit is now ready for gel preparation and pouring. Always reverse the silicone mat after casting to avoid indentations from persisting. - Page 10 Gel Volumes for the omniPAGE Mini Unit are shown below: Number of gels Gel Thickness (mm) Volume (ml) Single – one gel, one dummy plate 11.3 15.0 Double – two gels 15.0 22.5 30.0 Using a Triple Plate 10.0 sandwich – four gels 30.0 45.0 60.0...
-
Page 11: Preparation Of Denatured Protein Samples For Loading
Stacking Gel: Solution Volume Distilled Water 4.2ml 30 % Stock Acrylamide Solution 0.65ml 4 X Stacking Gel Tris Solution 1.6ml Add 67µl of 10 % Ammonium Persulphate and 6.7µl TEMED before pouring. Preparation of denatured protein samples for loading The instructions given below are for denatured samples. For Native samples, please consult a laboratory handbook. - Page 12 3. Fill the glass plates smoothly till the mark avoiding generating any air bubbles. Filling must be performed quickly before the TEMED causes the gel to become too viscous. 4. Overlay the gel extremely carefully with 1 ml of Isobutanol, Isopropanol or distilled water.
- Page 13 • Let the gel polymerize. Usually this takes from 15 to 30 minutes, but this can vary due to the freshness of the reagents used. If polymerization is taken a lot longer than this, use fresher stock solutions or add more APS and TEMED.
-
Page 14: Gel Running
Buffer Volume omniPAGE mini vertical Minimum – Inner tank is filled to above gel level. Outer Tank is filled to just flood the bottom of the glass 250ml plates. Cooling potential is at a minimum which may affect resolution. Maximum – Inner tank is filled to above gel level. Outer Tank is filled to the maximum fill line. - Page 15 40-90mA Three gels 90-225V 60-135mA Four gels 90-225V 80-180mA Gel Removal 1. Turn the power supply off when the loading dye reaches the bottom of the gel, sooner if your proteins are below 4 kDa in size. 2. Remove the gel running module, first emptying the inner buffer into the main tank.
-
Page 16: Protein Blotting
Protein Blotting Setting up the blot sandwich N.B Remember to always wear gloves when dealing with proteins to avoid contaminations! 1. Following electrophoresis, remove the glass plate and transfer the gel into Transfer buffer. 2. Equilibrate the gel between 10-30min at room temperature on a shaker according to specific protocols. -
Page 17: Blot Running Conditions
2. Close the cassettes hinge carefully to not disturb the sandwich. 3. Fill the tank with buffer solution up to the maximum fill line indicated on the side of each unit. See recommended buffer solutions section. NOTE: Improved transfer can usually be obtained by using chilled buffer. Buffer Volume SB10 One Cassette... - Page 18 vary according to the number of cassettes, type and temperature of buffer and thickness and percentage of gel. This will also affect quality of transfer so time course of transfer should be performed for your particular samples and conditions. 5. When the blot time is completed, turn the power supply off. 6.
-
Page 19: Solutions
Solutions Stock 30% Acrylamide Gel Solution:- 30.0 g acrylamide 0.8 g methylene bisacrylamide Distilled Water to 100ml Stock 4 X Resolving Gel Tris (1.5 M Tris HCl pH8.8, 0.4 % SDS) To 110ml Distilled Water add 36.4 g of Tris base Add 8ml of 10 % SDS Adjust pH to 8.8 with 1N HCl Adjust the final volume to 200ml with Distilled Water. - Page 20 1ml Distilled Water TEMED ready solution Stock 4 X Sample Buffer 4ml glycerol 2ml 2-mercaptoethanol 1.2 g SDS 5ml 4 X Stacking Tris 0.03 g Bromophenol blue Aliquot into 1.5ml microcentrifuge tubes. Store at -20°C. Towbin Buffer 25mM Tris, 192mM glycine, 20% methanol pH8.3, Towbin Buffer SDS 25mM Tris...
-
Page 21: References
N.B. Do not adjust the pH when making these buffers as this will cause blot over-heating. The pH will vary according to the freshness of the reagents used. References 1. Sambrook, Fritsch, and Maniatis, Molecular Cloning A Laboratory Manual, Second Edition, Cold Spring Harbor Laboratory Press, 1989. -
Page 22: Troubleshooting
Troubleshooting SDS-PAGE electrophoresis Problem: Sample Cause Solution Preparation Laemmil sample buffer turns Sample buffer too acidic Add Tris base until buffer turns blue again. yellow Sample very viscous High DNA or carbohydrate Fragment DNA with ultrasonic waves during content cell lysis and protein solubilization. Add endonucleases (for each benzonases). - Page 23 Problem: Electrophoresis Cause Solution Current zero or less than Tape at the bottom of precast Remove tape. gel cassette not removed expected and samples do not Insufficient buffer in inner buffer Fill buffer chamber with running buffer. migrate into gel chamber Insufficient buffer in outer buffer Fill inner and outer buffer chambers to ensure...
- Page 24 Gel temperature too high Use external cooling during run or run out a lower voltage. Bands ‘smile’ across gel, band Excess heating of gel; centre of Check buffer composition; buffer not mixed gel runs hotter than either end well, or buffer in upper chamber too pattern curves upward at both concentrated.
- Page 25 sandwich Western detection system not working or not sensitive enough • Include proper positive or negative control antigen. Consult kit manual. • Use protein markers with coloured reference bands during PAGE. • Stain gel with Coomassie, or stain membrane with Ponceau S.
- Page 26 - nitrocellulose • Ensure methanol concentration does not exceed 20% (v/v). Proteins may be transferring through nitrocellulose. • Use PVDF or smaller pore size (0.2µm) nitrocellulose. • Overlay an extra piece of nitrocellulose over membrane to determine if proteins are migrating through the membrane directly in contact with the gel.
- Page 27 Too low background • Increase antibody concentration / protein sample concentration Consult manual included with antibody detection kit Total protein detection Consult stain or detection kit manual.
-
Page 28: Warranty
Warranty The Cleaver Scientific Ltd. (CSL) omniPAGE Horizontal Electrophoresis units have a warranty against manufacturing and material faults of thirty-six months from date of customer receipt. If any defects occur during this warranty period, CSL will repair or replace the defective parts free of charge.
Need help?
Do you have a question about the CVS10CBS and is the answer not in the manual?
Questions and answers