Table of Contents
Advertisement
Quick Links
Owner's Manual
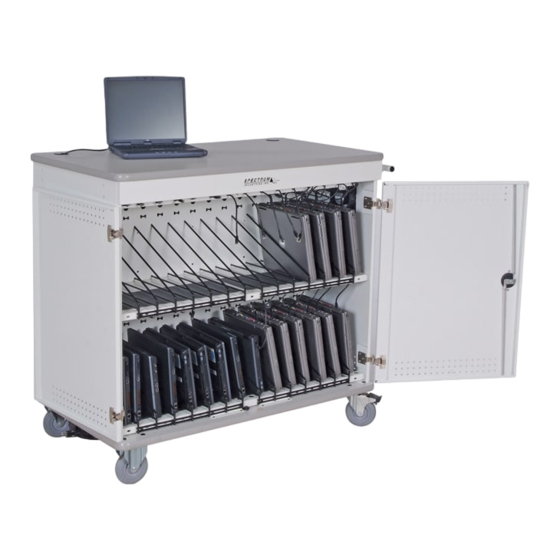
Impression 30 Imaging Laptop Cart
55377
Important
Before using this product:
• Read this manual
• Comply with all safety and operating instructions
• Ensure all parts and correct quantities are included
Any parts damaged during shipment must be reported
within 15 days of receipt. To report information regard-
ing missing parts or damage, to purchase parts or
accessories, or if you have any questions, please
contact us.
Thank you for purchasing Spectrum products!
Spectrum Industries, Inc
925 First Avenue, Chippewa Falls, WI 54729 USA
800 235 1262
715 723 6750
www.spectrumfurniture.com
™
0116141 Page 1 of 11
Advertisement
Table of Contents

Related Manuals for Spectrum Industries Impression 30 Imaging Laptop Cart


Summary of Contents for Spectrum Industries Impression 30 Imaging Laptop Cart
- Page 1 Owner’s Manual ™ Impression 30 Imaging Laptop Cart 55377 Important Before using this product: • Read this manual • Comply with all safety and operating instructions • Ensure all parts and correct quantities are included Any parts damaged during shipment must be reported within 15 days of receipt.
-
Page 2: Hardware Package Contents
If servicing is necessary, please (Ground Fault Interrupter) circuit breaker. contact Spectrum Industries for assistance. • Damaged electrical components can create signifi cant hazards to users and Warning - Relocating audio and/or video equipment to furniture not specifi cally is not covered by the warranty. -
Page 3: Assembly & Set-Up
Assembly / Setup Attach handle 4mm hex wrench Determine which side of the cart you want the handle to be on. (included) Attach the handle to the cart with (4) 1/4-20 x 15mm JC bolts and tighten securely. Figure 1. Note: Attaching the handle on the same side of the cart as the 2 swivel balloon wheels will provide more control when mobile. - Page 4 Attach cord wrap brackets 4mm hex wrench 1. Attach the cord wrap brackets to one of the side panels with 1/4-20 x (included) 15mm JC bolts as shown in Figure 2 and tighten securely. Be sure the brackets are facing away from each other as shown. 2.
- Page 5 Laptop charger and cart wiring 1. With the cart unplugged from wall, open all doors. 2. Install Ethernet switch (not included) into the 1RU opening and secure with 10-32 screws (not included). Figure 4. Note: Refer to your specific Ethernet switch instructions for setup information.
- Page 6 3. Pull both wire tray releases out to lower each wire tray. Figure 3. 4. Route each RJ-45 cord from the switch through the divider panel cutout, up to and across the wire tray, and down to each laptop bay. 3.
- Page 7 6. Place the laptop chargers into the two cord management trays and plug into power units. Figure 7. (Excess cord can be bundled and secured inside the tray.) Chargers can be secured to the tray using the slots if necessary. 7.
- Page 8 Impression 30 cart section Note: The pull-down wire trays provide easy-access to power cords. view and wiring diagram After the cords are in place, the trays flip-up and lock into a horizon- tal position. Cord length adjustments can be made depending on the size of laptop and location of charge port.
-
Page 9: Door Stop Adjustment
Door stop adjustment 4mm hex wrench If necessary, the offset door stop can be rotated slightly to adjust (included) the closed position of the doors and lock rods. 1. To rotate, loosen the JC bolt slightly with a 4mm hex wrench. Figure 9. 2. -
Page 10: Using Timer
Cycle Timer Operation ON / OFF switch (controls power to timer ‘A’ and ‘B’ outlets) cycle switch 15-amp reset button timer left (A) power right (B) power unit auxiliary control unit outlet and outlet and indicator (constant-power) indicator 2-outlets used for accessories such as Wi-Fi routers, teacher Note: Each power unit in the... -
Page 11: Warranty Statement
Warranty Statement WE WILL MAKE IT RIGHT FOR YOU! Spectrum is committed to provide complete customer satisfaction. Each of our products is manufactured from the best materials available and each product is stringently monitored throughout the production process through our P.A.C.E. program (Product Assurance to meet Customer Expectations). We expressly warrant that Spectrum products will be of good quality and workmanship and free from defect for the period set out in the warranty table below from the date of delivery.
Need help?
Do you have a question about the Impression 30 Imaging Laptop Cart and is the answer not in the manual?
Questions and answers