Table of Contents
Advertisement
Quick Links
Advertisement
Table of Contents

Related Manuals for CDA FWC881BL

Summary of Contents for CDA FWC881BL
- Page 1 FWC881BL Wine cooler Installation, use and maintenance...
-
Page 2: Table Of Contents
Contents Important information Disposal at the end of the appliance's life Before first use Use and controls Optimal temperature selection and humidity control Sabbath mode Dynamic and silent modes Removing the shelves Temperature alarm Care and cleaning Troubleshooting Installation and ventilation Installing the handle Reversing the door Fitting the plinth... - Page 3 Keep the mains cord out of the reach of children. Appliance information: Please enter the details on the appliance rating plate on page 4 for reference, to assist CDA Customer Care in the event of a fault with your appliance and to register your appliance for guarantee purposes.
-
Page 4: Important Information
Appliance Model Serial Number EU Declarations of Conformity: This appliance has been designed, constructed and marketed in compliance with safety requirements of EU Directive 2014/35/EU (Low voltage) and requirements of Directive 2014/30/EU (EMC). IMPORTANT INFORMATION FOR CORRECT DISPOSAL OF THE PRODUCT IN ACCORDANCE WITH EU DIRECTIVE 2012/19/EU. - Page 5 • Repairs carried out by unqualified persons may seriously endanger the appliance user. • Pursuant to Commission Regulation (EU) 2019/2019, The minimum availability period for spare parts necessary to repair the appliance is 7 or 10 years depending on the type and purpose of the spare part.
-
Page 6: Before First Use
Before first use You must allow the appliance to settle for at least eight hours prior to switching the power on. It is recommended that you remove all internal and external packaging and clean the interior of the appliance prior to first use, using a solution of bicarbonate of soda and warm water and then thoroughly dry the interior. - Page 7 • Only open the door when necessary. • Do not cover the shelves with aluminium foil or anything else that will prevent air from circulating around the cabinet. • To prevent damage to the door seal, ensure the door is fully open before removing the shelves.
-
Page 8: Use And Controls
Use and controls Key: 1 – Power button 2 – Upper zone "+" button 3 – Upper zone "-" button 4 – Lower zone "+" button 5 – Lower zone "-" button 6 – Light button Fig. 1 To switch the power on/off •... - Page 9 Please note: The temperature in the lower zone must be set either the same or higher than the temperature in the upper zone. For optimal performance, the temperatures in the two zones should differ by at least 4˚ C. Optimal temperature selection Whilst wine is best stored at temperatures between 13 and 15˚C, your wine can also be stored at drinking temperature, for red wine this is between 15 and 17˚C, and for white wine between 12 and 13˚C.
-
Page 10: Sabbath Mode
• Place the reservoir over the special lugs toward the back of the bottom shelf in the upper section of the wine cooler, as shown in fig. 2. Ensure it is located correctly to prevent water spillage. • Check the water level regularly and refill if required. Temperature display The temperature display will show the current internal temperature. -
Page 11: Dynamic And Silent Modes
Dynamic Cooling and Silent modes The appliance has two different running modes. Silent mode Once the required temperature is reached, the appliance will run without the fan. The wine cooler is factory set to silent mode. To change to dynamic cooling mode, touch and hold the "-" button for approximately five seconds. -
Page 12: Removing The Shelves
Removing the shelves To remove a shelf from the wine cooler, first remove all bottles from the shelf, then pull the shelf forwards until the groove on either side of the shelf is level with the Fig. 3 plastic peg on either side of the cabinet (as shown in fig. -
Page 13: Care And Cleaning
Care and cleaning Always disconnect the appliance from the mains electrical supply before any cleaning or maintenance. • Do not use abrasive products or detergents. After washing, rinse and dry thoroughly. • The exterior of the appliance and the door seal should be cleaned using mild soapy water and dried thoroughly. -
Page 14: Troubleshooting
Troubleshooting If you have any problems with your appliance you should check the troubleshooting guide prior to calling CDA Customer Care, to prevent unnecessary service calls and potential cost. If the appliance is not working, check • There is power to the appliance •... - Page 15 The light button is not set to off. Please note: The LED lighting cannot be replaced without a service call. If the light fails, contact CDA Customer Care. If the door will not close properly, check • The appliance is level and stable.
- Page 16 Installing the wine cooler This appliance is intended to be installed in a space between two Fig. 4 units. The minimum space required is: FWC881 – 595mm wide x 575mm deep x 1850mm high (630 depth with handle) Please note: When the product is installed, there should be a small ventilation gap between the top of the unit and the underside of any fitting above (6 mm or ¼”).
- Page 17 To install the handle IMPORTANT: Do not overtighten the screws, and do not use power tools to install the handle. 1. Carefully locate the handle in the required position (this would normally be the higher of the two positions as shown in Fig.
-
Page 18: Reversing The Door
Reversing the door It is possible to reverse the door on this appliance, if required. We recommend Door the help of at least one other individual throughout this process. Protect the area beneath the door with several clean towels or similar protective means. Do not tilt the appliance further than 90°... - Page 19 cabinet (Fig.10). 6. Unscrew and transfer the hinge pin (8) and door support (7) to the opposite lower hinge (Fig.8). 7. Unscrew and transfer the door adapter (9) to the designated top positions of the door (Fig.9). Fig. 9 8. Rotate the door 180° and relocate it to the designated position.
-
Page 20: Fitting The Plinth
Fitting the plinth We recommend the help of at least one other individual throughout this process. Protect the area beneath the door and plinth with several clean towels or similar Fig. 12 protective means. Do not tilt the appliance further than 90° during this process. -
Page 21: Electrical Information
Electrical information Warning! This appliance must be earthed. The mains lead of this appliance has been fitted with a BS 1363A 13 Amp fused plug. To change a fuse in this type of plug, follow the steps below: 1. Remove the fuse cover and fuse. 2. - Page 22 As the colours of the wires in the mains lead of this appliance may not correspond with the coloured markings identifying the terminals in your plug, proceed as follows:- • The wire which is coloured GREEN and YELLOW must be connected to the terminal which is marked with the letter (E) or by the Earth symbol or coloured GREEN and YELLOW.
-
Page 23: Bottle Loading Plan
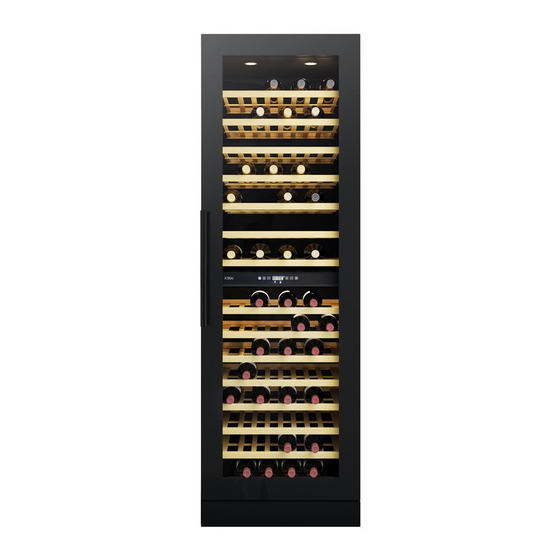
Bottle storage To achieve the most effective preservation of your wine for the longest time possible and avoiding any waste, position the products as shown in the diagrams in this section. In addition, this figure illustrates the layout of drawers, baskets and shelves, which allows the most efficient use of energy. -
Page 24: Climate Range
Climate Range The information about the climate range of the appliance is provided on the rating plate. It indicates at which ambient temperature (that is room temperature in which the appliance is working) is optimal for the operation of the appliance. Climate class Allowable ambient temperature Extended Temperate... -
Page 25: Energy Efficiency Information
Installation type Freestanding This appliance is intended to be used exclusively for the storage of wine. E & O E. All instructions, dimensions and illustrations are provided for guidance only. CDA reserve the right to change specifications without prior notice. -
Page 26: Notes
Notes... - Page 27 Notes...
- Page 28 The CDA Group Harby Road Langar Nottinghamshire NG13 9HY Sales Department Phone: 01949 862010 Email: sales@cda.eu Customer Care Department Phone: 01949 862012 Email: customer.care@cda.eu ©2020 CDA Group Ltd...
Need help?
Do you have a question about the FWC881BL and is the answer not in the manual?
Questions and answers