
Related Manuals for H3C WA6620X


Summary of Contents for H3C WA6620X
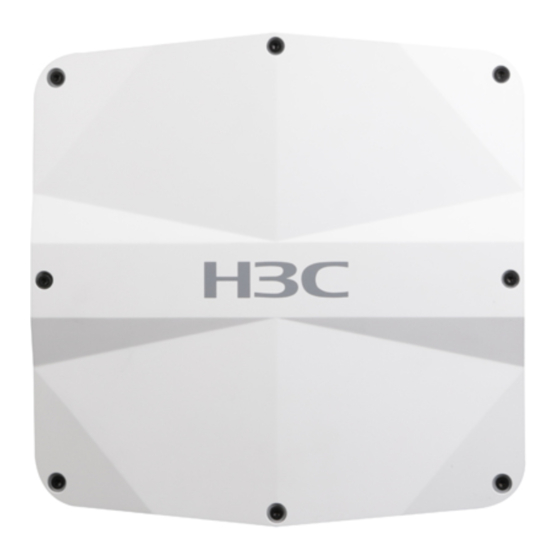
- Page 1 H3C WA6620X Access Point Installation Guide New H3C Technologies Co., Ltd. http://www.h3c.com Document version: 5W100-20201125...
- Page 2 The information in this document is subject to change without notice. All contents in this document, including statements, information, and recommendations, are believed to be accurate, but they are presented without warranty of any kind, express or implied. H3C shall not be liable for technical or editorial errors or omissions contained herein.
- Page 3 Preface This installation guide describes the installation procedure for the WA6620X access point. This preface includes the following topics about the documentation: • Audience. • Conventions. • Documentation feedback. Audience This documentation is intended for: • Network planners. • Field technical support and servicing engineers.
- Page 4 Symbols Convention Description An alert that calls attention to important information that if not understood or followed WARNING! can result in personal injury. An alert that calls attention to important information that if not understood or followed CAUTION: can result in data loss, data corruption, or damage to hardware or software. An alert that calls attention to essential information.
- Page 5 Documentation feedback You can e-mail your comments about product documentation to info@h3c.com. We appreciate your comments.
-
Page 6: Table Of Contents
Contents 1 Preparing for installation ·········································································· 1-1 Examining the installation site ························································································································· 1-1 Installation site selection ························································································································· 1-1 Temperature and humidity requirements ································································································ 1-1 Power supply ··········································································································································· 1-1 Grounding and lightning protection ········································································································· 1-2 Installation accessories ··································································································································· 1-3 Installation tools ·············································································································································· 1-3 2 Installing the AP ·······················································································... -
Page 7: Preparing For Installation
IP68 Power supply Power the AP by using a power injector. No power injector is provided with the AP. You can purchase an H3C power injector for the AP. See "Powering the AP by using a power injector" for the... -
Page 8: Grounding And Lightning Protection
Grounding and lightning protection The AP must be reliably grounded. Make sure the grounding points of the grounding conductor of the AP, lightning arresters, PE wire of the power cord, and antenna support are separate from each other, make good contact, and are securely connected and treated with corrosion protection. Ground resistance The ground resistance is typically required to be less than 5 ohms, and less than 10 ohms in an area with less than 20 thunderstorm days a year. -
Page 9: Installation Accessories
Installation accessories Figure1-1 Installation accessories Installation tools When installing the AP, you might need the following tools. Prepare the installation tools yourself as required. Figure1-2 Installation tools... -
Page 10: Installing The Ap
Installing the AP IMPORTANT: For optimal radio coverage, use professional technical engineers to install the AP as a best practice. Pre-installation tasks Before installing an AP, perform the following tasks: • Connect the AP to a power source and the network. Examine the LEDs to verify that the AP can operate correctly. -
Page 11: Installation Flowchart
Installation flowchart Figure2-1 Installation flowchart Start Connect the grounding cable Connect Ethernet cables Install the AP Wall-mount the AP Pole-mount the AP Adjust the AP angle Connect IoT access units Connect the AP to the power source Label cables Verify the installation Power on the AP Troubleshoot the AP Operating... -
Page 12: Connecting The Grounding Cable
Connecting the grounding cable CAUTION: • Correctly connecting the grounding cable is crucial to lightning protection and EMI protection. • Before connecting the AP to the power source, make sure the grounding cable is correctly connected. No grounding cable is provided with the AP. Prepare one yourself. To connect the grounding cable to the AP: Attach a ring terminal to the grounding cable. -
Page 13: Connecting An Ethernet Cable
IMPORTANT: When you apply weatherproof tape to a cable connection, follow these restrictions and guidelines: • Make sure you attach the adhesive side of the tape to the cable connector. • Pull the tape as needed for overlap. • Start wrapping at the top of the connector, and overlap the tape to half-width. Avoid creases or wrinkles and press the tape against the connection so that there are no gaps. -
Page 14: Connecting An Optical Fiber
If you route the cable outdoors by using PVC pipes, cut an opening at the bottom of the PVC pipes every 6 m (19.69 ft) to avoid water accumulation. If you route the cable outdoors without using cable casings, create drip loops on the cable ... - Page 15 Disassemble the liquid tight adapter (assembled by a weatherproof connector, a sealing nut, and a rubber seal) and detach the rubber seal, feed the optical fiber through the connector, and then attach the rubber seal to the cable. Figure2-8 Feeding the optical fiber through the connector Insert the rubber seal into the weatherproof connector.
-
Page 16: Connecting An Rf Cable
Figure2-13 Wrapping the connection Connecting an RF cable IMPORTANT: As a best practice, purchase and install lightning arresters for antenna ports in the areas where thunderstorms frequently occur. You can connect an RF cable or antenna to an antenna connector. The connection procedure is the same. - Page 17 Figure2-14 Connecting an RF cable Attach loads to unused antenna connectors to avoid radio interference.
-
Page 18: Installing The Ap
Figure2-15 Attaching loads to unused antenna connectors Installing the AP Attaching the AP bracket to the AP Orient the AP bracket correctly. To mount the AP on a horizontal pole, orient the AP bracket with the horizontal pole mounting arrow on it pointing up. To mount the AP on a vertical pole, orient the AP bracket with the vertical pole mounting arrow on it pointing up. -
Page 19: Mounting The Ap On A Vertical Pole
Figure2-16 Installing the AP bracket with the horizontal pole mounting arrow on it pointing up Figure2-17 Installing the AP bracket with the vertical pole mounting arrow on it pointing up Mounting the AP on a vertical pole You can use band clamps and a wall/pole bracket to mount the AP on a pole. The provided band clamps support poles with a diameter of 60 to 80 mm (2.36 to 3.15 in). - Page 20 Figure2-18 Securing the wall/pole bracket to the vertical pole Orient the AP with the vertical pole mounting arrow on the AP bracket pointing up. Use M5 × 20 screws to secure the AP bracket attached to the AP to the wall/pole bracket. Figure2-19 Attaching the AP to the wall/pole bracket 2-11...
-
Page 21: Mounting The Ap On A Horizontal Pole
Mounting the AP on a horizontal pole Slide the two band clamps through the mounting slots on the wall/pole bracket. Then use the band clamps to attach the wall/pole bracket to the horizontal pole. Figure2-20 Securing the wall/pole bracket to the horizontal pole Orient the AP with the horizontal pole mounting arrow on the AP bracket pointing up. -
Page 22: Mounting The Ap On A Wall
Figure2-21 Attaching the AP to the wall/pole bracket Mounting the AP on a wall The following procedure mounts the AP on a wall with the vertical pole mounting arrow on the AP bracket pointing up. To mount the AP on a wall with the horizontal pole mounting arrow on the AP bracket pointing up, adjust the installation direction of the wall/pole bracket accordingly. - Page 23 Drill four holes with a diameter of 8 mm (0.32 in) at the marked locations. Tap an expansion bolt with a rubber hammer into each hole and then remove the nut and washers, as shown in Figure2-23. Keep the drill bit perpendicular to the wall and hold the drill handle tightly with both hands ...
-
Page 24: Adjusting The Ap Angle
Figure2-25 Attaching the AP to the wall/pole bracket Adjusting the AP angle After the AP is installed, you can adjust the AP angle by loosening the four screws that secure the AP bracket and wall/pole bracket. • If the AP is installed with the vertical pole mounting arrow on the AP bracket pointing up, you can adjust the AP to the desired elevation angle (the adjustment angle must not exceed 60 degrees). -
Page 25: Powering The Ap
Figure2-26 Adjusting the AP angle on a vertical pole Powering the AP Powering the AP by using a PoE device CAUTION: • Only the GE1 port of the AP supports IEEE 802.3at PoE input. • To avoid damage, do not connect a cable carrying power to the PoE_OUT port. To power the AP through PoE, use an Ethernet cable to connect an Ethernet port on a PoE switch to the GE1 port on the AP. -
Page 26: Powering The Ap By Using A Power Injector
Powering the AP by using a power injector CAUTION: Follow these restrictions and guidelines for powering the AP by using a power injector: • Make sure the AP is installed correctly before powering on the AP. • Place the power injector stable in a well-ventilated location near the switch or access controller. Do not suspend the power injector in the air or place it on another device. -
Page 27: Labeling Cables
Figure2-28 Powering the AP by using a power injector (1) Using an optical fiber for uplink network connection Use an optical fiber to connect the SFP port on the AP to an Ethernet switch or access controller. Connect the power input end of the power injector to an AC power source. Connect the PoE1 port on the injector to the GE1 port of the AP. -
Page 28: Verifying The Installation
AP information State : I = Idle, J = Join, JA = JoinAck, IL = ImageLoad C = Config, DC = DataCheck, R = Run M = Master, B = Backup AP name APID State Model Serial ID WA6620X 219801A1CS8206E00001 2-19... -
Page 29: Appendix A Technical Specifications
Appendix A Technical specifications Table3-1 Technical specifications Item Specification Dimensions (H × W × D) 79.5 × 250 × 250 mm (3.13 × 9.84 × 9.84 in) Weight 1.8 kg (3.97 lb) System power consumption 31 W • External antenna •... -
Page 30: Appendix B Leds And Ports
Appendix B LEDs and Ports LEDs Table4-1 LED descriptions Status Description No power is present. Flashing at 1 Hz No radio cards have been detected. The Ethernet interfaces are down and no mesh links Yellow Flashing at 2 Hz are established. Steady on The AP is initializing. - Page 31 Figure4-1 Front view (1) and (2) 10/100/1000M Ethernet ports (3) 1000BASE-X SFP port (4) Console port Figure4-2 Rear view (1) 2.4G antenna ports (2.4G-1/2) (2) 5G antenna ports (5G-1/2) Table4-2 Port descriptions Standards and Port Description protocols Connects the AP to an uplink device for Internet or MAN •...
- Page 32 Standards and Port Description protocols • SFF-8427 It is represented by interface GE1/0/3 in the MAP file and Gigabitethernet 3 for configuration on the AC. For device configuration and management by the CONSOLE RS/EIA-232 maintenance engineers. • IEEE802.11a • IEEE802.11b •...
-
Page 33: Appendix C Transceiver Modules
Appendix C Transceiver modules Views An SFP transceiver module is required if you are to use the SFP fiber port. The AP supports only fibers with LC connectors. Figure5-1 SFP transceiver module Figure5-1 Optical fibers with LC connectors (1) LC connector (2) Optical fiber Specifications A transceiver module that has "MM"... - Page 34 Item SFP-GE-SX-MM850-A 50 μm Fiber diameter Output optical power –9.5 to 0 dBm ≤ –17 dBm Receiver sensitivity ≤ –3 dBm Light saturation Table5-2 SFP-GE-LX-SM1310-A transceiver module specifications Item SFP-GE-LX-SM1310-A Central wavelength 1310 nm Max transmission distance 10 km (6.21 miles) Data rate 1250 Mbps Connector type...
- Page 35 Item SFP-GE-LH40-SM1550 Output optical power –4 to +1 dBm ≤ –21 dBm Receiver sensitivity ≤ –3 dBm Light saturation...
Need help?
Do you have a question about the WA6620X and is the answer not in the manual?
Questions and answers