
Related Manuals for Beijer Electronics VICPAS EXTER Series


Summary of Contents for Beijer Electronics VICPAS EXTER Series
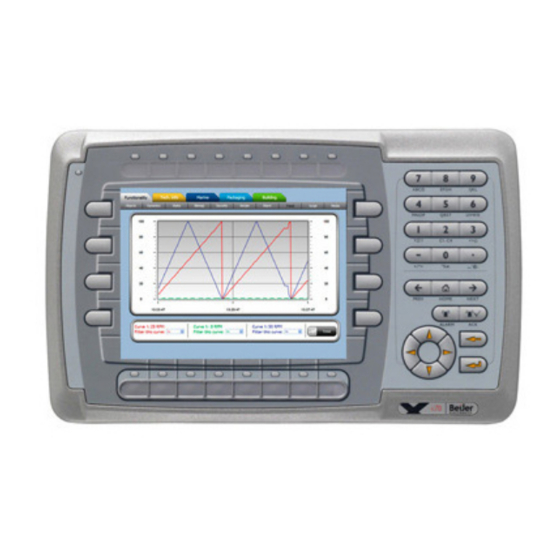
- Page 1 EXTER™-series Operator Terminals Service and Maintenance Manual English MA00757A 2006-07...
- Page 2 Beijer Electronics AB will accept no liability for any damage incurred during the installation or use of equipment mentioned in this document.
-
Page 3: Table Of Contents
4 Software .......................47 General Information about Software ..........47 4.1.1 Software Products ................47 Update Software ................48 4.2.1 Information Designer................ 48 4.2.2 Remote Access Viewer............... 48 4.2.3 Image Loader ..................48 4.2.4 System Program ................49 Beijer Electronics, MA00757A... - Page 4 Contents 5 Environmental Aspects ................51 General Environmental Aspects............51 Environmental Impact of the Operator Terminals......51 5.2.1 Mechanical Components..............51 5.2.2 Electronics..................51 Recycling...................52 Environmental Impact Report ............52 Beijer Electronics, MA00757A...
-
Page 5: Safety Precautions
– Only upgrade hardware if such instructions are found in the service manual or if sanctioned by the supplier. – Replacing the battery incorrectly may result in explosion. Only use batteries recommended by the supplier. Beijer Electronics, MA00757A... - Page 6 Safety Precautions Beijer Electronics, MA00757A...
-
Page 7: Introduction
240 x 64 pixels, display with keypad Outline drawing (also referred to Panel cut-out as BEPP K30) Text strip EXTER K60c 5.7" display with keypad Outline drawing (also referred to Panel cut-out as BEPP K60) Text strip Beijer Electronics, MA00757A... - Page 8 Text strip EXTER T40/ 3.5" touch screen display Outline drawing EXTER T40m Panel cut-out (also referred to as BEPP T40) EXTER T60c/ 5.7" touch screen display Outline drawing EXTER T60m Panel cut-out (also referred to as BEPP T60) Beijer Electronics, MA00757A...
- Page 9 Panel cut-out as BEPP 64T) EXTER T100 10.4" touch screen display Outline drawing (also referred to Panel cut-out as BEPP 104T) EXTER T150 15" touch screen display Outline drawing (also referred to Panel cut-out as BEPP 150T) Beijer Electronics, MA00757A...
-
Page 10: Maintenance
Dismantling and Scrapping – The operator terminal, or parts thereof, should be recycled according to local regulations. – The following components contain substances that might be hazardous to health and the environment: lithium battery, electrolytic capacitor, display. Beijer Electronics, MA00757A... -
Page 11: Contact And Support
To ensure quick resolution, provide as many details as possible in your report. Include the date and time when the problem occurred, a description of what you were trying to do, the detailed steps you took that led up to the problem, and details about any error messages received. Beijer Electronics, MA00757A... - Page 12 Introduction Beijer Electronics, MA00757A...
-
Page 13: Hardware
Shielded RJ 45 10/100 Mbit/s Host type A, max output current 500 mA. Processor 312 MHz RISC CPU (Intel XScale). Memory flash 32 MB (Intel StrataFlash). Application memory: 12 MB (incl. fonts) Memory RAM 64 MB Memory Expansion None Buzzer Beijer Electronics, MA00757A... - Page 14 UL: The power supply must conform with the require- ments for class II power supplies. Vertical installation: 0 ° to +50 °C. Ambient temperature Horizontal installation: 0 ° to +40 °C. -20 ° to +70 °C. Storage temperature Relative humidity 5 - 85% non-condensed. Beijer Electronics, MA00757A...
- Page 15 UL: The power supply must conform with the requirements for class II power supplies. Vertical installation: 0 ° to +50 °C. Ambient temperature Horizontal installation: 0 ° to +40 °C. -20 ° to +70 °C. Storage temperature Relative humidity 5 - 85% non-condensed. Beijer Electronics, MA00757A...
-
Page 16: Touch Screen Operated Terminals
UL: The power supply must conform with the require- ments for class II power supplies. Vertical installation: 0 ° to +50 °C. Ambient temperature Horizontal installation: 0 ° to +40 °C. -20 ° to +70 °C. Storage temperature Relative humidity 5 - 85% non-condensed. Beijer Electronics, MA00757A... - Page 17 UL: The power supply must conform with the requirements for class II power supplies. Vertical installation: 0 ° to +50 °C. Ambient Horizontal installation: 0 ° to +40 °C. temperature -20 ° to +70 °C. Storage tempera- ture Relative humidity 5 - 85% non-condensed. Beijer Electronics, MA00757A...
-
Page 18: Approvals And Enclosure Classes
Location classes: Temperature A, Humidity B, Vibration A, EMC B, Enclo- sure C (panel front only). Ingress IP 66/NEMA 4X (indoor use), UL 50 4X (indoor). protection Back cover IP 20. protection degree Shock IEC 60068-2-27 (15 g, 11 ms). Beijer Electronics, MA00757A... -
Page 19: Functionality Specification
Internal Variables Historic Trends Recipe Management Alarm Management Yes, with up to 16 groups Time Channels I/O Poll Groups Security Passwords Yes, up to 8 levels Message Libraries Macros Dynamic Objects Report Printouts Easy Configuration with Information Designer Beijer Electronics, MA00757A... -
Page 20: Additional Hardware
5. Re-attach the back cover to the operator terminal. 6. Turn on the power to the operator terminal. When the operator terminal starts up, you will be asked if you like to move the files to the internal card; select YES to this question. Beijer Electronics, MA00757A... - Page 21 The size of the internal memory card must be entered in the configuration tool for the operator terminal. 1. Select Setup/Terminal Options. 2. Enter the size of the internal memory card under Memory card settings/Internal. 3. Click OK to close the dialog. Beijer Electronics, MA00757A...
-
Page 22: Hardware Replacement
Hard reset (forces the system to reset). To change mode switches, follow the steps below: 1. Disconnect power from the operator terminal. 2. Set the mode switches using a ballpoint pen. 3. Reconnect power to the operator terminal. Beijer Electronics, MA00757A... -
Page 23: Cables
To release the flex cables from the connector, gently push the two flanges on the cable connector towards the flex cable. Note: The connectors must be unlocked on both sides before removing the cable, otherwise the flex cable may be damaged. Beijer Electronics, MA00757A... -
Page 24: Replacing The Rear Cover
4 x torx screws Illustration of EXTER K30m 4 x torx screws Illustration of EXTER K60c and EXTER T60c/T60m 4 x torx screws Illustration of EXTER T40/T40m 4. Re-assemble with the new rear cover in reverse order. Beijer Electronics, MA00757A... - Page 25 Then follow the steps below: 1. Power off the operator terminal. 2. Remove the rear cover of the operator terminal by loosening the 4 torx screws. 4 x torx screws 3. Re-assemble with the new rear cover in reverse order. Beijer Electronics, MA00757A...
-
Page 26: Replacing The Display/Display Cable
Press and bend gently on the display frame to unlock the frame and tilt up the display frame. pressure points on display frame 7. Mount the new display unit. 8. Re-assemble the terminal in reverse order. Beijer Electronics, MA00757A... - Page 27 Press and bend gently on the display frame to unlock the frame and tilt up the display frame. display frame pressure points 7. Mount the new display unit. 8. Re-assemble the terminal in reverse order. Beijer Electronics, MA00757A...
- Page 28 6. Insert the two screwdrivers between the display frame and the aluminum casing illustrated below. Press and bend gently on the display frame to unlock the frame and tilt up the display frame. display frame pressure points 7. Mount the new display unit. 8. Re-assemble the complete operator terminal. Beijer Electronics, MA00757A...
- Page 29 6. Insert the two screwdrivers between the display frame and the aluminum casing illustrated below. Press and bend gently on the display frame to unlock the frame and tilt up the display frame. display frame pressure points 7. Mount the new display unit. 8. Re-assemble the complete operator terminal. Beijer Electronics, MA00757A...
- Page 30 6. Mount the new display/display cable and frame and re-assemble the complete operator terminal. Make sure the guide pins on the frame are properly fastened in the holes in the front plate. 7. Re-assemble the complete operator terminal. Beijer Electronics, MA00757A...
- Page 31 6. Flip the mounting plate and unscrew the 4 torx screws, see figure below. 4 x torx screws 7. Make sure the display cable is attached to the new display before reattaching the mounting plate. 8. Re-assemble the complete operator terminal. Beijer Electronics, MA00757A...
- Page 32 6. Flip the mounting plate and unscrew the 4 torx screws. 4 x torx screws 7. Make sure the display cable is attached to the new display before reattaching the mounting plate. 8. Re-assemble the complete operator terminal. Beijer Electronics, MA00757A...
- Page 33 5. Lift up the power card and gently remove the 4 backlight cables and disconnect the display cable from the power card. backlight cable display cable backlight cable 6. Remove the mounting plate (12 torx screws). 12 x torx screws 7. Gently lift up the mounting plate and the display. Beijer Electronics, MA00757A...
-
Page 34: Self-Test Of The Display
1. Set the MODE switches to the correct positions in order to enter the User Menu mode (see table in the Mode Switches section). 2. Switch on the power and follow the instructions. 3. Power off the operating terminal. 4. Reset all MODE switches to the OFF position. Beijer Electronics, MA00757A... -
Page 35: Replacing The Complete Front
2. Follow the steps 1-3 and step 5 in the Replacing the Display/Display Cable instruction for EXTER K100, but in step 3, only disconnect the flex cable (do not remove the power card). 3. Attach the new front. 4. Re-assemble the unit. Beijer Electronics, MA00757A... - Page 36 2. Follow the steps 1-3 and step 5 in the Replacing the Display/Display Cable instruction for EXTER T150, but in step 3, only disconnect the flex cable and the LED cable (do not remove the power card). 3. Attach the new front. 4. Re-assemble the unit. Beijer Electronics, MA00757A...
-
Page 37: Replacing The Battery
1. Power off the operator terminal. 2. Open the battery cover. 3. Use a non conductive pair of pliers to extract the battery battery 4. Insert the new battery. 5. Re-assemble the battery cover. Note: The removed lithium battery should be recycled. Beijer Electronics, MA00757A... - Page 38 6. Glue the battery to the battery holder with melting glue. 7. Re-assemble the operator terminal in reverse order. Note: The removed lithium battery should be recycled. Beijer Electronics, MA00757A...
-
Page 39: Replacing The Backlight
3. Insert the new backlight. Be careful not to pull the cables of the new backlight when inserting it, since pulling the cables will damage the backlight. 4. Re-assemble the complete operator terminal. Beijer Electronics, MA00757A... - Page 40 2. Remove the backlights. 3. Insert the new backlights. Be careful not to pull the cables of the new backlights when inserting them, since pulling the cables will damage the backlights. 4. Re-assemble the complete operator terminal. Beijer Electronics, MA00757A...
-
Page 41: 3.7.10 Available Spare Parts
COMPLETE FRONT EXTER K70 incl. front cover, glass, keyboard, gaskets and labels 601009033 COMPLETE FRONT EXTER K100 incl. front cover, glass, keyboard, gaskets and labels 601009084 COMPLETE FRONT EXTER K30m incl. front cover, glass, keyboard, gaskets and labels Beijer Electronics, MA00757A... - Page 42 FRONT LABEL S-06042 EXTER K100 601009045 FRONT LABEL, S-06052 EXTER T150 601009124 LABEL (for expansion port) EXTER K30m, EXTER K60, EXTER T40 and EXTER T60 321099040 POWER CONNECTOR All operator terminals in the EXTER-series 601009120 REAR COVER EXTER K30m Beijer Electronics, MA00757A...
- Page 43 EXTER-series 601009006 TEST PLUG RS232 All operator terminals in the EXTER-series 601009007 TEST PLUG RS422/485 All operator terminals in the EXTER-series 601009004 TEST PLUG USB EXTER K70, EXTER K100, EXTER T70, EXTER T100, EXTER T150 Beijer Electronics, MA00757A...
-
Page 44: Hardware Self Test
4. When using the test plugs, make sure all LEDs on the 9-pin and 25-pin D-subs are on. 5. When the self-test is finished, power off the operator terminal and set all mode switches to the OFF position. If an error occurs during the self-test, try to fault trace. See Fault Tracing. Beijer Electronics, MA00757A... -
Page 45: Fault Tracing
(This is only valid for terminals with an external battery cover.) will not restart after changing a component. Low battery/ Check that the battery is correctly fitted in its holder. No battery If low battery/no battery voltage, replace the battery according to the Replacing the Battery section. Beijer Electronics, MA00757A... - Page 46 Hardware Beijer Electronics, MA00757A...
-
Page 47: Software
3. OPsys, the system program in the operator terminal that contains the HMI functionality. Information Designer can be used to update one part of the firmware, the system program Opsys_b*.cab, to the operator terminal. See the System Program section. Beijer Electronics, MA00757A... -
Page 48: Update Software
ALL existing data, including the file system and the project application files, in the op- erator terminal will be deleted (overwritten) by the Image Loader application Note: The Image Loader software is only intended for customers and partners that have an operator terminal. No other distribution is allowed. Beijer Electronics, MA00757A... -
Page 49: System Program
4. Set the operator terminal back to Run-mode (see the Mode Switches section). 5. Open a project or create a new project with the desired operator terminal type. 6. Select Transfer/Update Operator Terminal System Program. 7. Select Settings/Use TCP/IP transfer. Beijer Electronics, MA00757A... - Page 50 2. Place the memory card in the operator terminal, or connect the USB Flash drive, and start the operator terminal to update the system program automatically. Note: When updating an operator terminal it is important to ensure that the power is not interrupted during the transfer. Beijer Electronics, MA00757A...
- Page 51 There is a separate circuit board for the display. The liquid crystals in the display are cyclohexane compounds. The fluorescent tube contains mercury and lead solder. Batteries The operator terminal contains a button cell lithium battery (Li/MnO2). The battery is not classified as environmentally hazardous by the Swedish Battery Or- dinance (1997:645). Beijer Electronics, MA00757A...
- Page 52 Supply the operator terminal with 24 V DC. If the input voltage is lower, the loss effect increases. Ensure that the operator terminal, battery, and packaging are recycled in an environmentally responsible manner. Beijer Electronics, MA00757A...
- Page 53 Update System Program 49 Mode Switch 22 by Serial Port 49 Hardware Self Test 44 over Ethernet 49 Hardware Specification 13 via External Memory Card 50 Hardware Tests 13 via PC 49 USB 13, 15, 16, 17 Beijer Electronics, MA00757A...
- Page 54 Head Office Subsidiary Subsidiary Subsidiary Beijer Electronics AB Beijer Electronics GmbH Beijer Electronics Inc. Hitech Electronics Corp. Box 426 Zettachring 2A 939 N. Plum Grove Road, Suite F 4F, No. 501-15, Chung-Cheng Road SE-201 24 Malmö, Sweden 705 67 Stuttgart, Germany Schaumburg, IL 601 73, USA Shin-Tien, Taipei Shien, Taiwan, R.O.C.
Need help?
Do you have a question about the VICPAS EXTER Series and is the answer not in the manual?
Questions and answers