Table of Contents
Advertisement
Available languages
Available languages
Quick Links
Weight Limit:
200 Lb / 91 Kg For Upper Bed
600 Lb / 272 Kg For Lower Futon
All Rights Reserved
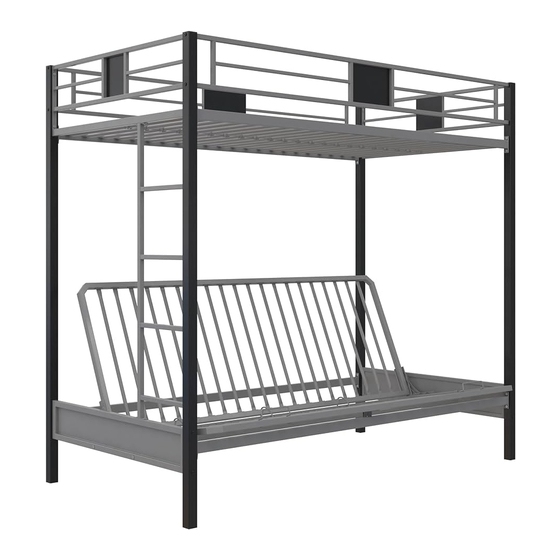
Silver Screen Metal Bunk Bed
DO NOT RETURN TO THE STORE !
If parts are missing or damaged, we will gladly ship your
replacement parts free of charge.
Date of Purchase
THIS INSTRUCTION BOOKLET CONTAINS IMPORTANT SAFETY
INFORMATION. PLEASE READ AND KEEP FOR FUTURE REFERENCE.
Twin Over Futon
Silver & Black
Lot Number
1
Advertisement
Table of Contents

Related Manuals for DHP Silver Screen Metal Bunk Bed


Summary of Contents for DHP Silver Screen Metal Bunk Bed
- Page 1 Silver Screen Metal Bunk Bed Twin Over Futon Silver & Black Weight Limit: 200 Lb / 91 Kg For Upper Bed 600 Lb / 272 Kg For Lower Futon DO NOT RETURN TO THE STORE ! If parts are missing or damaged, we will gladly ship your replacement parts free of charge.
-
Page 2: Warranty Information
Warranty Information Read Before Beginning Assembly Call our toll free number if you need assistance. Work in a spacious area and near where the unit will be used, preferably on a carpet, or use a piece of the cardboard packaging to protect your floor and product. Recommended # of people needed for assembly: 2 (however it is always better to have an extra hand). - Page 4 Parts All in 1 big box! There are inner box(es) that include components Two holes required to complete this assembly. Post 1 Post 3 Guard Rail Side Guard Rail 2 Before you throw the package, please use the Post 2 Side Guard Rail 1 T610510 T610520...
- Page 5 Parts All in 1 big box! There are inner box(es) that include components required to complete this assembly. Ladder Upper Slat Before you throw the package, please use the Left Mechanism Right Mechanism T610620 T919470 T605160 T605150 Check Box to identify the parts and ensure that X 22 you have all the parts needed for the assembly.
-
Page 6: Hardware Pack
Hardware Pack Hardware Pack # 5/16" X 3/4" 1/4" X 3/4" Silver Silver X 16 1/4" X 1 3/16" Silver 1/4" X 1 3/8" Silver 1/4" X 2 3/16" Black 1/4" 1/4" X 5/8" X 12 Wrench Silver 1/4" X 3/4" X 24 Black Hardware Note:... - Page 7 Step 1 1.1 Attach (F) to (A) with BOLTS 6. 1.2 Attach (Z) to (A) & (F) with BOLTS 4.
- Page 8 Step 2 2.1 Attach (B) to (F) with BOLTS 6. 2.2 Attach ( I ) to (Z) with BOLTS 4. 2.3 Attach ( I ) to (A) & (B) with BOLTS 1.
- Page 9 Step 3 3.1 Attach (M) to (B) & (C) with BOLTS 6. 3.2 Attach ( I ) to (B) & (C) with BOLTS 1.
- Page 10 Step 4 Attach (E) X 2 to (A) & (B) & (C) with BOLTS 7.
- Page 11 Step 5 5.1 Attach (J) X 2 to (A) & (B) & (C) with BOLTS 5. 5.2 Attach (F ) & (H) to (A) & (B) & (C) with BOLTS 5. Wide side of the slot should be facing up ! X 16...
- Page 12 Step 6 For your safety, please ensure (L & R) Attach (R) & (L) to ( I ) & ( I ) with BOLTS 3 are mounted on corresponding and NUTS 8. location as specified in drawing.
- Page 13 Step 7 7.1 Slide (O) into the slots on (J). 7.2 Lock (O) into place with (Y).
- Page 14 Step 8 8.1 Press (W) onto (O) approximately in the middle, as illustrated ; 8.2 Press (Q) onto (W) alternating left and right.
- Page 15 Step 9 9.1 Attach (X) to ( N ). 9.2 Attach (S) X 2 to (N) & (X) with BOLTS 9.3 Attach (E ) to (S) X 2 with BOLTS 6. Wide side of the slot should be facing up !
- Page 16 Step 10 10.1 Attach (S) X 2 to (V) with BOLTS 6. 10.2 Attach (N) to (S) X 2 with BOLTS 6. 10.1 10.2 Wide side of the slot should be facing up !
- Page 17 Step 11 11.1 Slide (K) into the slots on (V) & (N) & 11.2 Lock (K) into place with (Y). 11.1 11.2...
- Page 18 Step 12 In order to perfectly align the Locking Mechanism on part E1 with the Pin on Attach (N) & (E ) to (R) & (L) with BOLTS 2 part F1, please do not completely and NUTS 8. tighten the bolts 2 until next step is completed.
- Page 19 Step 13 Lift the bed to futon position and lock the mechanism on part E1 with the pin on part F1 as shown, then completely tighten all bolts 2.
- Page 20 Step 14 Attach (N) & (V) to (R) & (L) with BOLTS 2 and NUTS 8.
- Page 21 Step 15 Attach (T) X 2 to E1 where indicated.
- Page 22 Step 16 Attach (U) x 3 to (N) as shown...
-
Page 23: Helpful Hints
Helpful Hints Weight Limit: 200 Lb / 91 Kg 600 Lb / 272 Kg Move your new furniture carefully, with two Top Cap T392730 p eople lifting and carrying the unit to its new l ocation. Your furniture can be disassembled and r eassembled to move. - Page 24 WARNINGS for Bunk Bed Follow the information on the warnings appearing on the upper bunk end structure and on the carton. Do not remove warning label from bed. Always use the recommended size mattresses or mattress supports, or both, to help prevent the likelihood of entrapment or falls. Use only a twin mattress which is 74"-75"...
- Page 25 NO LO REGRESE A LA TIENDA ! Si le faltan piezas o las que se incluyen est n da adas, con Silver Screen Metal Bunk Bed mucho gusto le enviaremos sus piezas de reemplazo sin cargo extra. Twin Over Futon Plata &...
- Page 26 Lea antes de comenzar a ensamblar Partes Llame a nuestro n mero gratuito si necesita asistencia. P iezas de reemplazo Trabaje en un rea espaciosa y cerca de donde su producto ser utilizado, preferiblemente sobre una alfombra o utilice el cart n del empaque para proteger su piso y su producto.
- Page 27 Instrucciones L mites de peso:200 Lb / 91 Kg en la cama superior; 600 Lb / 272 Kg en la cama inferior. Paso 1 Consejos tiles 1.1 Una (F) con (A) con PERNOS 6. 1.2 Una (Z) con (A) & (F) con PERNOS 4. Mueva sus muebles nuevos con cuidado, con dos personas levantando y Paso 2 l levando el aparato a su nueva ubicaci n.
-
Page 28: Garantie
NE RETOURNEZ PAS AU MAGASIN ! Si une pi ce est manquante ou endommag e, nous vous Silver Screen Metal Bunk Bed exp dierons avec plaisir vos pi ces de remplacement gratuitement. Twin Over Futon Argent & Noir Date d'achat Numero de lot CE FEUILLET CONTIENT DES INFORMATIONS DE S CURIT IMPORTANTES. -
Page 29: Avant De Commencer L'assemblage
Avant de commencer l'assemblage Pi ces Si vous avez besoin d'aide, appelez notre service la client le sans frais. P i ces de rechange Travailler dans un endroit spacieux et pr s du lieu o l'unit sera utilis e, pr f rablement sur un tapis, ou sur un morceau de l'emballage pour prot ger le Tout dans 1 grosse bo te! plancher et le produit. -
Page 30: Conseils Utiles
Instructions Limite de Poids: 200 Lb / 91 Kg sur le lit sup rieur; 600 Lb / 272 Kg sur le lit inf rieur. tape 1 Conseils utiles 1.1 Attacher (F) (A) avec le BOULON 6. D placez votre nouveau mobilier avec soin, nous recommandons deux personnes 1.1 Attacher (Z) (A) &...
Need help?
Do you have a question about the Silver Screen Metal Bunk Bed and is the answer not in the manual?
Questions and answers