
Related Manuals for Hisense HER30F5CSS


Summary of Contents for Hisense HER30F5CSS
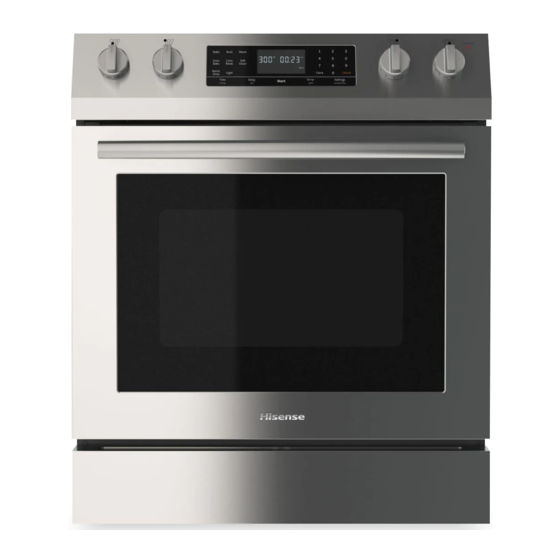
- Page 1 Slide-in Electric Range Use & Care Guide Model: HER30F5CSS For questions about features, operation/performance, parts or service,call: 1-855-344-7367...
-
Page 2: Table Of Contents
(6) Turning the light on and off........14 (7) Minimum and maximum settings......14 Table of Contents 1. Warnings.................3 (8) Using the oven racks..........14 2. Welcome................. 3 (10) Convection baking..........15 3. Before youstart..............3 (11) Convection roasting..........16 4. Safety and Warnings............3 (12) Broiling.............. -
Page 3: Warnings
Symbol Definition Warnings This will alert you to potential These are the most critical warnings summarized below. personal or property safety hazards. Obey all safety rules to avoid any property damage, personal injury or death If the instructions in this manual are not followed ... -
Page 4: General Safety Instructions
supplied with your range. Follow all installation Never use your appliance for warming or heating instructions. the room. Install the anti-tip device to the structure and/or the Do not touch the surface units, the heating range .Engage the range to the anti-tip device by support elements or the interior surface of the oven. -
Page 5: Cooktop Safety Instructions
flaming pan on a surface unit by covering the pan Do not store items of interest to children in cabinets completely with a well-fitting lid, cookie sheet or above a range or on the backguard of a range flat tray. Use a multi-purpose dry chemical or children climbing on the range to reach items could foam-type fire extinguisher. -
Page 6: Self-Cleaning Oven Safety Instructions
element may fail and present a potential burn, fire, Never keep pet birds in the kitchen. Birds are or shock hazard. Turn the oven off immediately and extremely sensitive to the fumes released during an have the heating element replaced by a qualified oven self-clean cycle. -
Page 7: Top Hood And Cabinet Specifications
The maximum depth of cabinets installed above cooking tops be 13 in (330mm) (1) Top Hood and cabinet specifications Minimum clearance Condition allowed Clearance between the top of the cooking surface and the bottom of an unprotected wood or metal cabinet 30”... -
Page 8: Preparing To Install The Range
6. Preparing to install the range beyond the front of the cabinets. Cabinets installed (1) Minimum dimensions above the cook top must be no deeper than 16” (2) Install the anti-tip device IMPORTANT 1. Adjust the oven size to the correct height, make sure the oven is level 2. - Page 9 Effective January 1,1996, the National Electrical Code re quires that new construction (not existing) utilize a 4-conductor connection to an electric range. When installing an electric range in new construction, follow Steps for 4-wire connection. You must use a 4-wire, single-phase A.C. 240/120 Volt, 60 hertz electrical system.
-
Page 10: Install Oven Handle
3.Check if the oven door handle is level and stable. Live 1 - Neutral 120V (6) Install rubber pad on back pane l Live 2 - Neutral 120 V To Prevent the range from being placed too close to the Live 1 - Live 2 240 V wall, there are 2 plastic pads offered with the user's... -
Page 11: Dual Surface Units And Control Knobs (On Some Models)
(2) Dual Surface Units and Control Knobs (on some and off. The heating element retains enough heat to models) provide a uniform and consistent heat during the off cycle. For efficient cooking, turn off the element several minutes before cooking is complete. This will allow residual heat to complete the cooking process. -
Page 12: Radiant Glass Cook Top
NOTE: The Cancel pad does not turn off the Warm Zone. If a spillover occurs while you are cooking, (9) Radiant Glass Cook top immediately clean the spill from the cooking area The radiant cook top features heating units beneath a while it is hot to prevent a tough cleaning chore smooth glass surface. -
Page 13: Oven Function
Do not use the cook top as a work surface or cutting the oven temperature, the start time, and the length of board. operation for timed baking. Etc. Do not cook food directly on the cook top. Always (2) Setting the clock The time can only be set when the range is in standby use the proper cookware. -
Page 14: Delay Start
The oven light turns on and door light turns off automatically when the door is opened. Touch Time Cooking. Enter the number of The oven light turns off automatically when the hours/minutes you want the oven to stay on using the door is closed. -
Page 15: Convection Baking
If you want to cancel baking or if you have Rack and Pan placement finished, touch Cancel. Centering baking pans in the Place food in the oven after preheating if the oven as much as possible will recipe calls for it.Preheating is very important for good produce better results. -
Page 16: Convection Roasting
The convection oven fan shuts off when the oven Touch Bake. Enter the temperature you want, eg. 400 °F, using the number pad. door is opened. Touch START. DO NOT leave the door open for long periods of The temperature display will start to change once time while using convection cooking or you may the oven temperature reaches 100℉. -
Page 17: Using Keep Warm
If you leave the oven door open for more than 1 Sabbath feature is cancelled. If the oven light is needed minute when the oven is on, all heating elements during the Sabbath, touch Light before activating the will shut off automatically. Sabbath feature. -
Page 18: Temp Adjust
Touch SETTING to change between (Fahrenheit) control display, but the oven will not operate. Food may and(Celsius). be safely removed from the oven while it is still in the Touch START to save the changes. (17) Time of Day Sabbath mode, however the oven cannot be turned The oven control can be programmed to display time of back on until after the Sabbath/ Holidays. -
Page 19: Clean Instruction
3 sec) can be operated, and other buttons are invalid. If Some birds are extremely sensitive to the fumes the oven is currently heating, press Cancel to stop the given off during the self-cleaning cycle of any oven. oven. Move birds to another well-ventilated room. -
Page 20: Care And Cleaning Of The Oven
Touch Self Clean 2/3/5h once for a 3 hour clean time, twice for a 5 hour clean time, or 3 times for a 2 hour clean time.The default setting is 3 hours. Touch START to start the self- cleaning cycle.The motor-driven door lock will engage automatically. -
Page 21: Care And Cleaning Of The Glass Cook Top
Place a small amount of stainless steel (3) Care and cleaning of the glass cook top appliance cleaner or polish on a damp cloth or damp Normal daily use cleaning papertowel. Use only a ceramic cook top cleaner. Other creams may Clean a small area, rubbing with the grain of not be as effective.By following these steps, you can the stainless steel if applicable. -
Page 22: Troubleshooting
NOTE Removing metal marks and scratches If pitting or indentations in the glass surface Be careful not to slide pots and pans across your have already occurred, the cook top glass will cook top. It will leave marks on the cook top surface. have to be replaced. -
Page 23: Control Display
(1) Control Display The surface unit Scratches or Scratches or Problem Possible cause Solution frequently cycles abrasions on abrasions on the The display goes Replace the fuse or 1.A fuse in your on and off. the cook top cook top surface. home may be blank. -
Page 24: Oven
The oven will not Make sure the oven turn on. electrical plug is will not inserted into a turn on. live, properly grounded outlet. Brown streaks or Boil overs have Wait until the specks. been cooked onto surface cools A fuse in your Replace the fuse or the surface. - Page 25 Food The oven rack has See the section on does not been positioned using the oven racks bake or incorrectly or is not on page 15. roast level. properly. The appliance is Make sure the power appliance not completely cord is plugged into a Incorrect cookware will not plugged into the...
-
Page 26: Information Code
The oven controls See the section on This is normal in a To speed the process, have been set self-cleaning on page burning new oven and will set a self- cleaning incorrectly. or oily disappear in time. cycle for a minimum odor is of 3 hours. - Page 27 open. position. Poor contact Replace the The circuit board is Replace the circuit between the connector. broken. board. connector of the The circuit and Replace the circuit temperature sensor components of the board. PT100 and the CN20 main control circuit position of the circuit board are damaged.
-
Page 28: Replacing The Parts
The oven door switch Replace the oven circuit board is is broken, causing the door switch. broken. circuit to misjudge The indoor ambient Indoor ventilation that the door is temperature is too cooling. open, so it causes the high, resulting in oven to stop heating. -
Page 29: Replacing The Oven Door
The door will stop at bakeware. Do not store plastics or flammable material this point. in the drawer. Clean the storage drawer with a damp Using two hands, grasp cloth or sponge. Never use harsh abrasives or scouring the edges of the oven door. pads. -
Page 30: Limited Warranty
This Hisense Cooking Range (the "Product") is sold with a one-year limited warranty from the original date of purchase. Hisense will repair or replace (the determination of which will be made by Hisense, in its sole discretion) any parts in this appliance that prove to be defective in materials or workmanship, when the appliance is used and maintained according to the user manual provided with the unit. - Page 31 Product or a failure of a Product, even if Hisense is aware of or has been advised of the possibility of such damages.
Need help?
Do you have a question about the HER30F5CSS and is the answer not in the manual?
Questions and answers