Table of Contents
Advertisement
Available languages
Available languages
Quick Links
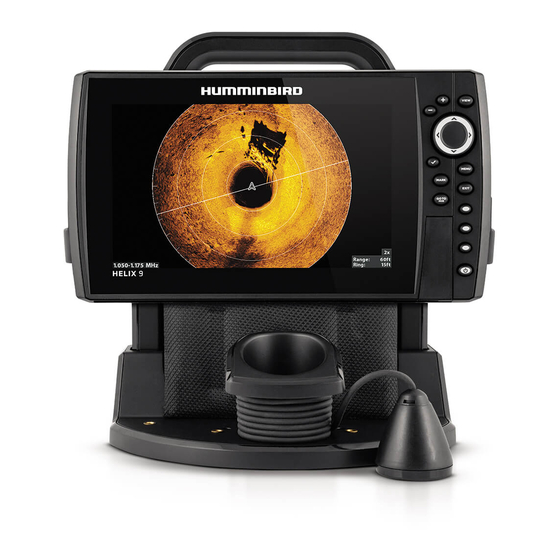
ICE HELIX® SERIES Installation Guide
Follow the instructions in this installation guide to install the ICE HELIX® control head in the portable
case and install the ICE transducer.
There may be some minor differences between the hardware described in this manual and the actual
hardware included, depending on the configuration you purchased. We encourage you to read this
guide completely so that you may understand the installation requirements.
Technical Support: If you find that any items are missing from your installation kit, visit our Web site
at humminbird.com or call Humminbird® Technical Support at 1-800-633-1468.
SUPPLIES: In addition to the installation kit, you will need a Phillips-head screwdriver and flat-head
screwdriver.
NOTE: The procedures and features described in this guide are subject to change without notice.
This guide was written in English and may have been translated to another language. Humminbird
is not responsible for incorrect translations or discrepancies between documents.
NOTE: The illustrations in this guide may not look the same as your product, but your unit will
function in the same way.
WARNING! Always make sure that conditions are safe before walking on the ice.
Installation Preparation
1
| Charging the Battery
You should fully charge your battery before using it for the first time to ensure peak performance.
You should also re-charge your battery at least once every 6 months to maintain your battery's peak
performance levels. This is especially important during periods of prolonged storage. This type of
battery should not be stored in a discharged state.
WARNING! Do NOT use the Humminbird charger with other manufacturers' batteries. The
Humminbird charger is only compatible with Humminbird batteries. If you have questions, please
see our Web site at humminbird.com or contact Humminbird Technical Support.
NOTE: Some international models may not include a battery or battery charger.
1. Charge the battery, using the included battery charger, until it is fully charged as indicated by
the LED on the charger. Charging usually requires 8 continuous hours, but may vary depending
on your configuration.
NOTE: The battery charger uses a yellow LED to indicate it is charging. On some models, this light
might appear closer to orange than yellow. When this happens, the battery is still charging properly
and should be left to charge until the LED becomes green.
2. Slide the battery terminal adapter over each spade terminal.
CAUTION! Do not pull on the battery or charger cables when you are trying to connect them or
disconnect them from the battery terminals. Push or pull gently on the spade terminals instead. If
the connector feels tight, use a slight wiggling motion to slide the spade connector into place on
the terminal.
NOTE: The battery terminal adapter allows you to power your control head and charge it at the
same time.
1
532363-3_A
Handling the Spade Terminals
Advertisement
Table of Contents

Related Manuals for Humminbird ICE HELIX Series


Summary of Contents for Humminbird ICE HELIX Series
- Page 1 NOTE: The procedures and features described in this guide are subject to change without notice. This guide was written in English and may have been translated to another language. Humminbird is not responsible for incorrect translations or discrepancies between documents.
-
Page 2: Testing The Transducer
Disconnect the power cable terminals from the battery until the installation is completed and you’re ready to fish. ICE HELIX Series Case Assembly Perform the ICE HELIX case assembly tasks in order, referring to the step-by-step procedures that represent the following main assembly tasks: Δ... -
Page 3: Assembling The Handle
ICE HELIX® SERIES Installation Guide 532363-3_A Installing the Transducer Storage Posts keyed space of cable retention arm storage post cable retention arm, facing out spring Installing the Handle onto the Base flat-head screw 6. Repeat steps 2-5 for the second cable retention arm. CAUTION! Do not use a high speed driver on this combination of fasteners. -
Page 4: Installing The Transducer
ICE HELIX® SERIES Installation Guide 532363-3_A Mounting the Control Head 3. Thread the gimbal knob through the gimbal mount adapter into the control head housing. Tighten the knob just enough so that you can still adjust the control head angle. gimbal NOTE: If you have a conversion kit, select the gimbal knob that corresponds with your control knob... - Page 5 ICE HELIX® SERIES Installation Guide 532363-3_A Positioning the Float 3. Once you know where you want to position your float, place the cable clamp onto the transducer cable, above the float. Make sure that the cable is taut, so that the transducer hangs straight down (see the illustration Attaching the Cable Clamp).
-
Page 6: Connecting Power
ICE HELIX® SERIES Installation Guide 532363-3_A Connecting the Spade Clips | Connecting Power 1. Turn the portable case around so that you can access the back, and open the back zippers. Connect the spade clip on the red wire of the power cable to the red terminal on the battery, and the spade clip on the black wire of the power cable to the black terminal on the battery. -
Page 7: Control Head Maintenance
Δ Chemicals, such as those found in bug spray and sunscreen, may cause permanent damage to the control head screen. Such damage is not covered by the warranty. Δ Never leave your Humminbird ICE unit in a closed car or trunk — the high temperatures generated in hot weather can damage the electronics. -
Page 8: Contact Humminbird
WARNING! Do NOT use the Humminbird charger with other manufacturers’ batteries. The Humminbird charger is only WEEE compliance may not be required in your location for electrical &... -
Page 9: Préparation De L'installation
à tout moment sans préavis. Ce manuel a été rédigé en anglais et a été traduit dans d'autres langues. Humminbird n'est pas responsable de la traduction inexacte ou des légères anomalies susceptibles d'être rencontrées dans les différents documents. - Page 10 Déconnectez les bornes du câble d’alimentation de la batterie jusqu’à la fin de l’installation et jusqu’à ce que vous soyez prêt à pêcher. Assemblage du Boîtiers ICE HELIX Series Vous devriez effectuer les tâches de montage du boîtier portable dans la séquence indiquée, c’est-à- dire en suivant systématiquement les procédures de montage principales suivantes :...
- Page 11 | Montage de la tête de commande à la base Suivez cette procédure pour installer la tête de commande de ICE HELIX Series sur l’ensemble socle/ poignée. 1. Insérez l'adaptateur de montage à cardan de chaque côté du support de cardan situé sur la base.
- Page 12 ICE HELIX Guide d'Installation 532363-3_A REMARQUE : Si vous avez un kit de conversion, sélectionnez le bouton de cardan correspondant Assemblage de la tête de commande à votre tête de commande. molette REMARQUE : Votre sac de quincaillerie peut inclure des rondelles en caoutchouc; cependant, du cardan s pour cette installation.
- Page 13 ICE HELIX Guide d'Installation 532363-3_A 3. Après avoir déterminé la position du flotteur, placez le serre-câble sur le câble de transducteur, Positionner le flotteur au-dessus du flotteur. Vérifiez la tension du le câble : le transducteur doit pendre à la verticale (voir l’illustration Fixation de serre-câble).
- Page 14 ICE HELIX Guide d'Installation 532363-3_A Raccordement des pinces | Puissance de connexion en fourche 1. Retournez le boîtier portable afin de pouvoir avoir accès à l’arrière et ouvrez les fermetures à glissière située à l'arrière. Raccordez la pince à fourche sur le cordon rouge du câble d'alimentation à...
-
Page 15: Entretien
ICE HELIX Guide d'Installation 532363-3_A Entretien Votre détecteur de poissons Humminbird ICE a été conçu pour fonctionner correctement pendant des années sans pratiquement aucun entretien. Suivez les procédures simples énumérées ci-dessous pour assurer un bon fonctionnement continu de votre appareil Humminbird ICE. - Page 16 électroniques grand public prenne en charge la gestion des déchets de leurs produits et mettent en oeuvre leur élimination AVERTISSEMENT ! NE PAS utiliser le chargeur Humminbird avec des en respectant l’environnement, pendant le cycle de vie du produit.
Need help?
Do you have a question about the ICE HELIX Series and is the answer not in the manual?
Questions and answers