Table of Contents
Advertisement
Available languages
Available languages
Quick Links
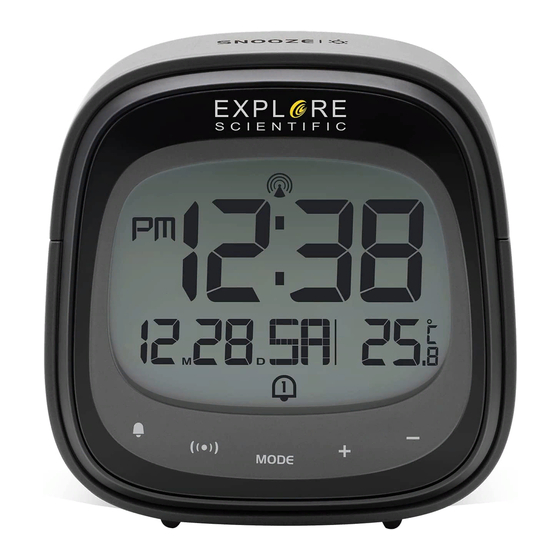
RADIO-CONTROLLED* ALARM CLOCK
SVEGLIA RADIOCONTROLLATA*
FUNKWECKER*
RÉVEIL RADIO-COMMANDÉ*
DESPERTADOR RADIO-CONTROLADO*
Art.No.: RDC3006
EN INSTRUCTION MANUAL ............... 2
IT
ISTRUZIONI PER L'USO .............. 14
DE BEDIENUNGSANLEITUNG .......... 28
FR MODE D'EMPLOI ....................... 42
ES MANUAL DE INSTRUCCIONES .... 56
*Radio-controlled clock function not available in all territories. / Funzione di orologio radiocontrollati non disponibile in ogni territorio. / Funkuhrfunktion nicht in jederm Gebiet verfügbar. / La fonction
d'horloge radio-piloté n'est pas disponible dans tous les territoires. / La función de reloj radiocontrolado no está disponible en todos los territorios.
Advertisement
Table of Contents

Related Manuals for Explore Scientific RDC3006


Summary of Contents for Explore Scientific RDC3006
- Page 1 RADIO-CONTROLLED* ALARM CLOCK SVEGLIA RADIOCONTROLLATA* FUNKWECKER* RÉVEIL RADIO-COMMANDÉ* DESPERTADOR RADIO-CONTROLADO* Art.No.: RDC3006 EN INSTRUCTION MANUAL ....2 ISTRUZIONI PER L’USO ....14 DE BEDIENUNGSANLEITUNG ..28 FR MODE D‘EMPLOI ....... 42 ES MANUAL DE INSTRUCCIONES ..56 *Radio-controlled clock function not available in all territories. / Funzione di orologio radiocontrollati non disponibile in ogni territorio. / Funkuhrfunktion nicht in jederm Gebiet verfügbar. / La fonction...
-
Page 2: General Warnings
otherwise, you run the risk of an electric ABOUT THIS INSTRUCTION shock. MANUAL • Choking hazard — Children should only These operating instructions are to be use the device under adult supervision. considered a component of the device. Keep packaging material, like plastic bags Please read the safety instructions and the and rubber bands, out of the reach of chil- operating instructions carefully before use. -
Page 3: Before You Begin
into a fire. Excessive heat or improper han- BEFORE YOU BEGIN dling could trigger a short-circuit, a fire, or • We recommend using alkaline batteries. an explosion. If temperatures regularly fall below 0°C • Do not disassemble the device. In the (32°F), we recommend using lithium batter- event of a defect, please contact your ies. -
Page 4: Product Overview
PRODUCT OVERVIEW Press [ ] to activate the snooze function and backlight for 8 seconds. The Snooze function will stop the alarm for 8 minutes. Press [ ] to turn on/off alarm. Press [ ] to toggle between the calendar and alarm display. - Page 5 Press the RESET button to restore set- tings to factory default. Battery compartment. Slide down to open. ...
- Page 6 BUTTON MODE Turn Alarm Turn on backlight on/off Toggle between for 8 seconds PRESS _______ _______ _______ Calendar and (SNOOZE when Stop alarm Alarm display alarm is ringing) Standard (ringing) mode Enter into Enter into Turn RCC _______ HOLD _______ _______ time and alarm setting...
-
Page 7: Lcd Display
LCD DISPLAY Time display Calendar display Weekday display Temperature display ] RCC signal received ] Time Zone indicator ] Snooze activated ] Alarm 1 ON ] Alarm 2 ON ] Alarm 1 + Alarm 2 ON ] Low battery indicator ... -
Page 8: Getting Started
GETTING STARTED 4. If the RCC receiving process is successful, a completed RCC symbol [ ] will be shown in the display and the date and time will be INSERT BATTERIES 1. Remove the battery door from the back. set automatically. If it fails within 7 minutes, 2. -
Page 9: Time Zone Setting
crease 1 unit (when setting minute, second TIME ZONE SETTING will reset to 0). Press and hold the [ ] but- To set a different time zone, proceed as follows: ton, the figures will increase rapidly. 1. Press and hold [ ] button, enter time 4. -
Page 10: Turn On/Off Alarm
is: AL1 on AL2 on AL1+AL2 on 1. Press the [ ] button to display Alarm 1. 2. Press and hold [ ] to enter the alarm set- AL1+AL2 off. ting mode for the currently selected alarm 2. -
Page 11: Specifications
Hereby, Bresser GmbH declares that 180 g the equipment type with part num- Temperature display range: ber: RDC3006 is in compliance with Directive: 2014/53/EU. The full text of the EU -5°C to +50°C (23°F to 122°F) declaration of conformity is available at the Accuracy: following internet address: www.bresser.de/... -
Page 12: Notes On Cleaning
Please note that changes or modifications not Do not dispose of electronic devices in expressly approved by the party responsible the household garbage! for compliance could void the user’s authority As per the Directive 2002/96/EC of the to operate the equipment. European Parliament on waste electrical and electronic equipment and its adaptation into German law, used electronic devices must be... -
Page 13: Manual Download
You can consult the full guarantee terms as well as information on extending the www.bresser.de/download/RDC3006 guarantee period and details of our services at www.bresser.de/warranty_terms. SERVICE AND WARRANTY:... -
Page 14: Avvertenze Generali
prescritto nel presente manuale. In caso INFORMAZIONI SUL MANUALE contrario, non sarà possibile escludere il DI ISTRUZIONI rischio di infortuni elettrici. Il presente manuale è parte integrante del • PERICOLO DI SOFFOCAMENTO — I bambini prodotto. Non azionare il dispositivo prima possono utilizzare il dispositivo solo sotto di aver letto attentamente le istruzioni di sicurez- la vigilanza di un adulto. -
Page 15: Contenuto Della Confezione
• PERICOLO DI INCENDIO/ESPLOSIONE se questa rimarrà inutilizzata per un perio- do prolungato. Non esporre il dispositivo a temperature elevate. Evitare che possano verificarsi CONTENUTO DELLA CONFEZIONE cortocircuiti a carico del dispositivo o del- Sveglia, manuale di istruzioni, due batterie le batterie. - Page 16 INFORMAZIONI GENERALI SUL PRODOTTO Premere [ ] per attivare lo snooze e la retroilluminazione per 8 secondi. La funzione di snooze con- sente di silenziare la sveglia per 8 minuti. Premere [ ] per attivare/disattivare la sveglia. Premere [ ] per passare dalla visua- lizzazione del calendario a quella della sveglia e viceversa.
- Page 17 In modalità impostazione, premere il tasto per aumentare il valore impostato di una unità; tenerlo premuto per incrementare il valore rapidamente. In modalità impostazione, premere il tasto [ ] per ridurre il valore impostato di una unità; tenerlo premuto per decrementare il valore rapidamente.
- Page 18 TASTO MODALITÀ Attivare o disattivare Accendere la Alternare la la sveglia retroilluminazione per visualizzazione PREMERE _______ _______ _______ 8 secondi del calendario Interrompere (SNOOZE mentre la e quella della la sveglia sveglia suona) sveglia (mentre Standard suona) Accedere alla Accedere Accensio- TENERE modalità...
-
Page 19: Display Lcd
DISPLAY LCD Visualizzazione dell’ora Visualizzazione del calendario Visualizzazione del giorno della settimana Visualizzazione della temperatura ] Segnale RCC ricevuto ] Indicatore del fuso orario ] Snooze attivato ] Sveglia 1 attivata ] Sveglia 2 attivata ] Sveglia 1 + Sveglia 2 attivate ... -
Page 20: Operazioni Preliminari
OPERAZIONI PRELIMINARI OROLOGIO INSTALLAZIONE DELLE BATTERIE RICEZIONE DELL’OROLOGIO 1. Rimuovere lo sportello dal vano batterie si- 1. Quando si sostituiscono le batterie o si tuato sul retro del dispositivo. tiene premuto il tasto [ ], viene avviata la 2. Inserire due batterie AAA tipo LR03 da 1,5 V. ricezione RCC. -
Page 21: Impostazione Manuale Dell'orologio
03:03, 04:03 e 05:03 di ogni notte. Una vol- l’impostazione dei minuti, i secondi vengo- ta raggiunto un esito positivo, la funzione di no reimpostati su 0). Se si tiene il tasto [ ] ricezione automatica viene disattivata. premuto, il valore decrementa rapidamente. 6. -
Page 22: Impostazione Del Fuso Orario
SVEGLIA IMPOSTAZIONE DEL FUSO ORARIO IMPOSTAZIONE/REGOLAZIONE DELLA Per impostare un altro fuso orario, effettuare le operazioni seguenti. DOPPIA ORA DI SVEGLIA 1. Tenere premuto il tasto [ ] e impostare È possibile impostare due orari per la sveglia l’ora e la data. (AL1 e AL2). -
Page 23: Funzionamento
FUNZIONAMENTO ne, la sveglia viene attivata automatica- mente. 1. All’ora impostata, la sveglia inizia a suonare. 8. Se non si esegue alcuna azione per 20 se- 2. Mentre la sveglia sta suonando, premere il condi, il valore impostato viene salvato e la tasto [ ] per ritardarla di 8 minuti. -
Page 24: Dichiarazione Di Conformità Ce
Con la presente Bresser GmbH di- Da 10 a 40 °C (da 50 a 104 °F) = +/- 1 °C (+/- chiara che il tipo di apparecchiatura identificato con il codice RDC3006 è 2 °F) conforme alla direttiva 2014/53/UE. Il testo <0 e >+40 °C (<32 e >104 °F): +/- 2 °C (+/-4 °F) -
Page 25: Note Sulla Pulizia
NOTE SULLA PULIZIA Non smaltire gli apparecchi elettronici nei rifiuti domestici. • Prima di pulire il dispositivo, rimuovere le Ai sensi della direttiva 2002/96/CE batterie. • Per pulire le superfici esterne del dispositivo, del Parlamento europeo sullo smaltimento servirsi solo di un panno asciutto. Per evitare di apparecchiature elettriche ed elettroniche, di danneggiare i componenti elettronici, non così... -
Page 26: Garanzia E Assistenza
Batteria contenente cadmio Se si desidera ricevere istruzioni particolareggiate su questo prodotto in una lingua specifica, Batteria contenente mercurio Batteria contenente piombo accedere al sito Web del Produttore servendosi Cd¹ Hg² Pb³ del collegamento sottostante (codice QR) per le versioni disponibili. GARANZIA E ASSISTENZA Il normale periodo di garanzia è... -
Page 27: Manual Download
MANUAL DOWNLOAD: www.bresser.de/download/RDC3006 SERVICE AND WARRANTY: www.bresser.de/warranty_terms... -
Page 28: Zu Dieser Anleitung
STROMSCHLAGS! ZU DIESER ANLEITUNG • ERSTICKUNGSGEFAHR! Kinder sollten das Lesen Sie vor der Benutzung des Geräts Gerät nur unter Aufsicht benutzen. Verpa- aufmerksam die Sicherheitshinweise und ckungsmaterialien (Plastiktüten, Gummi- die Bedienungsanleitung. bänder, etc.) von Kindern fernhalten! Es Bewahren Sie diese Bedienungsanleitung für besteht ERSTICKUNGSGEFAHR! die erneute Verwendung zu einem späteren •... -
Page 29: Vor Dem Gebrauch
Hitze und unsachgemäße Handhabung LIEFERUMFANG können Kurzschlüsse, Brände und sogar Funkwecker, Bedienungsanleitung, 2x Batteri- Explosionen ausgelöst werden! en vom Typ AAA • Bauen Sie das Gerät nicht auseinander! Wenden Sie sich im Falle eines Defekts bit- VOR DEM GEBRAUCH te an Ihren Fachhändler. Er nimmt mit dem •... - Page 30 PRODUKTÜBERSICHT Drücken Sie [ ], um die Schlummerfunktion und die Hinter- grundbeleuchtung für 8 Sekunden zu aktivieren. Die Schlummerfunktion stoppt den Alarm für 8 Minuten. Drücken Sie [ ], um den Alarm ein- oder auszuschalten. Im Weckzeitmo- dus. Drücken Sie [ ], um zwischen Kalen- der- und Alarmanzeige umzuschalten.
- Page 31 heit zu erhöhen, drücken und halten, um schnell zu erhöhen. Im Einstellmodus [ ] drücken, um eine Einheit zu verringern, drücken und halten, um sie schnell zu verringern. Drücken Sie die RESET-Taste, um die Ein- stellungen auf die Werkseinstellungen zurückzusetzen.
- Page 32 TASTE MODUS Alarm ein-/aus- Umschalten Schalten Sie die Hinter- schalten zwischen grundbeleuchtung für 8 _______ _______ _______ drücken Kalender- Sekunden ein (SNOOOZE Alarm und Alar- bei klingelndem Alarm) stoppen manzeige Standard Modus (Klingelton) In die Zeit- In die gedrückt und Datum- _______ _______ Alarmein-...
-
Page 33: Lcd-Anzeige
LCD-ANZEIGE Zeitanzeige Kalenderanzeige Wochentagsanzeige Temperaturanzeige: ] RCC-Signal empfangen ] Zeitzonenanzeige ] SNOOZE/Schlummermodus aktiviert ] Alarm 1 EIN ] Alarm 2 EIN ] Alarm 1 + Alarm 2 EIN ] Anzeige bei schwacher Batterie... -
Page 34: Erste Schritte
ERSTE SCHRITTE fang einzuleiten. 2. Die Empfangsprozessdauer beträgt 7 Minu- ten. BATTERIEN EINLEGEN 1. Entfernen Sie die Batteriefachabdeckung 3. Während des Empfangsvorgangs blinkt das von der Rückseite. RCC-Signalsymbol [ 2. Legen Sie 2x AAA (LR03)/1,5V Batterien 4. Wenn der Prozess erfolgreich war, wird das ein. -
Page 35: Die Uhr Manuell Einstellen
7. Wenn das Gerät das Signal immer noch stellung zu bestätigen und zum nächsten nicht empfängt, fahren Sie bitte fort, die Parameter zu gelangen. 6. Reihenfolge der Einstellung: Zeitzone Uhrzeit manuell einzustellen. 12/24 Stundenformat Stunde Minute Jahr Kalendermodus (Tag-Monat/ DIE UHR MANUELL EINSTELLEN Monat-Tag) ... - Page 36 ALARM ZEITZONENEINSTELLUNG EINSTELLEN/ANPASSEN DER BEIDEN Um eine andere Zeitzone einzustellen, gehen Sie wie folgt vor: ALARMZEITEN 1. Halten Sie die Taste [ ] gedrückt, um in Sie können zwei Alarmzeiten (AL1 und AL2) die Zeiteinstellung zu gelangen. einstellen. 2. Die Einstellung für den Zeitzonenversatz 1.
-
Page 37: Alarm Ein-/Ausschalten
7. Der Alarm wird automatisch eingeschaltet, 3. Wenn Sie keine Taste drücken, um den wenn die Alarmeinstellung beendet ist. Alarm zu beenden, wird er nach 2 Minuten 8. Wenn innerhalb 20 Sekunden keine weitere automatisch ausgeschaltet. Aktion erfolgt, wird die Einstellung gespei- 4. -
Page 38: Spezifikationen
Gewicht (Hauptgerät): Hiermit erklärt die Bresser GmbH, 180 g dass der Funkanlagentyp mit Artikel- Temperaturanzeigebereich: nummer: RDC3006 der Richtlinie 2014/53/EU entspricht. Der vollständige Text der -5 °C bis +50 °C (23 °F bis 122 °F) EG-Konformitätserklärung ist unter der folgen- Genauigkeit: den Internetadresse verfügbar: www.bresser.de/... - Page 39 • Schützen Sie das Gerät vor Staub und Sie können die Batterien nach Gebrauch Feuchtigkeit. entweder in unserer Verkaufsstelle oder in unmittelbarer Nähe (z.B. im Handel oder in kommunalen Sammelstellen) unent- ENTSORGUNG geltlich zurückgeben. Bitte entsorgen Sie Ihre Entsorgen Sie die Verpackungsmateriali- gebrauchten Batterien wie gesetzlich vorge- en sortenrein.
-
Page 40: Garantie & Service
Website erforderlich. vollständigen Garantiebedingungen sowie Informationen zu Garantiezeitverlängerung und Serviceleistungen können Sie unter www.bresser.de/garantiebedingungen www.bresser.de/download/RDC3006 einsehen. Sie wünschen eine ausführliche SERVICE AND WARRANTY: Anleitung zu diesem Produkt in einer bestimmten Sprache? Dann besuchen Sie unsere Website über nachfolgenden Link (QR Code) für verfügbare Versionen. - Page 42 A PROPOS DE CE MODE enfants ne peuvent utiliser cet appareil D’EMPLOI que sous la surveillance d’un adulte. N’utilisez l’appareil que de la façon décrite Ce mode d’emploi fait partie intégrante de dans le manuel, autrement vous encourez l’appareil. le risque de subir une électrocution. Veuillez lire les consignes de sécurité...
-
Page 43: Contenu De La Livraison
Risque d’incendie/explosion — N’exposez • CONTENU DE LA LIVRAISON pas l’appareil à des températures élevées. Réveil, mode d’emploi, 2 piles AAA. Utilisez uniquement les piles recomman- AVANT L’UTILISATION dées. Ne court-circuitez pas l’appareil ou les piles et ne les jetez pas au feu. Une •... -
Page 44: Description Du Produit
DESCRIPTION DU PRODUIT Appuyez sur [ ] pour activer la fonction de répétition de l’alarme et le rétroéclairage pendant 8 secondes. La fonction de répétition (snooze) ar- rête l’alarme pendant 8 minutes. Appuyez sur la touche [ ] pour acti- ver/désactiver l’alarme. - Page 45 ter d'une unité ou maintenez-la enfoncée pour augmenter rapidement. En mode de réglage, appuyez sur la touche [ ] pour diminuer d'une unité ou maintenez-la enfoncée pour diminuer rapidement. Appuyez sur la touche RESET pour réini- tialiser les réglages aux paramètres par défaut.
- Page 46 TOUCHE MODE Activer/ Activer le rétroé- désactiver Basculer entre clairage pendant l’alarme l’affichage du APPUYER 8 secondes _______ _______ _______ calendrier et de (SNOOZE lorsque Arrêter l’alarme. l’alarme sonne) l’alarme Mode standard (sonnerie) Passer au Activer/ MAIN- Passer au réglage de désactiver TENIR _______...
-
Page 47: Écran Lcd
ÉCRAN LCD Affichage de l’heure Affichage du calendrier Affichage des jours de la semaine Affichage de la température ] Signal radio-piloté reçu ] Indicateur de fuseau horaire ] Fonction snooze activée ] Alarme 1 ACTIVÉE ] Alarme 2 ACTIVÉE ] Alarme 1 + Alarme 2 ACTIVÉES ] Indicateur de pile faible ... -
Page 48: Pour Commencer
POUR COMMENCER du signal radio-piloté [ ] clignote. 4. Si le processus de réception du signal abou- tit, l’icône complète du signal radio-piloté [ INSERTION DES PILES ] s’affiche à l’écran et la date et l’heure 1. Retirez le couvercle du compartiment à piles situé... -
Page 49: Réglage Du Fuseau Horaire
entrer l'heure et la date. secondes, le réglage sera enregistré et l’ap- 2. Le paramètre de réglage clignote. pareil sortira du mode de réglage. 3. Appuyez une fois sur la touche[ ]. Le chiffre augmente d’1 unité (lors du réglage LANGUE Les langues disponibles sont : Anglais (E), des minutes, les secondes sont remises à... -
Page 50: Activation/Désactivation De L'alarme
2. Appuyez sur la touche [ ] plusieurs fois mer le réglage et passer au paramètre sui- jusqu’à ce que l’écran affiche °C/°F. vant. 6. Séquence de réglage : Heure Minute 3. Appuyez sur la touche [ ] ou [ ] pour pas- Vol H/L (volume de l’alarme) ... -
Page 51: Spécifications
FONCTIONNEMENT RÉINITIALISATION 1. A l’heure définie, le signal d’alarme sonne. Appuyez sur la touche RESET pour restaurer 2. Au cours de la sonnerie, appuyez sur la les paramètres par défaut. touche [ ] pour retarder l’alarme de 8 minutes. SPÉCIFICATIONS 3. Si vous n’appuyez sur aucune touche pour Dimensions (unité... -
Page 52: Déclaration De Conformité Ce
• Protégez l’appareil contre la poussière et clare que le type d’appareil de numé- l’humidité. ro de pièce : RDC3006 satisfait à la Directive : 2014/53/UE. L’intégralité de la dé- claration de conformité UE est disponible à l’adresse internet suivante : www.bresser.de/... - Page 53 Conformément aux réglementations ELIMINATION sur les piles et les piles rechargeables, Eliminez les matériaux d’emballage cor- il est formellement interdit de jeter les piles rectement en fonction de leur type, tels dans les ordures ménagères. Veillez à élimi- que le papier ou le carton. Prenez ner vos piles usagées tel qu’exigé...
-
Page 54: Manual Download
à la page www.bresser.de/warranty_ terms. www.bresser.de/download/RDC3006 Souhaitez-vous obtenir un mode d’emploi SERVICE AND WARRANTY: détaillé pour ce produit dans une autre langue ? Rendez-vous sur notre site internet via le lien ci-dessous (code QR) pour découvrir... -
Page 56: Advertencias Generales
ACERCA DE ESTE MANUAL DE aparato bajo la supervisión de un adulto. INSTRUCCIONES Utilice el aparato solo como se describe Este manual de instrucciones debe en el manual; de lo contrario, corre el riesgo de sufrir una descarga eléctrica. considerarse un componente del aparato. •... -
Page 57: Volumen De Suministro
Riesgo de incendio/explosión — No ex- • VOLUMEN DE SUMINISTRO ponga el aparato a altas temperaturas. Reloj despertador, manual de instrucciones, Utilice solo las pilas recomendadas. No 2 pilas AAA. cortocircuite el aparato o las pilas, ni los ANTES DE EMPEZAR tire al fuego. -
Page 58: Vista General Del Producto
VISTA GENERAL DEL PRODUCTO Pulse [ ] para activar la fun- ción de repetición y la retroiluminación durante 8 segundos. La función de re- petición detendrá la alarma durante 8 minutos. Pulse [ ] para activar/desactivar la alarma. Pulse [ ] para cambiar entre la indi- cación de calendario y la de alarma. - Page 59 rápidamente. En el modo de ajuste, pulse el botón [ ] para reducir el valor de uno en uno y manténgalo pulsado para reducirlo rá- pidamente. Pulse el botón RESET para restablecer los ajustes a la configuración predeter- minada de fábrica. Compartimento de las pilas.
- Page 60 BOTÓN MODO Activar/ Activar desactivar retroiluminación Cambiar entre alarma 8 segundos indicación de _______ _______ _______ PULSAR (SNOOZE calendario y de Detener mientras suena la alarma alarma (so- Modo alarma) estándar nando) Entrar en Activar/ Entrar en MANT. _______ _______ _______ ajuste de desactivar...
-
Page 61: Pantalla Lcd
PANTALLA LCD Indicación de la hora Indicación del calendario Indicación del día de la semana Indicación de la temperatura ] Recibiendo señal de radiocontrol ] Indicador de huso horario ] Repetición activada ] Alarma 1 activada ] Alarma 2 activada ] Alarma 1 + alarma 2 activadas ] Indicador de bajo nivel de las pilas ... -
Page 62: Primeros Pasos
PRIMEROS PASOS 3. Durante el proceso de recepción parpa- dea el símbolo de la señal de radiocontrol INSERCIÓN DE LAS PILAS 4. Si el proceso de recepción de radiocontrol 1. Retire la cubierta del compartimento de las es correcto, aparecerá un símbolo de ra- pilas de la parte posterior. -
Page 63: Ajuste Manual Del Reloj
AJUSTE MANUAL DEL RELOJ 7. Si no se realiza ninguna acción en 20 segun- 1. Mantenga pulsado el botón [ ] para en- dos, el ajuste se guardará y se abandonará trar en el modo de ajuste de fecha y hora. el modo de ajuste. - Page 64 Volumen alto/bajo de alarma Salir trar en el modo de ajuste de fecha y hora. 2. Pulse el botón [ ] varias veces hasta 7. La alarma se activará automáticamente que en la pantalla aparezca °C/°F. después de haberla ajustado. 3.
-
Page 65: Especificaciones
Dimensiones (unidad principal): DECLARACIÓN DE CONFORMIDAD CE 98 x 43 x 97 mm (La x An x Al) Por la presente, Bresser GmbH de- Peso (unidad principal): clara que el tipo de equipo con el número de referencia RDC3006 es 180 g... -
Page 66: Notas Sobre La Limpieza
UE está disponible en la siguiente dirección de De acuerdo con la Directiva 2002/96/ internet: ww.bresser.de/download/RDC3006/ CE del Parlamento Europeo sobre residuos de CE/RDC3006_CE.pdf aparatos eléctricos y electrónicos y su adap- tación a la legislación alemana, los aparatos NOTAS SOBRE LA LIMPIEZA electrónicos usados deben recogerse por se-... -
Page 67: Garantía Y Asistencia
¿Desea instrucciones detalladas para este SERVICE AND WARRANTY: producto en un idioma en particular? Visite nuestro sitio web a través del siguiente... - Page 68 Errors and technical changes reserved. • Con riserva di errori e modifiche tecniche. • Irrtümer und technische Änderungen vorbehalten. • Sous réserve d’erreurs et de modifications techniques. • Queda reservada la posibilidad de incluir modifica- ciones o de que el texto contenga errores. Manual_RDC3006000000_Alarm-clock_en-it-de-fr-es_EXPSC_v112019a...
Need help?
Do you have a question about the RDC3006 and is the answer not in the manual?
Questions and answers