Table of Contents
Advertisement
Available languages
Available languages
Advertisement
Table of Contents

Related Manuals for Explore Scientific RDP1003-CM3000


Summary of Contents for Explore Scientific RDP1003-CM3000
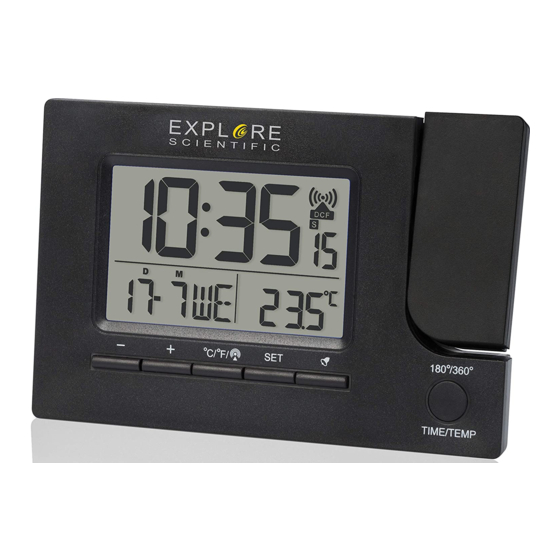
- Page 1 SVEGLIA RADIOCONTROLLATA FUNKWECKER RC ALARM CLOCK Art.No.: black RDP1003-CM3000 white RDP1003-GYE000 180°/360° °C/°F TIME/TEMP ISTRUZIONI PER L’USO ..2 DE BEDIENUNGSANLEITUNG ..14 EN INSTRUCTION MANUAL ..26...
-
Page 2: Avvertenze Generali
INFORMAZIONI SUL MANUALE DI • PERICOLO DI SOFFOCAMENTO — I bambini pos- sono utilizzare il dispositivo solo sotto la vigilanza ISTRUZIONI di un adulto. I materiali di imballaggio, i sacchetti Il presente manuale è parte integrante del prodot- di plastica e le fasce in gomma possono causare soffocamento e, pertanto, devono essere conser- Non azionare il dispositivo prima di aver letto attenta- vati in modo che i bambini non riescano a raggiun-... -
Page 3: Prima Di Iniziare
PRIMA DI INIZIARE • Non smontare il dispositivo. Qualora dovesse ri- levarsi difettoso, rivolgersi al proprio rivenditore • Si consiglia l'uso di batterie alcaline. Se le tempe- autorizzato. Il rivenditore provvederà a contattare rature tendono regolarmente a scendere sotto 0 °C il Centro assistenza e, se necessario, spedirà... - Page 4 INFORMAZIONI GENERALI SUL PRODOTTO 1. Premere [ ] per attivare la retroillumina- zione e la proiezione per 5 secondi o per atti- vare lo snooze e ritardare l'allarme di 5 minuti. 2. Lente di proiezione. 3. In modalità standard, premere [+] per passare al formato 12/24 ore.
- Page 5 6. In modalità standard, premere [SET] per cam- biare modalità in base alla sequenza. Tempe- ratura > AL1 > AL2 > Seconda ora. Nella mo- dalità di impostazione dell'ora o della sveglia, premere per confermare l'impostazione. 7. In modalità standard, premere per attivare/ disattivare la sveglia.
- Page 6 TASTO 180°/360° [–] MODALITÀ TIME/TEMP (IMPOSTAZIONE) Attrivare/ Visualizza- Accendere la Disattivare Visualizzare la re il giorno Azionare Attivare il retroilluminazione la sveglia temperatura, della l'iInterrut- PREMERE formato 12 e la proiezione la sveglia 1, la settimana, °C/°F tore per la Interrompe- ore (AM/PM) per 5 secondi...
-
Page 7: Display Lcd
DISPLAY LCD 1. Visualizzazione dell'ora 2. Visualizzazione della data e del giorno della set- timana o della settimana del calendario (preme- re il tasto [ ] per cambiare visualizzazione) 3. Visualizzazione della temperatura o dell'ora della sveglia (AL1/AL2) o della seconda ora (premere [SET] per cambiare) ] indica lo stato della ricezione del Segnale RCC ricevuto... -
Page 8: Operazioni Preliminari
OPERAZIONI PRELIMINARI PORTA DI RICARICA USB La porta di ricarica USB consente di caricare dispositi- vi USB come smartphone o lettori MP3. INSTALLAZIONE DELLE BATTERIE 1. Rimuovere lo sportello dal vano batterie situato sul OROLOGIO retro. 2. Inserire due batterie AAA tipo LR03 da 1,5 V. Accer- tarsi che i poli (+/-) delle batterie corrispondano RICEZIONE DELL'OROLOGIO ai segni riportati nel vano. -
Page 9: Impostazione Manuale Dell'orologio
6. Se il dispositivo non riceve ancora il segnale, proce- 5. Premere il tasto [SET] per confermare l'impostazio- dere all'impostazione manuale dell'ora. ne e passare al parametro successivo. 6. Sequenza di impostazione: Anno Mese Data NOTA: se si utilizza un adattatore di alimentazione, ... -
Page 10: Impostazione Del Fuso Orario
3. Il parametro di impostazione lampeggia. 6. Premere il pulsante [SET] per confermare l'impo- 4. Premere il pulsante [+] o [–] per impostare i dati stazione e uscire. desiderati. 5. Premere il tasto [SET] per confermare l'imposta- IMPOSTAZIONE °C/°F zione e passare al parametro successivo. 1. -
Page 11: Attivazione/Disattivazione Della Sveglia
glia viene attivata automaticamente. 5. La sveglia si riaccenderà all’ora successiva, a 8. Se non si esegue alcuna azione per 20 secondi, il meno che la funzione di sveglia non venga disatti- valore impostato viene salvato e la modalità impo- vata tenendo premendo il tasto [UP]. -
Page 12: Dichiarazione Di Conformità Ce
SPECIFICHE è disponibile all’indirizzo Internet: www.bresser.de/ download/RDP1003/CE/RDP1003_CE.pdf Dimensioni (unità principale) 140 x 40 x 95 mm (L x P x A) NOTE SULLA PULIZIA Peso (unità principale) • Prima di pulire il dispositivo, rimuovere le batterie. 143 g (escluse le batterie) •... -
Page 13: Garanzia E Assistenza
elettronici usati devono essere smaltiti separatamente È possibile consultare le condizioni di garanzia nella e riciclati nel rispetto dell'ambiente. loro interezza, le informazioni sulla proroga del perio- do di garanzia e i dettagli sui servizi offerti dal Pro- Le normative riguardanti le batterie e le batte- duttore all'indirizzo www.bresser.de/warranty_terms. -
Page 14: Zu Dieser Anleitung
ZU DIESER ANLEITUNG • ERSTICKUNGSGEFAHR! Kinder sollten das Gerät nur unter Aufsicht benutzen. Verpackungsmateria- Lesen Sie vor der Benutzung des Geräts aufmerk- lien (Plastiktüten, Gummibänder, etc.) von Kindern sam die Sicherheitshinweise und die Bedienungs- fernhalten! Es besteht ERSTICKUNGSGEFAHR! anleitung. Bewahren Sie diese Bedienungsanleitung •... -
Page 15: Vor Dem Gebrauch
VOR DEM GEBRAUCH • Benutzen Sie nur die empfohlenen Batterien. Erset- zen Sie schwache oder verbrauchte Batterien im- • Wir empfehlen die Verwendung von Alkali-Mangan- mer durch einen komplett neuen Satz Batterien mit Batterien. Bei Temperaturen, die regelmäßig unter voller Kapazität. Verwenden Sie keine Batterien un- 0°C (32°F) fallen, empfehlen wir Lithiumbatterien. - Page 16 PRODUKTÜBERSICHT 1. Drücken Sie [ ], um die Hintergrundbe- leuchtung und die Projektion für 5 Sekunden zu aktivieren oder um die SNOOZE/Schlummerfunk- tion zu aktivieren, um den Alarm um 5 Minuten zu verzögern. 2. Projektionslinse 3. Drücken Sie im Standardmodus [+], um in das 12/24-Stunden-Format zu wechseln.
- Page 17 diese Taste gedrückt, um den RCC-Empfang einzu- leiten. 6. Drücken Sie im Standardmodus [SET], um den Mo- dus zu wechseln: Temperatur > AL1 > AL2 > Zweite Uhrzeit. Drücken Sie im Zeit- oder Alarmeinstellm- odus die Taste, um die Einstellung zu bestätigen. 7.
- Page 18 TASTE 180°/360° [–] MODUS TIME/TEMP Alarm Hintergrund- ein-/aus- beleuchtung Temperatur, schalten 12/24 und Projektion Alarm 1, Wochentag, Projektion Stunden für 5 Sekunden drücken Alarm 2, Kalenderwo- °C/°F 180° Umkeh- Alarm Formatwech- aktivieren Zweite Uhrzeit rung stoppen sel (AM/PM) (SNOOOZE bei anzeigen Standard (Klingel-...
-
Page 19: Lcd-Anzeige
LCD-ANZEIGE 1. Zeitanzeige 2. Datumsanzeige und Wochentag oder Kalender- woche (zum Umschalten [ ] drücken) 3. Temperaturanzeige oder Alarmzeitanzeige (AL1/AL2) oder Zweite Uhrzeit Anzeige (zum Umschalten [SET] drücken) ] RCC-Signal empfangen ] Sommerzeit EIN (MESZ) ] Auslandszeit / Zeitzone +/-12h (Halten Sie [+] gedrückt, zum aktivieren/ deaktivieren) ] SNOOZE/Schlummermodus aktiviert... -
Page 20: Erste Schritte
ERSTE SCHRITTE USB-LADEANSCHLUSS Der USB-Ladeanschluss ermöglicht das Aufladen von USB-Geräten wie Smartphones oder MP3-Player. BATTERIEN EINLEGEN 1. Entfernen Sie die Batteriefachabdeckung von der Rückseite. 2. Legen Sie 2x AAA (LR03)/1,5V Batterien ein. Bitte stellen Sie sicher, dass die Polaritäten (+/-) der Bat- UHRENEMPFANG terien bei der Installation übereinstimmen. -
Page 21: Die Uhr Manuell Einstellen
6. Wenn das Gerät das Signal immer noch nicht emp- 5. Drücken Sie die Taste [SET], um die Einstellung zu be- fängt, fahren Sie bitte fort, die Uhrzeit manuell ein- stätigen und zum nächsten Parameter zu gelangen. zustellen. 6. Reihenfolge der Einstellung: Jahr ... - Page 22 °C/°F-EINSTELLUNG 5. Drücken Sie die [SET] Taste, um die Einstellung zu bestätigen und zum nächsten Parameter zu gelan- Drücken Sie die [ ] Taste, um Celsius (°C) / gen oder zum Verlassen. Fahrenheit (°F) zu wechseln. 6. Reihenfolge der Einstellung: Stunden Minuten ...
-
Page 23: Alarm Ein-/Ausschalten
8. Wenn innerhalb 20 Sekunden keine weitere Aktion 5. Der Alarm beginnt zum nächsten Alarmzeitpunkt erfolgt, wird die Einstellung gespeichert und der Ein- erneut, es sei denn, Sie schalten die Alarmfunktion stellmodus verlassen. durch Drücken der [UP] Taste aus. ALARM EIN-/AUSSCHALTEN PROJEKTION Der Projektor zeigt die Uhrzeit oder Temperatur an Ih- 1. -
Page 24: Spezifikationen
SPEZIFIKATIONEN HINWEISE ZUR REINIGUNG • Trennen Sie das Gerät vor der Reinigung von der Abmessungen (Hauptgerät): Stromquelle oder entfernen Sie die Batterien! 140 x 40 x 95 mm (L x B x H) • Reinigen Sie das Gerät nur äußerlich mit einem Gewicht (Hauptgerät): trockenen Tuch. -
Page 25: Garantie & Service
vollständigen Garantiebedingungen sowie Sie können die Batterien nach Gebrauch entwe- Informationen zu Garantiezeitverlängerung und der in unserer Verkaufsstelle oder in unmittelba- rer Nähe (z.B. im Handel oder in kommunalen Serviceleistungen können Sie unter www.bresser. de/garantiebedingungen www.bresser.de/warranty_ Sammelstellen) unentgeltlich zurückgeben. Bitte entsor- gen Sie Ihre gebrauchten Batterien wie gesetzlich vorge- terms einsehen. -
Page 26: General Warnings
ABOUT THIS INSTRUCTION MANUAL GENERAL WARNINGS These operating instructions are to be considered a component of the device. • Risk of electric shock — This device contains elec- Please read the safety instructions and the operating tronic components that operate via a power source instructions carefully before use. -
Page 27: Before You Begin
BEFORE YOU BEGIN proper handling could trigger a short-circuit, a fire, or an explosion. • We recommend using alkaline batteries. If temper- • Do not disassemble the device. In the event of a atures regularly fall below 0°C (32°F), we recom- defect, please contact your dealer. -
Page 28: Product Overview
PRODUCT OVERVIEW 1. Press [ ] to activate backlight and pro- jection for 5 seconds or to activate the snooze function to delay the alarm by 5 minutes. 2. Projection lens 3. In standard mode, press [+] to switch 12/24 hour format. - Page 29 7. In standard mode, press to toggle alarm on/ off. 8. In standard mode, press to flip projection 180°. Press and hold to switch from time to tempera- ture projection. 9. Battery compartment. Slide down to open. 10. Continous Projection on/off (only with AC/DC Adapter) 11.
- Page 30 BUTTON 180°/360° [–] MODE TIME/TEMP Temperature, Turn Alarm Turn on backlight 12/24 hour Alarm 1, on/off Weekday, and projection for 5 format Projection PRESS Alarm 2, Calendar °C/°F seconds switch (AM/ 180° switch Second time Stop alarm week (SNOOZE when display (ringing) alarm is ringing)
-
Page 31: Lcd Display
LCD DISPLAY 1. Main Time display 2. Date display and Weekday or Calendar week (Press [ ] to switch) 3. Temperature display or Alarm Time display (AL1/AL2) or Second Time display (Press [SET] to switch) ] RCC signal received ] DST ON (Daylight Saving Time) ] Foreign time / Time zone +/-12h (Hold [+] to activate/deactivate) -
Page 32: Getting Started
GETTING STARTED CLOCK INSERT BATTERIES CLOCK RECEPTION 1. Remove the battery door from the back. 1. When you insert or replace the batteries, RCC recep- 2. Insert 2x AAA (LR03)/1.5V batteries. Please en- tion is initiated. To manually start RCC reception sure the polarities (+/-) of the batteries match upon press and hold [ ] button. -
Page 33: Set The Clock Manually
SET THE CLOCK MANUALLY SET SECOND TIME FUNCTION 1. Press and hold [SET] button to enter time and date 1. Press [SET] button several times until the display setting. shows the second time. 2. The setting parameter will flash. 2. Press and hold [SET] button to enter time setting. 3. -
Page 34: Turn On/Off Alarm
°C/°F SETTING TURN ON/OFF ALARM Press [ ] button to switch Celsius (°C) / Fahr- 1. In standard mode, press the [ ] button to turn enheit (°F). on/off the alarm. The sequence is: AL1 on AL2 on AL1+AL2 on AL1+AL2 off. ALARM 2. -
Page 35: Specifications
PROJECTION SPECIFICATIONS The projector displays the time or temperature on your ceiling or wall and it can rotate 180°. It is easier to view Dimensions (Main unit): in a darkened room. For the optimal projection results, 140 x 40 x 95 mm (L x W x H) place the unit within 1.5 - 2 m (5-6.5 ft) from the ceiling or wall. -
Page 36: Ec Declaration Of Conformity
EC DECLARATION OF CONFORMITY DISPOSAL Hereby, Bresser GmbH declares that the Dispose of the packaging materials properly, equipment type with part number: RDP1003 according to their type, such as paper or card- is in compliance with Directive: 2014/53/ board. Contact your local waste-disposal ser- EU. -
Page 37: Warranty And Service
Alternatively you can also send an email to manuals@bresser.de or leave a message on +49 (0) 28 72 – 80 74-220*. Please always state your name, precise address, a valid phone number and email Cd¹ Hg² Pb³ address, as well as the article number and name. battery contains cadmium battery contains mercury *Number charged at local rates in Germany (the... - Page 40 MANUAL DOWNLOAD: SERVICE AND WARRANTY: www.bresser.de/warranty_terms www.bresser.de/download/RDP1003 Bresser GmbH Gutenbergstr. 2 · DE-46414 Rhede Germany www.bresser.de · service@bresser.de...
Need help?
Do you have a question about the RDP1003-CM3000 and is the answer not in the manual?
Questions and answers