
Subscribe to Our Youtube Channel
Related Manuals for Lancaster TT415Y19017


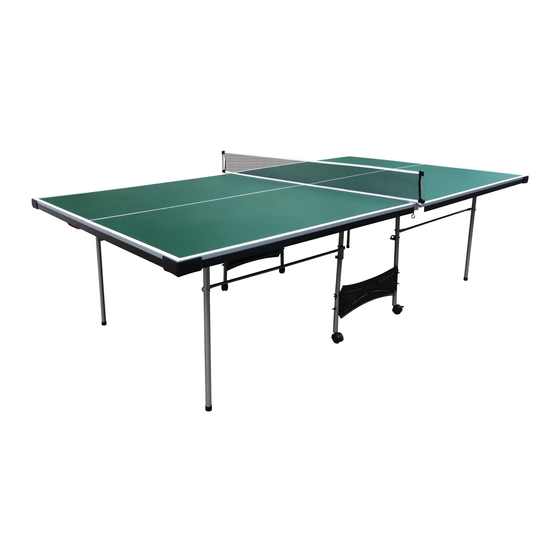
Summary of Contents for Lancaster TT415Y19017
- Page 1 MODEL TT415Y19017 VM Innovations Assembly Instructions NEW! Follow along with your smartphone to make assembly even easier! 877-472-4296 www.vminnovations.com...
-
Page 2: Before You Begin
Before you begin FOR A QUICKER & EASIER ASSEMBLY & WARRANTY EXPERIENCE Step 1: Scan the QR code below and download the free BILT app. Step 2: Once in the BILT app, search by product name or model number and select. TTT415 Step 3: Begin easy assembly of this product using the BILT 3D-guided interactive instructions. - Page 3 Consumer Service Department. Please be aware of your product’s Limited Warranty for the return/refund policy from the store, We, at Lancaster, cannot handle the product which is out of product’s limited warranty since we only provide available parts. Thank you!
-
Page 4: Tools Required
Do not use or keep area assembly area product outdoors. For indoor use only. No wet/humid conditions. WARNING Adult Assembly Required. CHOKING HAZARD - This item contains small parts. Not suitable for children under 3 years. TT415Y19017 (Continued on the next page) www.vminnovations.com... -
Page 5: Parts Identifier
FOR FIG. 5, 11 FOR FIG. 2 Safety Leg Bracket - A Leg Bracket - B Bracket Strap - Short FOR FIG. 16 FOR FIG. 8, 14 FOR FIG. 17 Plastic Corner Wheel Wood Block Spacers TT415Y19017 (Continued on the next page) www.vminnovations.com... -
Page 6: Before Assembly
Find a clean, level place to begin the assembly of your product. Verify that you have all listed parts as shown on the parts list pages. If any parts are missing, call our customer service. TT415Y19017 (Continued on the next page) - Page 7 English ASSEMBLY FIG. 1 Note: The playing surface should face down when assembling. TT415Y19017 (Continued on the next page) www.vminnovations.com...
- Page 8 Note: Each table section has pre-drilled holes on the inside of each section. The table top section (1 & 2) will line up next to each other. The bracket (17) will match the pre-drilled holes as shown in FIG. 2. TT415Y19017 (Continued on the next page) www.vminnovations.com...
- Page 9 English ASSEMBLY FIG. 3 FIG. 4 Pre-installed Pre-installed Note: The notch of leg bracket A (15), will face towards the center of the table. TT415Y19017 (Continued on the next page) www.vminnovations.com...
- Page 10 English ASSEMBLY FIG. 5 FIG. 6 Note: Place linkage tube with stop bracket (7) on the inner leg from the outside and outer leg from the inside. TT415Y19017 (Continued on the next page) www.vminnovations.com...
- Page 11 English ASSEMBLY FIG. 7 Note: Place linkage tube (8) on the inner leg from the outside and outer leg from the inside. FIG. 8 TT415Y19017 (Continued on the next page) www.vminnovations.com...
- Page 12 English ASSEMBLY FIG. 9 FIG. 10 Pre-installed Pre-installed Note: The notch of leg bracket A (15), will face towards the center of the table. TT415Y19017 (Continued on the next page) www.vminnovations.com...
- Page 13 English ASSEMBLY FIG. 11 FIG. 12 Note: Place linkage tube (8) on the inner leg from the outside and outer leg from the inside. TT415Y19017 (Continued on the next page) www.vminnovations.com...
- Page 14 English ASSEMBLY FIG. 13 Note: Place linkage tube with stop bracket (7) on the inner leg from the outside and outer leg from the inside. FIG. 14 TT415Y19017 (Continued on the next page) www.vminnovations.com...
- Page 15 English ASSEMBLY FIG. 15 FIG. 16 Note: Use the wood block spacers to align the center gap before assembling the logo panel. TT415Y19017 (Continued on the next page) www.vminnovations.com...
- Page 16 English ASSEMBLY FIG. 17 Note: Both logo panels should be inverted when assembling. TT415Y19017 (Continued on the next page) www.vminnovations.com...
- Page 17 / Bloquee las ruedas. Fold the table. Make sure to buckle the Safety Straps. FIG. 18E FIG. 18F Lift the table. DO NOT lean too much weight on the wheels while lifting the table. TT415Y19017 (Continued on the next page) www.vminnovations.com...
- Page 18 English ASSEMBLY FIG. 19 Note: Install the Table Lock accordingly. Note: Repeat the above steps for the other table half. FIG. 20 Note: Unbuckle the Safety Strap before unfolding the table. TT415Y19017 (Continued on the next page) www.vminnovations.com...
- Page 19 English ASSEMBLY FIG. 21 Note: Unlock the table locks. Note: Pull the legs out from the table top and lower the table half to the floor. TT415Y19017 (Continued on the next page) www.vminnovations.com...
- Page 20 English ASSEMBLY FIG. 22 Note: Attach the post and the net. TT415Y19017 (Continued on the next page) www.vminnovations.com...
-
Page 21: Storage Position
STEP 2 Step 2: Buckle the Safety Strap. IMPORTANT! When the table is in its storage position, always attach the safety strap to prevent the sides from falling. TT415Y19017 (Continued on the next page) www.vminnovations.com... -
Page 22: Playback Position
STEP 1 STEP 2 Step 2: Unlock the table locks. Step 1: Unbuckle the Safety Strap. STEP 3 Note: Pull the legs out from the table top and lower the table half to the floor. TT415Y19017 (The last page) www.vminnovations.com... - Page 23 www.vminnovations.com...
Need help?
Do you have a question about the TT415Y19017 and is the answer not in the manual?
Questions and answers