Table of Contents
Advertisement
Quick Links
Installation Manual
HIGH EFFICENCY
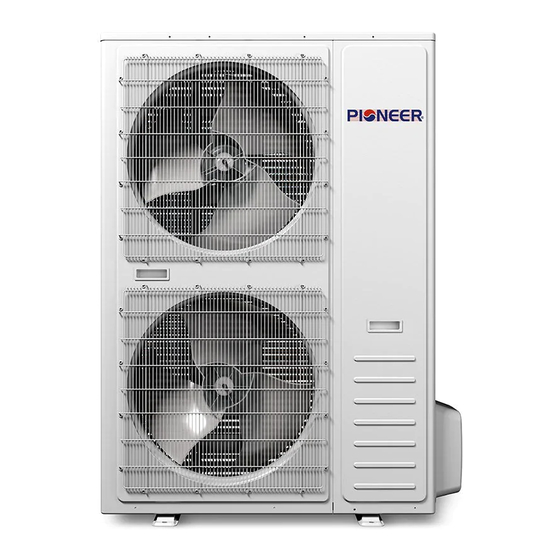
CONDENSING UNIT
Models:
• YH1824GHFD18RT2
• YH3036GHFD18RT2
• YH4248GHFD18RT2
• YH4860GHFD18RT2
- R-410A REFRIGERANT
- 208/230 V, 1 Phase, 60Hz
- 18 SEER
IMPORTANT NOTICE: Thank you very much for purchasing this Air Conditioner. Please read this manual carefully before
installing or operating your new air conditioning system. Be sure to save this manual for future reference.
CENTRAL SPLIT AIR CONDITIONER
Advertisement
Table of Contents

Summary of Contents for Pioneer YH1824GHFD18RT2
- Page 1 CENTRAL SPLIT AIR CONDITIONER Installation Manual HIGH EFFICENCY CONDENSING UNIT Models: • YH1824GHFD18RT2 • YH3036GHFD18RT2 • YH4248GHFD18RT2 • YH4860GHFD18RT2 - R-410A REFRIGERANT - 208/230 V, 1 Phase, 60Hz - 18 SEER IMPORTANT NOTICE: Thank you very much for purchasing this Air Conditioner. Please read this manual carefully before...
- Page 2 This page intentionally left blank.
-
Page 3: Table Of Contents
Contents Safety Precautions ............................1 Diagram of Refrigerant Cycle & Wiring ......................3 Refrigerant Flow Diagram ........................3 Electrical Wiring Diagram ........................3 Installation Instructions..........................4 Transportation and Handling Before Installation ..................4 Installation Location Selection........ -
Page 4: Safety Precautions
Safety Precautions This air conditioner uses new refrigerant HFC (R410A). Since the max. working pressure is 550 psig (3.8MPa) [R22:450 psig (R22:3.1MPa)], some of the piping and installation and service tools are special. This air conditioner uses the following power supply: ~208/230V, 60Hz. The outdoor unit must be installed with an indoor unit equipped with TXV, and ensure that the TXV can be opened to the maximum angle while running heating mode. - Page 5 Safety Precautions ·Be sure to cut off the main power supply before the installation of indoor electronic PCB or wiring. Otherwise, there is a risk of electric shock. ·The device should be compliant with all state provisions for installation wiring. ·The outdoor unit installation location should be compliant to all safety principles, avoiding locations susceptible to people or other small animals coming into contact with electrical components.
-
Page 6: Diagram Of Refrigerant Cycle & Wiring
The SI wire between the indoor and outdoor units is not mandatory, especially when the outdoor unit is connected to an indoor unit of a different brand. It is more energy-efficient when the outdoor unit is connected to a Pioneer indoor unit via SI wire. -
Page 7: Installation Instructions
Installation Instructions Transportation and Handling Before Installation Transport the product as close to the installation location as practical prior to unpacking. ·Recommended Transportation Method ·Handling When handling the unit, ensure a steady balance of the If the unit has no protective packaging, protect it unit, checking safety and lifting it up smoothly. -
Page 8: Drainage Elbow And Drain Hose Installation
Installation Instructions Drainage Elbow and Drain Hose Installation Install Drainage Elbow and Drain Hose The condensate water may drain from the outdoor unit · when the unit operates in heating mode. In order to avoid disturbing neighbors and to protect the environment, it is necessary to install a drainage elbow and a drain hose to properly drain out and route the condensate water away. -
Page 9: Refrigerant Piping
Installation Instructions Refrigerant Piping 1. Piping Requirement Outer Diameter of Pipe [ in. (mm)] Model Liquid (15.88) (9.52) (19.05) (9.52) 48K/60K (22.22) (9.52) The shorter the refrigerant piping is, the better the performance will be. Thus the connecting pipe should be as short as possible. - Page 10 Installation Instructions C A U T I O N ! 危 险 When installing piping through Do not place the pipe Correct Incorrect the wall, secure a cap at the directly on the ground. end of the pipe. Incorrect Correct Incorrect Correct Rain water can...
- Page 11 Installation Instructions 6. Vacuum Pumping and Charging Refrigerant · Vacuum Pumping (1) Remove the service port cap of the stop valve on the gas pipe side of the outdoor unit. (2) Connect the manifold gauge and vacuum pump to the service port of the stop valve on the gas pipe side of the outdoor unit.
-
Page 12: Wiring
Installation Instructions Wiring WARNING ! · Turn OFF the main power switch to the indoor unit and the outdoor unit, and wait for at least 3 minutes before electrical wiring work or a periodical check is performed. · Check to ensure that the indoor fan and the outdoor fan have stopped, before electrical wiring work or a periodical check is performed. - Page 13 Installation Instructions Wiring steps: 24K/36K BTU (1) Electrical Box Cover Removal Unscrew the mounting screws to remove the electric box cover. (2) Fasten the power supply cable and the transmitting cable to the conduit holder using the lock nut. (3) Connect the power supply cable and the transmitting cable to the terminal. (4) Fasten the power supply cable and the connection cable using the cable clamp.
-
Page 14: Test Run
Installation Instructions Electrical Data Model Power Source Transmitting Circuit Power Supply (Capacity) Cable Size Cable Size Breaker (A) Rated Current Nominal Sensitive Current (mA) 5×16AWG 208/230V/1Ph/60Hz 3×12AWG 5×16AWG 208/230V/1Ph/60Hz 3×10AWG 48K/60K 5×16AWG 208/230V/1Ph/60Hz 3×8AWG Running Current REFER TO NAMEPLATE Note: (1) Follow local codes and regulations when selecting field wires. - Page 15 This page intentionally left blank.
- Page 16 3250 NW 107 Avenue, Doral, FL 33172 - USA : (305) 513-4488 : (305) 513-4499 E-mail : info@pdhvac.com Website : www.pdhvac.com Pioneer product line, parts, and supplies are available online for convenient ordering at: www.highseer.com www.pioneerminisplit.com Scan the below code to visit our support page where you can find more installation materials: Copyright 2022, Parker Davis HVAC International, Inc., All rights reserved.


Need help?
Do you have a question about the YH1824GHFD18RT2 and is the answer not in the manual?
Questions and answers