
Subscribe to Our Youtube Channel
Related Manuals for D-Link DW-690


Summary of Contents for D-Link DW-690
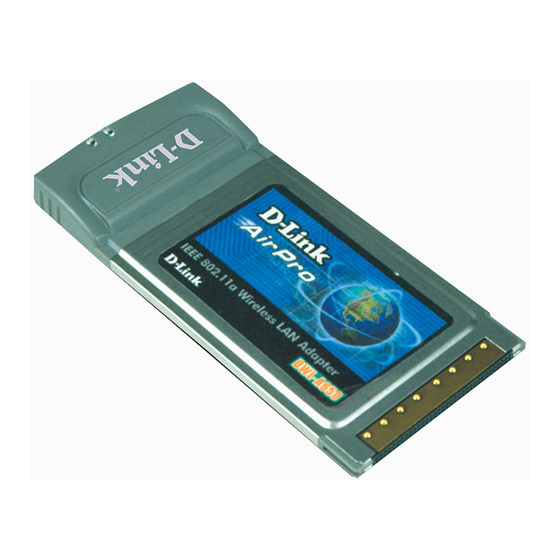
- Page 1 DW-690 & DWL-A650 5GHz Wireless Cardbus Card User’s Manual First Edition (December, 2001) 6DWLA650..01...
- Page 2 Wichtige Sicherheitshinweise 1. Bitte lesen Sie sich diese Hinweise sorgfältig durch. 2. Heben Sie diese Anleitung für den spätern Gebrauch auf. 3. Vor jedem Reinigen ist das Gerät vom Stromnetz zu trennen. Vervenden Sie keine Flüssig- oder Aerosolreiniger. Am besten dient ein angefeuchtetes Tuch zur Reinigung. 4.
- Page 3 WARRANTY PERIOD, AND REQUESTING A RETURN MATERIAL AUTHORIZATION (RMA) NUMBER. IF A REGISTRATION CARD FOR THE PRODUCT IN QUESTION HAS NOT BEEN RETURNED TO D-LINK , THEN A PROOF OF PURCHASE (SUCH AS A COPY OF THE DATED PURCHASE INVOICE) MUST BE PROVIDED. IF PURCHASER’S...
- Page 4 TOGETHER WITH A COPY OF THE REGISTRATION CARD. IF A REGISTRATION CARD FOR THE PRODUCT IN QUESTION HAS NOT BEEN RETURNED TO A D-LINK OFFICE, THEN A PROOF OF PURCHASE (SUCH AS A COPY OF THE DATED PURCHASE INVOICE) MUST BE PROVIDED WHEN REQUESTING WARRANTY SERVICE. THE TERM “PURCHASE”...
- Page 5 HAZARD. LIMITATION OF LIABILITY IN NO EVENT WILL D-LINK BE LIABLE FOR ANY DAMAGES, INCLUDING LOSS OF DATA, LOSS OF PROFITS, COST OF COVER OR OTHER INCIDENTAL, CONSEQUENTIAL OR INDIRECT DAMAGES ARISING OUT THE INSTALLATION, MAINTENANCE, USE, PERFORMANCE, FAILURE OR INTERRUPTION OF A D- LINK PRODUCT, HOWEVER CAUSED AND ON ANY THEORY OF LIABILITY.
- Page 6 D-Link Corporation/D-Link Systems Inc., as stipulated by the United States Copyright Act of 1976...
- Page 7 FCC Warning This device complies with part 15 of the FCC Rules. Operation is subject to the following two conditions: (1) This device may not cause harmful interference, and (2) this device must accept any interference received, including interference that may cause undesired operation. This equipment has been tested and found to comply with the limits for a Class B digital device, pursuant to part 15 of the FCC Rules.
- Page 9 Installers and end-users must follow the installation instructions provided in this user guide. Modifications to this device, unless expressly approved by D-Link, could void the user’s right to operate this equipment. The frequency band 5150-5250 MHz is only for indoor usage to reduce potential for harmful interference to co-channel Mobile Satellite systems.
-
Page 11: Table Of Contents
Contents List of Figures ............xv List of Tables............xvii Preface ..............xix About this Document ..................xix Audience ...................... xx Additional Resources..................xx Introduction ............1-1 Package Contents ..................1-1 System Requirements ................. 1-2 Windows 2000 ............2-1 Driver Installation (First-time Install) ............2-1 Driver Installation (Previous Driver Installed)..........2-5 Driver Uninstallation .................. - Page 12 Windows Millennium Edition ....... 3-1 Driver Installation..................3-1 Driver Uninstallation ..................3-5 Device Configuration ...................3-7 Infrastructure Mode ................3-9 Ad Hoc Mode..................3-10 TCP/IP Configuration................3-12 Windows 98 Second Edition ........ 4-1 Driver Installation..................4-1 Driver Uninstallation ..................4-5 Device Configuration ...................4-8 Infrastructure Mode ................4-9 Ad Hoc Mode..................4-11 TCP/IP Setup ..................4-13 Windows XP............
- Page 13 Infrastructure Mode ................6-8 Ad Hoc Mode..................6-11 Verify Connection ................6-13 Driver Uninstallation .................. 6-15 LinkMon ..............7-1 Installation ....................7-1 Features ...................... 7-5 RFSilent ..............8-1 System Requirements ................. 8-1 Windows 98SE Environment ..............8-1 RFSilent Setup .................... 8-2 Operation..................... 8-2 Troubleshooting ............9-1 Channel and Data Rate Selection ....A-9-2...
-
Page 15: List Of Figures
List of Figures Figure 2-1. Infrastructure Mode.............. 2-17 Figure 2-2. Ad Hoc Mode ............... 2-18 Figure 8-1. RFSilent Icon ................. 8-2 Figure 8-2. RFSilent Menu Selections............8-2... -
Page 17: List Of Tables
List of Tables Table 8-1. RFSilent Menu Descriptions ..........8-3... -
Page 19: Preface
D-Link NDIS driver from previous releases. This guide describes the steps required to install NDIS drivers for the D-Link DWL-A650 Wireless Network Adapter in Windows 2000, Windows Millennium Edition, Windows 98 Second Edition, Windows XP, and Windows NT 4.0. -
Page 20: Audience
Channel and Data Rate Selection—Describes how to select Fixed Data Rate and/or Channel Frequency for specific testing. Audience This document is intended for D-Link customers who wish to install and evaluate the D-Link DWL-A650 Station Reference Design in the supported Microsoft Windows environments. Additional Resources D-Link STA Reference Design hardware, software, and documentation contain proprietary information of D-Link Communications, Inc., and are... -
Page 21: Introduction
Turbo Mode supporting data rates up to 108 Mbps. The host interface is compatible with the PC Card 7.1 standard. You can find information regarding the D-Link Station Reference Designs in the detailed D-Link STA Reference Design Functional Specification. Package Contents Make sure the following materials are available before you begin: One 802.11a PCI Card... -
Page 22: System Requirements
System Requirements Laptop PC containing: − 32-bit CardBus slot (or Desktop PC with PC Card-PCI adapter) − 32 MB memory or greater − 300 MHz processor or higher Microsoft Windows 2000/Windows Millennium Edition/Windows 98 Second Edition/Windows XP/Windows NT 4.0 (with Service Pack 6) -
Page 23: Windows 2000
Windows 2000 Driver Installation (First-time Install) Insert the D-Link DWL-A650 Wireless Network Adapter into a 32-bit CardBus slot and follow these steps to install the NDIS driver: 1. Wait for the following dialog box to display, and click Next to continue. - Page 24 2. Choose “Search for a suitable driver for my device (recommended),” and click Next. 3. Insert the installation CD in your CD-ROM drive. Choose “Specify a location” under “Optional search locations,” and click Next to continue.
- Page 25 4. Browse to the location where the NDIS driver is located (assuming D is the CD-ROM drive), the default folder is D:\ndis\bin\production\ndis5. Click OK to continue. 5. When you find the D-Link driver installation file (net5210b.inf), click Next to continue.
- Page 26 6. The D-Link NDIS evaluation driver currently does not have a digital signature from Microsoft. Therefore, Windows 2000 shows a warning message. Click Yes to proceed with driver installation. 7. Click Finish to complete the driver installation. See Section “Device...
-
Page 27: Driver Installation (Previous Driver Installed)
Driver Installation (Previous Driver Installed) If the system already has a previous release of the D-Link NDIS installed, Windows does not prompt for the device driver when the WLAN Card is inserted. Follow the steps below to update the NDIS driver: 1. - Page 28 2. Within Device Manager, right-click “D-Link DWL-A650 Wireless Network Adapter” under “Network adapters” device node, and click Properties.
- Page 29 3. Click “Update Driver…” from the Driver tab. Note the Driver Version that you are updating from. You may need to verify this field again after driver update completes to make sure Release 1.3 driver has been updated correctly. 4. Click Next to continue.
- Page 30 5. Choose “Display a list of the known drivers for this device so that I can choose a specific driver,” and click Next to continue. 6. Insert the Release 1.3 CD into your CD-ROM drive. Click “Have Disk…” to continue.
- Page 31 7. Browse to the location where the NDIS driver is located (assuming D is the CD-ROM drive), the default folder is “D:\ndis\bin\production\ndis5”. Click OK to continue. 8. Select “D-Link DWL-A650 Wireless Network Adapter” from the list and click Next to continue.
- Page 32 9. Click Yes to continue when Windows displays the warning message. 2-10...
- Page 33 10. Click Next to proceed with installation. 11. The D-Link NDIS evaluation driver currently does not have a digital signature from Microsoft. Therefore, Windows 2000 shows a warning message. Click Yes to proceed with driver installation. 2-11...
- Page 34 12. Click Finish. 13. Note that Driver Version should display 1.3 as the major revision number. Click OK to continue. 2-12...
- Page 35 14. Click Yes to restart system. 15. After system restarts, the “D-Link DWL-A650 Wireless Network Adapter” now displays under “Network adapters” in the Device Manager. Proceed to Section “Device Configuration” for device configuration information. 2-13...
-
Page 36: Driver Uninstallation
Driver Uninstallation This section provides information about uninstallation procedures required for upgrading the NDIS driver from previous D-Link software releases. If the system does not have previously installed versions of the NDIS driver and you wish to remove the newly installed driver from the system, proceed to Step 4. - Page 37 To do so, go to the Start menu and choose Search For Files or Folders…, enter “oem*.inf” in the “Search for files or folders named:” field, and enter “D-Link” in the “Containing text:” field. Click Search Now. A few files matching these criteria are possible, if previous drivers have not been removed properly.
- Page 38 4. To complete the uninstallation, “ar5210b.sys” should also be removed from the “\WINNT\system32\drivers” folder. 2-16...
-
Page 39: Device Configuration
Device Configuration Configuration of the D-Link DWL-A650 Wireless Network Adapter can be done through the Network Control Panel (NCP) in adapter properties. You can set the Wireless Network Adapter to work in one of two modes, either infrastructure mode (which leverages an AP) or ad hoc mode (which consists of a group of stations participating in the WLAN). - Page 40 AP. STA3 STA1 STA5 STA2 STA4 Figure 2-2. Ad Hoc Mode To configure the DWL-A650 Wireless Network Adapter: 1. In the Device Manager, right-click “D-Link DWL-A650 Wireless Network Adapter,” and click Properties to access the properties of the adapter. 2-18...
- Page 41 2. Configuration additions, modifications, and deletions are made under the “Settings” tab of the “D-Link DWL-A650 Wireless Network Adapter” properties. 3. Select one of the configurations under the configuration list, and click Modify to show the “Network Configuration Settings” screen. This property sheet has two pages: General and Security.
- Page 42 Maximum, the driver turns off power to the adapter for longer periods over more widely-spaced time intervals. − Turbo Mode: This field enables or disables D-Link turbo mode. − Locally Administered Address: This field defines the locally administered MAC address (LAA). To enter a value in the address field, the check box needs to be selected.
- Page 43 − Unique Key: This field defines the unique encryption key for security for the current network configuration. In ad hoc mode, this encryption key type is not used. To enable security using a Unique Key, this field must be populated. −...
-
Page 44: Infrastructure Mode
Power Saving: This field allows the configuration of power management options. The options are Off, Normal, and Maximum. − Turbo Mode: This field enables or disables D-Link turbo mode. − Locally Administered Address: This field defines the locally administered MAC address (LAA). To enter a value in the address field, the check box needs to be selected. -
Page 45: Ad Hoc Mode
Security features are not typically a requirement. For ad hoc network activity, the Power Saving and Security features can be disabled. Currently, shared key security is supported in ad hoc mode. Future D-Link software implementations will provide unique key support. -
Page 46: Tcp/Ip Setup
Network Control Panel, the TCP/IP address for the network device must be configured. 1. Open the “Control Panel” and click “Network and Dial-up Connections.” 2. Find the “Local Area Connection” that is associated with the D-Link DWL- A650 Wireless Network Adapter. Right-click that connection, and click Properties. - Page 47 3. Select “Internet Protocol (TCP/IP)” and click Properties. 4. Click “Use the following IP address” and input an IP address and Subnet mask. Assigning an IP address and Subnet mask allows stations to operate in infrastructure mode and to have Internet access. “Default gateway”...
- Page 48 TCP/IP configuration has taken effect. To test IP connectivity in ad hoc or infrastructure mode, use the “ping <ipaddress>” command. When a TCP/IP connection is established, the LinkMon utility (See Chapter 7) can be used to monitor the D-Link DWL-A650 Wireless Network Adapter operating status. 2-26...
- Page 49 7. To map the drive on another machine to your computer, right-click “My Computer” and click “Map Network Drive….” 8. After mapping the drive, you can perform file transfers, use video streaming applications, and all other network data transfers that are normally performed with wired 10/100 Ethernet connections.
-
Page 51: Windows Millennium Edition
Windows Millennium Edition Driver Installation D-Link recommends that you remove any existing D-Link NDIS driver on the PC system before installing Version Error! Reference source not found. release of the NDIS driver. See Section “Driver Uninstallation” on page 3-5 for the instructions on how to remove previous driver releases. When the... - Page 53 “Specify a location.” Click Browse to locate the NDIS driver. The default folder is “E:\ndis\bin\production\ndis5” (assuming E: is the CD- ROM drive). Click Next to continue. 3. When the D-Link driver installation file (NET5210B.INF) has been found, click Next to continue.
- Page 54 4. Click Finish to continue, and restart the system to complete driver installation. Refer to Section “Device Configuration” on page 3-7 for device configuration.
-
Page 55: Driver Uninstallation
1. To remove the NDIS driver from the OS, go to Start > Search > For Files or Folders…, and search for the INF file containing the “D-Link” text string under the \WINDOWS\INF folder. Be sure to include subfolders in the search criteria. - Page 56 2. From Control Panel, launch the System Properties window. Select “D- Link DWL-A650 Wireless Network Adapter” from Device Manager, and click Remove to uninstall the device. 3. Click OK to confirm the removal of the device. Restart the system to complete un-installation.
-
Page 57: Device Configuration
Device Configuration Configuration of the D-Link DWL-A650 Wireless Network Adapter can be done through the D-Link NIC Configuration utility found in the Windows Control Panel. Similar to Windows 2000, the device can be set to work in one of two modes: infrastructure mode or ad hoc mode. Please refer to Section “Device Configuration”... - Page 58 The configuration utility allows addition, modification, and deletion of the configuration profiles. Select one of the existing configuration profiles under the configuration list to modify, or click New to add a new configuration profile. Follow Section “Infrastructure Mode” on page 3-9 and Section “Ad Hoc Mode”...
-
Page 59: Infrastructure Mode
Infrastructure Mode This section defines the process of configuring an D-Link DWL-A650 Wireless Network Adapter in infrastructure mode. See Section “Device Configuration” beginning on page 2-17 for detailed descriptions of each option in the Network Configuration Settings. 1. Under the “General” tab, make sure the “Locally Administered Address”... -
Page 60: Ad Hoc Mode
IT staff. Ad Hoc Mode This section defines the process of configuring an D-Link DWL-A650 Wireless Network Adapter in ad hoc or IBSS mode. See Section “Ad Hoc Mode” on page 2-23 for descriptions of ad hoc operation. - Page 61 For ad hoc network activity, the Power Saving and Security features can be disabled. Currently, shared key security is supported in ad hoc mode. Future D-Link software implementations will provide unique key support. 3. Click OK when the properties are set correctly. The system needs to reboot in order for the changes to take effect.
-
Page 62: Tcp/Ip Configuration
TCP/IP Configuration After configuring the D-Link DWL-A650 Wireless Network Adapter network adapter properties, the TCP/IP address for the network device needs to be configured. 1. From Control Panel, launch the Network properties window. Select “TCP/IP → D-Link DWL-A650 Wireless Network Adapter” and click Properties. - Page 63 TCP/IP configuration has taken effect. To test IP connectivity in ad hoc or infrastructure mode, use the “ping <ipaddress>” command. When a TCP/IP connection is established, the LinkMon utility (see Chapter 7) can be used to monitor the D-Link DWL-A650 Wireless Network Adapter operating status. 3-13...
- Page 64 3. To map the drive on another machine to your computer, right-click “My Computer” and click “Map Network Drive….” Specify the path of a network-shared folder. 4. After mapping the drive, you can perform file transfers, video streaming, and all other network data transfers that are normally performed with wired 10/100 Ethernet connections.
- Page 65 3-15...
-
Page 67: Windows 98 Second Edition
Windows 98 Second Edition Driver Installation D-Link recommends that you remove any existing D-Link NDIS driver on the PC system before installing Version 1.3 release of the NDIS driver. See Section “Driver Uninstallation” on page 4-5 for the instructions on how to remove previous driver releases. - Page 69 2. Choose “Search for the best driver for your device. (Recommended),” and click Next. 3. Insert the D-Link Software Release CD in your CD-ROM drive. Choose “Specify a location” and browse to the location where the NDIS driver is located. The default folder is D:\ndis\bin\production\ndis5 (assuming D: is...
- Page 70 4. When the D-Link driver installation file (NET5210B.INF) has been found, click Next to continue. 5. Click Finish to continue.
-
Page 71: Driver Uninstallation
1. To remove the NDIS driver from the OS, go to Start > Search > For Files or Folders…, and search for the INF file containing the “D-Link” text string under the \WINDOWS\INF folder. Be sure to include subfolders in the... - Page 72 2. When “D-Linknet5210b.inf” has been found, delete it by right-clicking the file and choose “Delete.”...
- Page 73 3. From Control Panel, launch the Network properties window. Select “D- Link DWL-A650 Wireless Network Adapter” from the list, and click Remove to uninstall the device. 4. Click OK to confirm the removal of the device. Restart the system to complete uninstallation.
-
Page 74: Device Configuration
Device Configuration Configuration of the D-Link DWL-A650 Wireless Network Adapter can be done through the D-Link NIC Configuration utility found in the Windows Control Panel. Similar to Windows 2000 the device can be set to work in one of two modes: infrastructure mode or ad hoc mode. Please refer to Section “Device Configuration”... -
Page 75: Infrastructure Mode
Infrastructure Mode This section defines the process of configuring an D-Link DWL-A650 Wireless Network Adapter in infrastructure mode. See Section “Device Configuration” beginning on page 2-17 for detailed descriptions of each option in the Network Configuration Settings. 1. Under the “General” tab, make sure the “Locally Administered Address”... - Page 76 It is important to configure security to make sure only stations with appropriate keys can receive sensitive data. The D-Link DWL-A650 Wireless Network Adapter and NDIS driver support key lengths of 40 bits, 104 bits, and 128 bits.
-
Page 77: Ad Hoc Mode
Ad Hoc Mode This section defines the process of configuring an D-Link DWL-A650 Wireless Network Adapter in ad hoc or IBSS mode. See Section “Ad Hoc Mode” on page 2-23 for descriptions of ad hoc operation. 1. Similar to the setup of the AP infrastructure mode described in the previous section, ad hoc mode is also configured by changing the Network Configuration Settings of the D-Link NIC Configuration utility. - Page 78 For ad hoc network activity, the Power Saving and Security features can be disabled. Currently, shared key security is supported in ad hoc mode. Future D-Link software implementations will provide unique key support. 3. Click OK when the properties are set correctly. The system needs to reboot in order for the changes to take effect.
-
Page 79: Tcp/Ip Setup
TCP/IP Setup After configuring the D-Link DWL-A650 Wireless Network Adapter network adapter properties, the TCP/IP address for the network device needs to be configured. 1. From Control Panel, launch the Network properties window. Select “TCP/IP → D-Link DWL-A650 Wireless Network Adapter” and click Properties. - Page 80 TCP/IP configuration has taken effect. To test IP connectivity in ad hoc or infrastructure mode, use the “ping <ipaddress>” command. When a TCP/IP connection is established, the LinkMon utility (see Chapter 7) can be used to monitor the D-Link DWL-A650 Wireless Network Adapter operating status. 4-14...
- Page 81 3. To map the drive on another machine to your computer, right-click “My Computer” and click “Map Network Drive….” Specify the path of a network-shared folder. 4. After mapping the drive, you can perform file transfers, video streaming, and all other network data transfers that are normally performed with wired 10/100 Ethernet connections.
-
Page 83: Windows Xp
Windows XP Driver Installation (First-time Install) D-Link recommends that you remove any existing D-Link drivers on the PC system before installing Version Error! Reference source not found. release of the NDIS driver. See Section “Driver Uninstallation” on page 5-6 for the instructions on how to remove previous driver releases. With no... - Page 85 2. Under “Search for the best driver in these locations,” choose “Include this location in the search” and click Browse to find the location of the NDIS driver. When the driver location has been identified, click Next to continue.
- Page 86 3. The D-Link NDIS evaluation driver currently does not have a digital signature from Microsoft. Therefore, Windows XP shows a warning message. Click Continue Anyway to proceed with driver installation. 4. Click Finish to complete driver installation, and refer to Section “Device...
-
Page 88: Driver Uninstallation
Driver Uninstallation This section provides uninstallation procedures for removing the D-Link NDIS driver from the system. Uninstallation is recommended for upgrading the NDIS driver from previous D-Link driver releases. 1. To remove the NDIS driver from the OS, go to Device Manager, right click “D-Link DWL-A650 Wireless Network Adapter,”... - Page 90 Start and choose Search > All files and folder, enter “oem*.inf” in the “All or part of the file name” field, and enter “D-Link” in the “A word or phrase in the file” field. Enter “C:\WINNT\INF” in the “Look in” field, where C: is the drive letter of where Windows XP is installed.
-
Page 92: Device Configuration
Section “Windows XP Wireless Network Configuration” on page 5-20. Similar to Windows 2000, configuration of the D-Link DWL-A650 Wireless Network Adapter can be done through the Network Control Panel (NCP) in adapter properties. You can set the Wireless Network Adapter to work in one of two modes: infrastructure mode or ad hoc mode. - Page 93 Configuration additions, modifications, and deletions are made under the “Settings” tab of “D-Link DWL-A650 Wireless Network Adapter Properties.” Select one of the configurations under the configuration, click Modify or New and complete the steps in Section “Infrastructure Mode” on page 5-12 or Section “Ad Hoc Mode”...
-
Page 94: Infrastructure Mode
Infrastructure Mode This section defines the process of configuring an D-Link DWL-A650 Wireless Network Adapter in infrastructure mode. See Section “Device Configuration” beginning on page 2-17 for detailed descriptions of each option in the Network Configuration Settings. 1. Under the “General” tab, make sure the “Locally Administered Address”... - Page 95 IT staff. Ad Hoc Mode This section defines the process of configuring an D-Link DWL-A650 Wireless Network Adapter in ad hoc or IBSS mode. See Section “Ad Hoc Mode” on page 2-23 for descriptions of ad hoc operation.
- Page 96 2. You can optionally set up security features, but it is not typically a requirement because the duration of the ad hoc network tends to be limited. Currently, shared key security is supported in ad hoc mode. Future D-Link software implementations will provide unique key support. 5-14...
- Page 97 BSSs being established, rather than a single BSS with multiple stations. TCP/IP Setup After configuring the D-Link DWL-A650 Wireless Network Adapter through the Network Control Panel, the TCP/IP address for the network device needs to be configured.
- Page 98 2. Select “Internet Protocol (TCP/IP)” and click Properties. Click “Use the following IP address” and input an IP address and Subnet mask. Depending on the type of network the station connects to, Gateway and DNS Configuration information can also be required. IP configuration information (DHCP or assigned IP address, Gateway and DNS server IP addresses) is usually obtained from the corporate IT staff.
- Page 99 To test IP connectivity in ad hoc or infrastructure mode, use the “ping <IP address>” command. When a TCP/IP connection is established, the LinkMon utility (see Chapter 7) can be used to monitor the operating status of D-Link DWL-A650 Wireless Network Adapter. 5-17...
- Page 100 4. To map the drive on another machine to your computer, from the Start menu, choose My Computer and right-click to select “Map Network Drive….” 5-18...
- Page 101 5. Assign the drive letter that maps to the network-shared folder and specify the shared folder information. Click Finish to map the drive. 6. After mapping the drive, you can perform file transfers, video streaming, and all other network data transfers that are normally performed with wired 10/100 Ethernet connections.
- Page 102 Windows XP Wireless Network Configuration Aside from using the Network Control Panel (NCP) to configure the D-Link DWL-A650 Wireless Network Adapter, Windows XP provides zero- configuration functionality that automatically tries to connect the STA to available wireless networks in the following order: a.
- Page 103 Note that you can disable automatic wireless network configuration, and revert back to using D-Link NCP configuration settings, by clearing the “Use Windows to configure my wireless network settings” check box. 5-21...
-
Page 104: Infrastructure Mode
Infrastructure Mode To set up automatic wireless network configuration to connect to an existing Access Point (infrastructure network): 1. Click the network name under “Available networks” in the Wireless Networks tab, and click Configure. You can update the list of available networks that are within range of your computer by clicking Refresh under Available Networks. - Page 105 Note that the key format must be hexadecimal digits and the key length is limited to 104-bit in Windows XP, as opposed to 128-bit key supported by D-Link NDIS driver in the NCP configuration interface. If the network that you are connecting to requires 128-bit WEP key, then it is recommended that you disable Windows XP automatic wireless network configuration and use D-Link NCP configuration instead.
-
Page 106: Ad Hoc Mode
Ad hoc mode To connect to an existing computer-to-computer (ad hoc) network: 1. Click the ad hoc network name under “Available networks” in the Wireless Networks tab, and click Configure. 5-24... - Page 107 Note that the key format must be hexadecimal digits and the key length is limited to 104-bit in Windows XP as opposed to 128-bit key supported by D-Link NDIS driver in the NCP configuration interface. If the network that you are connecting to requires...
- Page 108 3. If you want to connect to an ad hoc network, but both ad hoc and infrastructure networks are within range of your computer, then click Advanced in the Wireless Networks tab and then select “Computer-to- computer (ad hoc) networks only”. Note that if you want the station to start its own ad hoc network, the “Computer-to-computer (ad hoc) networks only”...
- Page 109 In Connect to Wireless Network, under “Available networks”, select the wireless network that you want to connect to. If a network key is required and is automatically provided for you, then leave “Network key” blank. If the network key is not automatically provided for you, then type the key in “Network key”.
- Page 110 If you are either unable to make a connection to the wireless network that you selected or need to configure additional wireless network connection settings, click Advanced in Connect to Wireless Network, and the Wireless Networks tab will appear. 5-28...
- Page 111 You can configure a new wireless network connection by clicking Add, and specifying the network name (SSID) in Wireless Network Properties, and the wireless network key settings, if needed. If the network connection that you are configuring is an ad hoc network, then select “This is a computer-to- computer (ad hoc) network;...
- Page 112 You can change the order of the preferred networks by selecting the wireless network that you want to reposition on the list, and then clicking Move up or Move down. You can change the wireless network connection settings of a preferred network by selecting the wireless network, clicking Properties, and then changing the settings as needed.
- Page 113 If a network is not defined in the preferred networks list, but you know it is available and you want to automatically connect to it, then click Advanced in the Wireless Networks tab, and select the “Automatically connect to non- preferred networks”...
- Page 114 5-32...
- Page 115 After CardWizard utility is loaded, insert the D-Link DWL-A650 Wireless Network Adapter into a 32-bit CardBus slot, and follow these steps to install the NDIS driver: 1. CardWizard will detect the insertion of the D-Link CardBus card and show the following screen. Click Correct to continue.
- Page 116 2. Click OK to continue. 3. Windows NT 4.0 Network Properties windows displays. Click Add to continue.
- Page 117 4. Click Have Disk. 5. Manually enter the location of where the D-Link NDIS 4.0 driver is located. For example, D:\NDIS\BIN\PRODUCTION\NDIS4. Click OK to continue.
- Page 119 6. Make sure D-Link DWL-A650 Wireless Network Adapter is selected. Click OK to continue. 7. Set Map Registers, QoS, and Transmit Power Control to default values and click OK.
- Page 120 8. Windows NT 4.0 binds TCP/IP protocol to D-Link DWL-A650 Wireless Network Adapters and TCP/IP properties have to be entered. Depending on the type of network the station connects to, Gateway and DNS Configuration information may also be required. IP configuration information (DHCP or assigned IP address, Gateway and DNS server IP addresses) is usually obtained from the corporate IT staff.
- Page 121 Configuration of the D-Link DWL-A650 Wireless Network Adapter can be done through the D-Link NIC Configuration Control Panel applet provided by D-Link. Similar to Windows 2000, the device can be set to work in one of two modes, either infrastructure mode or ad hoc mode. See Section “Device Configuration”...
- Page 122 Section “Ad Hoc Mode” on page 6-11 to set up the station to work in infrastructure mode and ad hoc mode. Infrastructure Mode This section defines the process of configuring an D-Link DWL-A650 Wireless Network Adapter in infrastructure mode. Refer to Section “Device Configuration” beginning on page 2-17 for detailed descriptions of each option in the Network Configuration Settings.
- Page 123 AP with the best signal strength. − Network Connection: AP (Infrastructure). − Power Saving: This field allows the configuration of power management options. The options are Off, Normal, and Maximum. − Turbo Mode: This field enables or disables D-Link Turbo mode.
- Page 124 It is important to configure security to make sure only stations with appropriate keys can receive sensitive data. The D-Link DWL-A650 Wireless Network Adapter and NDIS driver support key lengths of 40-bits, 104-bits and 128-bits.
- Page 125 Ad Hoc Mode This section defines the process of configuring an D-Link DWL-A650 Wireless Network Adapter in ad hoc or IBSS mode. Refer to Section “Ad Hoc Mode” on page 2-23 for detail descriptions of ad hoc operation. 1. Similar to the set up of AP Infrastructure mode described in the previous section, ad hoc mode is also configured by changing the options in “Network Configuration Settings”...
- Page 126 2. You may optionally set up security features, but it is not typically a requirement, since the duration of the ad hoc network tends to be limited. Currently, only shared key security is supported in ad hoc mode. Future D-Link software implementations will provide unique key support. 6-12...
-
Page 127: Verify Connection
BSS with multiple stations. Verify Connection You may use LinkMon utility to monitor the operating status of D-Link DWL- A650 Wireless Network Adapter once the STA is connected. Please refer to Chapter 7 for descriptions of LinkMon utility. If the STA is configured properly then you will be able to perform ping test as well as other network applications that a wired Ethernet device can perform. - Page 128 2. To map the drive on another machine to your computer, right-click “My Computer” and click “Map Network Drive….” 3. Specify the path of a network-shared folder. 4. After mapping the drive, you can perform file transfers, video streaming, and all other network data transfers that are normally performed with wired 10/100 Ethernet connections.
-
Page 129: Driver Uninstallation
Driver Uninstallation This section provides uninstallation procedures for removing the D-Link NDIS driver from the system. 1. To remove the NDIS driver from the system, go to Control Panel and open Network properties. 6-15... - Page 130 2. Under the Adapters tab, choose D-Link DWL-A650 Wireless Network Adapter and click Remove. 3. Click OK to confirm the removal of the D-Link DWL-A650 Wireless Network Adapter. 6-16...
- Page 131 4. D-Link DWL-A650 Wireless Network Adapter is no longer listed under the Adapters tab. Click Close to continue. 5. Restart the system to complete the un-installation of D-Link NDIS 4.0 driver. 6-17...
-
Page 133: Linkmon
LinkMon is a Graphical User Interface (GUI) program that provides detailed operational status and statistics for the D-Link DWL-A650 Wireless Network Adapter. The LinkMon executable file, linkmon.exe, is included on the D-Link Release Version Error! Reference source not found. CD, and is in the folder \ndis\bin\production\. - Page 135 3. Click Next to continue. 4. Click “I accept this agreement” and then click Next to continue.
- Page 136 5. Click Next to continue. 6. The installer now installs files to the SYSTEM directory. 7. The system must be rebooted for the WMI installation files to become effective. When the system completes the rebooting process, launch LinkMon.
-
Page 137: Features
Features There are five tabs in LinkMon used to display STA information: General tab Frame Statistics tab Transmit Retries tab Station tab Driver tab Under the General tab of the LinkMon program property sheet is general information about the program and its operations. Under the Frame Statistics tab is statistical information showing the number of frames being sent and received, retry count on frames sent, frame checksum error counts for received frames, and receive signal strength... - Page 138 Under the Transmit Retries tab is detailed transmit retry statistical information for transmitted frames.
- Page 139 Under the Station tab is detailed BSS information including SSID, BSSID, association status, operating channel frequency, and information about scanned APs. Under the Driver tab is statistical data pertaining to NDIS driver operation.
- Page 140 The Action menu enables a NDIS driver unloading and reloading, and network interface card (NIC) reset. Note that driver unload option is not available in Windows Me, Windows 98SE, and Windows NT 4.0. NIC reset is also not available in Windows NT 4.0. On the Options menu, choose Settings….
- Page 141 Under the Display tab, you can select the data display modes of “Cumulative” or “Relative.” “Cumulative” mode displays statistical LinkMon data collected from the beginning of driver load. “Relative” mode displays differences in the statistical data since the last update. Under the Log File tab, the logging function can be enabled to log to a file the statistical information collected by the LinkMon utility, for later reference or post processing by an application such as Microsoft Excel.
-
Page 143: Rfsilent
RFSilent This chapter describes the RFSilent application that allows you to enable or disable the RF Signal (radio) on all D-Link STA Reference Designs. The RFSilent is a Windows-based application that appears in the right-hand corner of your Windows taskbar. -
Page 144: Rfsilent Setup
The installer now copies the necessary files to the SYSTEM directory. 6. Reboot the system. RFSilent Setup The RFSilent application allows you to enable or disable D-Link STA References Designs. You can enable or disable the RFSilent application through user-defined settings. Refer to a description of driver parameters in the AP Programmer’s Reference Guide. - Page 145 Table 8-1. RFSilent Menu Descriptions RFSilent Menu Item Descriptions Disable RF Signal Use this selection to disable D-Link STA Reference Design. Enable RF Signal Use this selection to enable D-Link STA Reference Design. About Displays copyright, version information, and the build date for the RFSilent application.
-
Page 147: Troubleshooting
D-Link DWL-A650 Wireless Network Adapter. Read the following descriptions if you are having problems. If you cannot find an answer here, please contact an D-Link field application engineer for assistance. 1. My computer does not recognize the D-Link CardBus reference card. - Page 148 4. The station cannot access the Internet in the infrastructure configuration. Make sure the station is associated and joined with the AP. If Wired Equivalent Privacy (WEP) security is enabled on the AP, the station must have the proper WEP keys specified. Also make sure TCP/IP properties are correctly configured.
-
Page 150: Channel And Data Rate Selection
This section provides basic information for selecting fixed data rate and channel frequency in the NDIS driver. This becomes necessary if you want to test the D-Link Wireless Network Adapter at a specific channel with the rate adaptation controls turned off. - Page 151 4. Double-click on clist and enter the channel number in the “Value Data” field. Enter the IEEE channel number from the following table. For example, enter 40 to select channel frequency of 5.20 GHz. The channel numbers follow the IEEE format where: Channel Frequency (in GHz) = 5 + 0.005 * (Channel Number) Channel Number Channel Frequency...
- Page 152 Channel Number Channel Frequency Regulator Domain 5.41 GHz N/A (not calibrated) 5.42 GHz N/A (not calibrated) 5.43 GHz N/A (not calibrated) 5. To select the fixed data rate at which you want the station to transmit, double-click on rateCtrlEnable from the same registry key location where clist resides, and enter 0 to disable rate adaptation.
Need help?
Do you have a question about the DW-690 and is the answer not in the manual?
Questions and answers