Advertisement
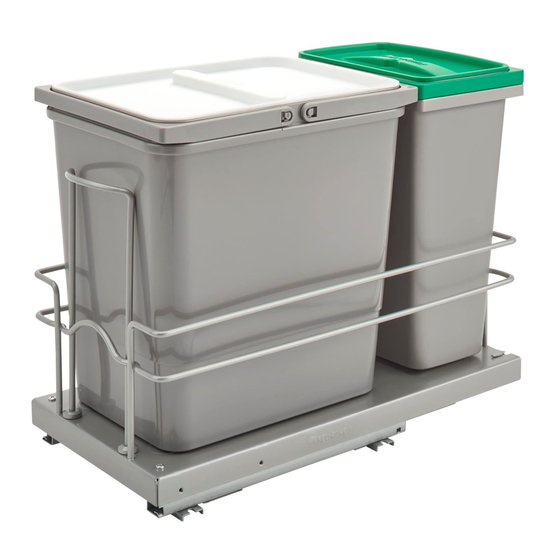
SINK BASE PULLOUT - NOT DOOR MOUNTING
TOOLS REQUIRED:
CARE AND MAINTENANCE:
ESTIMATED ASSEMBLY
TIME:
20 MIN
CLEAN WITH A DAMP CLOTH
AND WIPE PARTS DRY
5
64
1) Measure how far the hinge sticks out into the cabinet opening and record that
number (A).
2) Take the number from step one (A) and add 4-3/4" (121 mm).
(A) + 4-3/4 (121 mm) = (B)
3) Place template into cabinet and align the front edge per cabinet type:
a. Overlay - Place at the front outside edge of cabinet
b. Inset door - Set back the thickness of the cabinet door
From the hinge side of the cabinet use measurement (B) to align center line.
4) Use an awl or pencil to mark the (4) screw locations and remove the template.
5) Pre-drill (4) 5/64" holes at screw locations.
6) Attach handle to frame (See Fig A).
7) Place frame in cabinet, lining up the holes and install screws.
8) Snap in (4) plastic caps to cover holes (See Fig B).
Screw Locations
Fig. B
Fig. A
Screw Locations
Center line
T-5SBWC-0417
Advertisement
Table of Contents

Related Manuals for Rev-A-Shelf 5SBWC-815S-1


Summary of Contents for Rev-A-Shelf 5SBWC-815S-1
- Page 1 SINK BASE PULLOUT - NOT DOOR MOUNTING TOOLS REQUIRED: CARE AND MAINTENANCE: ESTIMATED ASSEMBLY TIME: 20 MIN CLEAN WITH A DAMP CLOTH AND WIPE PARTS DRY 1) Measure how far the hinge sticks out into the cabinet opening and record that number (A).
- Page 2 SINK BASE PULLOUT - DOOR MOUNTING TOOLS REQUIRED: CARE AND MAINTENANCE: ESTIMATED ASSEMBLY TIME: 20 MIN CLEAN WITH A DAMP CLOTH AND WIPE PARTS DRY 1) Place template into cabinet and align the front edge per cabinet type: a. Overlay - Place at the front outside edge of cabinet b.
Need help?
Do you have a question about the 5SBWC-815S-1 and is the answer not in the manual?
Questions and answers