
Related Manuals for Laser DVD-PT-10D


Summary of Contents for Laser DVD-PT-10D
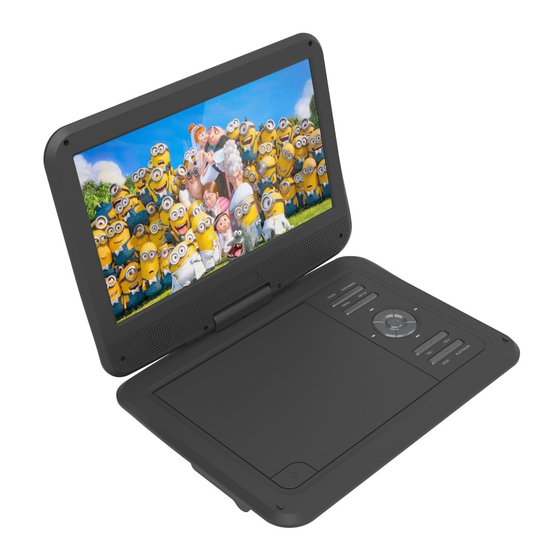
- Page 1 DVD-PT-10D USER MANUAL Laser 10” Screen Portable DVD Player AUDIO / VIDEO CARD SLOT Please read carefully before use...
-
Page 2: Table Of Contents
TABLE OF CONTENTS IMPORTANT SAFETY INSTRUCTIONS AND PRECAUTIONS CARE OF DISCS WHAT’S IN THE BOX THE PLAYER INSTALLATION Indoor Use In-car use PLAYBACK The Remote Control Key Functions Loading and Playing a Disc Display Angle Subtitle Audio Zoom A-B Repeat ALL Repeat Playback MP3/MPEG-4 Disc Playback of DIVX content... - Page 3 TABLE OF CONTENTS Audio Speaker Setup Dolby Dual Mono Dynamic Video Preferences TV Type Audio Subtitle Disc Menu Parental Password Default TROUBLESHOOTING Charging the DVD Player SPECIFICATIONS Warranty Against Defects...
-
Page 4: Important Safety Instructions And Precautions
IMPORTANT SAFETY INSTRUCTIONS AND PRECAUTIONS IMPORTANT SAFETY INSTRUCTIONS AND PRECAUTIONS - Read all instructions carefully before use. - Retain manuals for future reference. - Use this product only in the manner described. - Only use a water-dampened soft-cloth to clean the surface of this product. - Use electronic devices in well ventilated areas &... -
Page 5: Care Of Discs
CARE OF DISCS Laser product symbol located on the rear panel of the unit indicates that this player is a class 1 laser product: It uses only weak laser and no hazardous radiation outside of the unit. The lightning flash with arrowhead symbol, within an equilateral triangle, is intended to alert the user to the presence of uninsulated “dangerous voltage... -
Page 6: What's In The Box
WHAT’S IN THE BOX WHAT’S IN THE BOX 1x Earphones 1x Main DVD player with 10” 16:9 LCD display 2x AAA batteries 1x Remote Control 1x User Manual 1x 12V DC car power supply 1x Dual Purpose Carry Case and Headrest Pouch 1x 110-240V AC main power adaptor 1x AV Cable Please check the contents of the packaging carefully. -
Page 7: Indoor Use
INSTALLATION INSTALLATION Indoor Use 1 Locate a spare mains outlet and turn it OFF. 2. Plug the supplied AC adaptor in to the outlet. 3. Connect the other end to the 12V DC input socket. 4. Turn the main outlet ON. 5. -
Page 8: Playback
PLAYBACK PLAYBACK ITEM BUTTON Power The Remote Control Display Mute Repeat Search Zoom Prog Setup Mode1 Play/Pause Stop Left Right Down Audio Mode2 Number Pad Sub/Copy Rewind Fast Forward Previous Next Angle DVD Title Volume Down Volume Up... -
Page 9: Key Functions
PLAYBACK KEY FUNCTIONS BUTTON ACTION BUTTON ACTION Power Switches the player ON or OFF Press to select an option or validate a setting Display Shows information about the current content Audio Select available audio language for the DVD Switches the screen ON or OFF Mode2 Toggle between DVD, USB and SD Card Mute... - Page 10 PLAYBACK 5. Play/Pause. Press the Play/Pause ( button on the remote during play to pause playback. To resume, Press the Play/Pause button once again. 6. Fast Forward/ Rewind Press Fast Forward or Rewind buttons to toggle between 2x, 4x, 8x, 16x, and 32x speeds. 7.
-
Page 11: Angle
PLAYBACK ANGLE During playback of a disc, press the “ANGLE” button to display the available angles for discs containing multi-angles, with the current angle number and the total number of angles displaying. Press “ANGLE” to select another angle, then press again to exit and return to the normal viewing angle. -
Page 12: Zoom
PLAYBACK ZOOM During playback press “ZOOM” to enlarge the picture. The zoomed in value will be displayed onscreen. A-B REPEAT A. During playback press a first time “A-B” to set the Starting Point A. B. Press “A-B” a second time to set the Ending Point B and player will repeatedly play the part between Point A and Point B. -
Page 13: Playback Of Divx Content
PLAYBACK PLAYBACK MP3/MPEG-4 Disc When a MP3/MPEG-4 disc is inserted into the unit, the menu screen appears automatically. You can use the menu screen to select your desired folders and songs or the system plays the songs in the order they were burned onto the disc. 1. -
Page 14: Play Usb And Sd/Mmc Card
SYSTEM SETUP Play USB and SD/MMC Card 1. Plug in the USB device noting correct orientation. Press [Mode2] , then choose USB to select the content. 2. Insert a memory card to the SD/MMC slot. Press [Mode2] and select SD to play memory card. SYSTEM SETUP 1. -
Page 15: Osd Language
SYSTEM SETUP OSD LANGUAGE You can choose one out of several different languages as the OSD setup language Captions • ON: Captions are displayed. (If any captions available). • OFF: The screen will not display captions. SCREEN SAVER • ON: Enables screen saver. •... -
Page 16: Dynamic
SYSTEM SETUP • R-Mono: Playback of Right channel audio only. • Mb Mono: Both Left/Right channels are mixed to one mono channel. DYNAMIC Use this mode to level all sound channels to ensure even sound levels. 1. Press The OK Button to enter. 2. -
Page 17: Subtitle
SYSTEM SETUP Subtitle Sets the default Language of the Subtitles of DVDs played on this player. Disc Menu Sets the default Language of the DVD Menu of DVDs played on this player. NOTE: Audio, Subtitle and Disc Menu settings are subject the availability of your selection on the DVD. -
Page 18: Troubleshooting
TROUBLESHOOTING TROUBLESHOOTING Problem Possible Solution 1. Make sure your DVD is connected properly. Make sure all cables No sound or distorted are securely inserted into the appropriate jacks. sound? 2. Make sure the Audio is not muted. Ensure that power connection is firmly seated in plug and there is No Power power to the power supply. -
Page 19: Charging The Dvd Player
Output: 1 Vp-p/75 Ohm, Unbalanced Audio S/N: Better than 60 dB Dynamic range: Better than 85 dB Laser: Semiconductor Laser, Wave Length: 650 nm/795 nm Power source: DC 9-12V 1.5 amps Power Consumption: Battery Type: 7.4V Li lon 1600mAh Charge Time... -
Page 20: Warranty Against Defects
WARRANTY AGAINST DEFECTS Laser warrants your new product to be free from defects in materials and workmanship for 12 months, from the date of purchase, provided that the product is used in accordance with accompanying recommendations or instructions where provided. The benefit of this warranty is in addition to your rights under the Australian Consumer Law and to other rights and remedies of the consumer under a law in relation to the goods or services to which the warranty relates.
Need help?
Do you have a question about the DVD-PT-10D and is the answer not in the manual?
Questions and answers