
Related Manuals for Future light PCT-4000


Summary of Contents for Future light PCT-4000
- Page 1 BEDIENUNGSANLEITUNG USER MANUAL PCT-4000 LED spot © Copyright Für weiteren Gebrauch aufbewahren! Nachdruck verboten! Keep this manual for future needs! Reproduction prohibited!
-
Page 2: Table Of Contents
Inhaltsverzeichnis Table of contents EINFÜHRUNG ..............................3 SICHERHEITSHINWEISE ..........................3 BESTIMMUNGSGEMÄßE VERWENDUNG ..................... 5 GERÄTEBESCHREIBUNG ..........................6 Features ................................. 6 Geräteübersicht .............................. 6 INSTALLATION ..............................6 Montage ................................. 6 Überkopfmontage ............................7 ... -
Page 3: Einführung
- sich die letzte Version der Anleitung im Internet herunter laden EINFÜHRUNG Wir freuen uns, dass Sie sich für einen FUTURELIGHT PCT-4000 entschieden haben. Sie haben hiermit ein leistungsstarkes und vielseitiges Gerät erworben. Nehmen Sie den PCT-4000 aus der Verpackung. - Page 4 Bitte überprüfen Sie vor der ersten Inbetriebnahme, ob kein offensichtlicher Transportschaden vorliegt. Sollten Sie Schäden an der Netzleitung oder am Gehäuse entdecken, nehmen Sie das Gerät nicht in Betrieb und setzen sich bitte mit Ihrem Fachhändler in Verbindung. Der Aufbau entspricht der Schutzklasse I. Der Netzstecker darf nur an eine Schutzkontakt-Steckdose angeschlossen werden, deren Spannung und Frequenz mit dem Typenschild des Gerätes genau übereinstimmt.
-
Page 5: Bestimmungsgemäße Verwendung
BESTIMMUNGSGEMÄßE VERWENDUNG Bei diesem Gerät handelt es sich um einen Effektstrahler, mit dem sich dekorative Lichteffekte erzeugen lassen. Dieses Produkt ist nur für den Anschluss an 230 V, 50 Hz Wechselspannung zugelassen und wurde ausschließlich zur Verwendung in Innenräumen konzipiert. Dieses Gerät ist für professionelle Anwendungen, z. -
Page 6: Gerätebeschreibung
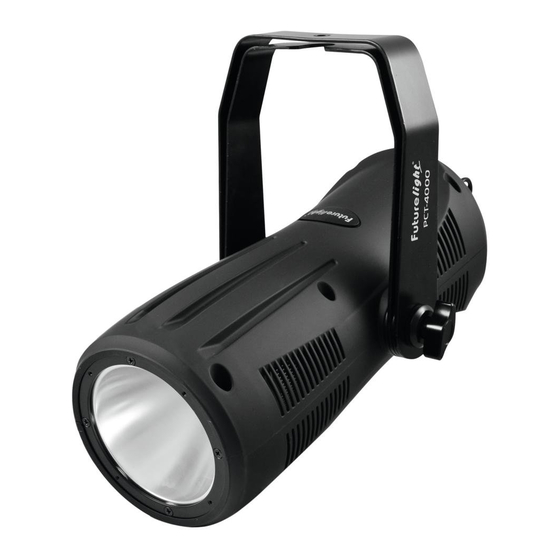
GERÄTEBESCHREIBUNG Features Scheinwerfer mit Bridgelux BXRA-LED mit 3000 Kelvin • DMX-gesteuerter Betrieb oder Standalone-Betrieb möglich • Bestückung mit einer Bridgelux Array BXRA-30E4000, warmweiß, 4000 Lumen • Ideal für Theater, Großbühnen und den mobilen Einsatz • Master-/Slave-Funktion • Strobe-Effekt mit 1-18 Blitzen pro Sekunde •... -
Page 7: Überkopfmontage
Überkopfmontage LEBENSGEFAHR! Bei der Installation sind insbesondere die Bestimmungen der BGV C1 und EN 60598-2-17 zu beachten! Die Installation darf nur vom autorisierten Fachhandel ausgeführt werden! Die Aufhängevorrichtungen des Gerätes muss so gebaut und bemessen sein, dass sie 1 Stunde lang ohne dauernde schädliche Deformierung das 10-fache der Nutzlast aushalten kann. -
Page 8: Anschluss An Den Dmx-512 Controller
BRANDGEFAHR! Achten Sie bei der Installation des Gerätes bitte darauf, dass sich im Abstand von mind. 0,5 m keine leicht entflammbaren Materialien (Deko, etc.) befinden. Befestigen Sie das Gerät über einen geeigneten Haken an Ihrem Traversensystem. Sichern Sie das Gerät bei Überkopfmontage immer mit einem geeigneten Sicherungsseil. Es dürfen nur Sicherungsseile gemäß... -
Page 9: Anschluss Zwischen Geräten
Achten Sie darauf, dass die Adern der Datenleitung an keiner Stelle miteinander in Kontakt treten. Die Geräte werden ansonsten nicht bzw. nicht korrekt funktionieren. Beachten Sie, dass die Startadresse abhängig vom verwendeten Controller ist. Unbedingt Bedienungsanleitung des verwendeten Controllers beachten. Die Verbindung zwischen Controller und Gerät sowie zwischen den einzelnen Geräten sollte mit einem DMX-Kabel erfolgen. -
Page 10: Bedienung
Bitte beachten: Es dürfen max. 8 Geräte in Reihe betrieben werden. Nach jeweils 8 Geräten muss erneut die Spannungsversorgung angeschlossen werden. BEDIENUNG Wenn Sie das Gerät an die Spannungsversorgung angeschlossen haben, nimmt der PCT-4000 den Betrieb auf. Während des Reset justieren sich die Motoren aus und das Gerät ist danach betriebsbereit. Stand Alone-Betrieb Der PCT-4000 lässt sich im Stand Alone-Betrieb ohne Controller einsetzen. -
Page 11: Dmx-Protokoll
DMX-Protokoll Steuerkanal 1 - Weiße LED Decimal Hexad. Percentage S/F Eigenschaft 0 255 00 FF 0% 100% F Weiß (0=aus, 255=100% weiß) Steuerkanal 2 - Shutter, Strobe Decimal Hexad. Percentage S/F Eigenschaft 0 31 00 1F 0% 12% S Shutter geschlossen 32 63 20 3F 13% 25%... -
Page 12: Hauptfunktionen
Hauptfunktionen - Hauptmenü 0 • Drücken Sie die Mode/Esc-Taste, um ins Hauptmenü "MODE" zu gelangen (Display blinkt). • Drücken Sie die Enter-Taste und wählen Sie "ADDR", “RUN” oder "DISP" durch Drücken der Up/Down-Tasten. • Drücken Sie die Enter-Taste zur Auswahl des gewünschten Untermenüs. - Einstellen der DMX-Startadresse, Slave-Einstellung - Einstellen der DMX-Startadresse Mit dieser Funktion können Sie die DMX-Startadresse über das Control Board einstellen. - Page 13 - Programm aufrufen, Master-Einstellung Mit der Funktion "RUN" lässt sich das interne Programm aufrufen. Die Anzahl der Steps können Sie unter Step festlegen. Die einzelnen Szenen können Sie unter Edit abändern. Die Szenen lassen sich automatisch (AUTO), d.h. mit der eingestellten Step-Time abspielen. Die Auswahl "ALON" bedeutet Stand Alone-Modus und "MAST", dass das Gerät als Master-Gerät definiert wird.
- Page 14 - Tastensperre Mit dieser Funktion lässt sich die automatische Tastensperre ein- bzw. ausschalten. Ist diese Funktion aktiviert, erfolgt eine Sperrung der Tasten automatisch 15 Sekunden nach der letzten Eingabe. Um die Tastensperre aufzuheben drücken Sie bitte für 3 Sekunden die Mode/Esc-Taste. •...
- Page 15 - Software-Version Mit dieser Funktion lässt sich die Software-Version des Gerätes auslesen. • Wählen Sie “VER” durch Drücken der Up/Down-Tasten. • Drücken Sie die Enter-Taste, auf dem Display erscheint “V-X.X”, “X.X“ steht für die Versionsnummer, z. B. “V-1.0”. “V-2.6” etc. •...
- Page 16 - Hauptmenü 4 • Drücken Sie die Enter-Taste, um ins Hauptmenü zu gelangen (Display blinkt). • Drücken Sie die Up/Down-Tasten zur Auswahl von “EDIT”. - Anzahl der Steps im Run definieren Mit dieser Funktion lässt sich die Anzahl der Steps festlegen die dann im Run aufgerufen werden. •...
-
Page 17: Reinigung Und Wartung
b) Szenen editieren via externen Controller • Rufen Sie jetzt an Ihrem Controller die erste Szene auf. • Wählen Sie “SC01” durch Drücken der Up/Down-Tasten. • Drücken Sie die Enter-Taste, auf dem Display erscheint “SC01”. • Drücken Sie die Enter-Taste, auf dem Display erscheint “C-01”. •... -
Page 18: Sicherungswechsel
Mindestabstand zu entflammbaren Oberflächen: 0,5 m Mindestabstand zum angestrahlten Objekt: 0,1 m Sicherung: T 3,15 A, 250 V Zubehör: Flügelbegrenzer für PCT-4000 Best.-Nr. 51840881 Bitte beachten Sie: Technische Änderungen ohne vorherige Ankündigung und Irrtum vorbehalten. 06.06.2012 © 18/35 00070537.DOC, Version 1.0... -
Page 19: Introduction
- pass this manual on to every further owner or user of the product - download the latest version of the user manual from the Internet INTRODUCTION Thank you for having chosen a FUTURELIGHT PCT-4000. You will see you have acquired a powerful and versatile device. Unpack your PCT-4000. -
Page 20: Operating Determinations
Please make sure that there are no obvious transport damages. Should you notice any damages on the A/C connection cable or on the casing, do not take the device into operation and immediately consult your local dealer. This device falls under protection-class I. The power plug must only be plugged into a protection class I outlet. - Page 21 This device is designed for professional use, e.g. on stages, in discotheques, theatres etc. Lighting effects are not designed for permanent operation. Consistent operation breaks will ensure that the device will serve you for a long time without defects. Do not shake the device. Avoid brute force when installing or operating the device. When choosing the installation-spot, please make sure that the device is not exposed to extreme heat, moisture or dust.
-
Page 22: Description Of The Device
DESCRIPTION OF THE DEVICE Features Spot light with Bridgelux BXRA LED with 3000 kelvin • DMX-controlled operation or stand-alone operation • Equipped with a Bridgelux LED Array BXRA-30E4000, warm white, 4000 lumen • Ideal for theatres, large stages and mobile use •... -
Page 23: Installation
INSTALLATION Mounting The device can be placed directly on the stage floor or rigged in any orientation on a truss without altering its operation characteristics. Overhead rigging DANGER TO LIFE! Please consider the EN 60598-2-17and the respective national standards during the installation! The installation must only be carried out by an authorized dealer! The installation of the device has to be built and constructed in a way that it can hold 10 times the weight for 1 hour without any harming deformation. - Page 24 Mount the device with the mounting-bracket to your trussing system using an appropriate clamp. For overhead use, always install an appropriate safety bond. You must only use safety bonds complying with DIN 56927, quick links complying with DIN 56927, shackles complying with DIN EN 1677-1 and BGV C1 carbines.
-
Page 25: Dmx-512 Connection/Connection Between Fixtures
DMX-512 connection/connection between fixtures The wires must not come into contact with each other, otherwise the devices will not work at all, or will not work properly. Please note, the starting address depends upon which controller is being used. Only use a DMX-cable and 3-pin XLR-plugs and connectors in order to connect the controller with the fixture or one fixture with another. -
Page 26: Connection Between Devices
OPERATION After you connected the effect to the mains, the PCT-4000 starts running. During the reset, the motors are trimmed and the device is ready for use afterwards. Stand Alone operation In the Stand Alone mode, the PCT-4000 can be used without controller. -
Page 27: Addressing
PCT-4000 will respond to the controller. If you set, for example, the address to channel 3, the PCT-4000 will use the channel 3 to 4 for control. Please, be sure that you don’t have any overlapping channels in order to control each PCT-4000 correctly and independently from any other fixture on the DMX-chain. -
Page 28: Control Board
Control Board The Control Board offers several features: you can simply set the starting address, run the pre-programmed program or make a reset. The main menu is accessed by pressing the Mode/Esc-button (display flashing). Browse through the menu by pressing Up or Down. Press the Enter-button in order to select the desired menu. You can change the selection by pressing Up or Down. -
Page 29: Main Functions
Main functions - Main menu 0 • Press [MODE/ESC] to enter the main menu "MODE" (display flashing) • Press [ENTER] and select "ADDR", “RUN” or "DISP" by pressing [UP] or [DN]. • Press [ENTER] for selecting the desired sub menu. - DMX address setting, Slave setting - DMX address setting With this function, you can adjust the desired DMX-address via the Control Board. - Page 30 - Program Run, Master setting With the function "RUN", you can run the internal program. You can set the number of steps under Step. You can edit the individual scenes under Edit. You can run the individual scenes automatically (AUTO), i.e.
- Page 31 - Key lock With this function, you can activate the automatic keylock status. If this function is activated, the keys are automatically locked 15 seconds after the last input. In order to deactivate the keylock status, press the Mode/Esc-button for 3 seconds. •...
- Page 32 - Software version With this function you can display the software version of the device. • Select “VER” by pressing [UP] or [DN]. • Press [ENTER], the display shows “V-X.X”, “X.X“ stands for the version number, e.g. “V-1.0”, “V-2.6”. • Press [ENTER] to confirm. •...
- Page 33 - Main menu 4 • Press [ENTER] to enter the main menu (display flashing). • Press [UP] to select “EDIT”. - Define the number of steps in Run With this function you can define the number of steps in the Program Run. •...
-
Page 34: Cleaning And Maintenance
b) Editing via the external controller • Call up the first scene in your controller now. • Select “SC01” by pressing [UP] or [DN]. • Press [ENTER], the display shows “SC01”. • Press [ENTER], the display shows “C-01”. • Select "FADE" by pressing [UP] or [DN]. •... -
Page 35: Replacing The Fuse
Min.distance from flammable surfaces: 0.5 m Min.distance to lighted object: 0.1 m Fuse: T 3.15 A, 250 V Accessory: Barndoors for PCT-4000 No. 51840881 Please note: Every information is subject to change without prior notice. 06.06.2012 © 35/35 00070537.DOC, Version 1.0...
Need help?
Do you have a question about the PCT-4000 and is the answer not in the manual?
Questions and answers