Table of Contents
Advertisement
Quick Links
Download this manual
See also:
User Manual
BEDIENUNGSANLEITUNG
USER MANUAL
MODE D'EMPLOI
MANUAL DEL USUARIO
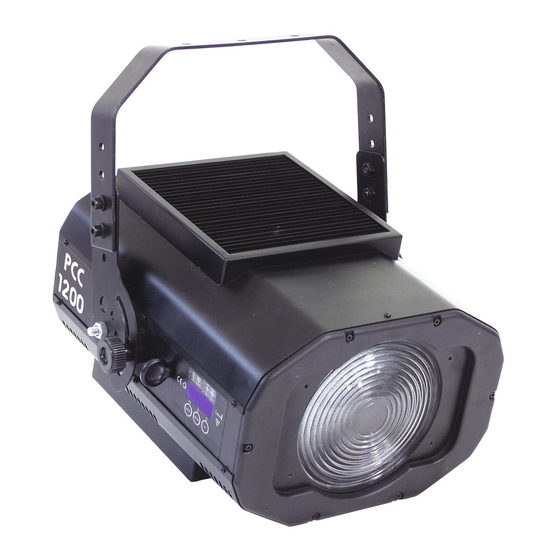
PCC-1200
Professional Colour-Changer
©
Für weiteren Gebrauch aufbewahren!
Copyright
Keep this manual for future needs!
Nachdruck verboten!
Gardez ce mode d'emploi pour des
Reproduction prohibited!
utilisations ultérieures!
Réproduction interdit!
Guarde este manual para posteriores usos.
Prohibida toda reproducción.
Advertisement
Table of Contents

Related Manuals for Future light Professional Colour-Changer PCC-1200


Summary of Contents for Future light Professional Colour-Changer PCC-1200
-
Page 1: Manual Del Usuario
BEDIENUNGSANLEITUNG USER MANUAL MODE D'EMPLOI MANUAL DEL USUARIO PCC-1200 Professional Colour-Changer © Für weiteren Gebrauch aufbewahren! Copyright Keep this manual for future needs! Nachdruck verboten! Gardez ce mode d’emploi pour des Reproduction prohibited! utilisations ultérieures! Réproduction interdit! Guarde este manual para posteriores usos. -
Page 2: Safety Instructions
- pass this manual on to every further owner or user of the product - download the ultimate version of the user manual from the Internet INTRODUCTION Thank you for having chosen a FUTURELIGHT PCC-1200. You will see you have acquired a powerful and versatile device. Unpack your PCC-1200. -
Page 3: Health Hazard
If the device has been exposed to drastic temperature fluctuation (e.g. after transportation), do not switch it on immediately. The arising condensation water might damage your device. Leave the device switched off until it has reached room temperature. Please make sure that there are no obvious transport damages. Should you notice any damages on the A/C connection cable or on the casing, do not take the device into operation and immediately consult your local dealer. -
Page 4: Operating Determinations
OPERATING DETERMINATIONS This device is a lighting effect for creating decorative effects. This product is only allowed to be operated with an alternating voltage of 220-250 V, 50 Hz and was designed for indoor use only. This device is designed for professional use, e.g. on stages, in discotheques, theatres etc. Lighting effects are not designed for permanent operation. -
Page 5: Description Of The Device
1 with 5 colour and white; colour-wheel 2 with 3 colours, 2 correction-filters and white • Strobe- effect with adjustable speed (1-7 flashes/sec.) • DMX-control via every standard DMX-controller • 3 DMX- control-channels required • Suitable FUTURELIGHT controllers: EX-6 controller, CP-256/32 Controller Overview... -
Page 6: Installation
(9) DMX-Out socket (10) DMX-In socket (11) Lamp system (12) Fuseholder (13) Power supply (14) Power switch (15) Mode-button (16) Down-button (17) Up-button (18) Display INSTALLATION Installing/Replacing the lamp DANGER TO LIFE! Only install the lamp with the device switched off! Unplug from mains before! For the installation, you need one MSD/HSD 200 GY-9.5, MSD/HSD 250 GY-9.5 or MSD 250/2 GY-9.5 lamp. -
Page 7: Lamp Adjustment
CAUTION! The lamp has to be replaced when it is damaged or deformed due to the heat! The lamp life given by the manufacturer must never be exceeded. This is why you need to take notes on the operational time of the lamp and replace the lamp in time. Keep exchanged lamp in a protective container and remove accordingly. -
Page 8: Overhead Rigging
Overhead rigging The installation of the projector has to be built and constructed in a way that it can hold 10 times the weight for 1 hour without any harming deformation. The installation must always be secured with a secondary safety attachment, e.g. an appropriate catch net. This secondary safety attachment must be constructed in a way that no part of the installation can fall down if the main attachment fails. -
Page 9: Dmx-512 Connection / Connection Between Fixtures
A safety rope which already hold the strain of a crash or which is defective must not be used again. Adjust the desired inclination-angle via the mounting-bracket and tighten the fixation screws. Connect the fixture to the mains with the power-plug. The occupation of the connection-cables is as follows: Cable International... -
Page 10: Connection With The Mains
3 mm at every pole has to be included in the permanent electrical installation. Lighting effects must not be connected to dimming-packs. OPERATION After you connected the effect to the mains, the PCC-1200 starts running. During the Reset, the motors are trimmed and the device is ready for use afterwards. Stand Alone operation In the Stand Alone mode, the PCC-1200 can be used without controller. -
Page 11: Dmx-Controlled Operation
PCC-1200 will respond to the controller. If you set, for example, the address to channel 4, the PCC-1200 will use the channel 4 to 6 for control. Please, be sure that you don’t have any overlapping channels in order to control each PCC-1200 correctly and independently from any other fixture on the DMX-chain. -
Page 12: Dmx-Protocol
DMX-protocol Control channel 1 - Colour-wheel 1 Linear colour change following the movement of the slider. In this way you can stop the colour-wheel in any position. DMX-value Feature 0-21 Open/white 22-43 44-65 Blue 66-87 Salmon pink 88-109 Yellow 110-127 Light blue 128-187 Forwards rainbow effect with decreasing speed... -
Page 13: Control Board
Control Board The Control Board offers several features: you can simply set the starting address, switch on and off the lamp, run the pre-programmed program or make a reset. The main menu is accessed by pressing the Enter-button for 3 seconds until the display starts flashing. Browse through the menu by pressing the Up-button. -
Page 14: Main Functions
Main functions - Main menu 0 ♦ Press [ENTER] for 3 seconds to enter the main menu "MODE" (display flashing) ♦ Press [ENTER] and select "ADDR", “RUN” or "DISP" by pressing [UP] button. ♦ Press [ENTER] for selecting the desired sub menu. - DMX address setting, Slave setting - DMX address setting With this function, you can adjust the desired DMX-address via the Control Board. - Page 15 (AUTO), i.e. with the adjusted Step-Time or sound-controlled (SOUN). The selection "ALON" means Stand Alone-mode and "MAST" that the device is defined as master. ♦ Select "AUTO" or "SOUN" by pressing [UP]. ♦ Press [ENTER] for selecting the desired extension menu. ♦...
- Page 16 Lamp - Main menu 1 ♦ Press [ENTER] for 3 seconds to enter the main menu (display flashing). ♦ Press [UP] to select “LAMP”. - Lamp on/off With this function you can switch the lamp on or off via the Control Board. ♦...
- Page 17 ♦ Select “rEST” by pressing [UP] button. ♦ Press [ENTER], the display shows“ON” or “OFF”. ♦ Press [UP] to select “ON” if you wish to enable this function or “OFF” if you don’t. ♦ Press [ENTER] or [EXIT/DN] to exit. - Restore factory settings With this function you can restore the factory settings of the device.
- Page 18 - Main menu 4 ♦ Press [ENTER] for 3 seconds to enter the main menu (display flashing). ♦ Press [UP] to select “TIME”. - Fixture running time With this function you can display the running time of the device. ♦ Select “MATI” by pressing [UP] button. ♦...
-
Page 19: Error Messages
- Editing the channels of the individual scenes With this function you can edit the program to be called up in Run. a) Editing via the Control Board ♦ Select “SC01” by pressing [UP] button. ♦ Press [ENTER], the display shows “SCXX”, “X” stands for the scene no. -
Page 20: Cleaning And Maintenance
times, it will detect whether the fixture has more than 3 errors. If the fixture has more than 3 errors (including 3 errors), all the channels can not work properly; but if the fixture has less than 3 errors, only the channels which have errors can not work properly, others can work as usual. 01Er: (Color-wheel error) This message will appear after the reset of the fixture if the magnetic-indexing circuit malfunctions (sensor failed or magnet missing) or the stepping-motor is defective (or its drive circuit on the... -
Page 21: Replacing The Fuse
T 4 A, 250 V Fitting lamp: GE CP93 240V/1200W G-22 200h 3200K No. 88463000 OSRAM 64756 230V/1200W G-22 200h No. 88463010 Recommended controllers: FUTURELIGHT EX-6 controller No. 51834046 FUTURELIGHT CP-256/32 controller No. 51834286 Wizard-512 DMX-Software + Interface No. 51860102 Wizard-1024 DMX-Software + Interface No.
Need help?
Do you have a question about the Professional Colour-Changer PCC-1200 and is the answer not in the manual?
Questions and answers