Table of Contents
Advertisement
Mast
General ...............................................................................................................................................................
Description .........................................................................................................................................................
Operation............................................................................................................................................................
Control Valve, Carriage/Attachment ............................................................................................................
Selector Valve.................................................................................................................................................
Safety Procedures When Working Near Mast..................................................................................................
Carriage Repair..................................................................................................................................................
Remove ...........................................................................................................................................................
Disassemble ...................................................................................................................................................
Assemble ........................................................................................................................................................
Install .............................................................................................................................................................
Selector Valve.................................................................................................................................................
Remove and Disassemble..........................................................................................................................
Clean and Inspect......................................................................................................................................
Assemble ....................................................................................................................................................
Install .........................................................................................................................................................
Tilt Cylinders Repair .........................................................................................................................................
Remove ...........................................................................................................................................................
Disassemble ...................................................................................................................................................
Clean ..............................................................................................................................................................
Assemble ........................................................................................................................................................
Install .............................................................................................................................................................
Mast Repair........................................................................................................................................................
Remove ...........................................................................................................................................................
Disassemble ...................................................................................................................................................
Clean and Inspect ..........................................................................................................................................
Assemble ........................................................................................................................................................
Install .............................................................................................................................................................
Lift Cylinders Repair .........................................................................................................................................
Description and Operation ............................................................................................................................
Remove ...........................................................................................................................................................
Disassemble ...................................................................................................................................................
Clean and Inspect ..........................................................................................................................................
Assemble ........................................................................................................................................................
Install .............................................................................................................................................................
Mast Operation Check .......................................................................................................................................
Lift and Tilt System Leaks Check.....................................................................................................................
Lift System.....................................................................................................................................................
Tilt System .....................................................................................................................................................
Tilt Cylinder Stroke and Backward Tilt Angle Adjustments ..........................................................................
Carriage Adjustments........................................................................................................................................
Lift Chain Adjustments.................................................................................................................................
Bearing Blocks ...............................................................................................................................................
Mast Adjustments..............................................................................................................................................
Bearing Blocks ...............................................................................................................................................
Wear Plates ....................................................................................................................................................
Troubleshooting..................................................................................................................................................
©2006 HYSTER COMPANY
TABLE OF CONTENTS
Table of Contents
1
1
1
2
2
3
5
5
5
7
7
8
8
8
8
8
9
9
9
10
10
11
11
11
14
14
16
17
19
19
20
20
20
20
22
23
23
23
23
25
26
26
26
26
26
26
28
i
Advertisement
Table of Contents

Related Manuals for Hyster A214


Summary of Contents for Hyster A214
-
Page 1: Table Of Contents
Lift and Tilt System Leaks Check........................Lift System..............................Tilt System ..............................Tilt Cylinder Stroke and Backward Tilt Angle Adjustments ................Carriage Adjustments............................Lift Chain Adjustments..........................Bearing Blocks ............................... Mast Adjustments.............................. Bearing Blocks ............................... Wear Plates ..............................Troubleshooting..............................©2006 HYSTER COMPANY... -
Page 2: General
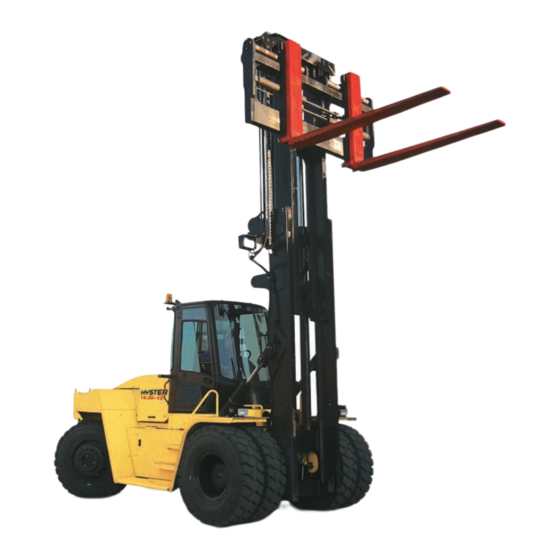
4000 SRM 660 Operation General This section has the description, operation, and repair procedures for the masts used on this series of lift trucks: Information on the lift cylinders, lowering control valves, carriage, and tilt cylinders is also described in this section. -
Page 3: Control Valve, Carriage/Attachment
Operation 4000 SRM 660 CONTROL VALVE, CARRIAGE/ATTACHMENT The hydraulic functions for the carriage and attach- ment are controlled by the auxiliary control valve. The operator actuates the auxiliary control valve with switches in the operator’s compartment. The oil from the auxiliary control valve is used to move the auxiliary spool in the main control valve. -
Page 4: Safety Procedures When Working Near Mast
4000 SRM 660 Safety Procedures When Working Near Mast NOTE: PORTS: 1 = LEFT-HAND CYLINDER (ROD END), 2 = LEFT-HAND CYLINDER (PISTON END), 3 = RIGHT-HAND CYLINDER (ROD END), 4 = RIGHT-HAND CYLINDER (PISTON END). SOLENOIDS: SOLENOID A (SIDESHIFT), SOLENOID B (RIGHT FORK), SOLENOID C (LEFT FORK). 1. - Page 5 Safety Procedures When Working Near Mast 4000 SRM 660 2. If parts of the mast must be in raised position, that the inner weldment cannot lower. In- install a safety chain to restrain the moving parts stall the chain on both sides of the mast. of the mast.
-
Page 6: Carriage Repair
4000 SRM 660 Carriage Repair Carriage Repair REMOVE 4. Put a weight of approximately 454 kg (1000 lb) on the forks. This weight on the forks will give stability to the carriage so that it will not fall WARNING when it is disconnected from the mast. The mast assembly and its components are heavy. - Page 7 Carriage Repair 4000 SRM 660 NOTE: QUICK DISCONNECT, HOOK-TYPE FORK ARRANGEMENT SHOWN. 1. CARRIAGE 10. SHIM 2. BRACKET 11. RETAINER 3. SHIM 12. FORK PIN 4. BEARING BLOCK 13. SELECTOR VALVE 5. LOAD ROLLER 14. ANCHOR PIN 6. SNAP RING 15.
-
Page 8: Assemble
4000 SRM 660 Carriage Repair 2. Install the load rollers on the carriage as follows: a. Lubricate the bearings with multipurpose grease. b. Install the load roller on the shaft. Install the retainer and capscrews. (Do not add shims at this time.) Tighten the capscrews to 26 N•m (19 lbf ft). -
Page 9: Selector Valve
Carriage Repair 4000 SRM 660 SELECTOR VALVE 4. Remove the nut and the solenoid coil from the housing. Remove the spool and O-rings. Remove and Disassemble Clean and Inspect NOTE: The selector valves are installed on the car- riage. WARNING 1. -
Page 10: Tilt Cylinders Repair
4000 SRM 660 Tilt Cylinders Repair Legend for Figure 7 1. SOLENOID A (SIDESHIFT) 2. SOLENOID B (RIGHT FORK) 3. SOLENOID C (LEFT FORK) 4. SELECTOR VALVE (AUXILIARY FUNCTION) 5. SELECTOR VALVE (AUXILIARY FUNCTION) 6. SELECTOR VALVE (AUXILIARY FUNCTION) 7. SELECTOR VALVE HARNESS 8. -
Page 11: Clean
Tilt Cylinders Repair 4000 SRM 660 1. O-RING 4. WEAR RING 7. PLUG 10. RETAINER 2. SEAL RING 5. NUT 8. ROD 11. WIPER SEAL 3. PISTON 6. SHELL 9. BACKUP RING 12. ROD SEAL Figure 8. Tilt Cylinder CLEAN ASSEMBLE NOTE: Always use new seals and O-rings. -
Page 12: Install
4000 SRM 660 Mast Repair 3. Install the O-ring and the backup ring on the out- 5. Operate the tilt cylinders. Check for correct op- side of the retainer. Install the rod seal and wiper eration and leakage. Adjust the tilt cylinders as seal in the retainer. - Page 13 Mast Repair 4000 SRM 660 Figure 10. Mast...
- Page 14 Table 1. Lift Height and Mast Weights Unit Lift Height Weight H14.00-20.00XM 2900 mm (114 in.) 3300 kg (7275 lb) (H360-450H) [A214] H16.00-18.00XM/XMS-12 3650 mm (144 in.) (H400-450HD/HDS) [A236] H14.00-20.00XM 4500 mm (177 in.) 3800 kg (8378 lb) (H360-450H) [A214] H16.00-18.00XM/XMS-12...
- Page 15 More Content includes Brake system, Capacities, and specifications, Frame, Hydraulic, System, Industrial battery, Main control, Valve, Mast repair, Fasteners, Schematics diagrams, Steering axle, Steering system, Wire harness repair And more) Click Here Get all the content after purchase Thank very much.
-
Page 16: Disassemble
Mast Repair 4000 SRM 660 DISASSEMBLE 1. Remove the pins for the lift chains at the chain anchors. See Figure 10 and Figure 11. Remove the capscrew and washers from the top of each lift cylinder. Remove the retainers for the lift cylinders at the top of the outer weldment. - Page 17 4000 SRM 660 Mast Repair chain becomes longer when it is worn. If a chain WARNING is 3% longer than a new lift chain, the lift chain Cleaning solvents can be flammable and toxic must be replaced. Use a chain scale to measure and can cause skin irritation.
-
Page 18: Assemble
7. Use a lifting device to install the lift cylinders. bly including the forks or carriage. Get infor- Install the washers and capscrews at the bottom mation from your dealer for Hyster lift trucks of the lift cylinders. Push the inner weldment before welding on the mast. -
Page 19: Install
4000 SRM 660 Mast Repair INSTALL 2. See Table 1 and connect a lifting device to the top of the mast assembly. Make sure the inner and 1. Make sure the bushings and snap rings for the outer weldments are fastened together. Make tilt cylinder pins are installed in the frame and sure that the chains do not damage any of the outer weldment. - Page 20 Mast Repair 4000 SRM 660 1. HOSE BRACKET 4. OUTER WELDMENT 7. HOSE CLAMP 2. SPACER 5. SHEAVE BRACKET 8. HEADER HOSE 3. SHEAVES 6. CABLE CLAMP 9. ELECTRICAL CABLE Figure 15. Header Hose Arrangement...
-
Page 21: Lift Cylinders Repair
4000 SRM 660 Lift Cylinders Repair Lift Cylinders Repair DESCRIPTION AND OPERATION The lowering control valve is shown in Figure 16. The position of the orifice sleeve is controlled by oil The lift cylinders are piston type, single-action cylin- flow. The position of the plunger is controlled by oil ders. -
Page 22: Remove
Special tools are available from Hyster Parts and Service. See Parts-Service WARNING Gram L-A-2 (Latest Revision) for the available The lift cylinders are very heavy. Use slings tools. - Page 23 4000 SRM 660 Lift Cylinders Repair 1. SHELL 6. WIPER 2. ROD AND PISTON 7. ROD SEAL 3. BACKUP RING 8. RETAINER 4. PISTON SEAL 9. O-RING 5. WEAR RING 10. SPACER Figure 17. Lift Cylinder...
-
Page 24: Install
Lift Cylinders Repair 4000 SRM 660 INSTALL Install the lift cylinders while assembling the mast. See the procedures in Mast Repair, Assemble. See Figure 18. 1. LIFT CYLINDER 3. SUPPLY LINE 2. BREATHER LINE Figure 18. Lift Cylinder Connections... - Page 25 4000 SRM 660 Lift and Tilt System Leaks Check Mast Operation Check 1. Check for leaks in the hydraulic system. Check WARNING the condition of the hydraulic hoses and tubes. Lower the lift mechanism completely. Never 2. Slowly raise and lower the mast several times allow anyone under a raised carriage.
Need help?
Do you have a question about the A214 and is the answer not in the manual?
Questions and answers