
Subscribe to Our Youtube Channel
Related Manuals for RHINO RMCS-3002


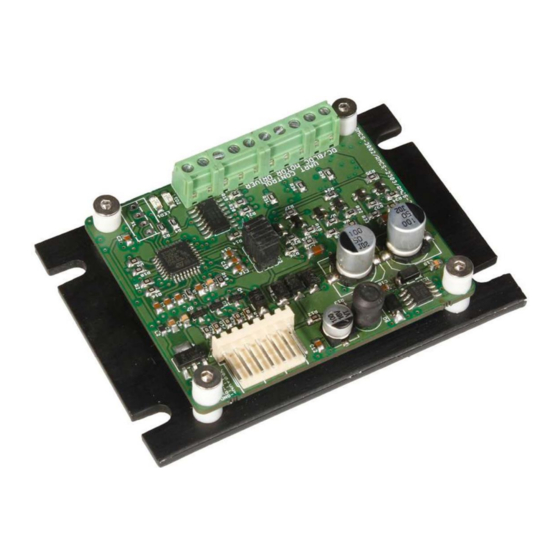
Summary of Contents for RHINO RMCS-3002
- Page 1 Rhino Industrial Brushless DC Motor Drive with UART ASCII Compatible (Model No : RMCS – 3002) Operating Manual v1.0...
-
Page 2: Table Of Contents
Contents Introduction – Salient Features ........................3 Technical specifications and Pin description ....................4 Description of the four modes of Operation and Slave ID settings .............. 5 How to use the drive: ............................ 7 Steps to configure the Drive using Modbus Poll Software: ................7 STEP 1: Hardware Connection ........................ -
Page 3: Introduction - Salient Features
Introduction – Salient Features Rhino Motion Controls RMCS-3002 with UART ASCII is a high performance brushless dc drive (10–30 V DC) designed for optimized operation of Rhino brushless DC motors with Hall sensor feedback. This is an amazing cost effective solution to provide closed loop/open loop control for various applications. The salient features of this drive: •... -
Page 4: Technical Specifications And Pin Description
Technical specifications and Pin description Supply Voltage and Current Specification Units Comments Supply Voltage Volts DC Between +Ve and GND Phase Current Amps Peak 5 Amps per phase Pin description of the drive is as per below image: Pin No. Description Pin No. -
Page 5: Description Of The Four Modes Of Operation And Slave Id Settings
Mode 1 Modbus UART ASCII Digitally Controlled Closed Loop Speed Mode: In this mode the frequency and direction of the Rhino BLDC motor is settable / controllable via a Computer / Arduino Controller board / any other Modbus ASCII compatible device. - Page 6 Slave ID Addressing: The second unique feature in this drive is that a single controller can be used to control seven drives at the same time using the physical jumpers. Using the Modbus Poll software, the slave ID can be set from 1 to 247.
-
Page 7: How To Use The Drive
To describe the configuration of the drive for we shall be using the following: PC with Modbus Poll software. ( The Modbus poll software can be downloaded from the link - https://www.modbustools.com/download.html RMCS-3002 UART ASCII Encoder DC Motor Driver https://robokits.co.in/motor-drives-drivers/brushless-dc-motor-driver/brushless-dc-motor-driver-50w-with- uart-ascii-compatible Brushless DC Motor ( any of the below motors would work with the drive) https://robokits.co.in/motors/rhino-industrial-brushless-motor/brushless-dc-motor-with-hall-low-noise-... -
Page 8: Step 1: Hardware Connection
STEP 1: Hardware Connection The hardware connections need to be setup between the motor, drive and PC as per the below block diagram and the pin out tables provided below. The potentiometer connections need to be provided only to run the driver and motor in Analog Mode. - Page 9 Motor Pin outs Drive Pin outs Motor Wire Color Pin No. Description Black VCC(5 V DC ) +5VDC Hall W Blue ENC_B/Hall W Hall V Green ENC_A/Hall V Hall U Yellow Hall U Thick blue Motor- / V Thick green Motor- / V Motor+ / U Thick yellow...
-
Page 10: Step 2: Connect Modbus Uart Ascii Drive With Modbus Poll Software
STEP 2: Connect Modbus UART ASCII Drive with Modbus Poll Software Once the Modbus Poll software is installed and the CP2102 is connected, please run the Modbus Poll software. Proceed to the Connection Tab on the screen and click the same as per below image. Then click on the connect tab which will open the connection settings as per the next image. - Page 11 Please make sure the connection setup settings are as per above for all parameters including the parity and stop bit. Once the OK button is pressed in the connection setup, the screen should show connected and it should be as per below image. This concludes STEP 2 of the configuration procedure.
-
Page 12: Step 3: Set Slave Id In Modbus Poll Software To Send And Receive Data
Step 3: Set slave ID in Modbus Poll Software to send and receive Data Read/Write Definition: Right Click on the Table shown on the home screen of Modbus Poll software. It should pop up a menu as per below image. Change screenshot Now select the first option Read / write Definition. - Page 13 Make all the settings as per above image except the slave ID. The slave ID needs to be set as per your requirement or physical jumper settings. When there is no jumpers connected on the drive then slave ID Default set to 1 Slave ID Function: Select Function as 03 Read Holding registers (4x).
- Page 14 The procedure to set Slave ID through software setting is explained below with images. User can set 1 to 247 Slave ID through software setting. For example If user wants to set slave ID 247 then Send Hex value F7FF (247) to address 0 as per below image. Then with power reset also remove all the three jumpers and enter Slave ID 247 as per below image.
-
Page 15: Step 4: Go To Function
Step 4: Go to Function This step is to understand the procedure to write the data to the drive to run it as per the requirement. Go to Functions tab on the home screen and click on “06: Write Single Register” as per the below image. It should open up a screen as per below image. - Page 16 This pop Window enables us to write data in HEX value to the drive in different Address Registers. Eg. When we write HEX value 0101 in the Address register 1 with a slave ID 1, this command will enable the Digital speed control mode of the drive.
-
Page 17: Step 5: Program The Drive To Run In Any One Of The Four Modes
For Analog input controlled Open Loop PWM mode we need proper hardware connections as per STEP 1 and set the values in address 2 as per below table. Note: Connect the potentiometer (refer step 1) as in this mode the speed of the Rhino BLDC motor can be controlled by an externally connected Potentiometer. - Page 18 This should open up a window as per below image. Write the value 1 to address 2 to ENABLE the motor in open loop mode and click send. After receiving response OK in the window,motor will enable motor The speed of the motor in Open Loop Mode can be changed using the external connected potentiometer to the Drive.
- Page 19 Send value 0 to address 2 as per below image to STOP the motor in open loop mode For Analog mode connect external potentiometer to change speed of motor. Connect enable (Pin 4) of drive to GND (Pin 8) to enable motor in Analog mode. User can lock motor by connecting brake (Pin 7) to GND (Pin 8).
-
Page 20: Mode 1 - Modbus Uart Ascii Controlled Closed Loop Speed Mode
Mode 1 – Modbus UART ASCII Controlled Closed Loop Speed Mode: For Modbus UART ASCII Controlled Closed Loop Speed Mode the register values need to be set as per the below table. (The procedure for same along with screenshots is provided after the table) refer below table settings and procedure is also explained below from point b. - Page 21 This should open up a window as per below image. Write the HEX value 0100 to address 2 to ENABLE mode 1 and click send. To run the Motor at Closed Loop Frequency 200 Hz.Write the HEX value C8 (hex value of 200) to address 2 Page | 21...
- Page 22 To run the Motor at Closed Loop Frequency 400 Hz.Write the HEX value 190(hex value of 400) to address 2 After frequency setting user needs to enable motor by sending Hex value 0101 to address 2 as per below image. Page | 22...
- Page 23 To change Direction of motor send Hex value 0109 to address 2 as per below image. NOTE: Direction of the motor should be change in lower speed. To Stop motor send Hex value of 0 to address 2 as per below image. This concludes the settings for Mode1.
-
Page 24: Mode 2 - Digitally Controlled Open Loop Pwm Mode
Mode 2 – Digitally Controlled Open Loop PWM Mode: For Digitally Controlled Open Loop PWM Mode the register values need to be set as per the below table. (The procedure for same along with screenshots is provided after the table) refer below table settings and procedure is also explained below Slave ID Address... - Page 25 To enable motor Digitally Controlled Open Loop PWM Mode send Hex value 0201 to address 2 as per below image. To set the PWM of the Motor send Hex value 7D0 to address 4 as per below image. Page | 25...
- Page 26 To Stop motor send Hex value of 0 to address 2 as per below image. Page | 26...
-
Page 27: Mode 3- Analog Input Closed Loop Mode
(The procedure for same along with screenshots is provided after the table) refer below table settings and procedure is also explained below Note: Connect the potentiometer (refer step 1) as in this mode the speed of the Rhino BLDC motor can be controlled by an externally connected Potentiometer. - Page 28 To set the minimum speed, Write Hex value in Address 2. (For example: for minimum speed 1000, enter hex value: 3E8 in address 2. To enable the motor in Analog Input Closed Loop Mode, Write the Hex value 0401 in Address 2. Move the potentiometer from minimum to maximum value, you can observe that minimum value of potentiometer-motor moves at 1000 Maximum value of potentiometer-motor moves at 4800 (maximum value can be...
-
Page 29: Step 6: Save And Reset Settings In Drive
STEP 6: Save and Reset settings in Drive To save settings in drive send Hex value 01FF to address 0. If user saves setting in drive then user just need to power up drive then motor will run according to saved setting. Users don’t need to connect the drive through software again to run the motor. -
Page 30: Appendix
Appendix: 1. Registers Modbus Input No. of Maximum Value Description Register Address Device Address 8 Bit Input Control Byte Modbus Input No. of Register Maximum Value Description Bits Address Frequency 16 Bit 65535 (Range:0 to 400Hz) PWM of motor 16 Bit 65535 (Range:0 to4800) Modbus Input... -
Page 31: Troubleshooting
Troubleshooting: • Timeout Error: When slave address is not set. Set slave ID. • Byte Missing Error: Check Connections and reset power. Check Jumpers connection as per slave ID. If no jumper is connected then default slave ID is 1. •...
Need help?
Do you have a question about the RMCS-3002 and is the answer not in the manual?
Questions and answers
I keep getting a timeout error no matter what data i try to read from it followed instructions. My slave id is 7 on account of all jumpers inserted. What could be the reasons for there to be no communication and how do i verify that motor controller is functioning properly and how do i solve the timeout error