
Related Manuals for Pfeiffer Vacuum CCR 371


Summary of Contents for Pfeiffer Vacuum CCR 371
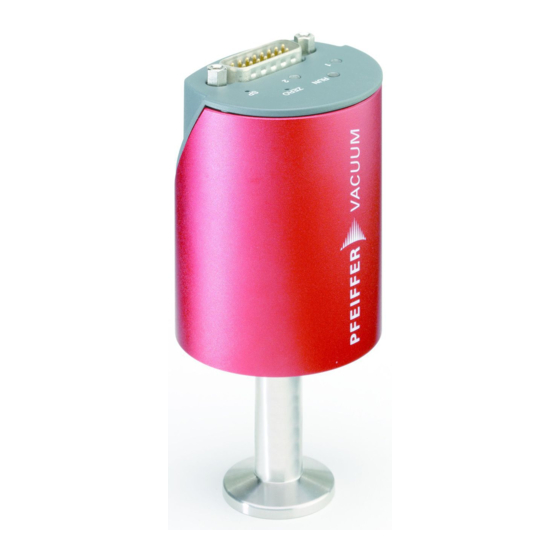
- Page 1 A P A S S I O N F O R P E R F E C T I O N CCR 371 … CCR 375 Ceramic Capacitance Gauge Operating Instructions...
-
Page 2: Product Identification
Product Identification In all communications with Pfeiffer Vacuum, please specify the information given on the product nameplate. For convenient re- ference copy that information into the space provided below. Pfeiffer Vacuum, D-35614 Asslar Typ: Range: F-No: W; LPS BG 5139 BEN / A... -
Page 3: Validity
PT R28 100 ½" Rohr 1.33×10 1.33×10 PT R28 101 DN 16 ISO-KF … … … CCR 371 PT R28 102 DN 16 CF-R 1000 (F.S.) 133'322 (F.S.) 1333 (F.S.) ® PT R28 103 8 VCR PT R28 110 ½"... -
Page 4: Intended Use
Intended Use The temperature controlled Capacitance Diaphragm Gauges of the CCR 37X series are intended for absolute pressure measurement of gases in their respective pressure ranges (→ 3). Functional Principle A ceramic diaphragm is deflected by pressure. The deflection is measured capacitively and converted into an analog linear out- put signal by the digital electronics. -
Page 5: Table Of Contents
Contents Product Identification Validity Intended Use Functional Principle Trademark Patents Scope of Delivery Safety 1.1 Symbols Used 1.2 Personnel Qualifications 1.3 General Safety Instructions 1.4 Liability and Warranty Technical Data Installation 3.1 Vacuum Connection 3.2 Power Connection Operation 4.1 Status Indication 4.2 Zeroing the Gauge 4.3 Switching Functions 4.4 Activating the Factory Setting (Factory Reset) -
Page 6: Safety
Safety Symbols Used DANGER Information on preventing any kind of physical injury. WARNING Information on preventing extensive equipment and environ- mental damage. Caution Information on correct handling or use. Disregard can lead to malfunctions or minor equipment damage. Notice <…> Labeling Personnel Qualifications Skilled personnel... -
Page 7: General Safety Instructions
Communicate the safety instructions to all other users. Liability and Warranty Pfeiffer Vacuum assumes no liability and the warranty becomes null and void if the end-user or third parties • disregard the information in this document • use the product in a non-conforming manner •... -
Page 8: Technical Data
Technical Data Measurement range → "Validity" Accuracy 0.15% of reading Temperature effect on zero PT R28 100 … PT R28 133 0.0025% F.S./ °C PT R28 140 … PT R28 143 0.0050% F.S./ °C Temperature effect on span 0.01% of reading / °C Resolution 0.003% F.S. - Page 9 Switching functions SP1, SP2 Setting range 0 … 99% F.S. (0 … 9.9 V) Hysteresis 1% F.S. Relay contact 30 VDC/ ≤0.5 ADC floating (n.o.) closed p ≤ p (LED on) open p ≥ p (LED off) Switching time ≤50 ms Status relay closed measurement mode...
- Page 10 Power connection 15-pin D-Sub, male Sensor cable 15-pin plus shielding Cable length Supply voltage 15 V ≤ 8 m (0.14 mm²/conductor) ≤15 m (0.25 mm²/conductor) Supply voltage 24 V ≤43 m (0.14 mm²/conductor) ≤75 m (0.25 mm²/conductor) Supply voltage 30 V ≤88 m (0.14 mm²/conductor) ≤135 m (0.25 mm²/conductor) For longer cables, larger conductor cross-sections are required...
- Page 11 Dimensions [mm] DN 16 CF-R DN 16 ISO-KF OD½" 8 VCR female Weight 837 … 897 g BG 5139 BEN / A (2012-11)
- Page 12 Analog Measuring Signal vs. Pressure Pressure p 1.1×F.S. 1.0×F.S. 0.9×F.S. 0.8×F.S. 0.7×F.S. 0.6×F.S. 0.5×F.S. 0.4×F.S. 0.3×F.S. 0.2×F.S. 0.1×F.S. 0.0×F.S. Measuring signal U p = (U / 10 V) × p (F.S.) Conversion Torr ↔ Pascal Torr mbar 1013.25 / 760 = 101325 / 760 = 1.00 1.3332…...
-
Page 13: Installation
Installation WARNING WARNING: fragile components The ceramic sensor may be damaged by impacts. Do not drop the product and prevent shocks and impacts. Vacuum Connection DANGER DANGER: overpressure in the vacuum system >1 bar Injury caused by released parts and harm caused by escaping process gases can result if clamps are opened while the vacuum system is pressurized. - Page 14 DANGER DANGER: protective ground Products that are not correctly connected to ground can be extremely hazardous in the event of a fault. Electrically connect the gauge to the grounded vacuum chamber. This connection must conform to the requirements of a protective connection ac- cording to EN 61010: •...
- Page 15 Mount the gauge so that no vibrations occur. The gauge may be mounted in any orientation. To keep conden- sates and particles from getting into the measuring chamber preferably choose a horizontal to upright posi- tion. If adjustment should be possible after the gauge has been installed, be sure to install it so that the but- tons can be accessed with a pin.
-
Page 16: Power Connection
Power Connection Make sure the vacuum connection is properly made (→ 13). DANGER The gauge may only be connected to power sup- plies, instruments or control devices that conform to the requirements of a grounded protective extra- low voltage (SELV) and limited power source (LPS), Class 2. - Page 17 If no sensor cable is available, make one according to the following diagram (cable length and conductor cross- sections → 10). Status Remote Zero Adjust Ident 10 Ω 15 V 14…30 V 15 V case Electrical connection Pin 1, 4 Relay SP1, closing contact Pin 2 Signal ouput (measurement signal)
- Page 18 Connect the sensor cable to the gauge and secure it using the lock screw. Connect the sensor cable to the controller. BG 5139 BEN / A (2012-11)
-
Page 19: Operation
Operation Put the gauge into operation. A warm-up time of at least ½ hour should be allowed; for exact pressure measurements a warm-up time of at least 2 hours is required. If the gauge is used for fast downstream pressure con- trol we recommend setting its signal filter to "fast". -
Page 20: Zeroing The Gauge
Zeroing the Gauge The gauge is factory calibrated while "standing upright" (→ "Calibration Test Report"). We recommend performing a zero adjustment, when the gauge is operated for the first time. Due to long time operation or contamination, a zero drift could occur and zero adjustment may become necessary. - Page 21 • the digital input "Remote Zero" (briefly apply the supply voltage (+14 … +30 V) to pin 10), • a Pfeiffer Vacuum Gauge Controller. While the gauge is being heated and/or under atmos- pheric pressure, the zeroing function is locked in order for operating errors to be prevented.
- Page 22 Briefly press the <ZERO> button with a pin (max. ø1.1 mm). The zero adjustment runs automatically. The <STATUS> LED blinks until the adjustment (duration ≤8 s) is completed. Press the button briefly max. ø1.1 mm After zero adjustment the gauge automatically returns to measurement mode.
- Page 23 <ZERO> Adjustment with Ramp Function 4.2.2 The ramp function allows to adjust the zero at a known reference pressure within the measurement range of the gauge. It also permits to adjust an offset of the characteristic curve in order to •...
- Page 24 Push the <ZERO> button with a pin (max. ø1.1 mm) and keep it depressed. The <STATUS> LED starts blinking. After 5 s, the zero adjustment value, starting at the current output value, keeps continually changing (ramp) until the button is released or until the setting limit (max. 25% F.S.) is reached.
-
Page 25: Switching Functions
Switching Functions The two switching functions can be set to any pressure within the measurement range of the gauge (→ 12). The current setpoint setting • can be read/written via the diagnostic port, • is output at the D-Sub connector instead of the measurement signal (→... - Page 26 4.3.1 Adjusting the Setpoints DANGER DANGER: malfunction If processes are controlled via the signal output, keep in mind that by pushing the <SP> button the measurement signal is suppressed and the cor- responding threshold value is output instead. This can cause malfunctions. Push the <SP>...
- Page 27 For changing the threshold value, push the <ZERO> button and keep it depressed. The threshold keeps changing from the current value (ramp) until the button is released or until the limit of the setting range is reached. Keep the button depressed max.
-
Page 28: Activating The Factory Setting (Factory Reset)
Adjusting Setpoint <2> Push the <SP> button twice (the LED <2> blinks). The adjust- ment procedure is the same as for setpoint <1>. Activating the Factory Setting (Factory Reset) All user defined parameters (e.g. zero, filter) are restored to their default values. -
Page 29: Deinstallation
Deinstallation WARNING WARNING: fragile components The ceramic sensor may be damaged by impacts. Do not drop the product and prevent shocks and impacts. DANGER DANGER: contaminated parts Contaminated parts can be detrimental to health and environment. Before beginning to work, find out whether any parts are contaminated. -
Page 30: Maintenance, Repair
We recommend checking the zero at regular intervals (→ 20). Pfeiffer Vacuum assumes no liability and the warranty becomes null and void if any repair work is carried out by the end-user or third parties. -
Page 31: Returning The Product
Contaminated products (e.g. radioactive, toxic, caustic or microbiological hazard) can be detrimen- tal to health and environment. Products returned to Pfeiffer Vacuum should pre- ferably be free of harmful substances. Adhere to the forwarding regulations of all involved countries and forwarding companies and enclose a duly completed declaration of contamination Form under www.pfeiffer-vacuum.com... -
Page 32: Disposal
Disposal DANGER DANGER: contaminated parts Contaminated parts can be detrimental to health and environment. Before beginning to work, find out whether any parts are contaminated. Adhere to the relevant regulations and take the necessary precautions when handling contaminated parts. WARNING WARNING: substances detrimental to the environ- ment Products or parts thereof (mechanical and electric... -
Page 33: Conversion Table
1.3332 0.1332 mm HG 1 Pa = 1 N/m ETL Certification ETL LISTED The products CCR 371 … CCR 375 com- ply with the requirements of the following Standards: UL 61010-1, Issued: 2004/07/12 Ed: 2 Rev: 2005/07/22 CAN/CSA C22.2#61010-1, 3103457... -
Page 34: Ec Declaration Of Conformity
EC Declaration of Conformity We, Pfeiffer Vacuum, hereby declare that the equipment men- tioned below complies with the provisions of the Directive relat- ing to electromagnetic compatibility 2004/108/EC and the Directive on the restriction of the use of certain hazardous substances in electrical and electronic equipment 2011/65/EU. - Page 35 Notes BG 5139 BEN / A (2012-11)
- Page 36 A P A S S I O N F O R P E R F E C T I O N Pfeiffer Vacuum stands for innovative and custom Vacuum solutions vacuum solutions worldwide, technological perfection, from a single source competent advice and reliable service.
Need help?
Do you have a question about the CCR 371 and is the answer not in the manual?
Questions and answers