Table of Contents
Advertisement
Quick Links
Advertisement
Table of Contents

Subscribe to Our Youtube Channel
Related Manuals for Upvel UR-326N4G


Summary of Contents for Upvel UR-326N4G
- Page 1 UR-326N4G User Manual...
-
Page 2: Table Of Contents
Contents Features ............................. 3 Configuring the Router ........................3 1 Operation Mode ..........................8 2 Internet Settings ..........................8 2.1 WAN............................ 9 2.2 LAN ..........................13 2.3 DHCP clients ........................15 2.4 Advanced Routing ......................15 2.5 QoS ........................... 16 3 Wireless Settings .......................... -
Page 3: Features
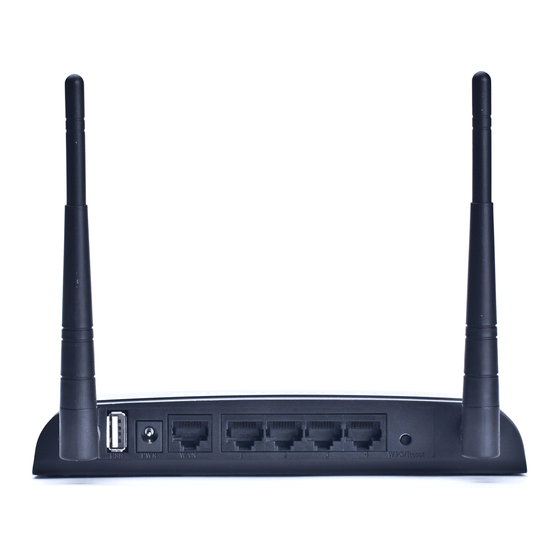
Features ► Complies with IEEE 802.11g, IEEE 802.11b, IEEE 802.3, IEEE 802.3u standards. ► 1 10/100M Auto-Negotiation RJ45 WAN port, 4 10/100M Auto-Negotiation RJ45 LAN ports, supporting Auto MDI/MDIX. ► Adopts 2x to 3x eXtended Range wireless LAN transmission technology. ►... - Page 4 You can configure and manage the router. There are six main menus on the left of the web pages. Submenus will be available after you click one of the main menus. The six main menus are: Operation Mode, Internet Settings, Wireless Settings, Firewall, Storage, Administration.
- Page 5 Statistic: Click the "Statistic" button, the page will display the Ralink SoC statistics. You can see the information of send and receive packets in all ports.
- Page 6 System Management: Click the "Management" button, enter into the system management setting page. You can set the account to access the web server of Access Point, NTP settings and DDNS settings here. Click the "Apply" button to enable configuration to take effect. Click the "Cancel"...
- Page 7 DDNS: The router offers a Dynamic Domain Name System (DDNS) feature. DDNS lets you assign a fixed host and domain name to a dynamic Internet IP Address. It is useful when you are hosting your own website, FTP server, or other server behind the router. Before using this feature, you need to sign up for DDNS service providers such as www.zoneedit.com or www.no-ip.com.
-
Page 8: Operation Mode
4. Click the Apply button to apply to the DDNS service. 1 Operation Mode You can setup different modes to LAN and WLAN interface for NAT and bridging function. Click "Apply" button to enable configuration to take effect. Click "Cancel" button to cancel the settings. 2 Internet Settings There are five submenus under the Internet Settings menus: WAN, LAN, DHCP clients, Advanced Routing, QoS. -
Page 9: Wan
2.1 WAN You can configure the parameters for Internet network which connects to the WAN port of your Access Point. Here you may change the access method to static IP, DHCP, PPPoE , L2TP, PPTP or 3G by click the item value of WAN Connection type. a. - Page 10 You should type the following parameters into the spaces provided: IP Address - Enter the IP address in dotted-decimal notation provided by your ISP. Subnet Mask - Enter the subnet Mask in dotted-decimal notation provided by your ISP, usually is 255.255.255.0. Default Gateway - (Optional) Enter the gateway IP address in dotted-decimal notation provided by your ISP.
- Page 11 User Name/Password - Enter the User Name and Password provided by your ISP. These fields are case-sensitive. Connect on Demand - You can configure the router to disconnect your Internet connection after a specified period of inactivity (Max Idle Time). If your Internet connection has been terminated due to inactivity, Connect on Demand enables the router to automatically re-establish your connection as soon as you attempt to access the Internet again.
- Page 12 User Name/Password - Enter the User Name and Password provided by your ISP. These fields are case-sensitive. Dynamic IP/ Static IP ¨ Choose either as you are given by your ISP. Click the Connect button to connect immediately. Click the Disconnect button to disconnect immediately.
-
Page 13: Lan
User Name/Password - Enter the User Name and Password provided by your ISP. These fields are case-sensitive. Address Mode: Dynamic and Static. Dynamic IP/ Static IP - Choose either as you are given by your ISP and enter the ISP's IP address or the domain name. f. - Page 14 Note: a. If you change the IP Address of LAN, you must use the new IP Address to login the router and you must change the DHCP Client Range at the same time.
-
Page 15: Dhcp Clients
b. If the new LAN IP Address you set is not in the same subnet, the IP Address pool of the DHCP server will not take effect, until they are re-configured. c. If the new LAN IP Address you set is not in the same subnet, the Virtual Server and DMZ Host will change accordingly at the same time. -
Page 16: Qos
2.5 QoS If you enable QoS, you can set the Upload Bandwidth and Download Bandwidth. Click "Submit" button to enable configuration to take effect. -
Page 17: Wireless Settings
3 Wireless Settings There are six submenus under the Wireless Settings menus: Basic, Advanced, Security, WDS, WPS, Station List. 3.1 Wireless Network You could configure the minimum number of Wireless settings for communication, such as Network Name (SSID) and Channel. The Access Point can be set simply with only the minimum setting items. -
Page 19: Advanced
3.2 Advanced Use the Advanced Setup page to make detailed settings for the Wireless. Advanced Setup includes items that are not available from the Basic Setup page, such as Beacon Interval, Control Tx Rates and Basic Data Rates. 3.3 Security Setup the wireless security and encryption to prevent from unauthorized access and monitoring. -
Page 20: Wps
3.4 WPS Wi-Fi Protected Setup You could setup security easily by choosing PIN or PBC method to do Wi-Fi Protected Setup. If you open the WPS function, you'll see the interface as follows:... -
Page 21: Station List
You can see WPS summary, such as WPS SSID, WPS Auth Mode. Click the "Generate" button, generate PIN number; WPS mode: you can setup WPS mode to PIN or PBC method. 3.5 Station List You can view the user's station which associated to this AP here. -
Page 22: Firewall
4 Firewall There are five submenus under the Firewall Settings menus: MAC/IP/Port Filtering, Port Forwarding, DMZ, System Security and Content Filtering. 4.1 MAC/IP/Port Filtering You may setup firewall rules to protect your network from virus, worm and malicious activity on the Internet. You can set MAC/IP/Port Filtering is enabled or disabled. -
Page 23: Port Forwarding
filtering rules of MAC/IP/Port Filtering, either dropped or accepted. MAC Address---to fill the MAC Address you want to filtering. Dest IP Address --- fill the destination IP address you want to filtering. Source IP Address ---fill the source IP address you want to filtering. Protocol ---Select which protocol is to be used, either TCP, UDP or ICMP. -
Page 24: System Security
To assign a computer or server to be a DMZ server: Enable the DMZ Settings, enter the local host IP Address in the DMZ IP Address field, Click the Apply button. 4.4 System Security You may configure the system firewall to protect AP/Router itself from attacking. 4.5 Content Filtering You can setup Content Filter to restrict the improper content access. -
Page 25: Administration
5 Administration There are eight submenus under the Administration menus: Management, Upload Firmware, Settings Management, Status, Statistics, System Command, System Log, SDK History. -
Page 26: Management
5.1 Management You may select language, configure administrator account and password, NTP settings, and Dynamic DNS settings here. Click "Apply" button, to enable the configuration to take effect. Click "Cancel" button to upset. -
Page 27: Upload Firmware
5.2 Upload Firmware Upgrade the Ralink SoC firmware to obtain new functionality. It takes about 1 minute to upload upgrade flash and be patient please. Caution! A corrupted image will hang up the system. Click "Browse" button, select the upgrade software, then click the "Apply" button. 5.3 Setting Management You might save system settings by exporting them to a configuration file, restore them by importing the file, or reset them to factory default. -
Page 28: Status
5.4 Status You can see the status of Ralink SoC platform in this page. -
Page 29: Statistics
5.5 Statistics Take a look at the Ralink SoC statistics. 5.6 System Command Run a system command as root, you can enter system commands such as ping. -
Page 30: System Log
5.7 System Log This page allows you to query the logs of the router. The router can keep logs of all traffic. You can query the logs to find what happened of the router. Click the "Refresh" button to refresh the logs. Click the "Clear"... -
Page 31: Sdk History
5.8 SDK History This page you can see the version of the router, and information the driver update, reference design, new feature, and the peripheral components. -
Page 32: Appendix: Glossary
Appendix: Glossary 2x to 3x eXtended Range WLAN Transmission Technology - The WLAN device with 2x to 3x eXtended Range WLAN transmission technology make its sensitivity up to 105 dB, which gives users the ability to have robust, longer-range wireless connections. With this based client and access point can range-enhancing technology, a 2x to 3x eXtended Range based client and access point can maintain a connection at as much as three times the transmission distance of traditional 802.11b and 802.11g products,... - Page 33 direct-sequence spread-spectrum (DSSS) technology and operating in the unlicensed radio spectrum at 2.4GHz, and WEP encryption for security. 802.11b networks are also referred to as Wi-Fi networks. 802.11g - specification for wireless networking at 54 Mbps using direct-sequence spread-spectrum (DSSS) technology, using OFDM modulation and operating in the unlicensed radio spectrum at 2.4GHz, and backward compatibility with IEEE 802.11b devices, and WEP encryption for security.
- Page 34 FCC Statement This equipment has been tested and found to comply with the limits for a Class B digital device, pursuant to part 15 of the FCC rules. These limits are designed to provide reasonable protection against harmful interference in a residential installation. This equipment generates, uses and can radiate radio frequency energy and, if not installed and used in accordance with the instructions, may cause harmful interference to radio communications.
Need help?
Do you have a question about the UR-326N4G and is the answer not in the manual?
Questions and answers