
Related Manuals for GBC 44DT


Summary of Contents for GBC 44DT
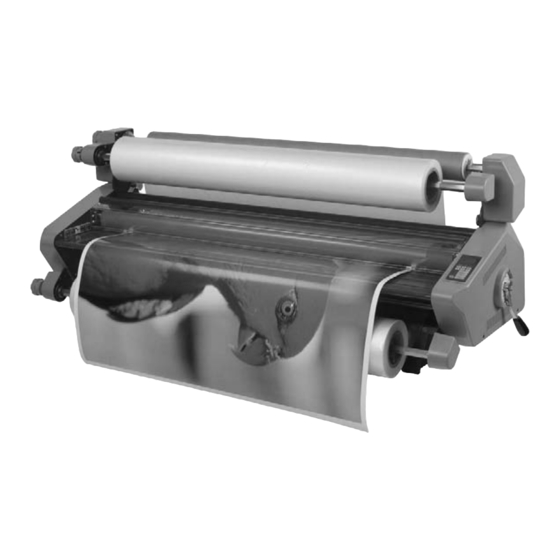
- Page 1 GBC 44DT Laminator Installation & Operation Manual Provided By http://www.MyBindingBlog.com http://www.MyBinding.com...
- Page 2 44DT Laminator INSTALLATION & OPERATION MANUAL Document Number: 930-122 REV: - REV DATE: 11-24-04 Do not duplicate without written permission.
-
Page 4: Table Of Contents
3. Specifications Clearing a Film Jam (Wrap-up) ......6-16 Lamination Guide ..........6-16 FCC Note..............3-2 7. Operator Maintenance 4. Installation Caring for the 44DT Laminator .......7-1 Prior to Installation ..........4-1 Cleaning The Rollers...........7-1 Installation .............. 4-1 Troubleshooting ............7-2 5. Feature Guide Top Film Supply Shaft.......... - Page 5 44DT Operating Instructions Page ii...
-
Page 6: Safety
The following warnings are found on the 44DT instructions. Maintain these instructions in a laminator. convenient location for future reference. -
Page 7: Electrical
44DT Operating Instructions • Do not insert objects unsuitable for lamination or expose the equipment to liquids. LECTRICAL The laminator should be connected only to a source of power as indicated in these instructions and on the serial plate located on the rear of the laminator. -
Page 8: Warranty
44DT Operating Instructions 2. W ARRANTY 90-D IMITED ARRANTY The Manufacturer warrants to the original purchaser for a period of ninety days on labor and one year on parts after installation that this laminator is free from defects in workmanship and material under normal use and service. - Page 9 44DT Operating Instructions Page 2...
-
Page 10: Specifications
U.S. Receptacle NEMA 6-15R Heat Capacity • Max. temperature 300 °F (167 °C) • Warm up from ambient 10 Minutes to 220 °F (122 °C) 22 (56) 22 (56) 55 (137) Fig. 3-1. 44DT Dimensions Shown in Inches (cm). Page 3-1... -
Page 11: Fcc Note
44DT Operating Instructions FCC N This equipment has been tested and found to comply with the limits for a Class A digital device, pursuant to part 15 of the FCC Rules. These limits are designed to provide reasonable protection against harmful interference when the equipment is operated in a commercial environment. -
Page 12: Installation
44DT Operating Instructions 4. I NSTALLATION NSTALLATION This chapter describes how to install the machine. There are no operator serviceable parts to the To set up the laminator for the first time: machine other than periodic cleaning. Refer to the Operator Maintenance chapter. - Page 13 44DT Operating Instructions Page 4-2...
-
Page 14: Feature Guide
Table interlock latch (under table) Control panel Heat pressure rollers Bottom supply shaft Fig. 5-1. 44DT Laminator Identification. UPPLY HAFT OINT Holds the film supply on the laminator. (Not shown.) The point at which the top and bottom rollers come into contact and the point at which the items for lamination are introduced into the laminator. -
Page 15: Feed Table
44DT Operating Instructions ABLE OLLER RESSURE ANDLE The feed table is used to position items for laminating and mounting. When the feed table is removed, the laminator runs at 3 fpm (0.9 mpm) when you press the RUN button. The feed table is removed only when you load film. -
Page 16: Film And Take-Up Tension Adjustment Knobs
44DT Operating Instructions ILM AND ENSION DJUSTMENT ONTROL ANEL NOBS READY TEMPERATURE SPEED °F Tension Adjustment Knobs Display BOTTOM HEAT TEMP SPEED REVERSE Fig. 5-4. Tension Adjustment Knobs. Allows the operator to increase or decrease film web and release liner tension as needed to reduce curl STOP MEAS. -
Page 17: Pull Rollers
44DT Operating Instructions IMPORTANT: To change from a process where only OWER WITCH the top roller is heated to a process that requires heat on both rollers, you must first turn off the laminator and allow the top roller to cool to room Power switch temperature. -
Page 18: Operation
44DT Operating Instructions 6. O PERATION To run the laminator: This chapter describes how to use the laminator to: • Operate the machine Turn the laminator On (I) with the power switch located at the back of the machine. •... -
Page 19: Standby Mode
If the laminator will be used within one hour, you may leave it turned on. TANDBY The 44DT automatically goes into a standby mode Poly-out after it has been idle for 3 hours. The heat roller temperature is lowered to 176 °F (80 °C), if they were on. -
Page 20: Removing And Installing The Safety Shield
44DT Operating Instructions EMOVING AND NSTALLING THE AFETY IMPORTANT: The top and bottom rolls of laminating film must be the same width. HIELD Always change the top and bottom supply rolls at The safety shield should not be removed except to the same time. -
Page 21: Removing And Installing The Feed Table
44DT Operating Instructions EMOVING AND NSTALLING THE OADING NTO THE UPPLY HAFTS ABLE If you are replacing existing films, perform the The feed table should not be removed except to following set of instructions, To remove existing films . install films. When the table is off, the laminator runs If you are loading film for the first time, skip these... - Page 22 44DT Operating Instructions To load films onto the supply shafts: Remove the release liner from the take-up core by doing the following. If the supply shaft is on the machine, remove it Lift the right end upward and out of the...
-
Page 23: Thermal And Accushield™ Films Configuration
44DT Operating Instructions ™ F HERMAL AND HIELD ILMS Insert the bearing end of the shaft into its support on the right side of the machine, press ONFIGURATION to the right, and then insert the left end of the hex shaft into the brake hub. - Page 24 44DT Operating Instructions PSA F ONFIGURATION FOR ILMS PSA films are loaded with the top supply shaft assembly in the rear position as shown in Fig. 6-12. Notice that the supply shaft is mounted on the rear of the machine.
-
Page 25: Loading Film With A Threading Card
44DT Operating Instructions Webbing Thermal Films OADING ILM WITH A HREADING The following procedure uses a film threading card Refer to the Configuration for Thermal and Accushield that is sometimes provided with new rolls of film. If Films section in this chapter for the proper one is not provided, a scrap piece of cardboard or configuration. -
Page 26: Webbing Accushield Films
44DT Operating Instructions Webbing AccuShield Films Press the straight edge of the threading card into the two films at the nip (the point between the two pressure rollers) until the card and films are The threading card for webbing AccuShield film can slightly past the nip. -
Page 27: Webbing Psa Films
44DT Operating Instructions Webbing PSA Films Refer to the Configuration for PSA Film section in this chapter for the proper configuration. Poly-out Poly-in Fig. 6-18. Threading Card Inserted Into the Film. Fig. 6-19. Configuration for Poly-in or Poly-out PSA Films. - Page 28 44DT Operating Instructions While pulling evenly, carefully align the edges of the mounting film (or kraft paper) with the WARNING: Keep your fingers and hands away laminating film, and press the two together. from the nip point while the machine is running.
-
Page 29: Tacking New Film To Existing Film
44DT Operating Instructions ACKING ILM TO XISTING The following describes a method for loading thermal or PSA film whereby the existing film on the rollers may be used in place of the threading card to draw the new film through the laminator. Leading edges of the new film will be overlapped onto the adhesive of... -
Page 30: Decaling In Two Passes With Psa Film
44DT Operating Instructions ECALING IN ASSES Guide the item into the rollers. PSA F Once the item has cleared the back of the machine, press STOP. Decaling is where you laminate items and then mount them on other materials such as Foam Core Remove the web and trim out the encapsulated or mounting board. -
Page 31: Tips For Threading Pressure Sensitive Adhesive (Psa) Film
44DT Operating Instructions Press RUN and immediately grasp the release liner for separation as the board is pulled into the rollers. Do not allow the release liner to be pulled into the rollers. After the board has cleared the rollers press STOP. -
Page 32: Film Alignment And Tension
44DT Operating Instructions LIGNMENT AND ENSION LIGNMENT Tension Adjustment Knobs The top and bottom supply rolls must be aligned as closely as possible. Misalignment can cause adhesives to be deposited on the rollers. To align the supply rolls: Use a ruler to measure the distance between the left edge of the roll to the side frame. -
Page 33: Clearing A Film Jam (Wrap-Up)
44DT Operating Instructions LEARING A AMINATION UIDE Film jams (wrap-ups) may occur if the film is loaded Do not attempt to laminate abrasive or metal objects backwards or if the area at which film exits the such as staples, paper clips and glitter, as they may equipment is blocked. -
Page 34: Operator Maintenance
44DT Operating Instructions 7. O PERATOR AINTENANCE 44DT L ARING FOR THE AMINATOR To clean the rollers and idler bar: The only maintenance required by the operator Remove the safety shield and feed table. is to periodically clean the rollers. The following... -
Page 35: Troubleshooting
44DT Operating Instructions ROUBLESHOOTING Symptom Possible Cause Corrective Action Power lamp does not Laminator not connected to electrical Insert attachment plug into receptacle. illuminate (next to the supply. stop button when the power switch is in the ON Fuse blown out. - Page 36 44DT Operating Instructions Page 7-3...
Need help?
Do you have a question about the 44DT and is the answer not in the manual?
Questions and answers