
Related Manuals for Electrolux EKK066AAOX


Summary of Contents for Electrolux EKK066AAOX
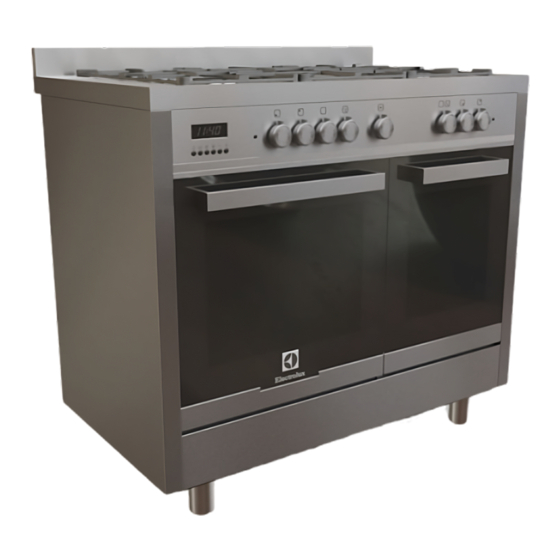
- Page 1 EKK066AAOX EN COOKER USER & INSTALLATION MANUAL EKK066AAOX EN COOKER USER & INSTALLATION MANUAL...
-
Page 2: Table Of Contents
7. ENVIRONMENT CONCERNS ..................26 WE'RE THINKING OF YOU Thank you for purchasing an Electrolux appliance. You've chosen a product that brings with it decades of professional experience and innovation. Ingenious and stylish, it has been designed with you in mind. So whenever you use it, you can be safe in the knowledge that you'll get great results every time. -
Page 3: Safety Information
ENGLISH 1. SAFETY INFORMATION You have purchased one of our left within easy reach of children products for which we thank you. We because they are a potential hazard are confident that this new appliance, source. All packaging materials used modern, functional and practical, made are environmentally-friendly and with top quality materials, will meet all... - Page 4 • Young children should be supervised scratch the surface, which may result to ensure that they not play with the in shattering of the glass. appliance. • Never use sponges or abrasive • This appliance can be used by...
-
Page 5: Product Description
ENGLISH are in the off or closed position, checking that the “0” of the knob Warning! corresponds to the “•” symbol • Be careful when you cut the plastic strip serigraphed on the front panel. to avoid damaging the cable •... - Page 6 Description of hob controls Oven thermostat knob (fig.5) By turning the oven knob clockwise we Gas burner knob (fig.3) will find the different oven temperature By rotating the knob in an anticlockwise values (from 50°C to max). direction, the following symbols appear: = Closed position = “Full on”...
- Page 7 ENGLISH Electronic programmer By pressing push button 2 and setting the length of cooking time with push button 5 The programmer can select the following symbols will light or 6, the AUTO and functions: up and stay on all the time. At the end of the set time the symbol will turn off, Minute counter...
-
Page 8: Operation
5 or 6. To cancel a programme, correct the Correcting/cancelling the programme time set bringing it to a value of “0.00”. - Page 9 ENGLISH 3.2 Oven: general notes on safety heating units, evenly distributing heat on your foods. • Always grip the centre of the oven This type of cooking is ideal for all kind of door when opening. Do not practice foods (meats, fish, bread, pizzas, cakes..). excessive pressures on the door when it is open.
- Page 10 Selecting this function the top central a golden finish onto cooked foods or to heating element turns on and heat is toast your bread slices. distributed directly on food surface. The grill function automatically activates the eventual spit (if present). When you...
- Page 11 ENGLISH • If the cake will not come out of the tin: • Your roast is underdone? Cut it in slices, slide a knife around the edges, place a arrange the slices on a baking tray with damp cloth over the cake and turn the the gravy and finish cooking it.
- Page 12 Cooking/baking timetable Right oven cavity COOKING BY Position of Weight the oven NATURAL CONVECTION FOODS shelf from the Temperature Cooking Time in bottom in °C minutes MEAT LOAFS Roasted Veal 200-225 100-120 Roastbeef 200-225 40-50 Roasted Pork 200-225 100-120...
- Page 13 ENGLISH Cooking/baking timetable Left oven cavity COOKING BY COOKING BY Position FORCED CONVECTION Weight of the NATURAL CONVECTION (with fan) FOODS oven shelf Cooking Cooking from the Temperature Temperature Time in Time in bottom in °C in °C minutes minutes MEAT LOAFS Roasted Veal 200-225...
- Page 14 COOKING BY COOKING BY FORCED CONVECTION NATURAL CONVECTION (with fan) Position of Weight the oven Cooking Cooking FOODS shelf from Time in Time in Temperature Temperature the bottom minutes minutes in °C in °C side side side side MEAT...
- Page 15 ENGLISH personnel. Just open the oven door and remove the support securing the glass (fig.4). Caution: This operation can be done also with the door fitted on appliance, but in this way, pay attention that when the glass is pull upwards, the force of the hinges can close the door roughly.
- Page 16 Lamp holder (fig.8): Turn glass protection • Repeat previous operations in reverse counterclockwise and change the order to replace all elements. lamp . Important! Re-fit the cap, screwing it back in a Position both side panels by taking the clockwise direction.
-
Page 17: Troubleshooting
ENGLISH 4. TROUBLESHOOTING Some problems can be caused either as the results of simple maintenance operations or by incorrect selection of settings. Prior to contacting a Service Centre please check the following chart. PROBLEM REMEDY The appliance is not • Make sure the gas tap is open working •... - Page 18 If you have any doubts do not use the appliance and call in a qualified person. • Some parts mounted on the appliance are protected by a plastic film. This protection must be removed before using the appliance. We recommend...
- Page 19 ENGLISH 5.2 Securing the cooker to wall • Backguard If the cookers are equipped with this accessory, leave of Note:- The installation of the chain the factory with this particular inserted provided is for safety reasons, it must be inside the packaging. In order to install installed as indicated below.
- Page 20 5.3 Gas connection Note: For certain types of gas bayonet Before connecting the appliance connection used, it may not be possible for check that the data on the rating plate the appliance to be pushed fully back to affixed to the cooker, correspond to the wall stops.
- Page 21 ENGLISH 5.4 Electrical connection can, with due modifications, be powered by three phase systems by following these The electrical connection must be instructions: carried out in accordance with the • Remove the rear panel from the current standards and laws in force. cooker.
- Page 22 5.5 Adjustments Thermocouples to top burners cups: 3 Nm • Always disconnect the appliance Thermocouples to thermostats: 4 Nm from the electricity supply before Push-on connector: 20 Nm making any adjustment. Injectors: 4 Nm • All seal must be replaced by the technician following any adjustment or regulation.
- Page 23 ENGLISH 5.7 Maintenance • Change seal each time a tap is replaced. This will ensure perfect Prior to any maintenance work or retention between the tap and part. changing parts, disconnect the • Reassemble all the parts following the appliance from the gas and electricity same procedure but in the reverse power sources.
-
Page 24: Technical Information
Replacing the electrical • To change the oven lamp see the instructions given “Replacing the components oven lamp” paragraph. • The rear protection will have to be • To change the spark generator, the removed in order to change the... - Page 25 ENGLISH Burner disposition and hob burner technical data table Diameter Air reg. Operating Burners Rate injector Heat input Sleve By-pass pressure gas Sabaf Opening Denomination mbar 1/100 mm “X” mm 1/100 mm GPL 30 1600 3800 Ultrarapid Natural gas 20 135-K 1600 3800...
-
Page 26: Environment Concerns
7. ENVIRONMENT CONCERNS The appliance was designed and made in accordance with the European standards listed below: The user is responsible for => EN 30-1-1, EN 30-2-1 and EN 437 delivering the appliance to the plus subsequent amendments (gas) appropriate collection centre at the =>... - Page 27 ENGLISH...
- Page 28 www.electrolux.com/shop...
Need help?
Do you have a question about the EKK066AAOX and is the answer not in the manual?
Questions and answers
How to put control knob back on as one popped off? I seem to have something missing the knob doesn’t stay on?